# Working with Pathway Steps (popular steps)

# How to use a Comment Step

The **Comment** step is used to display information to the user. When the user has viewed the step, it is seen as completed.

## <svg aria-label="Heading anchor" enable-background="new 0 0 20 20" height="16" role="img" viewbox="0 0 20 20" width="16" xmlns="http://www.w3.org/2000/svg"></svg>Pathway Toolbox

<div data-role="steps-container" id="bkmrk-"><div data-role="steps-container"><div data-role="steps-container"><div data-step-uuid="37816770-C728-0137-693D-0E63FF21C970"></div><div></div></div></div></div>[![image-1616881012790.png](https://signature.signifyhr.co.za/uploads/images/gallery/2021-03/scaled-1680-/sLZnmNxb9GMAzbvl-image-1616881012790.png)](https://signature.signifyhr.co.za/uploads/images/gallery/2021-03/sLZnmNxb9GMAzbvl-image-1616881012790.png)

<div data-role="steps-container" id="bkmrk--1"><div data-role="steps-container"><div></div><div></div></div></div>From the Toolbox, click on the Comment hyperlink. The Comment Detail screen will open.

## <svg aria-label="Heading anchor" enable-background="new 0 0 20 20" height="16" role="img" viewbox="0 0 20 20" width="16" xmlns="http://www.w3.org/2000/svg"></svg>Comment Detail

Comment steps are often used to give a welcome message or specific information at certain points in the pathway. No interaction from the learner’s side is possible except to view the step information.

<div data-role="steps-container" id="bkmrk--2"><div data-role="steps-container"><div></div><div>![](https://media.screensteps.com/image_assets/assets/002/858/525/original/85191d38-8eff-46d5-bbe1-471cacffda93.png)</div><div></div></div></div>**Focus:** To quickly create a Comment Step, complete only the numbered fields.

After you click the Save button, the step will be added to the Pathway. Click the Close button to return to the Pathway.

## <svg aria-label="Heading anchor" enable-background="new 0 0 20 20" height="16" role="img" viewbox="0 0 20 20" width="16" xmlns="http://www.w3.org/2000/svg"></svg>Overview of fields

Below is an overview of fields used when adding a Comment step.

<div data-role="steps-container" id="bkmrk-field-overview-custo"><div data-role="steps-container"><div data-step-uuid="3781F8C0-C728-0137-6945-0E63FF21C970"><div></div><div><table><thead><tr><th>Field</th><th>Overview</th></tr></thead><tbody><tr><td>Custom Main Header</td><td>This value is displayed at the top of the Pathway step. Use a verb to communicate simple and clear instructions to the Learner.</td></tr><tr><td>Reference Description</td><td>The heading displayed inside the Pathway step.</td></tr><tr><td>Description</td><td>Provide information which will add value for the learner.</td></tr><tr><td>Lock Pathway Step</td><td>When this checkbox is selected, the Pathway step is not available to the learner, but it remains in the pathway.</td></tr></tbody></table>

</div></div><div data-step-uuid="37823070-C728-0137-6948-0E63FF21C970"></div></div></div>## <svg aria-label="Heading anchor" enable-background="new 0 0 20 20" height="16" role="img" viewbox="0 0 20 20" width="16" xmlns="http://www.w3.org/2000/svg"></svg>Comment step for the learner

The image below shows an example of an **Comment** step previewed as a user.

When the user opens the step, it is marked as viewed.

<div data-role="steps-container" id="bkmrk-try-it-out%3A%C2%A0click-on"><div data-role="steps-container"><div data-step-uuid="37823070-C728-0137-6948-0E63FF21C970"><div></div><div>[![](https://media.screensteps.com/image_assets/assets/002/884/940/medium/de745d05-eb11-422d-9eb0-7801b338358c.png)](http://signify.screenstepslive.com/s/10619/m/91598/l/1150797/show_image?image_id=2884940)</div></div><div>**Try It Out:** Click on the **Comment** item in the **Toolbox** and complete the required details to create a Pathway step.</div></div></div><div id="bkmrk--3"></div># How to use a Document (Download) Step

The **Document** step lets the learner download a document uploaded to the Pathway by an administrator. Examples of documents used for this step include terms and conditions, reading material, manuals, user guides, SOP, etc. The user is expected to download the document to complete the step.

## <svg aria-label="Heading anchor" enable-background="new 0 0 20 20" height="16" role="img" viewbox="0 0 20 20" width="16" xmlns="http://www.w3.org/2000/svg"></svg>Pathway Toolbox

<div id="bkmrk--4"><div><div data-step-uuid="37A91290-C728-0137-694C-0E63FF21C970"></div><div>[![](https://media.screensteps.com/image_assets/assets/002/890/666/medium/eae0ab55-b894-4c5e-b93f-1a738a9c0baa.png)](http://signify.screenstepslive.com/s/10619/m/91598/l/1150799/show_image?image_id=2890666)</div><div></div></div></div>From the Toolbox, click on the Document (Download) hyperlink. The Document Detail screen will open.

## <svg aria-label="Heading anchor" enable-background="new 0 0 20 20" height="16" role="img" viewbox="0 0 20 20" width="16" xmlns="http://www.w3.org/2000/svg"></svg>Document Detail

<div id="bkmrk--5"><div><div data-step-uuid="37A94EE0-C728-0137-694F-0E63FF21C970"><div>![](https://media.screensteps.com/image_assets/assets/002/884/824/original/6fd228e9-c9d6-4e3e-9272-f4d49de63acc.png)</div><div></div></div></div></div>**Focus:** To quickly create an **Document** Step, complete only the numbered fields.

After you click the Save button, the step will be added to the Pathway. Click the Close button to return to the Pathway.

## <svg aria-label="Heading anchor" enable-background="new 0 0 20 20" height="16" role="img" viewbox="0 0 20 20" width="16" xmlns="http://www.w3.org/2000/svg"></svg>Overview of fields

Below is an overview of fields used when adding an Document step.

<div id="bkmrk-field-overview-custo-0"><div><div data-step-uuid="37A99A80-C728-0137-6953-0E63FF21C970"><div></div><div><table><thead><tr><th>Field</th><th>Overview</th></tr></thead><tbody><tr><td>Custom Main Header</td><td>This value is displayed at the top of the Pathway step. Use a verb to communicate simple and clear instructions to the Learner.</td></tr><tr><td>Reference Description</td><td>The heading displayed inside the Pathway step.</td></tr><tr><td>File Name</td><td>Choose the file you want the learner to download.</td></tr><tr><td>Description</td><td>A more detailed description of why the learner must download the document. </td></tr><tr><td>Allow Not Logged In Download</td><td>Allows a learner who is not logged into the system, to download the document via the link they receive by SMS or email.</td></tr><tr><td>Lock Pathway Step</td><td>When this checkbox is selected, the Pathway step is not available to the learner, but it remains in the pathway.</td></tr></tbody></table>

</div></div><div data-step-uuid="37A9D290-C728-0137-6956-0E63FF21C970"></div></div></div>## <svg aria-label="Heading anchor" enable-background="new 0 0 20 20" height="16" role="img" viewbox="0 0 20 20" width="16" xmlns="http://www.w3.org/2000/svg"></svg>Document Step for the learner

The image below shows an example of a **Document (Download)** step previewed as a user.

When the user opens the Document step, the date and time the document was downloaded are recorded against the Pathway step details for that learner.

<div id="bkmrk--6"><div><div data-step-uuid="37A9D290-C728-0137-6956-0E63FF21C970"><div></div><div>[![](https://media.screensteps.com/image_assets/assets/002/884/943/medium/9b261188-0553-405c-9691-537befe2fbee.png)](http://signify.screenstepslive.com/s/10619/m/91598/l/1150799/show_image?image_id=2884943)</div></div><div></div></div></div><p class="callout info">**Try It Out:** Click on the **Document (Download)** item in the **Toolbox** and complete the required details to create a Pathway step.</p>

# How to use an Acceptance Step

The **Acceptance** step is used to display a message with information to the user. The user is then required to accept a statement in order to complete the step.

## <svg aria-label="Heading anchor" enable-background="new 0 0 20 20" height="16" role="img" viewbox="0 0 20 20" width="16" xmlns="http://www.w3.org/2000/svg"></svg>Pathway Toolbox

<div data-role="steps-container" id="bkmrk--7"><div data-role="steps-container"><div data-role="steps-container"><div data-step-uuid="3725FF80-C728-0137-690A-0E63FF21C970"></div><div></div></div></div></div>[![image-1616881080402.png](https://signature.signifyhr.co.za/uploads/images/gallery/2021-03/scaled-1680-/vJPGo9p4AyQqQ7Rp-image-1616881080402.png)](https://signature.signifyhr.co.za/uploads/images/gallery/2021-03/vJPGo9p4AyQqQ7Rp-image-1616881080402.png)

<div data-role="steps-container" id="bkmrk--9"><div data-role="steps-container"><div></div><div></div></div></div>From the Toolbox, click on the Acceptance hyperlink. The Acceptance Detail screen will open.

## <svg aria-label="Heading anchor" enable-background="new 0 0 20 20" height="16" role="img" viewbox="0 0 20 20" width="16" xmlns="http://www.w3.org/2000/svg"></svg>Acceptance Detail

<div data-role="steps-container" id="bkmrk--10"><div data-role="steps-container"><div data-step-uuid="37263F30-C728-0137-690D-0E63FF21C970"><div>![](https://media.screensteps.com/image_assets/assets/002/884/948/original/ee724527-15fb-4a05-afd9-8a366a2454c9.png)</div><div></div></div></div></div>**Focus:** To quickly create an Acceptance Step, complete only the numbered fields.

After you click the Save button, the step will be added to the Pathway. Click the Close button to return to the Pathway.

## <svg aria-label="Heading anchor" enable-background="new 0 0 20 20" height="16" role="img" viewbox="0 0 20 20" width="16" xmlns="http://www.w3.org/2000/svg"></svg>Overview of fields

Below is an overview of fields used when adding an Acceptance step.

<div data-role="steps-container" id="bkmrk-field-overview-custo-1"><div data-role="steps-container"><div data-step-uuid="37268500-C728-0137-6911-0E63FF21C970"><div></div><div><table><thead><tr><th>Field</th><th>Overview</th></tr></thead><tbody><tr><td>Custom Main Header</td><td>This value is displayed at the top of the Pathway step. Use a verb to communicate simple and clear instructions to the Learner.</td></tr><tr><td>Reference Description</td><td>The heading displayed inside the Pathway step.</td></tr><tr><td>Acceptance Title</td><td>The phrase displayed next to the checkbox. This is the sentence or phrase the learner must accept.</td></tr><tr><td>Description</td><td>A more detailed description of why the learner must accept the step and what the impact is if they do not accept.</td></tr><tr><td>Lock Pathway Step</td><td>When this checkbox is selected, the Pathway step is not available to the learner, but it remains in this pathway.</td></tr><tr><td>Log to Learner Record</td><td>When this checkbox is selected, the step can be logged to the learner record of a learner. This will serve as proof that the learner accepted the Pathway step. When this checkbox is selected, the option will become available to select a Training Intervention against which the learner record will be logged.</td></tr></tbody></table>

</div></div><div data-step-uuid="3726C2C0-C728-0137-6914-0E63FF21C970"></div></div></div>## <svg aria-label="Heading anchor" enable-background="new 0 0 20 20" height="16" role="img" viewbox="0 0 20 20" width="16" xmlns="http://www.w3.org/2000/svg"></svg>Acceptance Step for the learner

The image below shows an example of an **Acceptance** step previewed as a user.

The moment a learner ticks the acceptance check box below, the user is asked to confirm that the acceptance will be permanent. Once the acceptance is confirmed, the acceptance tick box below will not be editable anymore.

<div data-role="steps-container" id="bkmrk--11"><div data-role="steps-container"><div data-role="steps-container"><div data-step-uuid="3726C2C0-C728-0137-6914-0E63FF21C970"><div></div><div></div></div></div></div></div>[![image-1616881093342.png](https://signature.signifyhr.co.za/uploads/images/gallery/2021-03/scaled-1680-/KBS4lxAMEKB52RL4-image-1616881093342.png)](https://signature.signifyhr.co.za/uploads/images/gallery/2021-03/KBS4lxAMEKB52RL4-image-1616881093342.png)

<div data-role="steps-container" id="bkmrk--13"><div data-role="steps-container"><div data-step-uuid="3726C2C0-C728-0137-6914-0E63FF21C970"><div></div></div><div></div></div></div><p class="callout info">**Try It out:** Click on the **Acceptance** item in the **Toolbox** and complete the required details to create a Pathway step.</p>

# How to use an Online Assessment Step

The **Online Assessment** step is used to link an assessment to a pathway. This assessment is created in the **Assessment Builder.** The assessment guides the user through a structured set of questions. The user is expected to answer the questions one-by-one. An assessment is sometimes used to gauge a user’s knowledge after downloading and studying material from a previous Pathway step.

## <svg aria-label="Heading anchor" enable-background="new 0 0 20 20" height="16" role="img" viewbox="0 0 20 20" width="16" xmlns="http://www.w3.org/2000/svg"></svg>Pathway Toolbox

<div data-role="steps-container" id="bkmrk--14"><div data-role="steps-container"><div data-role="steps-container"><div data-step-uuid="380829E0-C728-0137-696C-0E63FF21C970"></div><div></div></div></div></div>[![image-1616881119213.png](https://signature.signifyhr.co.za/uploads/images/gallery/2021-03/scaled-1680-/gZxmJTKbPbZYy7sN-image-1616881119213.png)](https://signature.signifyhr.co.za/uploads/images/gallery/2021-03/gZxmJTKbPbZYy7sN-image-1616881119213.png)

<div data-role="steps-container" id="bkmrk--16"><div data-role="steps-container"><div></div><div></div></div></div>From the Toolbox, click on the Assessment (Online) hyperlink. The Assessment Detail screen will open.

## <svg aria-label="Heading anchor" enable-background="new 0 0 20 20" height="16" role="img" viewbox="0 0 20 20" width="16" xmlns="http://www.w3.org/2000/svg"></svg>Assessment Detail

<div data-role="steps-container" id="bkmrk--17"><div data-role="steps-container"><div data-step-uuid="caa15723-a869-41bf-801f-590608b05ab9"></div><div>![](https://media.screensteps.com/image_assets/assets/002/885/030/original/532cf106-cb85-4343-a159-eb9b9e1ac81e.png)</div><div></div></div></div>**Focus:** To quickly create an Online Assessment, complete only the numbered fields.

After you click the Save button, the step will be added to the Pathway. Click the Close button to return to the Pathway.

## <svg aria-label="Heading anchor" enable-background="new 0 0 20 20" height="16" role="img" viewbox="0 0 20 20" width="16" xmlns="http://www.w3.org/2000/svg"></svg>Overview of fields

Below is an overview of fields used when adding an Online Assessment step.

<div data-role="steps-container" id="bkmrk-field-overview-custo-2"><div data-role="steps-container"><div data-step-uuid="38089CA0-C728-0137-6972-0E63FF21C970"><div></div><div><table><thead><tr><th>Field</th><th>Overview</th></tr></thead><tbody><tr><td>Custom Main Header</td><td>This value is displayed at the top of the Pathway step. Use a verb to communicate simple and clear instructions to the Learner.</td></tr><tr><td>Assessment</td><td>On other pathway steps this is called the Reference Description. The heading displayed inside the Pathway step.</td></tr><tr><td>Description</td><td>A more detailed description of what the learner can expect in the assessment as well as what the outcome means.</td></tr><tr><td>Reset all employee assessment attempts</td><td>Resets all previous assessment attempts made on this Assessment step. All assessments across all pathways will be reset. The number of attempts set on the assessment itself, will be available to the user again. </td></tr></tbody></table>

</div></div><div></div></div></div><p class="callout info">There is no Log to Learner Record option when creating an Online Assessment Pathway step. For Online Assessments, this value is set on the Assessment itself in the Assessment Builder module.</p>

## <svg aria-label="Heading anchor" enable-background="new 0 0 20 20" height="16" role="img" viewbox="0 0 20 20" width="16" xmlns="http://www.w3.org/2000/svg"></svg>Online Assessment Step for a learner

The image below shows an example of an **Online Assessment** step previewed as a user.

<div data-role="steps-container" id="bkmrk--18"><div data-role="steps-container"><div data-role="steps-container"><div data-step-uuid="38090A90-C728-0137-6978-0E63FF21C970"><div></div><div></div></div></div></div></div>[![image-1616881170173.png](https://signature.signifyhr.co.za/uploads/images/gallery/2021-03/scaled-1680-/iG8Uaj728mKPhwhP-image-1616881170173.png)](https://signature.signifyhr.co.za/uploads/images/gallery/2021-03/iG8Uaj728mKPhwhP-image-1616881170173.png)

<div data-role="steps-container" id="bkmrk--20"><div data-role="steps-container"><div data-step-uuid="38090A90-C728-0137-6978-0E63FF21C970"><div></div><div></div></div></div></div><p class="callout info">**Try It Out:** Click on the **Assessment (Online)** item in the **Toolbox** and complete the required details to create a Pathway step.</p>

# How to use a SCORM Step

<div id="bkmrk--21"></div><p class="callout info">A **Sharable Content Object Reference Model** is a collection of standards and specifications for web-based e-learning. It defines communications between client-side content and a host system called the run-time environment, which is commonly supported by a learning management system. SCORM also defines how content may be packaged into a transferable ZIP file called "Package Interchange Format.</p>

### <svg aria-label="Heading anchor" enable-background="new 0 0 20 20" height="16" role="img" viewbox="0 0 20 20" width="16" xmlns="http://www.w3.org/2000/svg"></svg>Pathway Toolbox

[![image-1616881189711.png](https://signature.signifyhr.co.za/uploads/images/gallery/2021-03/scaled-1680-/CfuiZzgIuDAxG4V1-image-1616881189711.png)](https://signature.signifyhr.co.za/uploads/images/gallery/2021-03/CfuiZzgIuDAxG4V1-image-1616881189711.png)

<div data-step-uuid="389FBB10-C728-0137-69A5-0E63FF21C970" id="bkmrk--23"><div data-step-uuid="389FBB10-C728-0137-69A5-0E63FF21C970"><div></div><div></div></div></div>From the Toolbox, click on the SCORM / xAPI hyperlink. The SCORM Detail screen will open.

### <svg aria-label="Heading anchor" enable-background="new 0 0 20 20" height="16" role="img" viewbox="0 0 20 20" width="16" xmlns="http://www.w3.org/2000/svg"></svg>SCORM Detail

<div data-step-uuid="389FEDC0-C728-0137-69A8-0E63FF21C970" id="bkmrk--24"><div data-step-uuid="389FEDC0-C728-0137-69A8-0E63FF21C970"><div>![](https://media.screensteps.com/image_assets/assets/002/893/248/original/1c65a256-6360-4822-9a9a-5dd5683ddb1e.png)</div><div></div></div></div><p class="callout success">**Focus:** To quickly create a SCORM Step, complete only the numbered fields.</p>

After you click the Save button, the step will be added to the Pathway and the window will close.

### <svg aria-label="Heading anchor" enable-background="new 0 0 20 20" height="16" role="img" viewbox="0 0 20 20" width="16" xmlns="http://www.w3.org/2000/svg"></svg>Overview of fields

<div data-step-uuid="38A03540-C728-0137-69AC-0E63FF21C970" id="bkmrk-field-overview-step-"><div data-step-uuid="38A03540-C728-0137-69AC-0E63FF21C970"><div><table><thead><tr><th>Field</th><th>Overview</th></tr></thead><tbody><tr><td>Step Header</td><td>This value is displayed at the top of the Pathway step. Use a verb to communicate simple and clear instructions to the Learner.</td></tr><tr><td>Description Header</td><td>The heading displayed inside the Pathway step.</td></tr><tr><td>Description</td><td>A more detailed description of what the learner can expect in the SCORM content.</td></tr><tr><td>Course</td><td>Select the course from the SCORM library. </td></tr><tr><td>Preview</td><td>Click on the Preview button to preview the selected SCORM content . </td></tr><tr><td>Lock Pathway Step</td><td>When this checkbox is selected, the Pathway step is not available to the learner, but it remains in this pathway.</td></tr></tbody></table>

</div></div></div><p class="callout danger">There is no Log to Learner Record option when creating a SCORM Pathway step. For SCORM, this value is set on the SCORM content itself in the SCORM Library.</p>

### <svg aria-label="Heading anchor" enable-background="new 0 0 20 20" height="16" role="img" viewbox="0 0 20 20" width="16" xmlns="http://www.w3.org/2000/svg"></svg>How do I add a SCORM file to the course list?

If you want to upload a SCORM package for the first time, refer to these articles for more information:

[Add Content / Add a SCORM file to the library](http://signify.screenstepslive.com/s/10619/m/91598/l/1160183-add-content-a-scorm-file-to-the-library)

[Signify's New SCORM Engine](http://signify.screenstepslive.com/s/10619/m/86774/l/1142440-signify-s-new-scorm-engine)

Signify develops SCORM content in-house. For examples of content our team has created, you can navigate to our website: [https://www.signify.co.za/elearning.html](https://www.signify.co.za/elearning.html)

### <svg aria-label="Heading anchor" enable-background="new 0 0 20 20" height="16" role="img" viewbox="0 0 20 20" width="16" xmlns="http://www.w3.org/2000/svg"></svg>SCORM Step for a learner

The image below shows an example of a SCORM step previewed as a user.

<div data-step-uuid="38A03540-C728-0137-69AC-0E63FF21C970" id="bkmrk--25"><div data-step-uuid="2cef9c6e-6bcf-4bc4-877c-322f4340d8ea"><div>[![](https://media.screensteps.com/image_assets/assets/002/893/607/medium/4bc4b832-972f-4918-9b47-34d0104254ac.png)](http://signify.screenstepslive.com/s/10619/m/91598/l/1150802/show_image?image_id=2893607)</div></div></div>**Try It Out:** Click on the **SCORM/xAPI** item in the **Toolbox** and complete the required details to create the pathway step.

# How to work with the Assignment (Document upload) Step

<div id="bkmrk--26"></div>The **Assignment** item is used to inform a user that he has to submit documentation (making up a portfolio of evidence) in support of his completion of a certain number of pathway steps.

### <svg aria-label="Heading anchor" enable-background="new 0 0 20 20" height="16" role="img" viewbox="0 0 20 20" width="16" xmlns="http://www.w3.org/2000/svg"></svg>Pathway Toolbox

[![image-1616881235488.png](https://signature.signifyhr.co.za/uploads/images/gallery/2021-03/scaled-1680-/kajVx67XugYgthot-image-1616881235488.png)
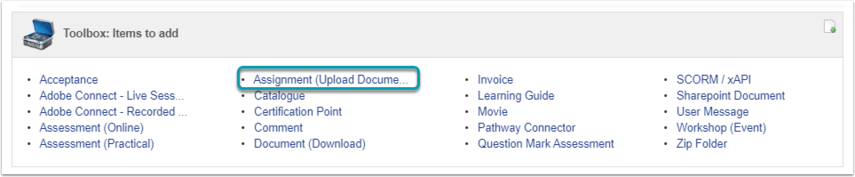
](https://signature.signifyhr.co.za/uploads/images/gallery/2021-03/kajVx67XugYgthot-image-1616881235488.png)

From the Toolbox, click on the **Assignment (Upload Document)** hyperlink. The Assignment Detail screen will open.

### <svg aria-label="Heading anchor" enable-background="new 0 0 20 20" height="16" role="img" viewbox="0 0 20 20" width="16" xmlns="http://www.w3.org/2000/svg"></svg>Assignment Detail

<div data-step-uuid="38161EE0-C728-0137-6980-0E63FF21C970" id="bkmrk--28"><div data-step-uuid="38161EE0-C728-0137-6980-0E63FF21C970"><div>![](https://media.screensteps.com/image_assets/assets/003/568/841/original/9dc200a8-f649-4614-9b39-9e046b76d558.png)</div><div></div></div></div>After you click the Save button, the step will be added to the Pathway. Click the Close button to return to the Pathway.

### <svg aria-label="Heading anchor" enable-background="new 0 0 20 20" height="16" role="img" viewbox="0 0 20 20" width="16" xmlns="http://www.w3.org/2000/svg"></svg>Overview of fields

Below is an overview of fields used when adding an Assignment step.

<div data-step-uuid="381646A0-C728-0137-6982-0E63FF21C970" id="bkmrk-field-overview-1.-cu"><div data-step-uuid="381646A0-C728-0137-6982-0E63FF21C970"><div><table><thead><tr><th>Field</th><th>Overview</th></tr></thead><tbody><tr><td>1. Custom Main Header</td><td>This value is displayed at the top of the Pathway step. Use a verb to communicate simple and clear instructions to the Learner.</td></tr><tr><td>2. Heading</td><td>On other pathway steps this is called the Reference Description. The heading displayed INSIDE the Pathway step.</td></tr><tr><td>3. Description</td><td>A more detailed description of what the learner can expect in the assignment as well as what the outcome means.</td></tr><tr><td>4. Log to Learner Record</td><td>Determines if the completion of this step is logged to a learner's training records.  
- When checked, a learner record will be completed for this step.
- When unchecked, a learner record will not be created for this step.

When the log to learner record value is checked, a Training Intervention must be selected so that it is linked to the step.  
  
**<u>Note</u>: Only assignment documents linked to a learner record, can be assessed and moderated.**</td></tr></tbody></table>

</div></div></div><p class="callout success">**Try It Out:** Click on the **Assignment** step-item in the **Toolbox** and complete the required details to create a Pathway step.</p>

### <svg aria-label="Heading anchor" enable-background="new 0 0 20 20" height="16" role="img" viewbox="0 0 20 20" width="16" xmlns="http://www.w3.org/2000/svg"></svg>Assignment Step for a user/learner

Open the **Assignment** from the Pathway summary screen.

[![image-1616881251259.png](https://signature.signifyhr.co.za/uploads/images/gallery/2021-03/scaled-1680-/zGKlduvo85KRAGWN-image-1616881251259.png)](https://signature.signifyhr.co.za/uploads/images/gallery/2021-03/zGKlduvo85KRAGWN-image-1616881251259.png)

<div data-step-uuid="abba1731-824b-41ac-bf79-a50184a96798" id="bkmrk-the-following-functi"><div data-step-uuid="abba1731-824b-41ac-bf79-a50184a96798"><div></div><div>- The following functionality is available for learners to upload assignments or documents: 
    - **Add**: The learner can upload multiple documents as long as the step status is not ‘Submitted’ nor ‘Competent’. The **Add** button will be disabled when the pathway status is ‘Submitted’ or ‘Competent’.
    - **Delete**: The **Delete** document option will be available when the document is not locked.
    - **Download**: The learner can download a document to his PC. The downloaded document will be saved in the Downloads folder.
    - **Submit for Review:** This button will only be enabled when one or more documents have been uploaded in the pathway step and the learner did not submit the documents for review.
    - **View Comments:** Opens a feedback screen showing the comments made by assessors and moderators on the assignment step.

</div></div></div>The image below shows an example of an **Assignment** step previewed as a learner.

<div id="bkmrk--30">[![](https://media.screensteps.com/image_assets/assets/003/569/311/medium/4ef959c1-734c-4221-b3a9-609bf9e1a468.png)](http://signify.screenstepslive.com/s/10619/m/91598/l/1150805/show_image?image_id=3569311)</div>### <svg aria-label="Heading anchor" enable-background="new 0 0 20 20" height="16" role="img" viewbox="0 0 20 20" width="16" xmlns="http://www.w3.org/2000/svg"></svg>How to Submit Assignment for Review

After the learner uploaded the POE and other documents it can be submitted for review by an Assessor.

The following actions will apply when the **Submit for Review** button is clicked by the learner:

<div id="bkmrk-the-following-confir"><div>- The following confirmation message will display: "*You are about to submit your assignments for review. In doing so, you confirm that all your uploaded documents will be locked and cannot be deleted. You will also be prevented from uploading any additional documents until your assignments have been reviewed.*"
- After the learner confirms the submission of documents the following will happen: 
    - The documents uploaded on the step up to date will be locked.
    - The **Add** and **Submit for Review** buttons are disabled.
    - Once a document was locked by the **Submit for Review** option, it cannot be deleted by the learner unless the Learning Administrator or Assessor 'opens' the pathway step to the 'Re-submit', 'General Action Required' or 'Remedial' status.
    - The pathway step status will be changed to SUBMITTED which locks the pathway step for further uploads/deletions by the learner. The pathway step can only be unlocked by an Assessor or Learning Administrator via the **Assignment Control Panel**.
    - The learner record Completed Status is set to "Yes" and the Competent Status is set to "No".
    - There is no restriction on downloading documents from the assignment pathway step for a learner.

</div></div>The image below shows an example of an **Assignment** step after the **Submit for Review** button is clicked.

<div id="bkmrk-%C2%A0-0"><div><svg class="svg-icon" data-icon="link" role="presentation" viewbox="0 0 24 24" xmlns="http://www.w3.org/2000/svg"></svg><div> <button class="button outline icon" data-clipboard-target="#pointer-url" title="Copy Link" type="button"><svg class="svg-icon" data-icon="copy" role="presentation" viewbox="0 0 24 24" xmlns="http://www.w3.org/2000/svg"></svg></button></div>[<svg class="svg-icon" data-icon="edit" role="presentation" viewbox="0 0 24 24" xmlns="http://www.w3.org/2000/svg"></svg>](https://signature.signifyhr.co.za/books/elearning---pathways-v88/page/how-to-work-with-the-assignment-%28document-upload%29-step/edit?content-id=bkmrk--1&content-text= "Edit Content")</div></div><div id="bkmrk--31">[![](https://media.screensteps.com/image_assets/assets/003/569/309/medium/dfdf54ac-e6d5-4377-90f0-17358d79926f.png)](http://signify.screenstepslive.com/s/10619/m/91598/l/1150805/show_image?image_id=3569309)</div><div id="bkmrk--32"></div># How to use a Movie Step

<p class="callout info">**System Movies** contain content intended to be watched by the learner to enrich their knowledge of a certain field or product. </p>

### <svg aria-label="Heading anchor" enable-background="new 0 0 20 20" height="16" role="img" viewbox="0 0 20 20" width="16" xmlns="http://www.w3.org/2000/svg"></svg>Pathway Toolbox

<div id="bkmrk--33"><div><div data-step-uuid="38B386D0-C728-0137-69B1-0E63FF21C970"><div data-step-uuid="38B386D0-C728-0137-69B1-0E63FF21C970"><div>[![](https://media.screensteps.com/image_assets/assets/002/893/579/medium/6ccb202e-379f-4cfc-9f03-a4ed3b956d94.png)](http://signify.screenstepslive.com/s/10619/m/91598/l/1150803/show_image?image_id=2893579)</div><div></div></div></div></div></div>From the Toolbox, click on the **Movie** hyperlink. The **Movie** detail screen will open.

### <svg aria-label="Heading anchor" enable-background="new 0 0 20 20" height="16" role="img" viewbox="0 0 20 20" width="16" xmlns="http://www.w3.org/2000/svg"></svg>System Movie Detail screen

<div id="bkmrk--34"><div><div data-step-uuid="38B3C290-C728-0137-69B4-0E63FF21C970"><div data-step-uuid="38B3C290-C728-0137-69B4-0E63FF21C970"><div>![](https://media.screensteps.com/image_assets/assets/002/896/763/original/155e252f-db4a-4156-9594-dca419995889.png)</div><div></div></div></div></div></div><p class="callout success">**Focus:** To quickly create a System Movie Step, complete only the numbered fields.</p>

After you click the Save button, the step will be added to the Pathway. Click the Close button to return to the Pathway.

To create a Movie file, read the [The HTML Video Element](http://signify.screenstepslive.com/s/10619/m/86505/l/1062350-how-to-create-a-system-movie-file#working-with-a-system-movie-item) article. When you click on the link it will open in a new page.

### <svg aria-label="Heading anchor" enable-background="new 0 0 20 20" height="16" role="img" viewbox="0 0 20 20" width="16" xmlns="http://www.w3.org/2000/svg"></svg>Options available when adding a System Movie

#### <svg aria-label="Heading anchor" enable-background="new 0 0 20 20" height="16" role="img" viewbox="0 0 20 20" width="16" xmlns="http://www.w3.org/2000/svg"></svg>Choose File

To upload a new System Movie file, click on Choose File.

<div id="bkmrk--35"><div><div data-step-uuid="3b2f2491-5394-48fa-a672-449fe9cb3c14"><div data-step-uuid="3b2f2491-5394-48fa-a672-449fe9cb3c14"><div data-step-uuid="95bc596f-e309-4280-98b3-c971c84a580a"><div>![](https://media.screensteps.com/image_assets/assets/002/896/781/original/229acb37-4e4f-41f2-ab95-1049e602cdd8.png)</div></div></div></div></div></div>#### <svg aria-label="Heading anchor" enable-background="new 0 0 20 20" height="16" role="img" viewbox="0 0 20 20" width="16" xmlns="http://www.w3.org/2000/svg"></svg>Select System Movie

A System Movie can be re-used in pathways. Once the System Movie file is uploaded, it is saved to a list of System Movies. The Select System Movie Tab, displays a list of System Movies uploaded on the LMS previously.

<div id="bkmrk--36"><div><div data-step-uuid="3b2f2491-5394-48fa-a672-449fe9cb3c14"><div data-step-uuid="c6f7c8d9-3bfe-4700-9076-74896ff83d55"><div>![](https://media.screensteps.com/image_assets/assets/002/896/766/original/4cda48f1-bde3-4561-944b-72f58411acdc.png)</div></div></div></div></div>### <svg aria-label="Heading anchor" enable-background="new 0 0 20 20" height="16" role="img" viewbox="0 0 20 20" width="16" xmlns="http://www.w3.org/2000/svg"></svg>Overview of fields

<div id="bkmrk-field-overview-custo-3"><div><div data-step-uuid="38B41AB0-C728-0137-69B9-0E63FF21C970"><div data-step-uuid="38B41AB0-C728-0137-69B9-0E63FF21C970"><div><table><thead><tr><th>Field</th><th>Overview</th></tr></thead><tbody><tr><td>Custom Main Header</td><td>This value is displayed at the top of the Pathway step. Use a verb to communicate simple and clear instructions to the Learner.</td></tr><tr><td>System Movie File Path</td><td>Choose the Movie file you want to use.</td></tr><tr><td>Reference Description</td><td>The heading displayed inside the Pathway step. The Reference Description of this step is the same as the name of the Movie file and cannot be edited.</td></tr><tr><td>Description</td><td>A more detailed description of what the learner can expect in the Movie file.</td></tr><tr><td>Startup Page</td><td>The filename of the Startup file of the Movie file. When adding a Movie Step for the first time, this field must be entered manually. It is good practice to name the startup file of yuor system movie startup.html</td></tr><tr><td>Local PC Path</td><td>This refers to a central location (e.g. a shared network drive) where the zipped file can be stored (in addition to being uploaded on the step itself) allowing users to access and run the file from there instead of the file being downloaded to their own computers before being able to run.</td></tr><tr><td>Interactive</td><td>Can be checked or unchecked. This option indicates whether the System Movie is interactive or not, but does not enable the movie to be interactive. This, to a degree, manages the expectations of the user with regards to the nature of the content.</td></tr><tr><td>Log to Learner Record</td><td>When this checkbox is selected, the step can be logged to the learner record of a learner. This will serve as proof that the user has completed requirements for the step. When this checkbox is selected, the option will become available to select a Training Intervention against which the learner record will be logged.</td></tr><tr><td>Lock Pathway Step</td><td>When this checkbox is selected, the Pathway step is not available to the learner, but it remains in this pathway.</td></tr></tbody></table>

</div></div></div></div></div>### <svg aria-label="Heading anchor" enable-background="new 0 0 20 20" height="16" role="img" viewbox="0 0 20 20" width="16" xmlns="http://www.w3.org/2000/svg"></svg>Startup File

The file the LMS will try to use as the startup file in the zipped folder is known as the Startup file. If, for example, a zipped folder containing 2 or 3 other files as well as an HTML page, is uploaded to the System Movie File Path, a startup page needs to be selected in order to indicate from what file the content will begin to display – which in this case will be the HTML file that will enable the rest of the videos/movies to run as required.

### <svg aria-label="Heading anchor" enable-background="new 0 0 20 20" height="16" role="img" viewbox="0 0 20 20" width="16" xmlns="http://www.w3.org/2000/svg"></svg>Movie Step for a learner

The image below shows an example of a **Movie** step previewed as a user.

<div id="bkmrk-%C2%A0-1"><div><div data-step-uuid="300df7cb-03fd-49cc-bc8e-5205d7ee1f8d"><div data-step-uuid="300df7cb-03fd-49cc-bc8e-5205d7ee1f8d"><div>[![](https://media.screensteps.com/image_assets/assets/002/893/617/medium/d6c8a35f-5846-4e8c-ab93-2b303b27997c.png)](http://signify.screenstepslive.com/s/10619/m/91598/l/1150803/show_image?image_id=2893617)</div></div></div><div><div><svg class="svg-icon" data-icon="link" role="presentation" viewbox="0 0 24 24" xmlns="http://www.w3.org/2000/svg"></svg><div> <button class="button outline icon" data-clipboard-target="#pointer-url" title="Copy Link" type="button"><svg class="svg-icon" data-icon="copy" role="presentation" viewbox="0 0 24 24" xmlns="http://www.w3.org/2000/svg"></svg></button></div>[<svg class="svg-icon" data-icon="edit" role="presentation" viewbox="0 0 24 24" xmlns="http://www.w3.org/2000/svg"></svg>](https://signature.signifyhr.co.za/books/elearning---pathways-v88/page/how-to-use-a-movie-step/edit?content-id=bkmrk-try-it-out%3A%C2%A0click-on&content-text=Try%20It%20Out%3A%C2%A0Click%20on%20the%20movie%20item%20in%20the%20Toolbox "Edit Content")</div></div></div></div><p class="callout success">**Try It Out:** Click on the movie item in the Toolbox and complete the required details to create a Pathway step.</p>

<div id="bkmrk--37"></div># How to use a Learning Guide Step

The **Learning Guide** item is used to make Learning Guides available to the learner. The learner is expected to download and review the documents in order to complete the pathway.

Documents displayed in this pathway element are distinguished from normal documents in that they originate from the **Learning Guides** module or library. They are therefore of a somewhat more permanent and controlled nature.

When a learner opens the **Learning Guide** step, a learner record is not created, but the document download date is captured.

### <svg aria-label="Heading anchor" enable-background="new 0 0 20 20" height="16" role="img" viewbox="0 0 20 20" width="16" xmlns="http://www.w3.org/2000/svg"></svg>Pathway Toolbox

<div id="bkmrk--38"><div><div data-step-uuid="3db10a3c-0324-415d-b59b-8025811a48cf"><div data-step-uuid="3db10a3c-0324-415d-b59b-8025811a48cf"><div>[![](https://media.screensteps.com/image_assets/assets/002/893/718/medium/60cf6909-cd14-44a5-96b3-95f809e37f3c.png)](http://signify.screenstepslive.com/s/10619/m/91598/l/1150809/show_image?image_id=2893718)</div><div></div></div></div></div></div>From the Toolbox, click on the Learning Guide hyperlink. The Learning Guide Detail screen will open.

### <svg aria-label="Heading anchor" enable-background="new 0 0 20 20" height="16" role="img" viewbox="0 0 20 20" width="16" xmlns="http://www.w3.org/2000/svg"></svg>Learning Guide Detail

<div id="bkmrk--39"><div><div data-step-uuid="37E5D650-C728-0137-6966-0E63FF21C970"><div data-step-uuid="37E5D650-C728-0137-6966-0E63FF21C970"><div>![Working with a Learning Guide Item](https://media.screensteps.com/image_assets/assets/002/893/720/original/065070bf-fafb-462c-9c92-f9970c8efc6a.png)</div></div></div></div></div><p class="callout success">**Focus:** To quickly create a Learning Guide Step, complete only the numbered fields.</p>

After you click the Save button, the step will be added to the Pathway. Click the Close button to return to the Pathway.

### <svg aria-label="Heading anchor" enable-background="new 0 0 20 20" height="16" role="img" viewbox="0 0 20 20" width="16" xmlns="http://www.w3.org/2000/svg"></svg>Overview of fields

Below is an overview of fields used when adding a Learning Guide step.

<div id="bkmrk-field-overview-custo-4"><div><div data-step-uuid="47423ab8-77cf-4475-8a6f-f8a73e2dcf2d"><div></div><div><table><thead><tr><th>Field</th><th>Overview</th></tr></thead><tbody><tr><td>Custom Main Header</td><td>This value is displayed at the top of the Pathway step. Use a verb to communicate simple and clear instructions to the Learner.</td></tr><tr><td>Reference Description</td><td>Select the Learning Guide from the list of available Learning Guides. </td></tr><tr><td>Description</td><td>A more detailed description of why the learner must download the document.</td></tr><tr><td>Allow Not Logged In Download</td><td>Allows a learner who is not logged into the system, to download the document via the link they receive by SMS or email.</td></tr><tr><td>Lock Pathway Step</td><td>When this checkbox is selected, the Pathway step is not available to the learner, but it remains in the pathway.</td></tr></tbody></table>

</div></div></div></div>### <svg aria-label="Heading anchor" enable-background="new 0 0 20 20" height="16" role="img" viewbox="0 0 20 20" width="16" xmlns="http://www.w3.org/2000/svg"></svg>Learning Guide Step as a learner

The image below shows an example of a **Learning Guide** step previewed as a user.

When the user opens the **Learning Guide** step, the date and time the document was downloaded are recorded against the Pathway step details for that learner.

<div id="bkmrk-%C2%A0-2"><div><div data-step-uuid="37E5F950-C728-0137-6968-0E63FF21C970"><div data-step-uuid="37E5F950-C728-0137-6968-0E63FF21C970"><div>[![](https://media.screensteps.com/image_assets/assets/002/893/722/medium/998d0547-3bdb-4d54-9427-78662557bff5.png)](http://signify.screenstepslive.com/s/10619/m/91598/l/1150809/show_image?image_id=2893722)</div></div></div><div><div><svg class="svg-icon" data-icon="link" role="presentation" viewbox="0 0 24 24" xmlns="http://www.w3.org/2000/svg"></svg><div> <button class="button outline icon" data-clipboard-target="#pointer-url" title="Copy Link" type="button"><svg class="svg-icon" data-icon="copy" role="presentation" viewbox="0 0 24 24" xmlns="http://www.w3.org/2000/svg"></svg></button></div>[<svg class="svg-icon" data-icon="edit" role="presentation" viewbox="0 0 24 24" xmlns="http://www.w3.org/2000/svg"></svg>](https://signature.signifyhr.co.za/books/elearning---pathways-v88/page/how-to-use-a-learning-guide-step/edit?content-id=bkmrk-try-it-out%3A%C2%A0click-on&content-text=Try%20It%20Out%3A%C2%A0Click%20on%20the%20Learning%20Guides%20item%20in%20t "Edit Content")</div></div></div></div><p class="callout success">**Try It Out:** Click on the Learning Guides item in the Toolbox and complete the required details to create a Pathway step.</p>

# How to use an Invoice Step

The **Invoice** step is used where payment is required before a learner can continue with a pathway.

### <svg aria-label="Heading anchor" enable-background="new 0 0 20 20" height="16" role="img" viewbox="0 0 20 20" width="16" xmlns="http://www.w3.org/2000/svg"></svg>Pathway Toolbox

<div id="bkmrk--40"><div><div data-step-uuid="7ef63678-0c85-43f7-9f3f-1cbf84408b22"><div data-step-uuid="7ef63678-0c85-43f7-9f3f-1cbf84408b22"><div>[![](https://media.screensteps.com/image_assets/assets/002/896/683/medium/f423ea0d-998b-46d3-b9fb-141370d01c2c.png)](http://signify.screenstepslive.com/s/10619/m/91598/l/1150808/show_image?image_id=2896683)</div><div></div></div></div></div></div>From the Toolbox, click on the **Invoice** hyperlink. The Learning Guide Detail screen will open.

### <svg aria-label="Heading anchor" enable-background="new 0 0 20 20" height="16" role="img" viewbox="0 0 20 20" width="16" xmlns="http://www.w3.org/2000/svg"></svg>Invoice Detail

<div id="bkmrk--41"><div><div data-step-uuid="37B95EF0-C728-0137-695D-0E63FF21C970"><div data-step-uuid="37B95EF0-C728-0137-695D-0E63FF21C970"><div>![](https://media.screensteps.com/image_assets/assets/002/896/688/original/68eda0d6-28be-4ae7-b9f5-d5bcdef6cdc0.png)</div><div></div></div></div></div></div><p class="callout success">**Focus:** To quickly create an **Invoice** Step, complete only the numbered fields.</p>

After you click the Save button, the step will be added to the Pathway. Click the Close button to return to the Pathway.

#### <svg aria-label="Heading anchor" enable-background="new 0 0 20 20" height="16" role="img" viewbox="0 0 20 20" width="16" xmlns="http://www.w3.org/2000/svg"></svg>Overview of fields

<div id="bkmrk-field-overview-custo-5"><div><div data-step-uuid="9a51e73c-d604-46bd-912f-12b3ff172865"><div><table><thead><tr><th>Field</th><th>Overview</th></tr></thead><tbody><tr><td>Custom Main Header</td><td>This value is displayed at the top of the Pathway step. Use a verb to communicate simple and clear instructions to the Learner.</td></tr><tr><td>Reference Description</td><td>The heading displayed inside the Pathway step.</td></tr><tr><td>Invoice Title</td><td>This is the title of the invoice displayed to the user. It is recommended that the name of the pathway is used for this. </td></tr><tr><td>Description</td><td>Provide information which will add value for the learner.</td></tr><tr><td>Amount (excl VAT)</td><td>The total cost of the pathway/course. </td></tr><tr><td>VAT Percentage</td><td>The percentage of VAT added to the total cost of the course. The VAT Percentage value cannot be edited on the Invoice Detail screen. The value is fixed at 15%. </td></tr><tr><td>Lock Pathway Step</td><td>When this checkbox is selected, the Pathway step is not available to the learner, but it remains in the pathway.</td></tr></tbody></table>

</div></div></div></div>### <svg aria-label="Heading anchor" enable-background="new 0 0 20 20" height="16" role="img" viewbox="0 0 20 20" width="16" xmlns="http://www.w3.org/2000/svg"></svg>Invoice Step as a Learner

The image below shows an example of an **Invoice** Step previewed as a learner.

#### <svg aria-label="Heading anchor" enable-background="new 0 0 20 20" height="16" role="img" viewbox="0 0 20 20" width="16" xmlns="http://www.w3.org/2000/svg"></svg>Complete the Invoice Details

<div id="bkmrk--42"><div><div data-step-uuid="37B983A0-C728-0137-695F-0E63FF21C970"><div data-step-uuid="37B983A0-C728-0137-695F-0E63FF21C970"><div data-step-uuid="58928228-5001-4cd1-9bc0-e863e4b59ddf"><div>[![](https://media.screensteps.com/image_assets/assets/002/896/685/medium/34be2239-78c0-404a-97de-e88c9f3cc0f2.png)](http://signify.screenstepslive.com/s/10619/m/91598/l/1150808/show_image?image_id=2896685)</div></div></div></div></div></div>### <svg aria-label="Heading anchor" enable-background="new 0 0 20 20" height="16" role="img" viewbox="0 0 20 20" width="16" xmlns="http://www.w3.org/2000/svg"></svg>View the invoice details and download the Invoice

<div id="bkmrk--43"><div><div data-step-uuid="37B983A0-C728-0137-695F-0E63FF21C970"><div data-step-uuid="37B983A0-C728-0137-695F-0E63FF21C970"><div data-step-uuid="59c770f6-e7a7-4e0c-9864-340ea14a87d3"><div>[![](https://media.screensteps.com/image_assets/assets/002/896/680/medium/a5cf9d89-df74-4fb8-b3ca-8ba13b1440ab.png)](http://signify.screenstepslive.com/s/10619/m/91598/l/1150808/show_image?image_id=2896680)</div><div></div></div></div></div></div></div>When the invoice details are saved by the learner, the details are fixed and cannot be edited again. The learner can click on the Print Invoice button to print a copy of the invoice.

The invoice step **WILL NOT** prevent the learner from proceeding to the next step. To prevent the learner from moving on to the next step(s) in the pathway, add the invoice step as a prerequisite. Read more on [How to create Prerequisites for a Pathway Step](http://signify.screenstepslive.com/s/10619/m/91598/l/1150794-add-a-prerequisite#how-to-create-prerequisites-for-a-pathway-step)

### <svg aria-label="Heading anchor" enable-background="new 0 0 20 20" height="16" role="img" viewbox="0 0 20 20" width="16" xmlns="http://www.w3.org/2000/svg"></svg>How the Invoice Step works

The learner can complete the details of the person to who the invoice is made out to. Information such as the address, contact detail, purchase order voucher and their company’s VAT registration number (if relevant) must be supplied. After the information is saved, the tax invoice will be displayed.

The following actions must take place before the invoice will be seen as paid in the system:

<div id="bkmrk-the-learner-can-prin"><div><div>- The learner can print the invoice and is expected to make payment as arranged.
- Once paid, the learner has to inform the pathway administrator of his payment after which the administrator will trace and confirm the payment and mark the invoice as paid. For more information read the following article: [Maintain User Invoice](http://signify.screenstepslive.com/s/10619/m/91598/l/1161424-how-to-mark-an-invoice-step-as-paid#maintain-user-invoice)
- If subsequent pathway steps had a payment of the invoice as a prerequisite, these steps will then become available and the learner can continue with his pathway.

</div><div><div><svg class="svg-icon" data-icon="link" role="presentation" viewbox="0 0 24 24" xmlns="http://www.w3.org/2000/svg"></svg><div> <button class="button outline icon" data-clipboard-target="#pointer-url" title="Copy Link" type="button"><svg class="svg-icon" data-icon="copy" role="presentation" viewbox="0 0 24 24" xmlns="http://www.w3.org/2000/svg"></svg></button></div>[<svg class="svg-icon" data-icon="edit" role="presentation" viewbox="0 0 24 24" xmlns="http://www.w3.org/2000/svg"></svg>](https://signature.signifyhr.co.za/books/elearning---pathways-v88/page/how-to-use-an-invoice-step/edit?content-id=bkmrk-try-it-out%3A%C2%A0click-on&content-text=Try%20It%20Out%3A%C2%A0Click%20on%20the%C2%A0Invoice%C2%A0item%20in%20the%20Toolb "Edit Content")</div></div></div></div>**Try It Out:** Click on the **Invoice** item in the Toolbox and complete the required details to create a Pathway step.

# How to use a Certification Point Step

The **Certification Point** item is used to do the following:

<div id="bkmrk-to-convey-messages-t"><div><div><div>- To convey messages to the learner for example The learner has successfully completed the pathway.
- Create a learner record if there are prerequisites loaded on this step.

</div></div></div></div>No interaction from the learner’s side is possible except to take note of what is being communicated.

### <svg aria-label="Heading anchor" enable-background="new 0 0 20 20" height="16" role="img" viewbox="0 0 20 20" width="16" xmlns="http://www.w3.org/2000/svg"></svg>Pathway Toolbox

[![image-1616881293455.png](https://signature.signifyhr.co.za/uploads/images/gallery/2021-03/scaled-1680-/Iiw8JsKPDjL2kClL-image-1616881293455.png)
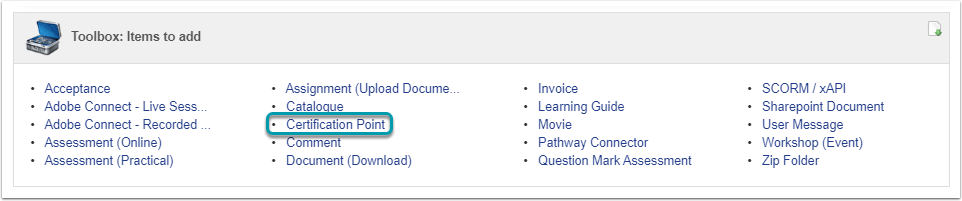
](https://signature.signifyhr.co.za/uploads/images/gallery/2021-03/Iiw8JsKPDjL2kClL-image-1616881293455.png)

<div id="bkmrk--45"><div data-step-uuid="376B7900-C728-0137-6924-0E63FF21C970"></div></div>From the Toolbox, click on the Certification Point hyperlink. The Certification Point detail screen will open.

### <svg aria-label="Heading anchor" enable-background="new 0 0 20 20" height="16" role="img" viewbox="0 0 20 20" width="16" xmlns="http://www.w3.org/2000/svg"></svg>Certification Point Detail

Certification Point steps are often used to either indicate a milestone in their learning journey or to indicate that the learner has completed the requirements for the course.

<div id="bkmrk--46"><div><div data-step-uuid="376BBFE0-C728-0137-6927-0E63FF21C970"><div data-step-uuid="376BBFE0-C728-0137-6927-0E63FF21C970"><div></div><div>![](https://media.screensteps.com/image_assets/assets/002/896/954/original/89b1cf76-e1dc-4990-8995-dd1b529482ec.png)</div><div></div></div></div></div></div><p class="callout success">**Focus:** To quickly create a Certification Point Step, complete only the numbered fields.</p>

After you click the Save button, a prompt will be displayed asking if you want to maintain Prerequisites.

<div id="bkmrk--47"><div><div data-step-uuid="376BBFE0-C728-0137-6927-0E63FF21C970"><div data-step-uuid="376BBFE0-C728-0137-6927-0E63FF21C970"><div>![](https://media.screensteps.com/image_assets/assets/002/286/913/original/2e5beb31-5379-4017-870e-3305527963a1.png)</div><div></div></div></div></div></div>Click on the **Yes** button to proceed.

Read the article [Add a Prerequisite](http://signify.screenstepslive.com/s/10619/m/91598/l/1150794-add-a-prerequisite) for steps on adding Prerequisites to a Pathway step. When you click on the link a new tab will be opened containing the article.

After you added the Prerequisite, click the Close button to return to the Certification Point Detail screen. Click the Close button to return to the Pathway.

### <svg aria-label="Heading anchor" enable-background="new 0 0 20 20" height="16" role="img" viewbox="0 0 20 20" width="16" xmlns="http://www.w3.org/2000/svg"></svg>Overview of fields

<div id="bkmrk-field-overview-custo-6"><div><div data-step-uuid="376C3F60-C728-0137-692D-0E63FF21C970"><div><table><thead><tr><th>Field</th><th>Overview</th></tr></thead><tbody><tr><td>Custom Main Header</td><td>This value is displayed at the top of the Pathway step. Use a verb to communicate simple and clear instructions to the Learner.</td></tr><tr><td>Certification Point</td><td>On other pathway steps this is called the Reference Description. The heading displayed inside the Pathway step.</td></tr><tr><td>Description</td><td>A more detailed description of why what the learner has achieved and why they have reached the certification point.</td></tr><tr><td>Lock Pathway Step</td><td>When this checkbox is selected, the Pathway step is not available to the learner, but it remains in the pathway.</td></tr><tr><td>Log to Learner Record</td><td>When this checkbox is selected, the step can be logged to the learner record of a learner. This will serve as proof that the learner met all requirements for the Certification Point. When this checkbox is selected, the option will become available to select a Training Intervention against which the learner record will be logged.</td></tr></tbody></table>

</div></div></div></div>### <svg aria-label="Heading anchor" enable-background="new 0 0 20 20" height="16" role="img" viewbox="0 0 20 20" width="16" xmlns="http://www.w3.org/2000/svg"></svg>Log to Learner Record Explained

In order to keep a learner record which will be displayed on the Training History report, Log to Learner Record must be checked.

<div id="bkmrk--48"><div><div data-step-uuid="376D0CD0-C728-0137-6937-0E63FF21C970"><div data-step-uuid="376D0CD0-C728-0137-6937-0E63FF21C970"><div>![](https://media.screensteps.com/image_assets/assets/002/286/881/original/586b5d88-5a21-49dc-bdb3-7cebf43d1457.png)</div><div></div></div></div></div></div>Options available to Log to Learner Record:

**Training Intervention**

<div id="bkmrk-only-certification-p"><div><div data-step-uuid="376D0CD0-C728-0137-6937-0E63FF21C970"><div data-step-uuid="376D0CD0-C728-0137-6937-0E63FF21C970"><div>- Only Certification Point Training Interventions are available for selection.
- The name of the Training Intervention will become the Title of the Learner Record.

</div></div></div></div></div>**Unit Standard**

<div id="bkmrk-if-this-is-an-ad-hoc"><div><div data-step-uuid="376D0CD0-C728-0137-6937-0E63FF21C970"><div>- If this is an Ad Hoc Pathway all Unit Standards will be available for selection.
- If this is a Standard Pathway, only the Standard selected for the Pathway will be available for selection.

</div></div></div></div>### <svg aria-label="Heading anchor" enable-background="new 0 0 20 20" height="16" role="img" viewbox="0 0 20 20" width="16" xmlns="http://www.w3.org/2000/svg"></svg>Certification Point Step for a learner

#### <svg aria-label="Heading anchor" enable-background="new 0 0 20 20" height="16" role="img" viewbox="0 0 20 20" width="16" xmlns="http://www.w3.org/2000/svg"></svg>The first time the user views the step

The image below is an example of a **Certification Point** step previewed as a learner when the Prerequisites have not been met.[![](https://media.screensteps.com/image_assets/assets/002/896/948/medium/b56580df-f90e-448a-952f-31007064ae1f.png)](http://signify.screenstepslive.com/s/10619/m/91598/l/1150800/show_image?image_id=2896948)

#### <svg aria-label="Heading anchor" enable-background="new 0 0 20 20" height="16" role="img" viewbox="0 0 20 20" width="16" xmlns="http://www.w3.org/2000/svg"></svg>The step after Prerequisites have been met

Click here for more information on [How to allow the Learner to download a certificate from a pathway step](http://signify.screenstepslive.com/s/10619/m/91598/l/1150835-how-to-allow-the-learner-to-download-a-certificate-from-a-pathway-step)

<div id="bkmrk--49"><div><div data-step-uuid="376C9100-C728-0137-6931-0E63FF21C970"><div data-step-uuid="376CE3B0-C728-0137-6935-0E63FF21C970"><div>[![](https://media.screensteps.com/image_assets/assets/002/896/950/medium/1f72f7a1-851c-4ed7-a363-1bb7a9cea2e6.png)](http://signify.screenstepslive.com/s/10619/m/91598/l/1150800/show_image?image_id=2896950)</div></div></div><div><div><svg class="svg-icon" data-icon="link" role="presentation" viewbox="0 0 24 24" xmlns="http://www.w3.org/2000/svg"></svg></div></div></div></div><p class="callout success">**Try It Out:** Click on the **Certification Point** item in the Toolbox and complete the required details to create a Pathway step.</p>

<div id="bkmrk--50"></div>