Pathways
- How To Create a Movie Step
- How To Upload An Image
- How To Publish a Pathway
- How to Generate a Shareable a Pathway Link
How To Create a Movie Step
How to get there?
Click on System Administration (1), with your cursor hover over Modules (2) then click on e-Learning (3) and select your pathway (4) then click on the Preview (5) tab.


What to do?
Create a .zip video file
- On your desktop click on Search (1).
- Type Notepad (2) in the search field.
- Click on Notepad (3) to open a blank Notepad file.

- Copy the following text in Notepad:
<!DOCTYPE html>
<html>
<body>
<video width="100%" height="90%" controls>
<source src="VideoName.mp4" type="video/mp4">
</video>
</body>
When the video width and height are set as percentages for example:
<video width="100%" height="90%" controls>
The video will automatically resize depending on the device's screen resolutions you use to ensure the video fits your screen.
- Ensure that the video name is typed precisely into this field marked (4) below.

- Select file (5).
- Click on Save As...(6).

- Navigate to your video file you want to upload (7).
- Click on the drop down Save as type: (8) and select All Files (*.*).
- In the File name (9) type Startup.html
- Then click on Save (10).

- Firstly select the Startup.html (11).
- Then press (Ctrl) on your keyboard, while clicking on your video file (12).
- Right click on the files selected and navigate to Sent to (13).
- Click on Compressed (zipped) folder (14).
Before you zip the file you can double click on the Startup.html file and the video will open in your web browser. If this does not work there is something wrong with your (.html) file.
Important: It is important that you select the (.html) first and then your video file, otherwise the video will not play.

- You will now see three files:
- Startup.html (15).
- Your video file (16) (VideoName.mp4).
- Your zip file (17) (VideoName.zip).

Creating a Movie step
- Make sure you are in Edit mode
- Click on Edit Pathway (1) to enter edit mode.

- Click on Movie (2) in the toolbox menu.

- Enter the Custom Main Header (3) for your pathway step.
- Click on Choose File (4) to upload your video.
- Navigate to your (.zip) video file (5).
- Click on Open (6).

- Enter a Description (7) for your video.
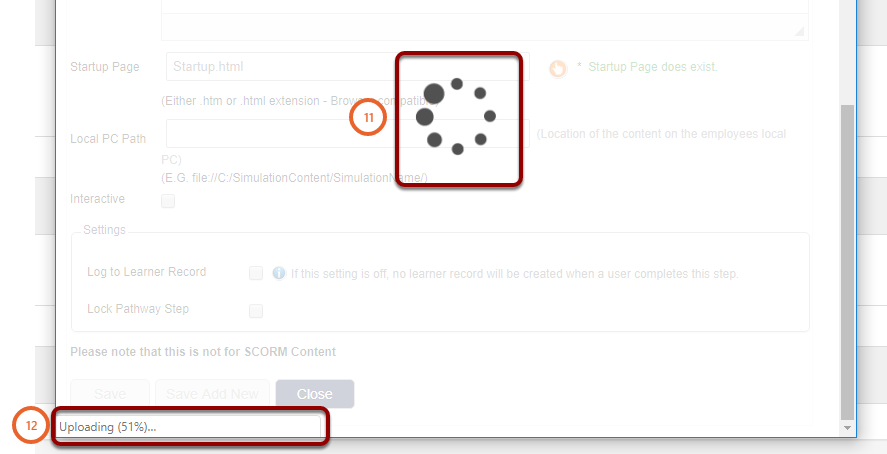
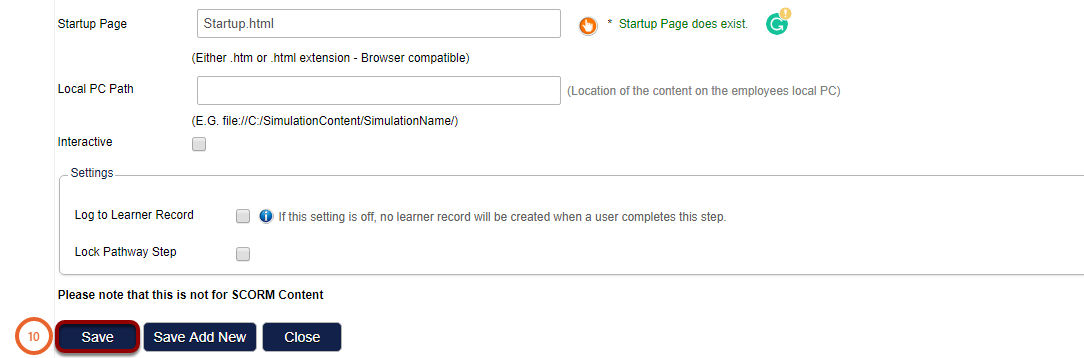
- In the Startup Page field (8) type Startup.html.
- Tick the box Log to Learner Record (9) if you would like to link it to a learner record.
- Click on Save (10).

Important: Do not close the windows until the upload process has been completed (11). Progress indication will be displayed at the bottom of the screen (12).
Test the video to make sure everything is working correctly.
- Enter View mode by clicking on Preview as User (13).

- Navigate to the video step and click on the video (14) to open.
- A new window will open.
- Click on the play icon to ensure the video works.

How To Upload An Image
How to get there?
Click on System Administration (1), then with your cursor hover over System Administration (2) | Tools (3) | Configuration (4).


What to do?
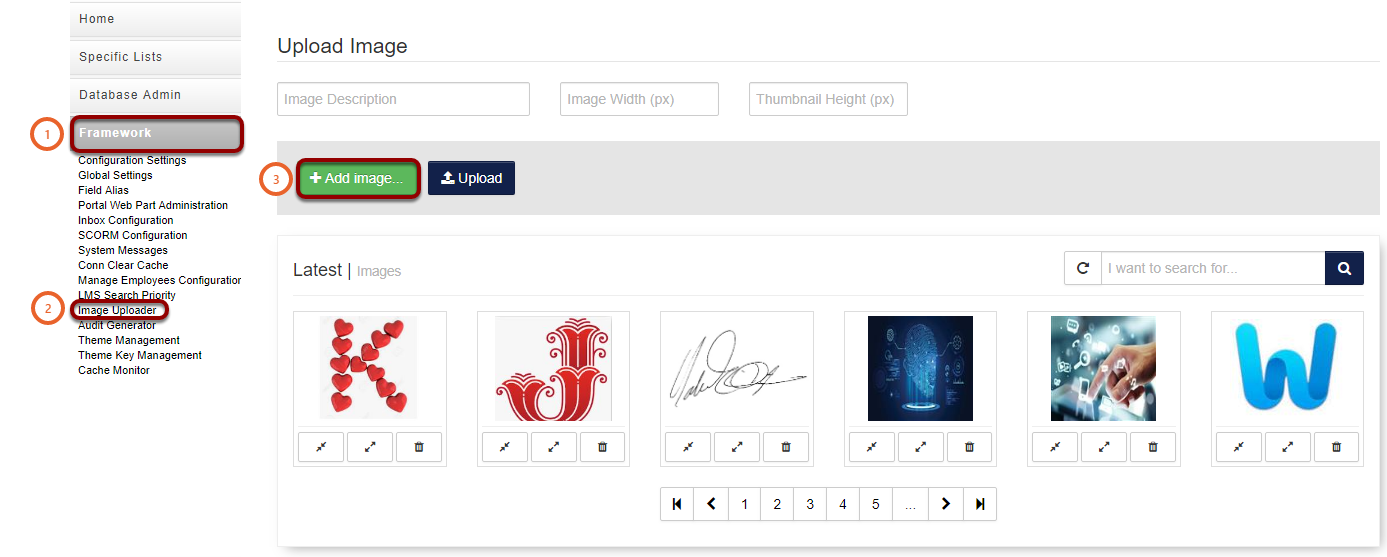
- Click on Framework (1).
- Then Navigate to Image Uploader (2).
- Click on the Add image... (3) button.
- A new file explorer window will open.
- Navigate to and select your image you would like to upload (4).
- Click on open (5).

- You can now enter a name for your image (6) to make searching easier.
- Click on the Upload button (7) to upload your image.
- A new window will open.

- Two links will appear (8):
- Image Url: (This is the original size image that you have uploaded).
- Thumbnail Url: (This is a smaller size image than what you have uploaded).
- Now you can click on Done (9).

- Click on the icon at (10) to open the Thumbnail in you browser.
- Click on the icon at (11) to open the original size image in your browser.
- Click on the Delete icon (12) to delete your image

You can copy any of these links at step (8) or (13) when you would like to add the image.

Add an image to a pathway step
How to get there
Click on System Administration (1), then with your cursor hover over Module (2) | e-Learning (3) | Learning Management (4) | Maintain Learning Pathway (5), then select the pathway you would like to edit (6).


What to do?
- Click on the Preview (1) tab.
- Ensure you are in Edit (2) mode.
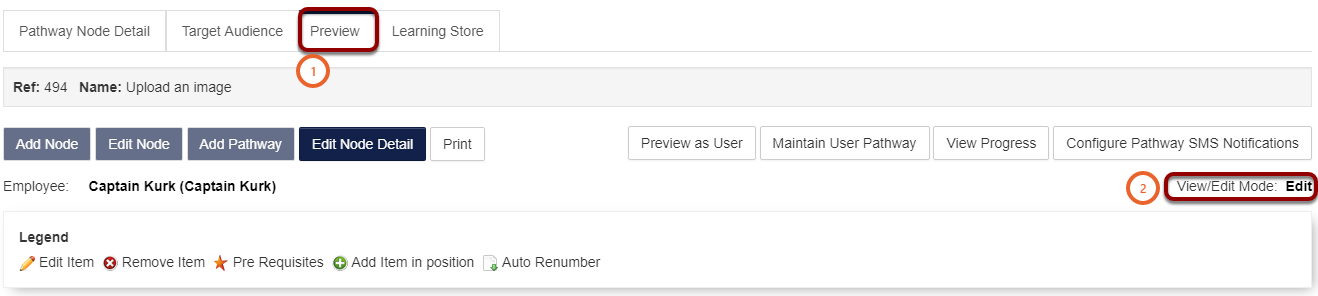
- Click on the edit symbol (3) were you would like to insert the image.
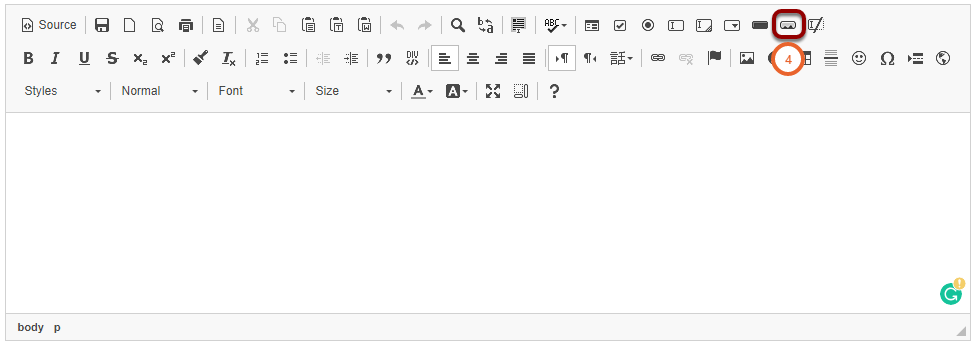
- A new window will open.

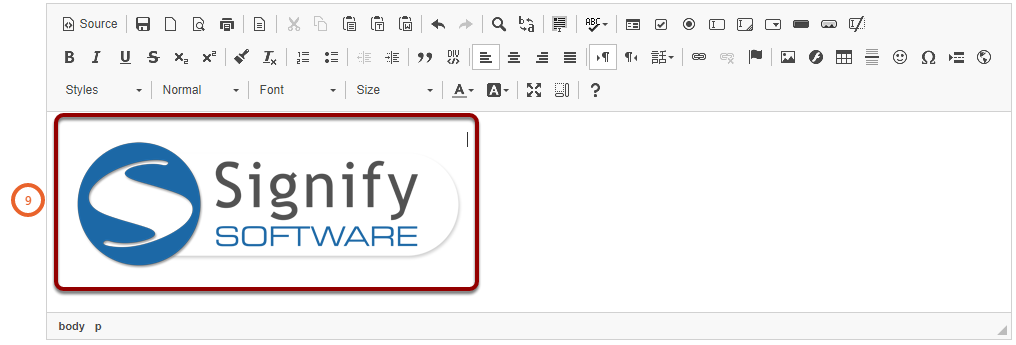
- Click on the image symbol (4).
- A new window will open.
- You can edit the dimensions of the image (6).
- Preview the image in the Preview field (7).
- Click on OK (8) when you are done.

- Ensure that the image you inserted is correct (9).
- Then click on Save (10).
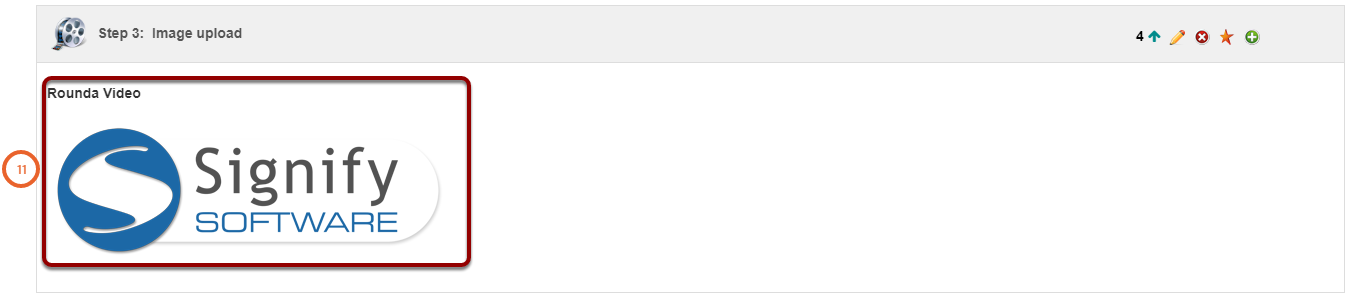
- Ensure that you are happy with the image in the pathway step (11).
How To Publish a Pathway
How to get there?
Click on System Administration (1), then with your cursor hover over Modules (2) | e-Learning (3) | Learning Management (4) | Maintain Learning Pathway (5) | Click on Edit (6) by the pathway in question.


What to do?
Publish the pathway
To publish a pathway and make it accessible to users follow these steps:
- Click on the tab Pathway Node Details (1).
Note: users have to be added to the target audience for them to access the pathway.

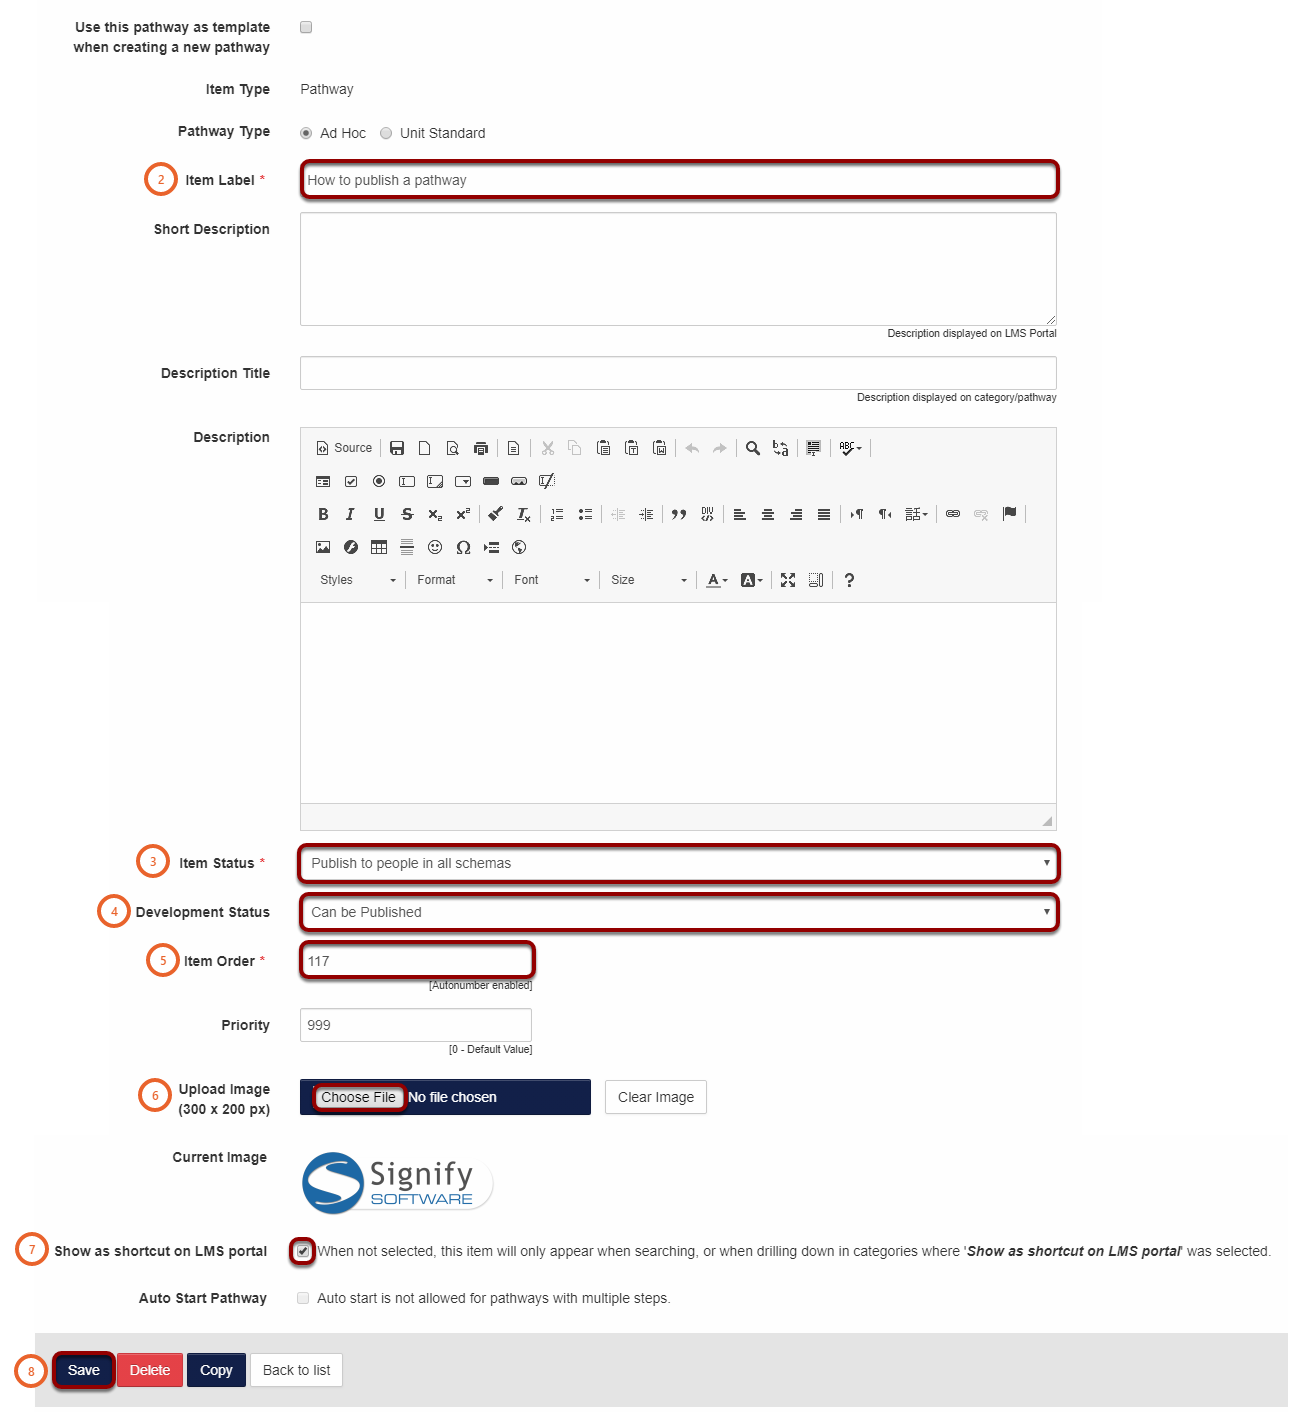
- Enter the pathways Item Label (2), this is the pathway name.
- From the Item Status (3) drop down select one of these options:
- Not Active. (Select this option when the pathway should not be accessed by users).
- Publish to people in all schemas. (This option allows users across all schemas to access this pathway).
- Publish to people in this schema only. (Users only in the current schema will be able to access this pathway).
- From the Development Status (4) drop down select one of these options:
- Under Construction.
- Being Checked.
- Can be Published. (Select this option to publish the pathway).
- Temporarily Out of Service.
- The Item Order (5) will automatically generate, but if you need the pathway to be in a different order you can change it here.
- Click on Choose File (6) to select a picture for the pathway.
- Select the tick box Show as shortcut on LMS portal (7).
- Click on Save (8).
Adding users to the Target Audience
- Click on the Target Audience (1) tab to add users.

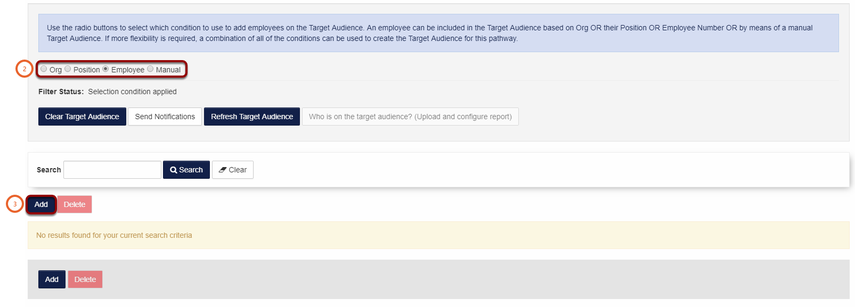
Tip: You can add an Org, Position and Employee to a target audience by clicking on the relevant buttons (2). For this example we will add an employee.
- Select Employee (2).
- Click on the Add (3) button.
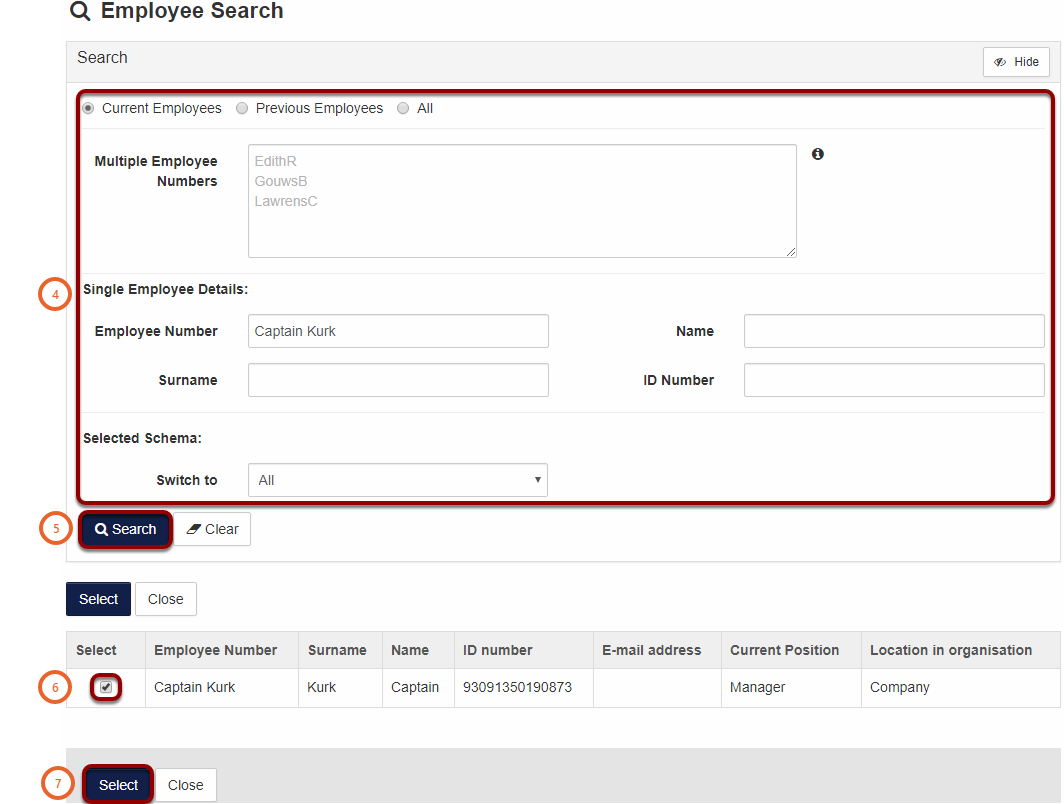
- A new windows will open.
- Use the Search (4) criteria to locate a user.
- Then click on Search (5).
- Navigate to the user and select the tick box (6) to select the user.
- Click on Select (7) to add the user to the target audience.
- Close this window when all the employees have been selected.
Tip: if multiple users needs to be added use the Multiple Employee Numbers (4) field.
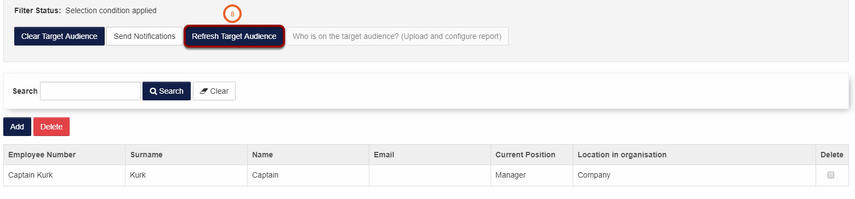
- Click on Refresh Target Audience (8) to apply these settings.
Tip: Click on this link to view the full manual or send an email to support@signify.co.za for any assistance or more information.
How to Generate a Shareable a Pathway Link
System Administration
How to get there?


What to do?
On the pathway preview tab you can select Generate Shareable Link (1).
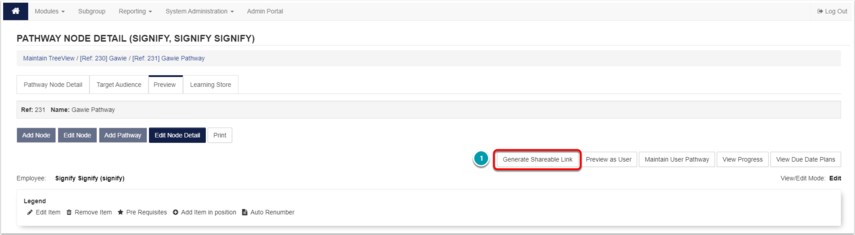
When you select the Generate Shareable Link button a new page opens with a link that can be copied ant send to other users.

Note: A user will only have access to the pathway if loaded on the Target Audience (if applicable), and is logged into the system. If the user is not logged in, the login screen will be displayed.
LMS Portal
How to get there?
What to do?
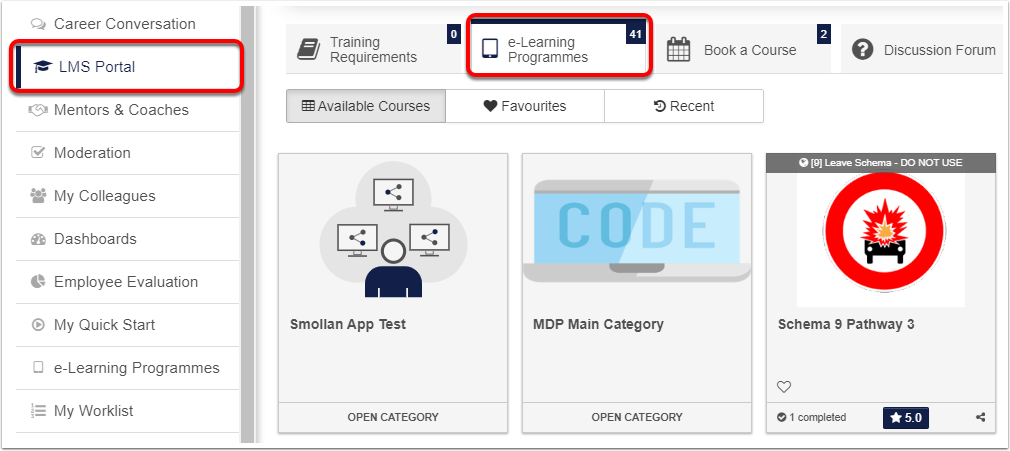
On the pathway select the share icon (1).

OR
Open the pathway and select the share icon (2) inside that pathway.

When you select the share button a new page opens with a link that can be copied ant send to other users.

Note: A user accessing the link will be requested to log in, if not already logged in. Access to the pathway is dependent on relevant permissions.