Schemas
How to Switch Between Schemas
In this quick guide we will explain the following steps:
- How to switch schemas from System Administration.
- How to switch schemas from Manage Employees.
1. From System Administration
1.1. How do I get there?
From your home page, in the left bottom corner, click on System Administration.

1.2. What do I do?
- Hover over the Home icon (1)
- Click on the Switch Schema option (2)

- Select the schema you want to switch to from the drop-down (3)
- Click on the Switch Schema button to switch to the new schema (4)
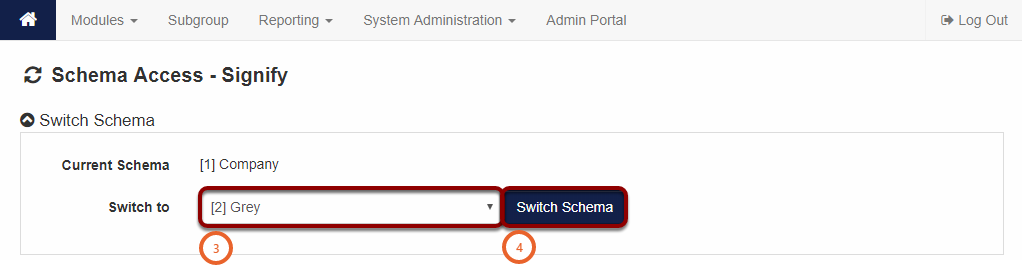
Note the conditions displayed in the pop up screen

2. From Manage Employees
2.1. How do I get there?
From your home page, in the left bottom corner, click on System Administration (1). Hover over the Modules Button (2). Click on Manage Employees (3)


2.2. What do I do?
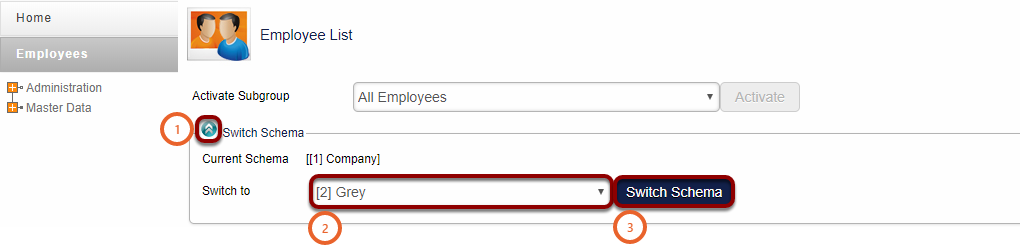
- Click on the blue circle with the white down arrows in (1)
- Select the schema you want to switch to from the drop down (2)
- Click on the Switch Schema button to switch to the new schema (3)
- You will remain on the same page
Take Note: You will only be able to edit an employee profile when you are working on the schema the employee is appointed on.
How to Create a Schema
How to get there?
Click on System Administration (1), then with your cursor hover over System Administration (2) | Tools (3) | Configuration (4). Finally click on Schema Management (5).


What to do?
In this FAQ we are going to copy the configuration from an existing Schema to the new Schema. If you would like to create a new Schema or there is no Schema on your system please contact our support team for assistance.
Email: support@signify.co.za
Tell: (012) 763 6600
- To add a new Schema click on the Add (1) button.

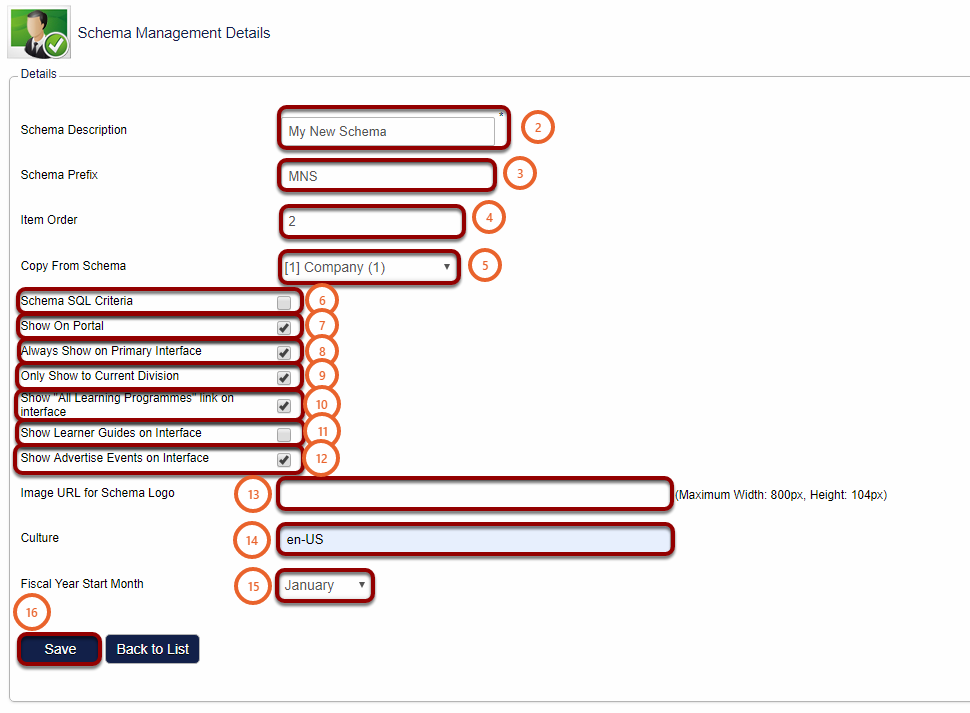
- Insert your Schema name is the Schema Description (2) field.
- You can enter a short name for your Schema in the Schema Prefix (3) field.
- Item Order (4) is the order in which your Schema will be displayed.
- From the Copy From Schema (5) drop-down the Schema you would like to copy.
- The following boxes should be ticked or unticked respectively:
- Schema SQL Criteria (6) remains UNTICKED.
- Tick the box Show On Portal (7).
- Tick the box Always Show on Primary Interface (8).
- Tick the box Only Show to Current Division (9).
- Tick the box Show "All Learning Programmes" link on interface (10).
- Show Learner Guides on Interface (11) remains UNTICKED.
- Tick the box Show Advertise Event on Interface (12).
- Image URL for Schema Logo (13) LEAVE BLANK.
- Enter en-US in the Culture (14) field.
- Select from the Fiscal Year Start Month (15) drop-down the month the fiscal/financial year of the organisation starts on.
- Click on Save (16).
- Wait for the Schema is Successfully Saved (17) message to appear on the top of the page.
- Click on Back to List (18).


- Confirm that the new Schema is created (19).

How to assign Schema access right on new Schema?
Note: Before switching to the new Schema you need to assign Schema access rights on the new Schema to your user.
With your cursor hover over System Administration (1) | Users (2) | Manage Users (3).

- Search for you user (4).
- Click on Action (5).
- Click on View / Edit (6).

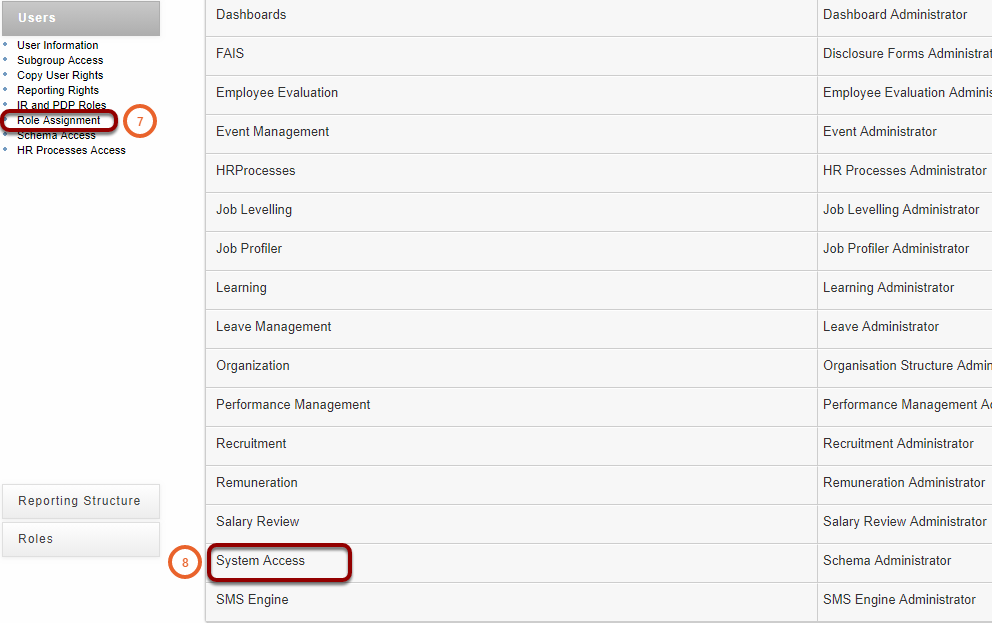
- Click on Role Assignment (7).
- Then click on System Access (8).
- Ensure the Switch Schema (9) tick box is ticked.
- Tick the tick box at your new Schema (10).
- Click on Save (11).
