Create a Pathway

- Hover over the sidebar menu, then click Learning Portal.

- Click the spanner icon to access the system's Administration menu.

- On the eLearning card, click Manage eLearning Library.
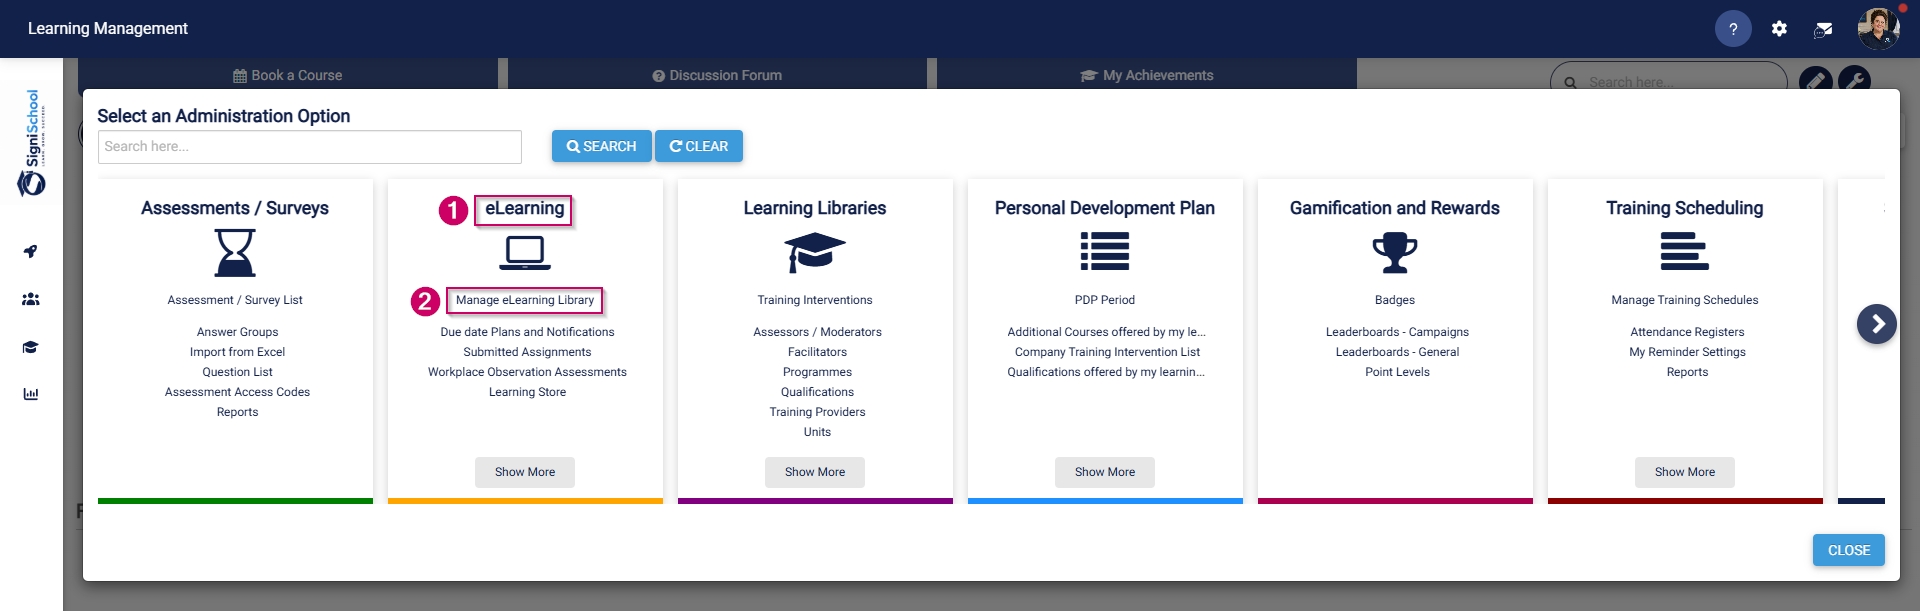
- The Pathways Tree View screen will open in a new tab.
- Click the pathway icon next to the main category's name to add a new pathway.
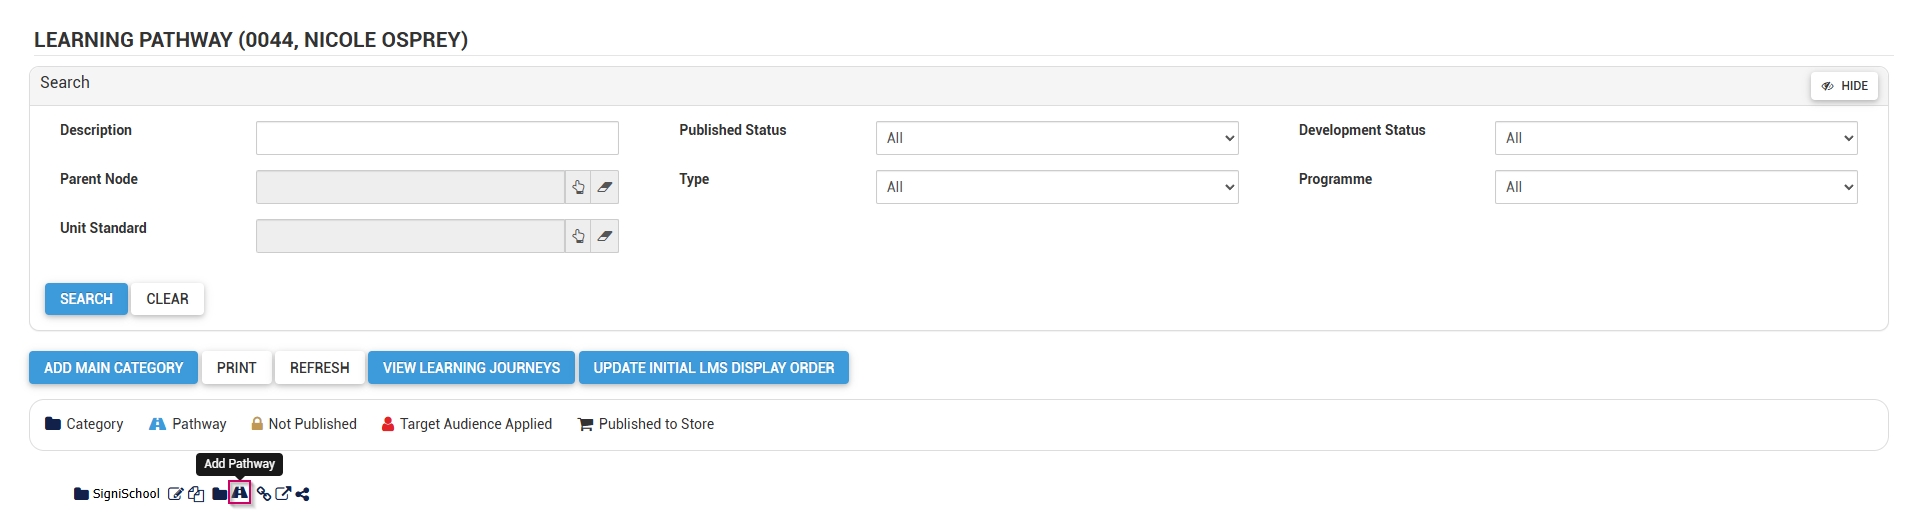
- The pathway details screen will open.
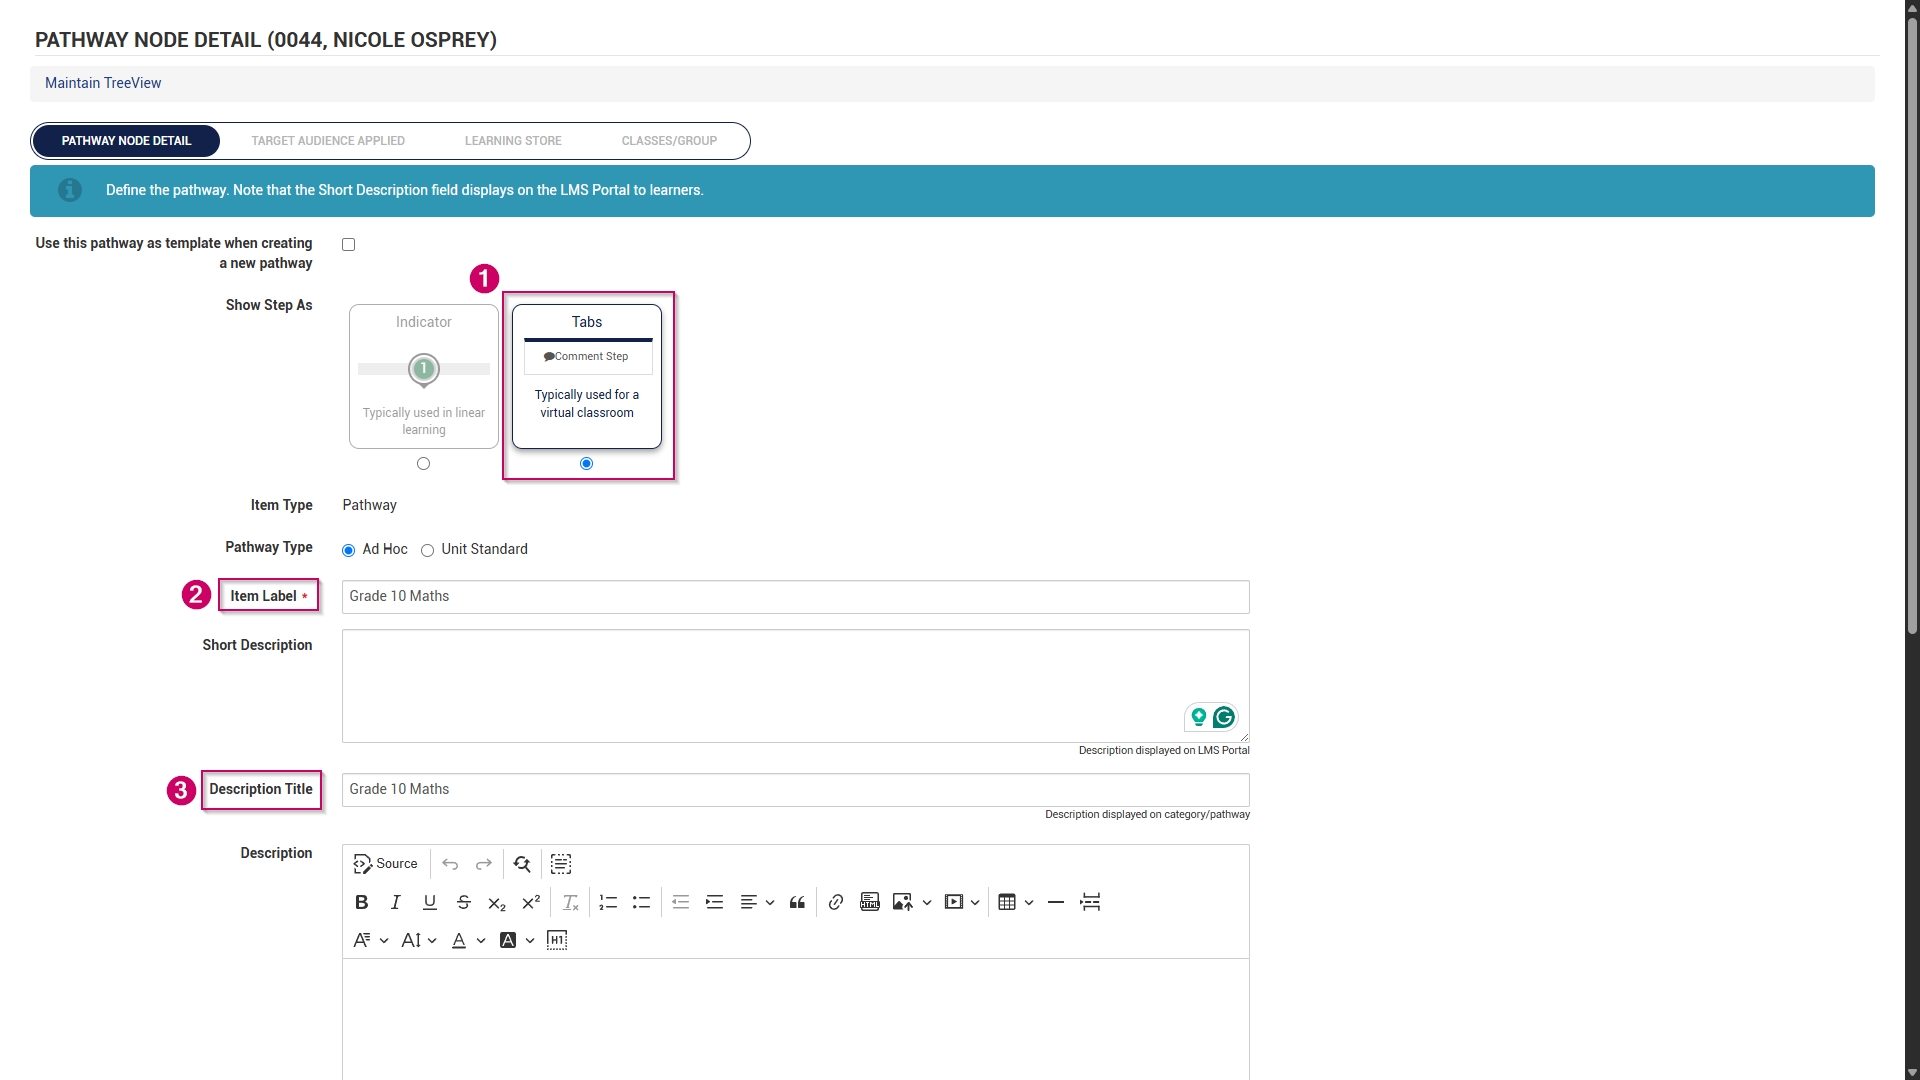
- Choose how the pathway steps should be displayed:
-
- Indicators are used for linear learning.
- Tabs are ideal for a virtual classroom or online school environment.
- For our example, we will be using tabs.
-
- Add the pathway name to the item label text field.
- Optionally, add a short description for the pathway.
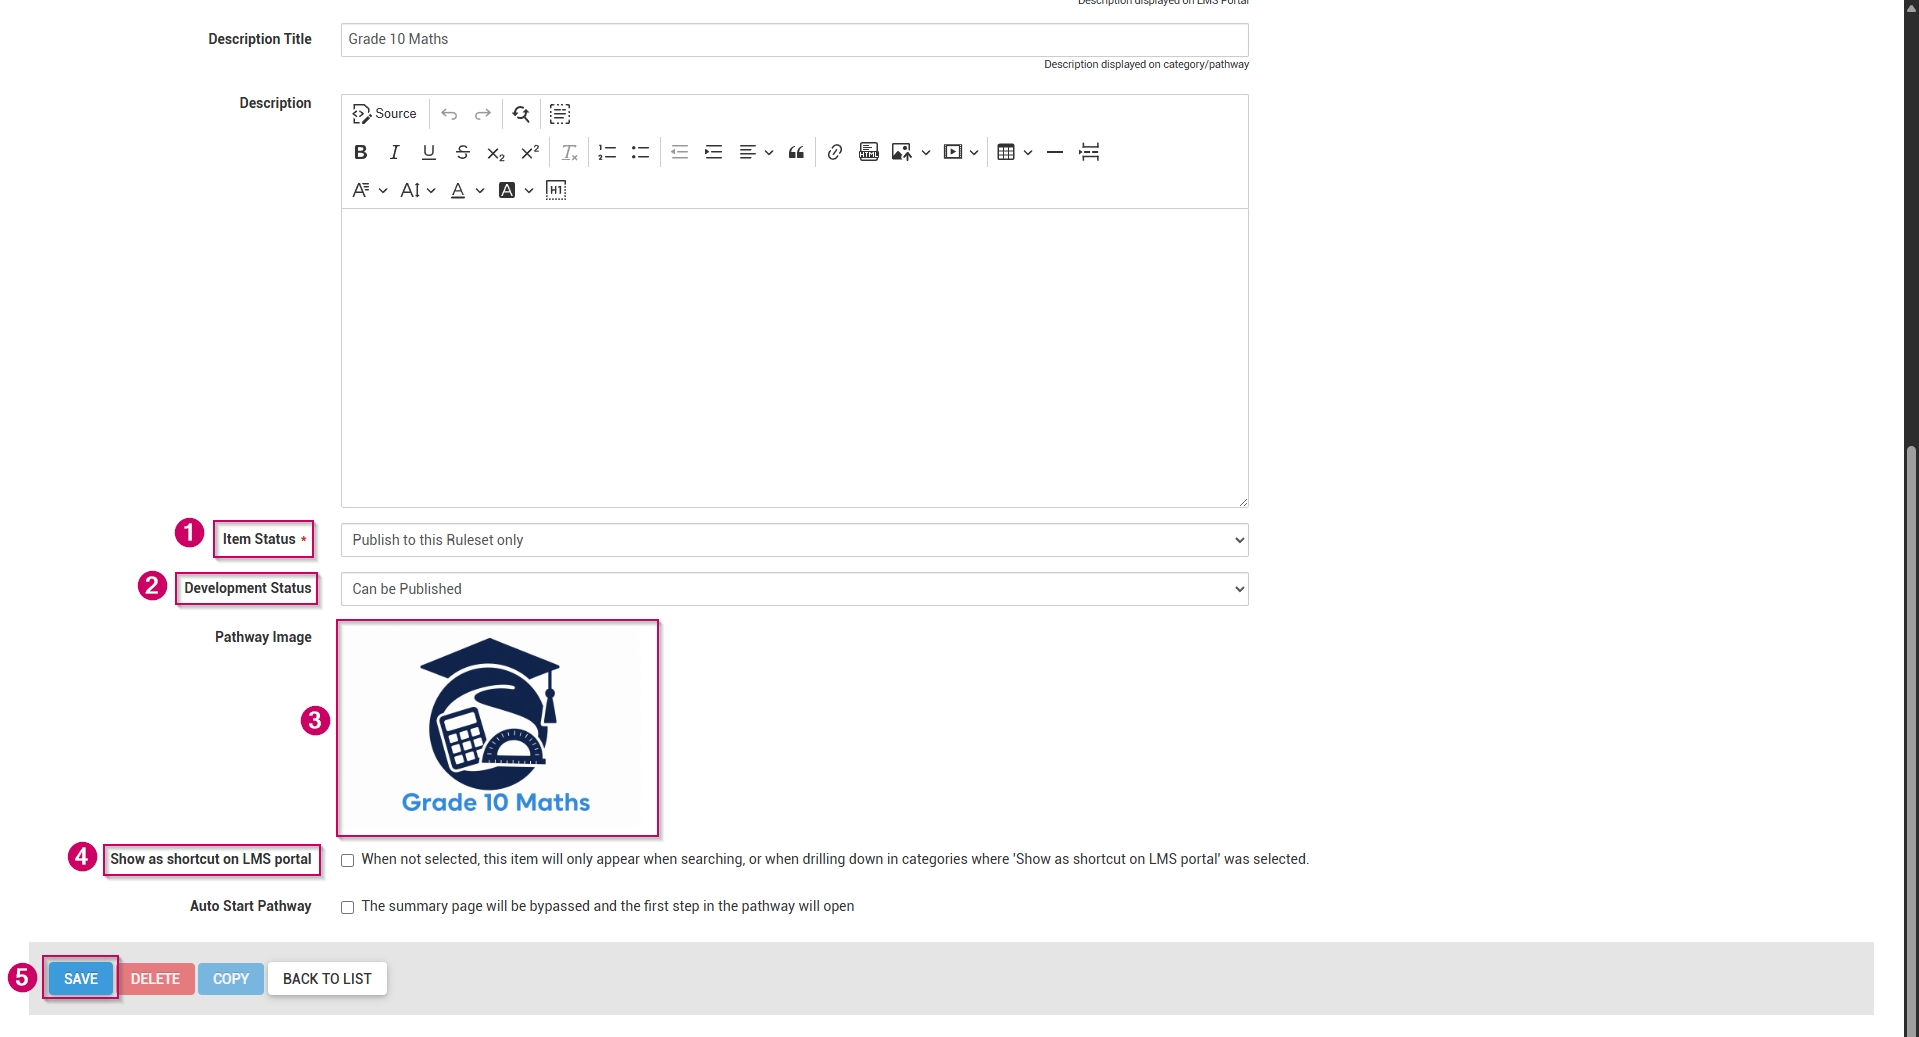
- Add a description title.
- Optionally, add a longer description for the pathway.
- From the drop-down menu, select the item status as Publish to this Ruleset only.
- From the drop-down menu, select Can be Published to set the development status.
- Choose a pathway image for the pathway. When adding your own image, ensure the aspect ratio is 300 by 200 px and that it is in .png, .jpg, or .gif format.
- If the main category should display on the Learning Portal, tick the Show as shortcut on LMS portal checkbox.
- Optionally, tick the Auto Start Pathway checkbox to skip the summary page when learners start the pathway.
- Click SAVE when you are finished or click BACK TO LIST to discard your edits.