SYSTEM ADMINISTRATION
Schema Setup;
- User Manual - Schemas Setup
- Quick Reference Guides and Practical Exercises
- Audit Recovery Tool
- Support Button Set Up Using Image Links (Support Message)
User Manual - Schemas Setup
General Setup for Schemas
In Signify, Schemas are used to keep an organisation together in one unit. If your company has is a holding company and owns several other companies, management may want to retain the branding and culture of the companies within the group. If the companies have different values, different branding and different HR managers, consider using a schema to easily manage communication from the LMS. The purpose of this article is to elaborate on the steps required to create a new schema.
Requirements and Setup
Schema creation results in major system changed. The following precautions can assist in reducing any risk when creating a new schema:
- Before you begin, request a backup to be made by sending an email to support@signify.co.za. Your responsible BA will be assigned on the Request and you will have someone from our team on standby should anything unexpected happen.
- Create the new Schema on UAT first. Complete the steps listed in these articles and make 100% sure that what you expect to see and do on the new schema is in line with your expectations.
- When creating the schema on LIVE, make sure to do it after hours. In line with the Backup request, Support can take the system offline for you to complete the configuration.
A user must have specific rights to create a schema. On the List of Users page, complete the following steps to assign the appropriate access.
- Search for and select the user
- In the User Details section, check the Schema Administrator Option
- Click the Submit button at the bottom of the page
The user will now be able to create a new schema.

Create New Schema
To create a new schema, click on the Add button. The Schema Management Details page will be displayed.

Below is a list of all the fields available on this screen and a description of the intention of each field.
| Field Name | Description |
|---|---|
| Schema Description | This will be then Schema name. For example Signify Software |
| Schema Prefix | This is a shortened version of the Schema name. For example SS |
| Item Order | This is the order of the Schema in the list. For example 4 |
| Copy From Schema | Select the Schema you want to copy from |
| Schema SQL Criteria | More information regarding this field will be supplied as soon as possible. |
| Show On Portal | Checkbox is must be checked. |
| Always show on Primary Interface | Checkbox is must be checked. |
| Only Show to Current Division | Checkbox is must be checked. |
| Show "All Learning Programmes" link on interface | Checkbox is must be checked. |
| Show Learning Guides on Interface | Checkbox is must remain unchecked. |
| Show Advertised Events on Interface | Checkbox is must be checked. |
| Image URL for Schema Logo | Leave Blank. |
| Culture | Leave Blank. |
| Fiscal Year Start Month | This is the month the fiscal/financial year of the organisation starts on. |
Switch to New Schema
System Administration Portal | Home (Icon) - Hover Only | Switch Schema

After creation the new schema, you must switch to the schema which was created to configure the schema. Click on Switch Schema to open the Schema Access Page.

- Select the new Schema you created from the Switch To Drop Down.
- Click the Switch Schema button.
The Administration Portal will open and you will see the Schema you have switched to in the bottom left corner of the screen.

Define New Schema Administrator
5.1. Assign Schema Administrator Rights
The first action to complete on the new Schema is to assign Schema administration access.
- Search for and select the user who will be the Administator of the new schema.
- On the User Information page, in the User Details section, check the Schema Administrator Checkbox.
- Click the Submit button at the bottom of the page.

Assign User Rights
Activate Modules
Create New Theme
Theme Key Management
System Administration | Tools | Configuration | Framework | Theme Key Management
New URL
Configure Basic Learning Store Login Page
System Administration | Tools | Configuration |
Configure Emails
System Administration | Tools | Configuration | Notifications | Emails | Notification - Global Settings

Quick Reference Guides and Practical Exercises
COMING SOON....


Audit Recovery Tool
Front End Access to Tool:
System Administration | Tools | Configuration | Framework | Restore Audit Data
Keep in mind before using the tool:
- As of Version 1 of the Audit Recovery Tool, it does not restore related table data. It will only restore the data from the table you are currently selecting from. In other words, please restore the data for each table in the correct required order.
- The restore audit functionality is schema specific. You need to be logged in with the correct schema to see that schema's data.
- When the Audit Table Dropdown is set to AudAuditLogs, the Field Dropdown will be set to 'All' and the Operator to 'Contains'.
- The Deleted By textbox refers to the Username of the user who deleted the record.
- When Using the IN Operator in the Operator Dropdown, seperate values by comma. For Example: 1,2,3.
For SysAudit Table Restores:
- When the Audit Table Dropdown is set to one of the SysAudit tables, the Field, Value and Operator dropdowns are based on the old value field in sysAudit.
- The SysAudit Field Dropdown and SysAudit Value Textbox are optional filters that become available if one of the SysAudit tables are selected.
- When filtering on specific columns for a SysAudit record (Field & Value Criteria), it will only bring back one column. This is fine. The script will restore all the related columns as well.
Criteria Available to find Audit Data:
- Table
- List of tables that you can use to look for Audit Data.
- Audit Table
- List of audit tables that contains data for the table selected previously.
- Deleted By
- Refers to the Username of the person that deleted the record(s)
- Deleted Between
- Refers to the date(s) the data was deleted before/after/between
- Field
- Filter on the columns from the Table selection
- Operator
- Filter Options for Value of the Field.
- Options Available: Equals, Contains, In, Greater Than, Less Than
- Value
- Filter value for the Field selection
- SysAudit Field
- Enables once one of the sysAudit tables are selected as the audit table criteria
- Allows you to filter on the sysAudit columns directly because IDs are not always saved in sysAudit record
- SysAudit Value
- Enables once one of the sysAudit tables are selected as the audit table criteria
- Allows you to filter on the sysAudit column value (Selected above) directly because IDs are not always saved in sysAudit record
How to restore data for clients that do not have the Audit Restore Functionality yet:
- Utilize your local to access the front-end of the sysAudit Functionality. Add the filter criteria as you would enter it on the client site.
- Open SQL Profiler and get the EXEC created for sysRestoreAuditData script.
- Make sure you run all the below scripts on the client and that they run successfully:
- B_00266_99999_fncSplit_NthItem.sql
- C_02229_99999_sysSelectAuditTablesByTableName.sql
- C_02237_99999_sysSelectAllTableColumns.sql
- C_02238_99999_sysRestoreAuditData.sql
- C_02258_99999_sysSelectAllForeignKeyReferencesByTableName.sql
- C_02317_99999_sysSelectAllNonAuditTables.sql
- Utilize the EXEC (Step 2) to generate the selection of the records that will be restored. You can set the @Debug parameter to 1 if you'd like to get the select statement.
- Once you have confirmed that you are happy with the data displayed from the select, set @IsRestore equals to 1 and run the exec.
- Fix any issues if occurs (Mostly it will be FK Constraint issues from other tables that might not have the needed data anymore)
Videos
Support Button Set Up Using Image Links (Support Message)
If a client uses an image with a link to launch an external mail launcher, they most probably will experience an issue where the main page loading indicator does not stop loading.
The below fix should be applied to the customer's front end.
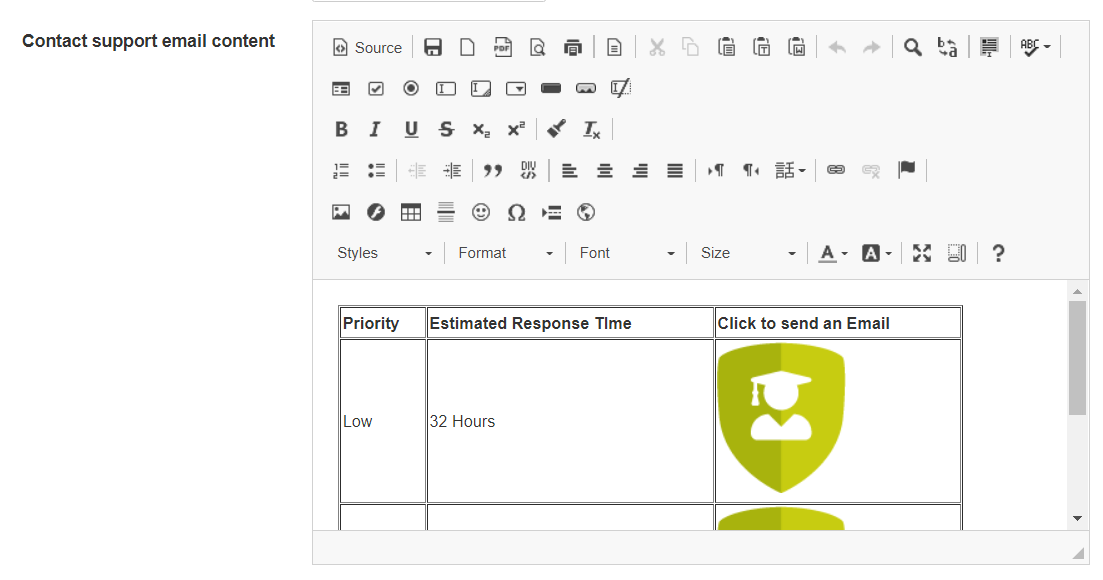
Click on Source and search for mailto (this is where the changes need to be made):

An onclick method will need to be added to a div in order to trigger the page load function in the backend. (Please note this commit must exist on the branch you are making changes to or the function will not be triggered. TP80416)
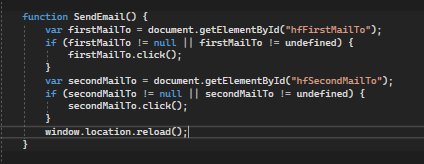
For this to happen, the image button needs to be formatted at such:
<div onclick="SendEmail(hfFirstMailTo );">
<image here - Copy image tag from the <a> tag here>
</div>
<a id="hfFirstMailTo style="visibility:hidden" href="mailto:_url_"></a>
Please note: variable names for the <a> tag id as well as the function name for the div needs to be exactly the same as in the below example.
Example:
<div onclick="SendEmail(hfFirstMailTo);"><img alt="" src="http://arthur/signifyhr_gvk/app/api/thumbnail/general? id=175" style="height:121px; width:103px" /></div><a id="hfFirstMailTo" style="visibility:hidden" href="mailto:test.analyst@signify.co.za"></a>
<div onclick="SendEmail(hfSecondMailTo);"><img alt="" src="http://arthur/signifyhr_gvk/app/api/thumbnail/general? id=175" style="height:121px; width:103px" /></div><a id="hfSecondMailTo" style="visibility:hidden" href="mailto:test.analyst@signify.co.za"></a>
scr = (image path from signify)
href = (email to send to)
Setting up a link:
The above format needs to be adhered to when setting up a hyper link should the same error occur. Please use the below code snippet for the front-end html:
<div onclick="SendEmail(hfFirstMailTo);"> Send Email</div><a id="hfFirstMailTo" style="visibility:hidden" href="mailto:test.analyst@signify.co.za"></a>
You can use text formatting to ensure that the link appears as a link (blue text colour underlined)
Quick Steps:
Step 1: Download Glassfit example here
https://drive.google.com/file/d/150MVQe2AS3C0TTgrFd24jEV1GbKCGuPE/view?usp=share_link
Step 2: Navigate to System Admin | System Admin | Tools | Config | Framework | Global Settings | Contact Support Email Content
Step 3: Click on source
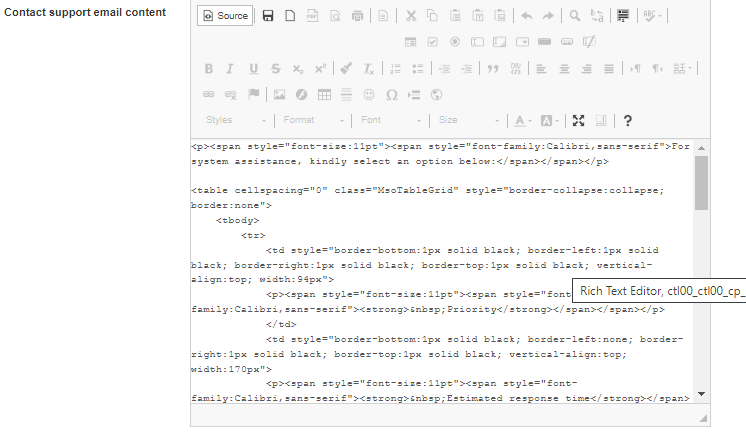
Step 4: Delete everything from block and paste all from downloaded sheet in this block.
Step 5: Scroll to bottom of page and click save.
Full HTML Example: (Used for Glassfit)
You can copy and paste this HTML into the block shown above. Click source, paste and save.
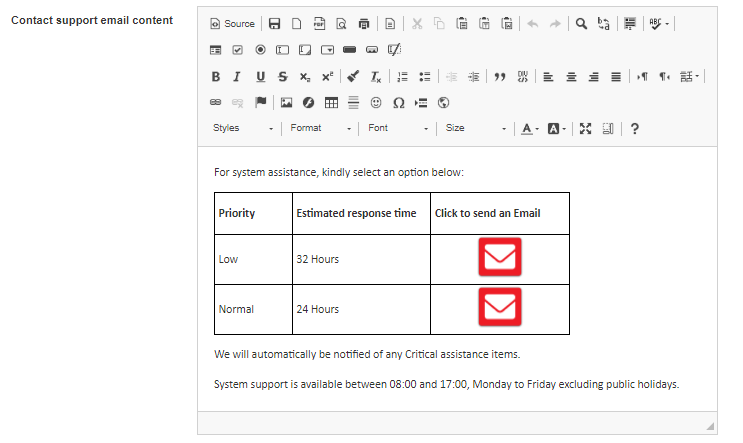
<p><span style="font-size:11pt"><span style="font-family:Calibri,sans-serif">For system assistance, kindly select an option below:</span></span></p>
<table cellspacing="0" class="MsoTableGrid" style="border-collapse:collapse; border:none">
<tbody>
<tr>
<td style="border-bottom:1px solid black; border-left:1px solid black; border-right:1px solid black; border-top:1px solid black; vertical-align:top; width:94px">
<p><span style="font-size:11pt"><span style="font-family:Calibri,sans-serif"><strong> Priority</strong></span></span></p>
</td>
<td style="border-bottom:1px solid black; border-left:none; border-right:1px solid black; border-top:1px solid black; vertical-align:top; width:170px">
<p><span style="font-size:11pt"><span style="font-family:Calibri,sans-serif"><strong> Estimated response time</strong></span></span></p>
</td>
<td style="border-bottom:1px solid black; border-left:none; border-right:1px solid black; border-top:1px solid black; vertical-align:top; width:151px">
<p><span style="font-size:11pt"><span style="font-family:Calibri,sans-serif"><strong> Click to send an Email</strong></span></span></p>
</td>
</tr>
<tr>
<td style="border-bottom:1px solid black; border-left:1px solid black; border-right:1px solid black; border-top:none; width:94px">
<p><span style="font-size:11pt"><span style="font-family:Calibri,sans-serif"> Low</span></span></p>
</td>
<td style="border-bottom:1px solid black; border-left:none; border-right:1px solid black; border-top:none; width:170px">
<p><span style="font-size:11pt"><span style="font-family:Calibri,sans-serif"> 32 Hours</span></span></p>
</td>
<td style="border-bottom:1px solid black; border-left:none; border-right:1px solid black; border-top:none; width:170px; text-align: center;">
<div onclick="SendEmail(hfFirstMailTo);">
<img alt="" src="http://angelo.signify.local/signifyhr_masterqa/app/api/image/general?id=477" style="height:52px; width:61px" />
</div>
<a id="hfFirstMailTo" style="visibility:hidden" href="mailto:leanca@thewiredhuman.co.za?subject=LOW%3A%20Glasfit%20System%20Support&body=Good%20Day%20Leanca%0D%0A%0D%0AKindly%20assist%20me%20with....%0D%0A%0D%0AKind%20Regards%0D%0A%0D%0A"></a>
</td>
</tr>
<tr>
<td style="border-bottom:1px solid black; border-left:1px solid black; border-right:1px solid black; border-top:none; width:94px">
<p><span style="font-size:11pt"><span style="font-family:Calibri,sans-serif"> Normal</span></span></p>
</td>
<td style="border-bottom:1px solid black; border-left:none; border-right:1px solid black; border-top:none; width:170px">
<p><span style="font-size:11pt"><span style="font-family:Calibri,sans-serif"> 24 Hours</span></span></p>
</td>
<td style="border-bottom:1px solid black; border-left:none; border-right:1px solid black; border-top:none; vertical-align:top; width:151px; text-align: center;">
<div onclick="SendEmail(hfSecondMailTo);">
<img alt="" src="http://angelo.signify.local/signifyhr_masterqa/app/api/image/general?id=477" style="height:52px; width:61px; align:center" />
</div>
<a id="hfSecondMailTo" style="visibility:hidden" href="mailto:leanca@thewiredhuman.co.za?subject=NORMAL%3A%20Glasfit%20System%20Support&body=Good%20Day%20Leanca%0D%0A%0D%0AKindly%20assist%20me%20with....%0D%0A%0D%0AKind%20Regards%0D%0A%0D%0A"></a>
</td>
</tr>
</tbody>
</table>
<p><span style="font-size:11pt"><span style="font-family:Calibri,sans-serif">We will automatically be notified of any Critical assistance items.</span></span></p>
<p><span style="font-size:11pt"><span style="font-family:Calibri,sans-serif">System support is available between 08:00 and 17:00, Monday to Friday excluding public holidays.</span></span></p>