How To Create a Movie Step
How to get there?
Click on System Administration (1), with your cursor hover over Modules (2) then click on e-Learning (3) and select your pathway (4) then click on the Preview (5) tab.


What to do?
Create a .zip video file
- On your desktop click on Search (1).

- Copy the following text in Notepad:
<!DOCTYPE html>
<html>
<body>
<video width="100%" height="90%" controls>
<source src="VideoName.mp4" type="video/mp4">
</video>
</body>
When the video width and height are set as percentages for example:
<video width="100%" height="90%" controls>
The video will automatically resize depending on the device's screen resolutions you use to ensure the video fits your screen.
- Ensure that the video name is typed precisely into this field marked (4) below.

- Select file (5).

- Navigate to your video file you want to upload (7).

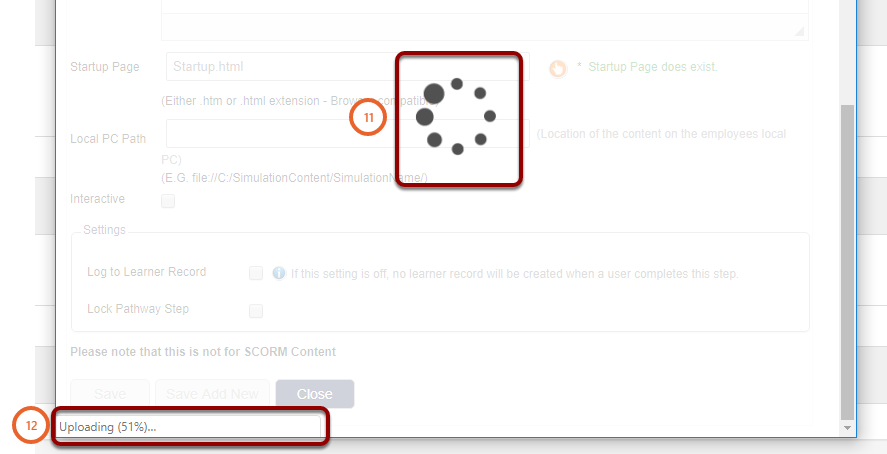
- Firstly select the Startup.html (11).
Before you zip the file you can double click on the Startup.html file and the video will open in your web browser. If this does not work there is something wrong with your (.html) file.
Important: It is important that you select the (.html) first and then your video file, otherwise the video will not play.

- You will now see three files:
- Startup.html (15).
- Your video file (16) (VideoName.mp4).

Creating a Movie step
- Make sure you are in Edit mode

- Click on Movie (2) in the toolbox menu.

- Enter the Custom Main Header (3) for your pathway step.

- Enter a Description (7) for your video.

Important: Do not close the windows until the upload process has been completed (11). Progress indication will be displayed at the bottom of the screen (12).
Test the video to make sure everything is working correctly.
- Enter View mode by clicking on Preview as User (13).

- Navigate to the video step and click on the video (14) to open.
