Build a Pathway

Create learning pathways
Starting with pathways
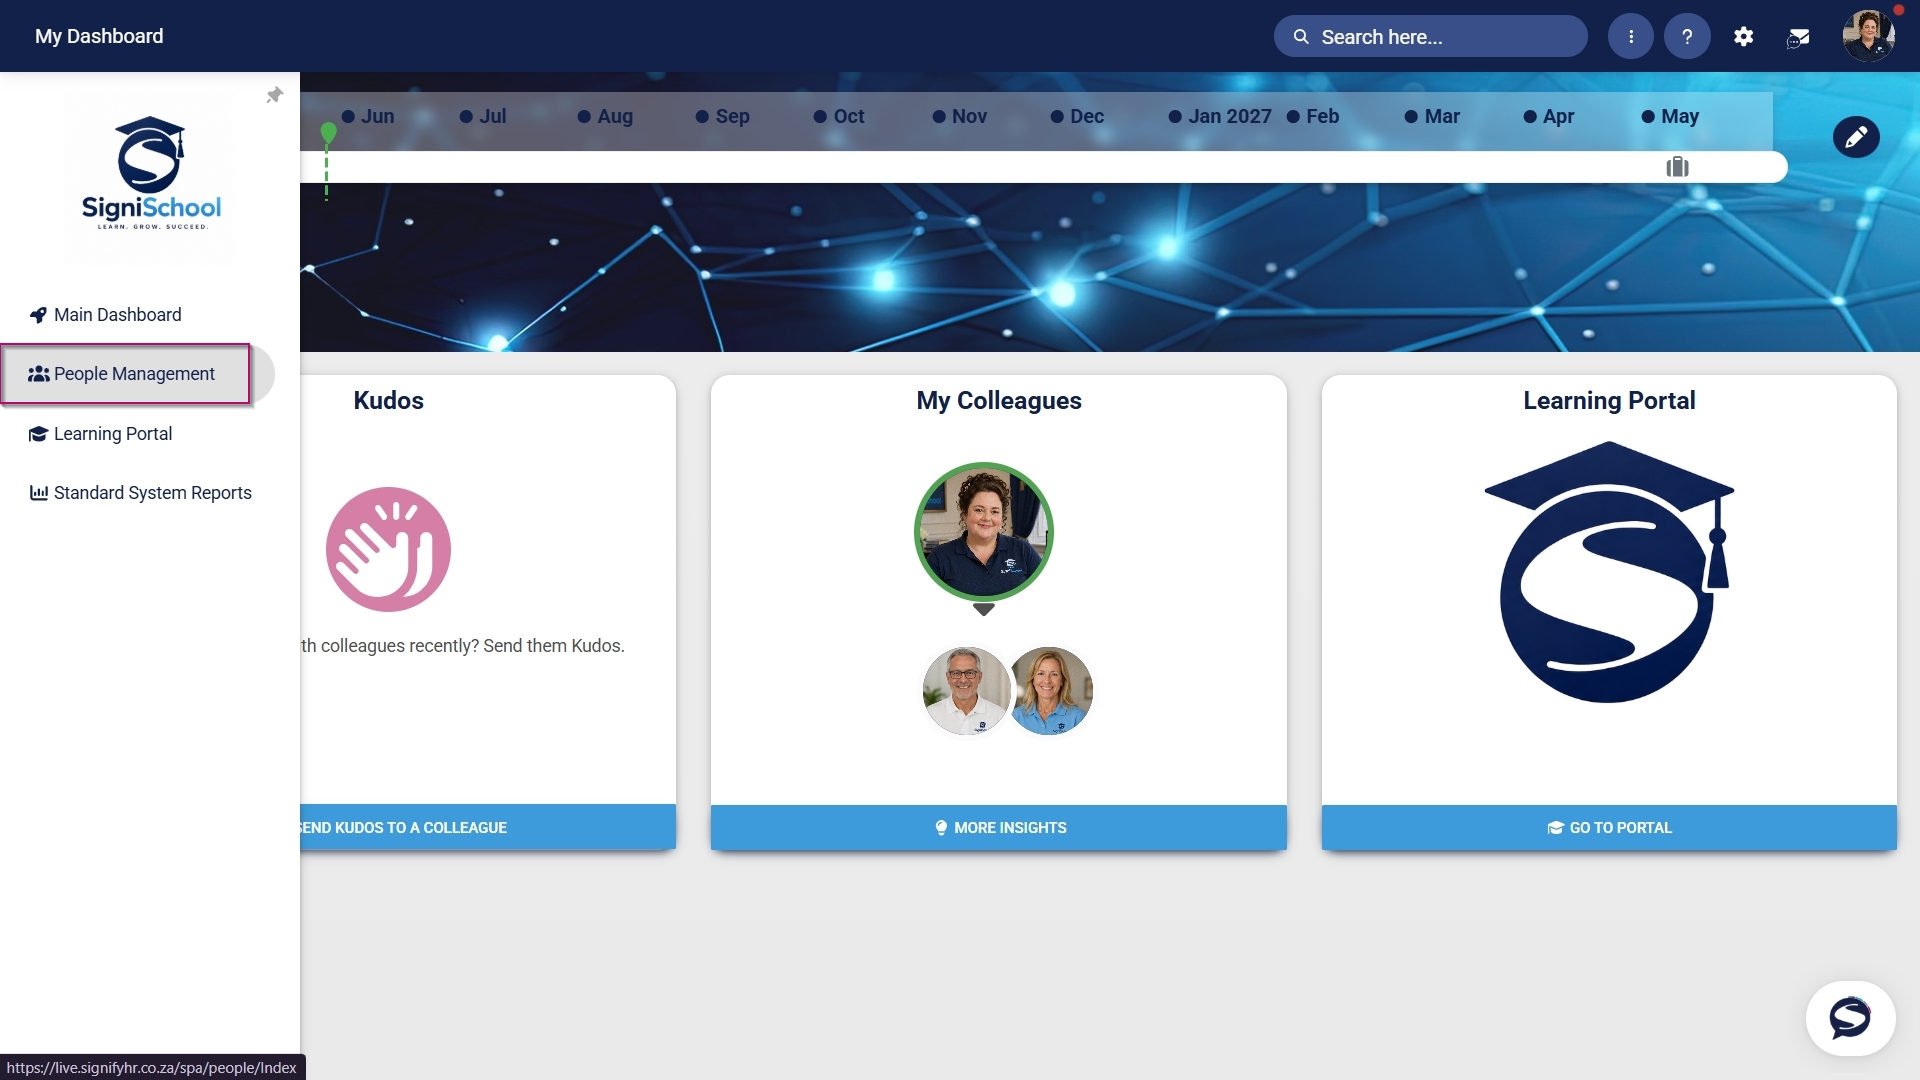
- Hover over the sidebar menu, then click Learning Portal.
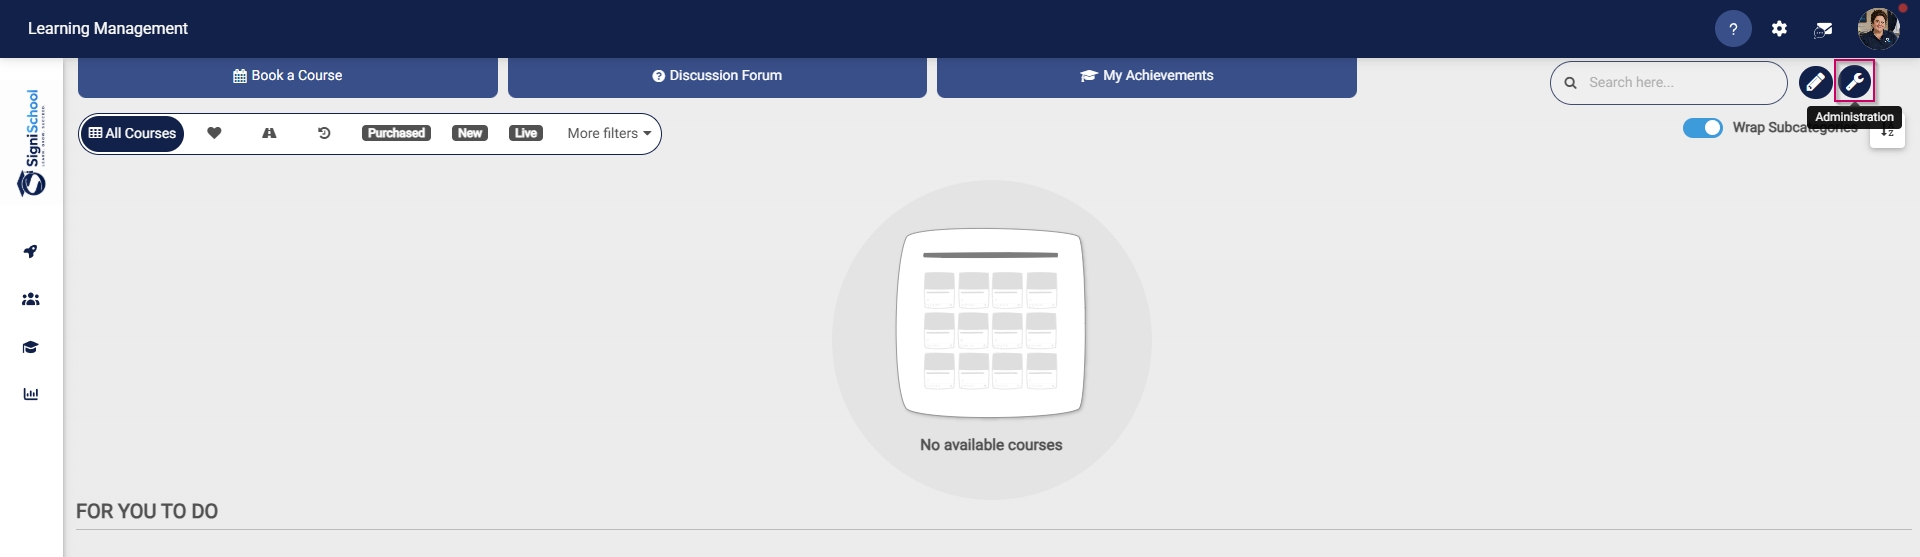
- Click the spanner icon to access the system's Administration menu.
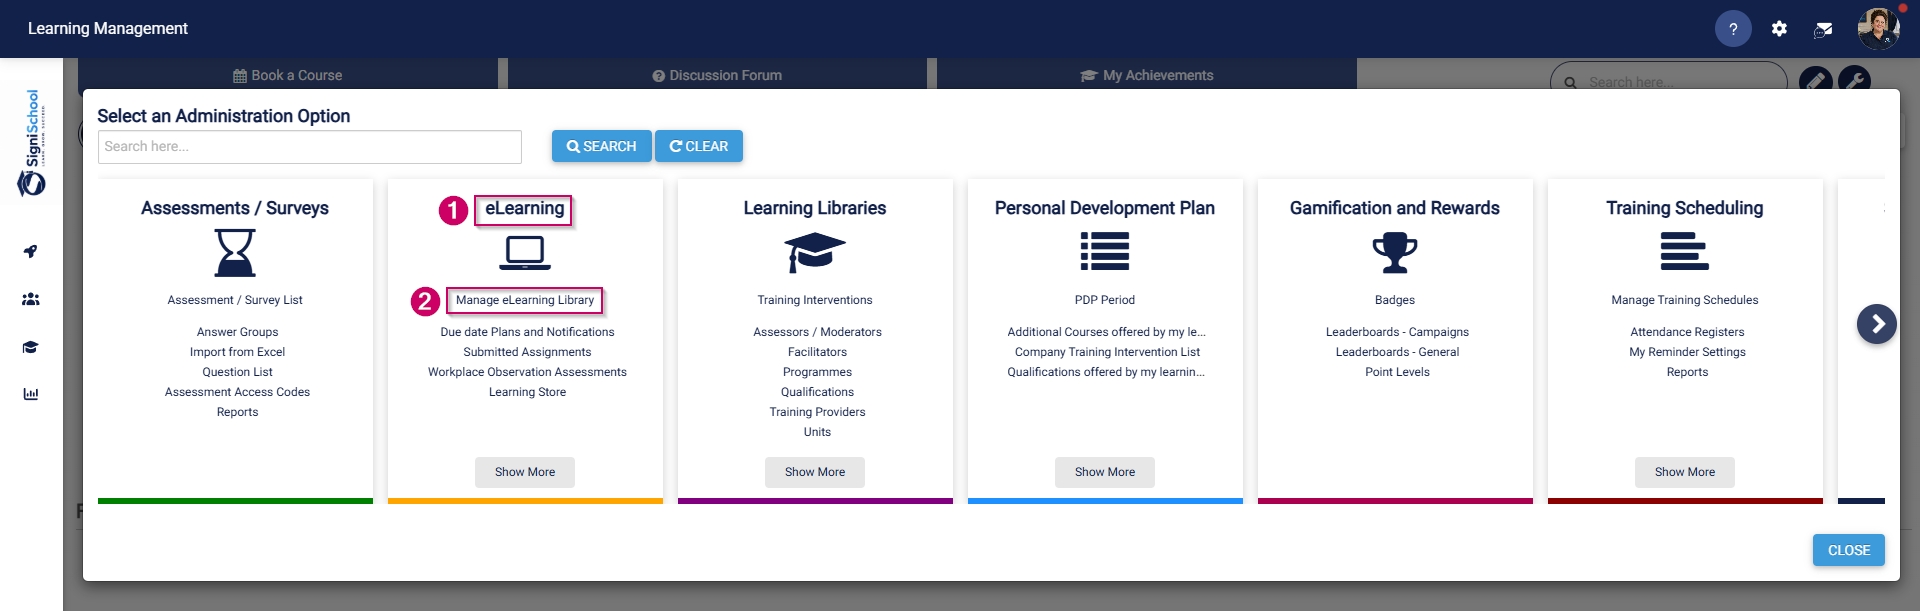
- On the eLearning card, click Manage eLearning Library.
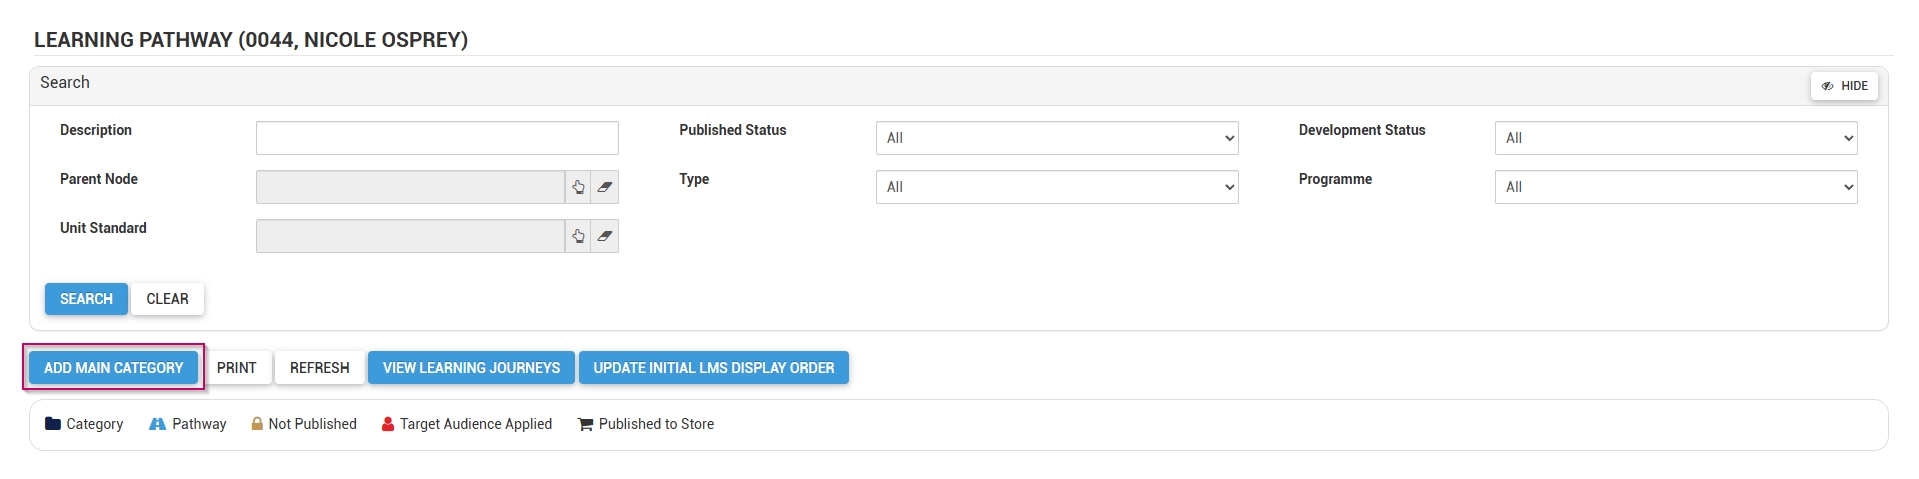
- The Pathways Tree View screen will open in a new tab.
- Click ADD MAIN CATEGORY.
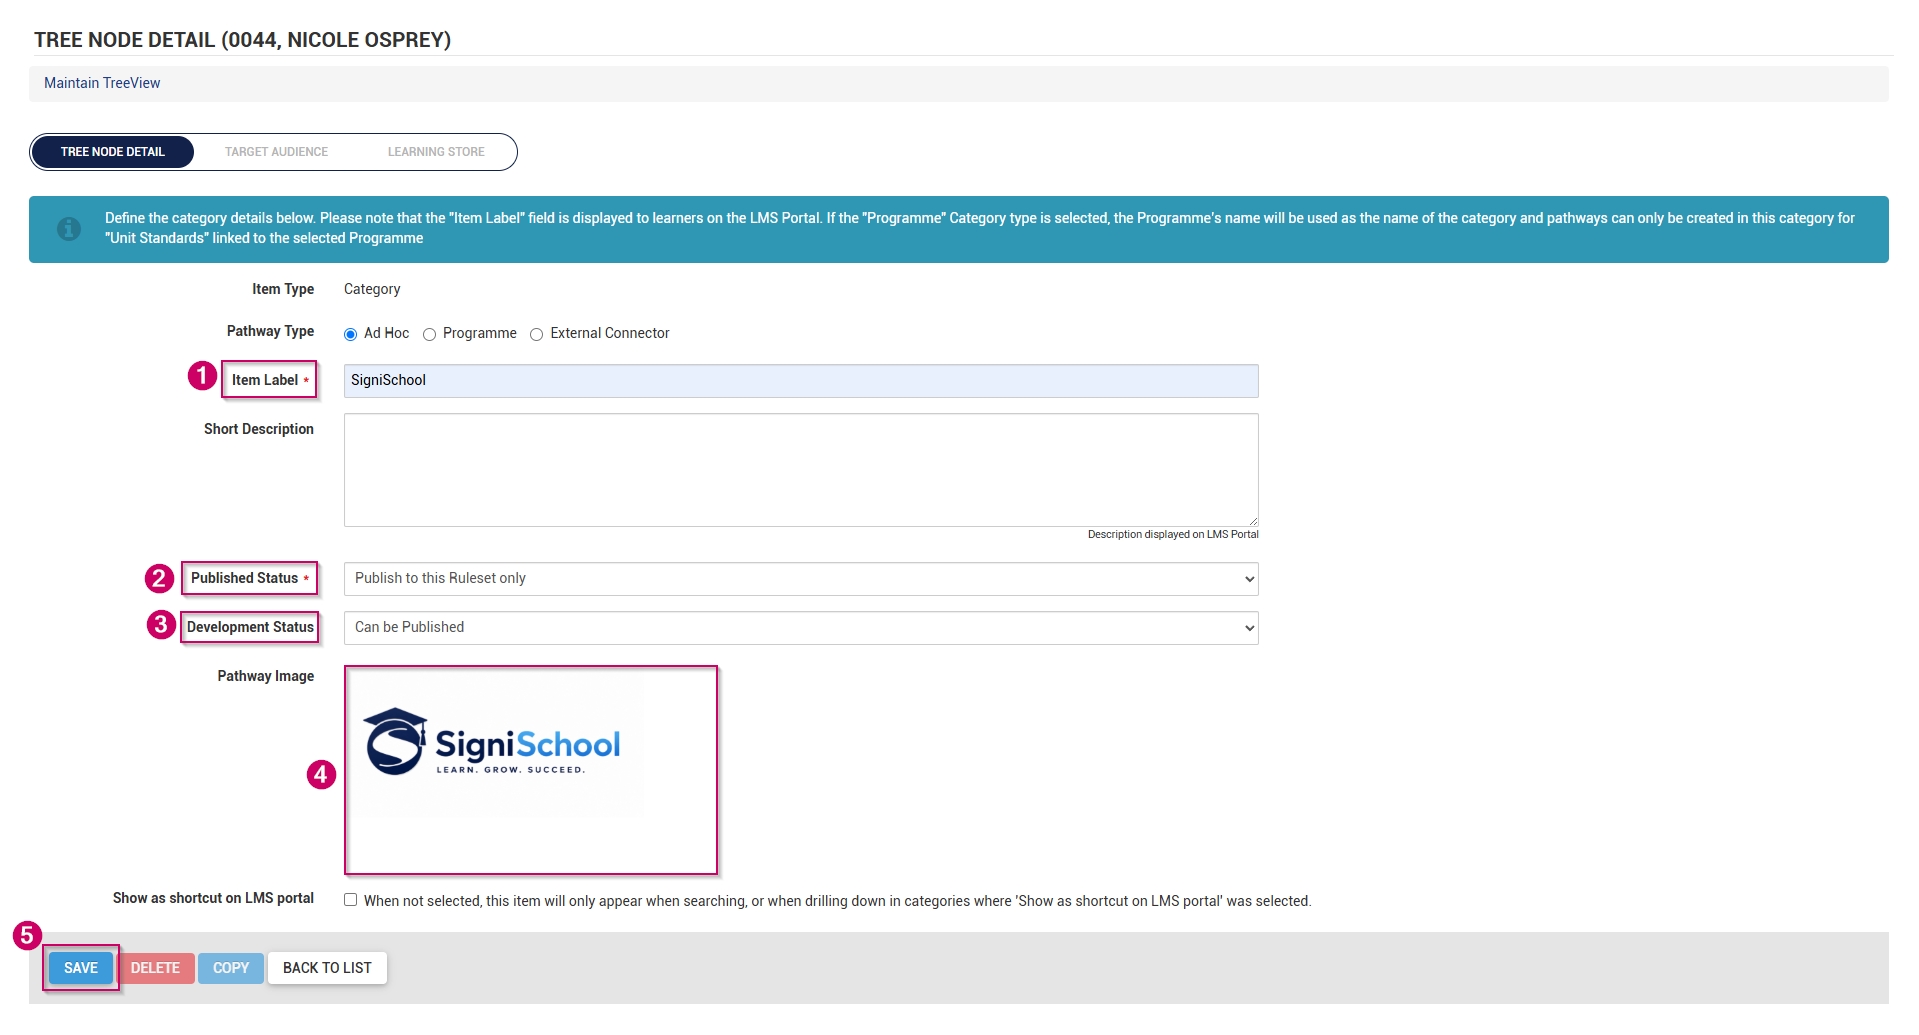
- Add a name for the category.
- Optionally, add a short description for the category.
- From the drop-down menu, select the published status as Publish to this Ruleset only.
- From the drop-down menu, select Can be Published to set the development status.
- Choose an image for the category. When adding your own image, ensure the aspect ratio is 300 by 200 px and that it is in .png, .jpg, or .gif format.
- If the main category should display on the Learning Portal, tick the Show as shortcut on LMS portal checkbox.
-
- Please be aware that selecting a main category on the Learning Portal and checking this box for related pathways in that category may lead to duplicate entries appearing on the Learning Portal screen.
- If the main category appears on the Learning Portal, its pathways are accessible through the drill-down feature, so there's no need to tick this checkbox for those pathways.
- It is recommended to try out this feature to determine the most effective way for you.
-
- Click SAVE when you are finished or click BACK TO LIST to discard your edits.
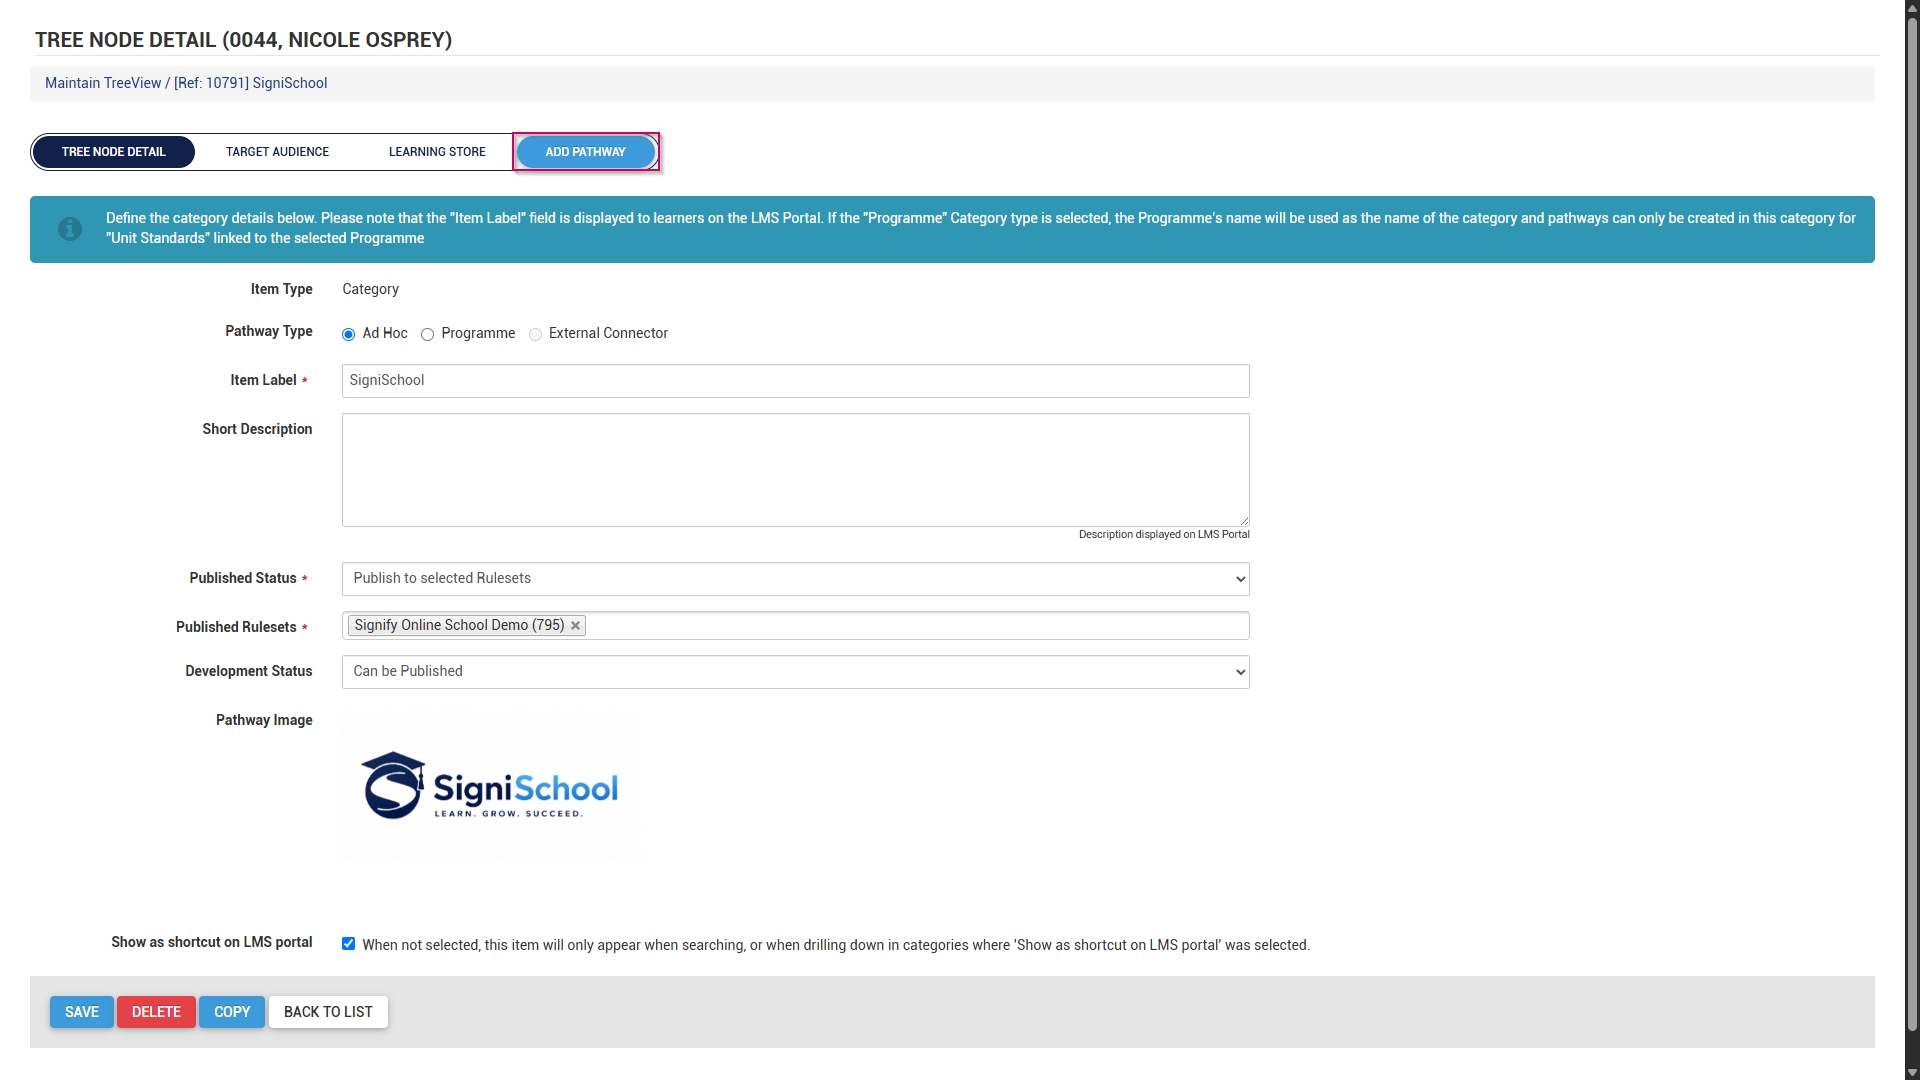
- A new pathway can be added to this category in two ways:
-
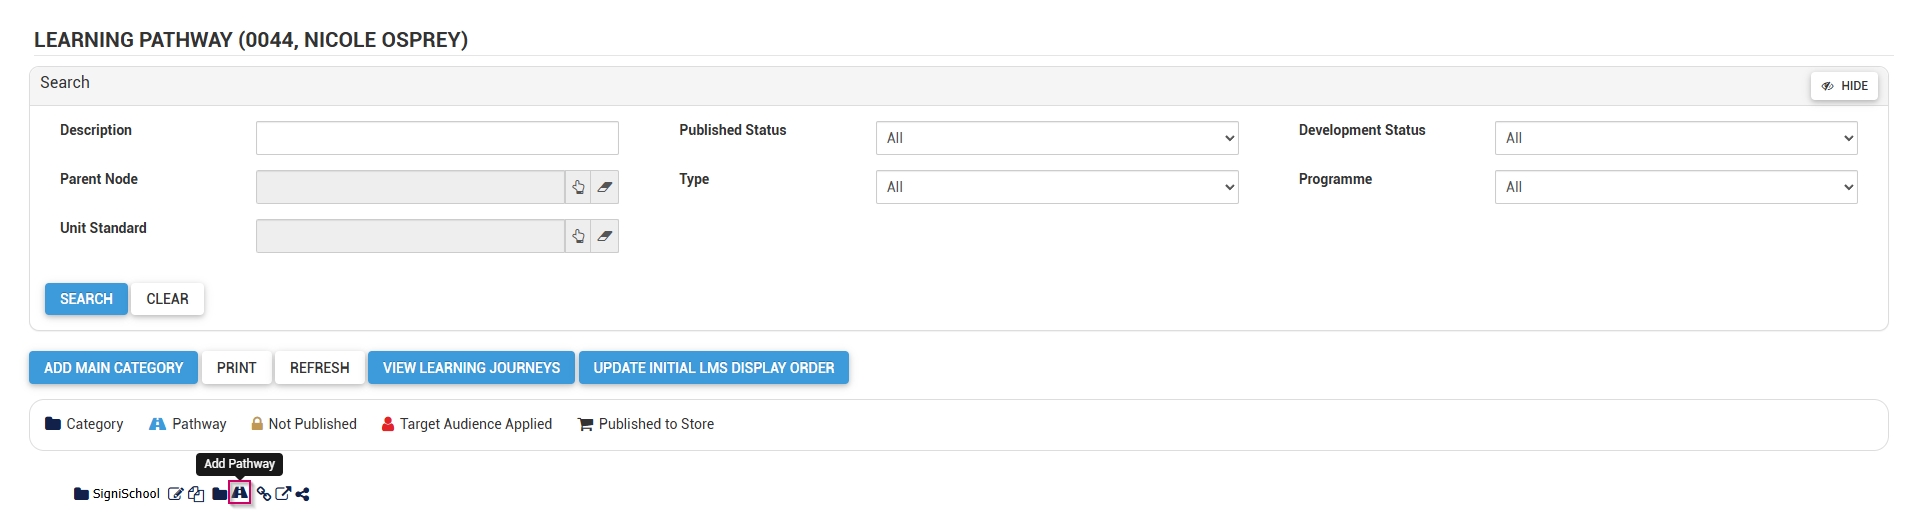
- Scroll to the top of the screen after the save is complete, then click ADD PATHWAY.
-
-
-
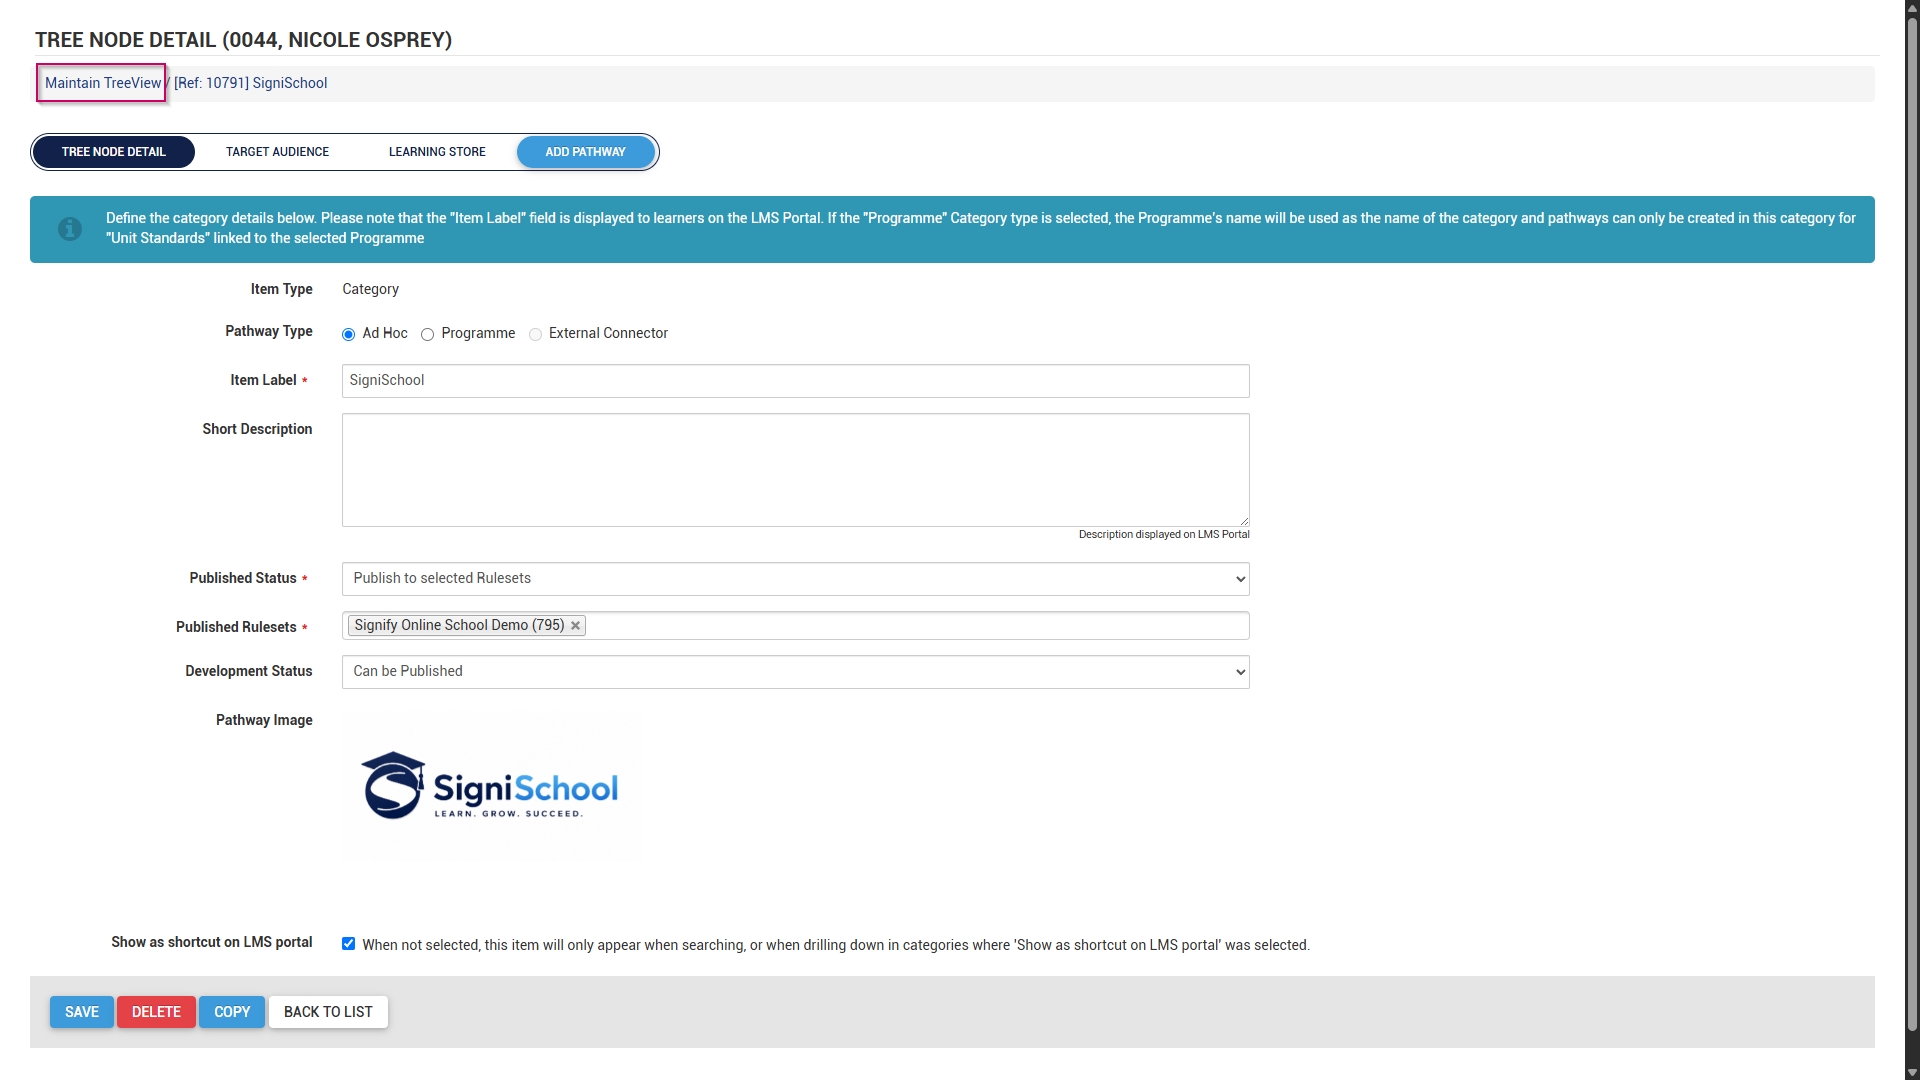
- Alternatively, click Maintain TreeView at the top of the screen to return to the Pathways Tree View.
-
-
-
- Click the pathway icon next to the main category's name to add a new pathway.
-
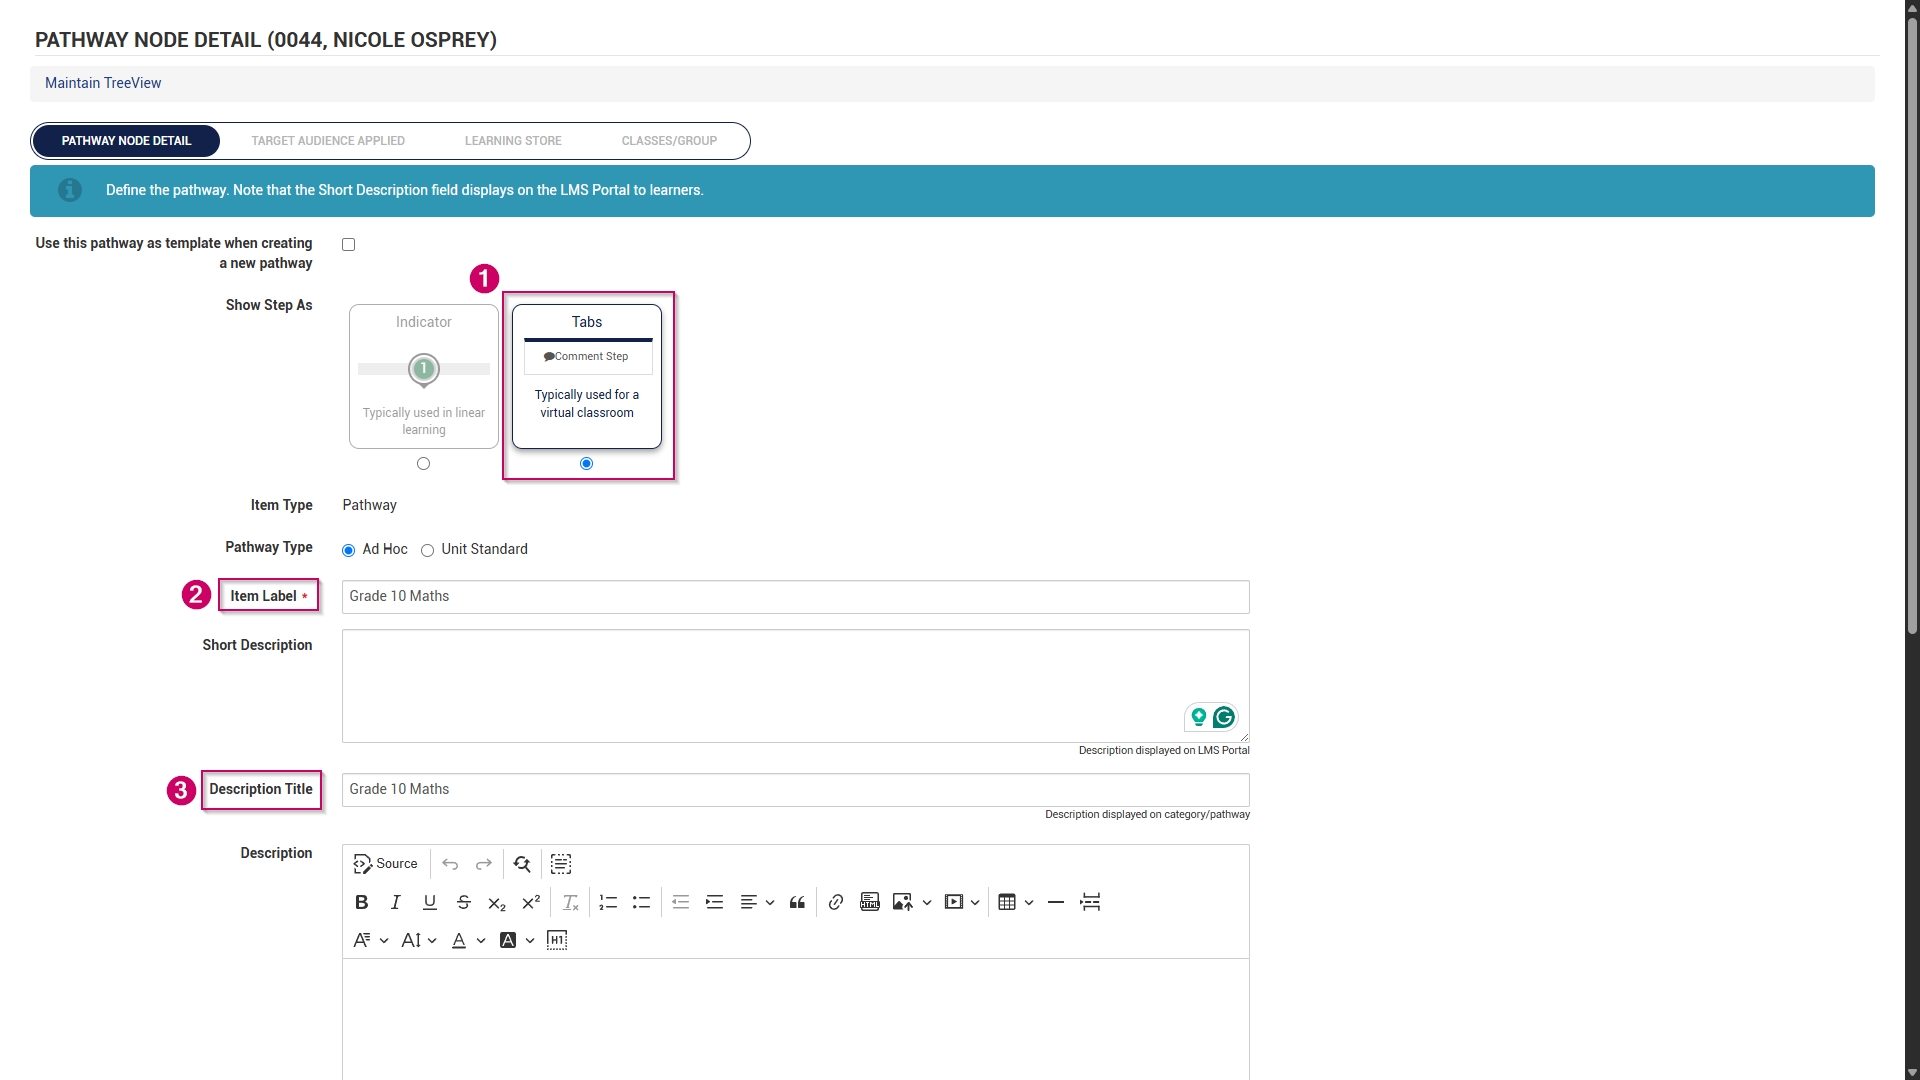
- The pathway details screen will open.
- Choose how the pathway steps should be displayed:
-
- Indicators are used for linear learning.
- Tabs are ideal for a virtual classroom or online school environment.
- For our example, we will be using tabs.
-
- Add the pathway name to the item label text field.
- Optionally, add a short description for the pathway.
- Add a description title.
- Optionally, add a longer description for the pathway.
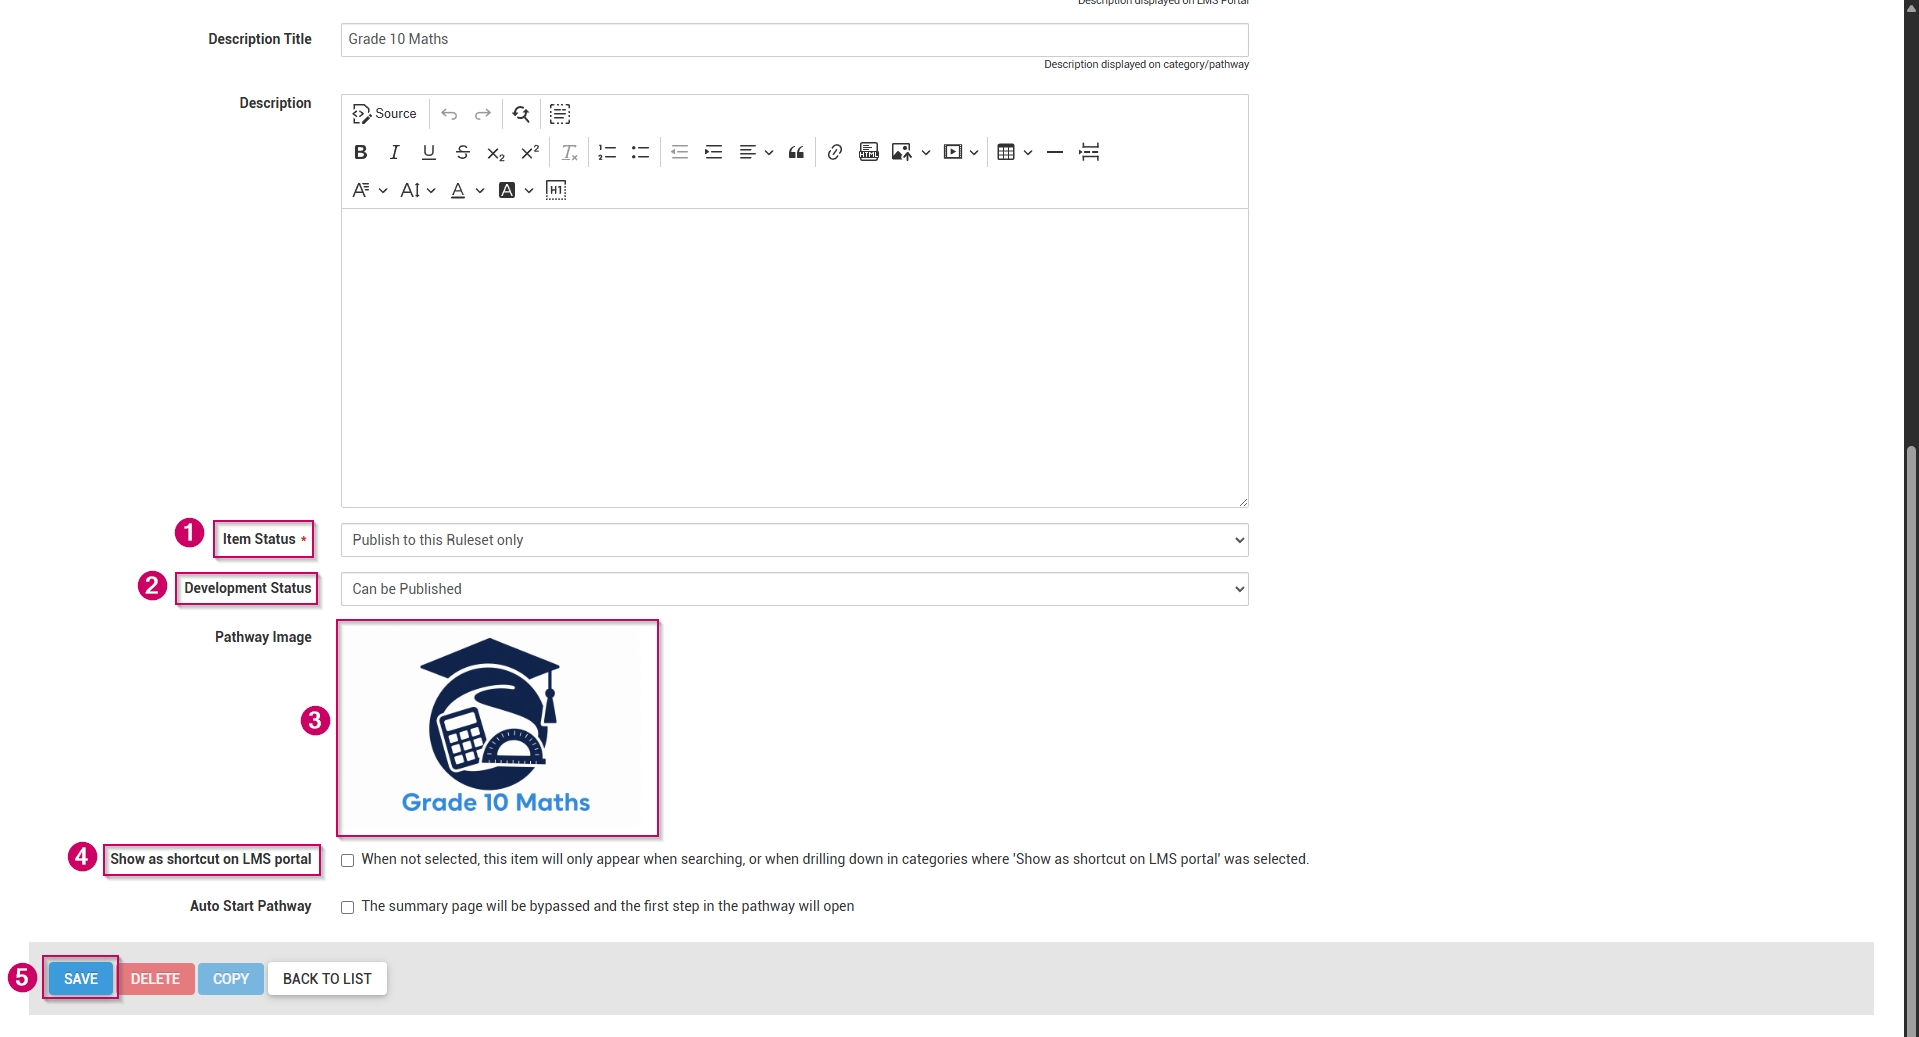
- From the drop-down menu, select the item status as Publish to this Ruleset only.
- From the drop-down menu, select Can be Published to set the development status.
- Choose a pathway image for the pathway. When adding your own image, ensure the aspect ratio is 300 by 200 px and that it is in .png, .jpg, or .gif format.
- If the main category should display on the Learning Portal, tick the Show as shortcut on LMS portal checkbox.
- Optionally, tick the Auto Start Pathway checkbox to skip the summary page when learners start the pathway.
- Click SAVE when you are finished or click BACK TO LIST to discard your edits.
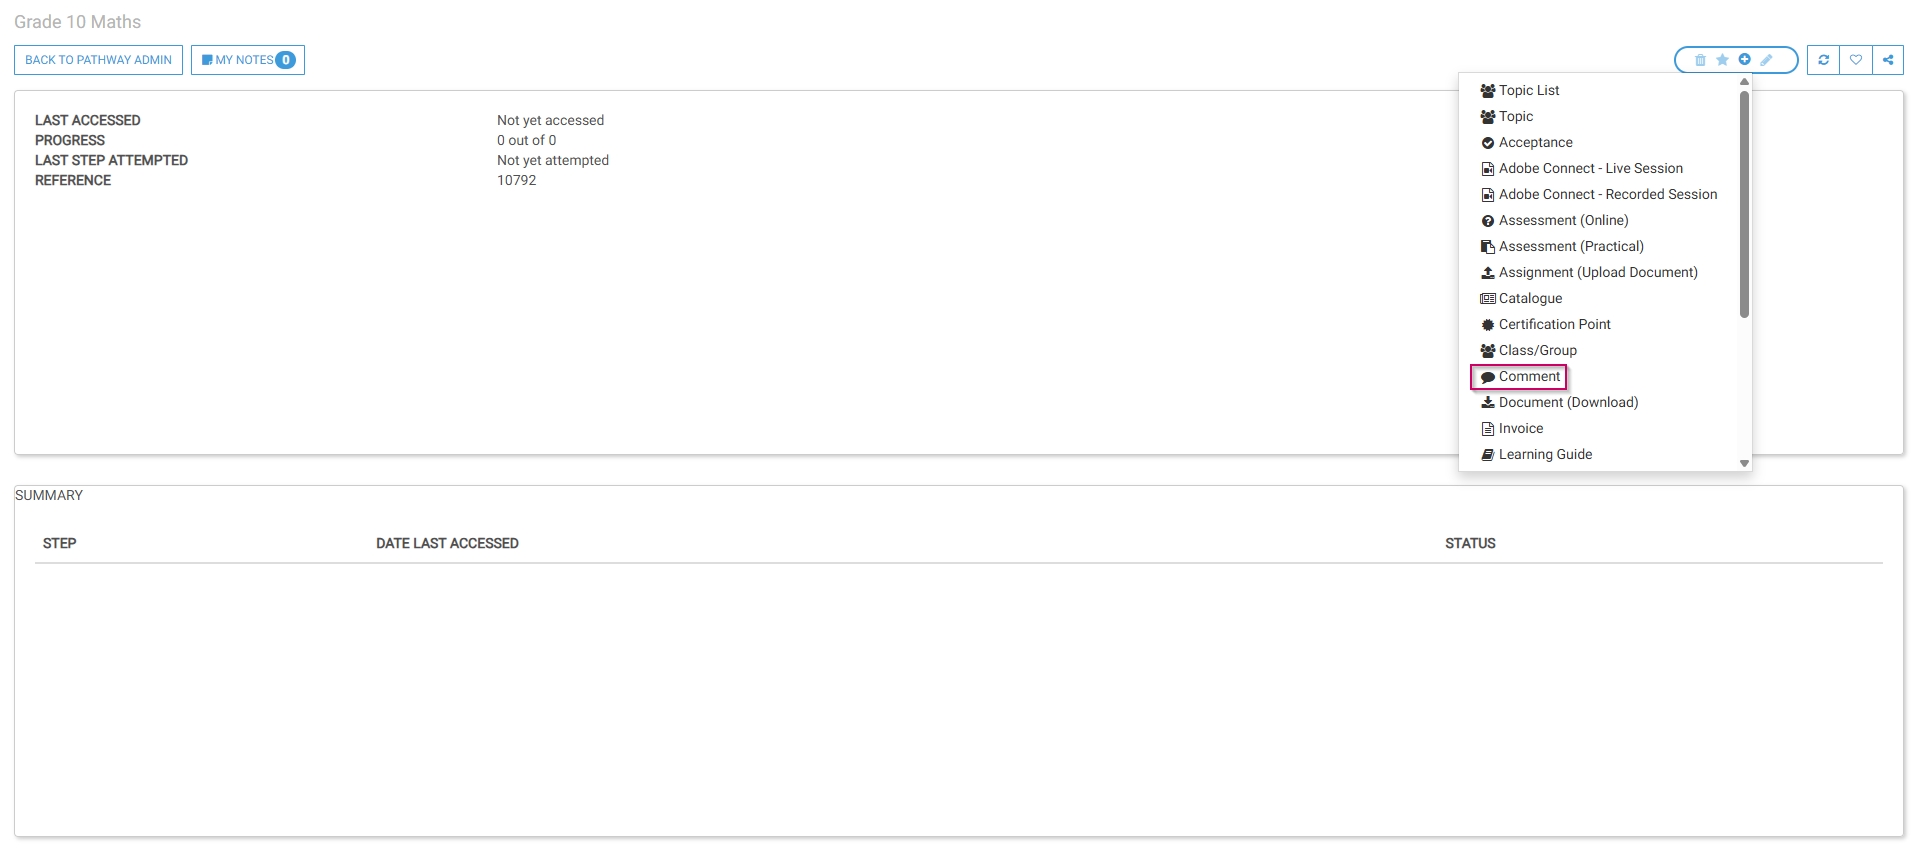
- Scroll to the top of the screen after the save is complete, then click DESIGN PATHWAY.

- This overview explains how to set up learning pathways for an online school. We will create the following steps, which are mainly used in an eLearning environment:
-
- Comment
- Document (Download)
- Acceptance
- SCORM/xAPI
- Assessment (Online)
- Assignment (Upload)
- Certification point
- Class/Group
-
- Feel free to include any additional step types not covered in this guide.
Comment
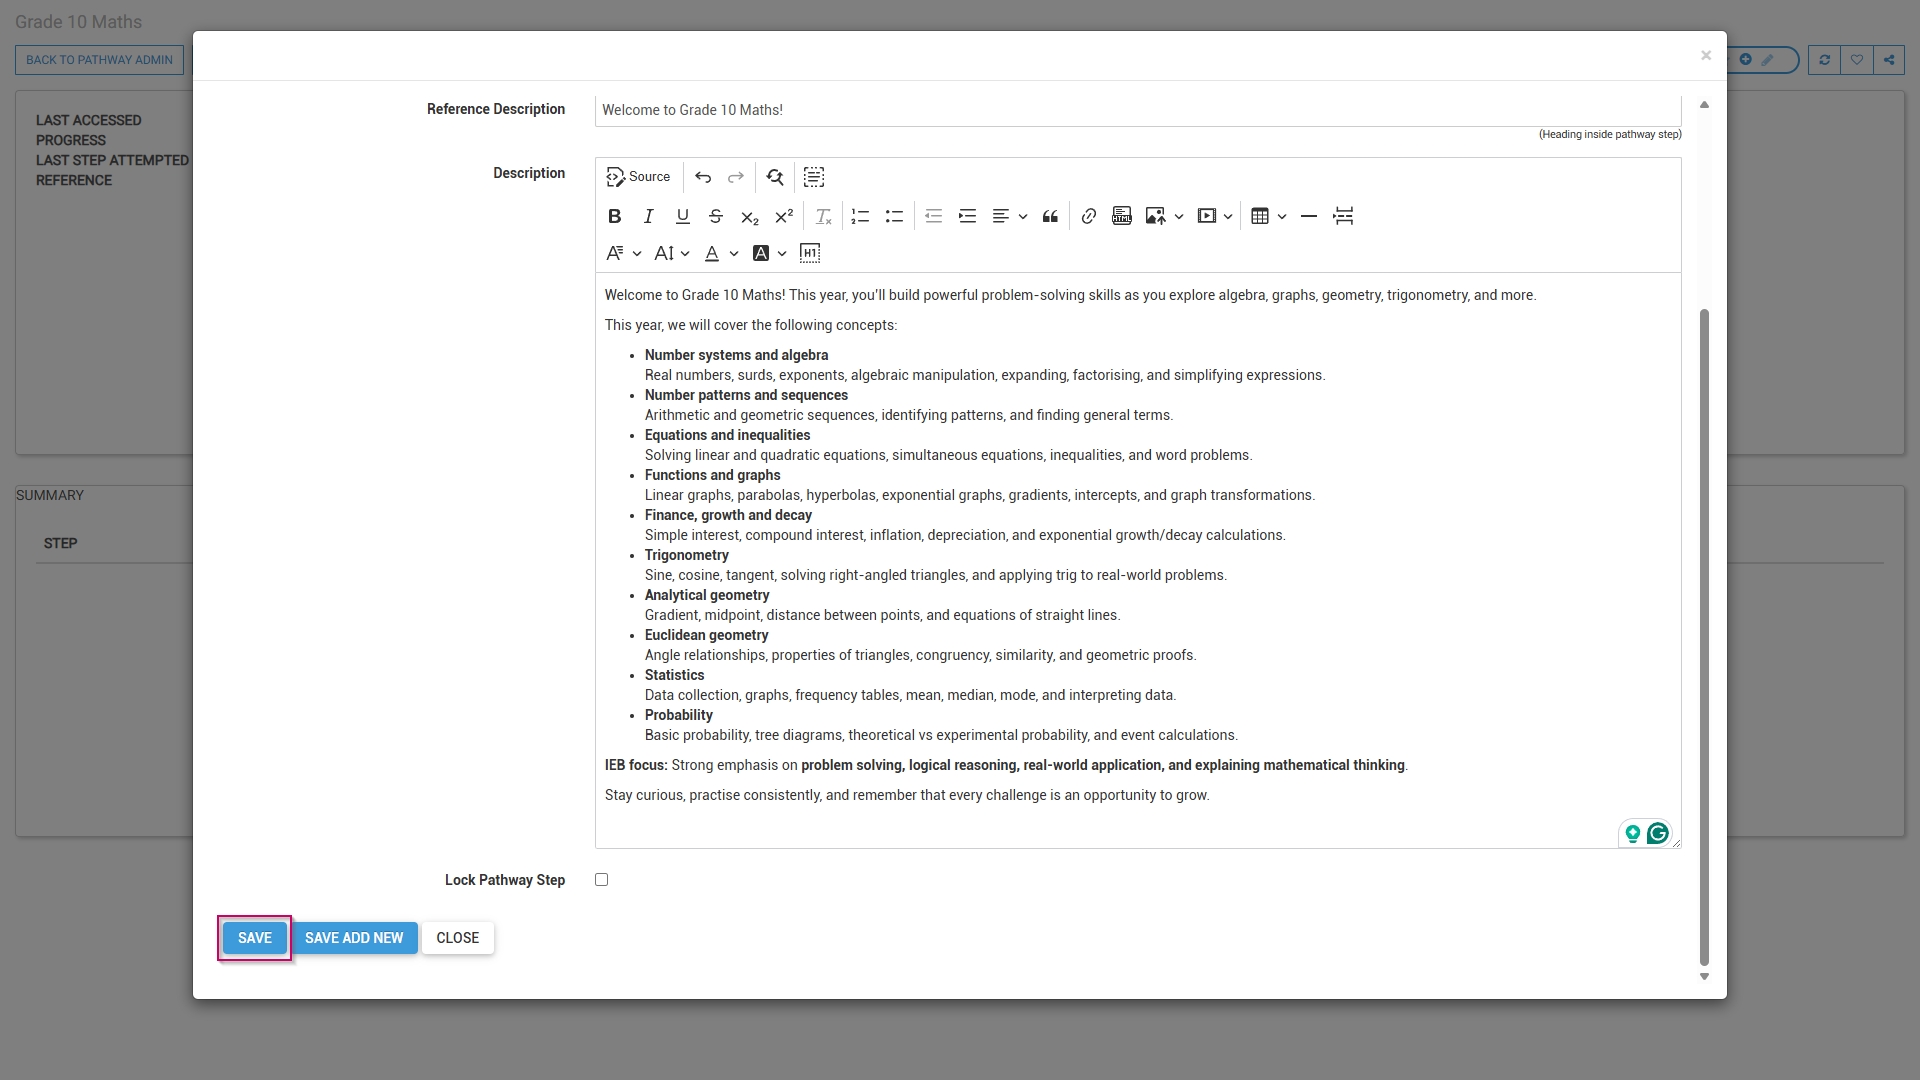
- The pathway design screen will open. Select Comment from the menu.
- Optionally, select an image or a custom icon for your step.
- Add a main header, or title, for this step.
- Add a subheading to the Reference Description field.
- Add a description for this step.

- Click SAVE when you are finished, SAVE ADD NEW to add another comment step or click CANCEL to discard your edits.
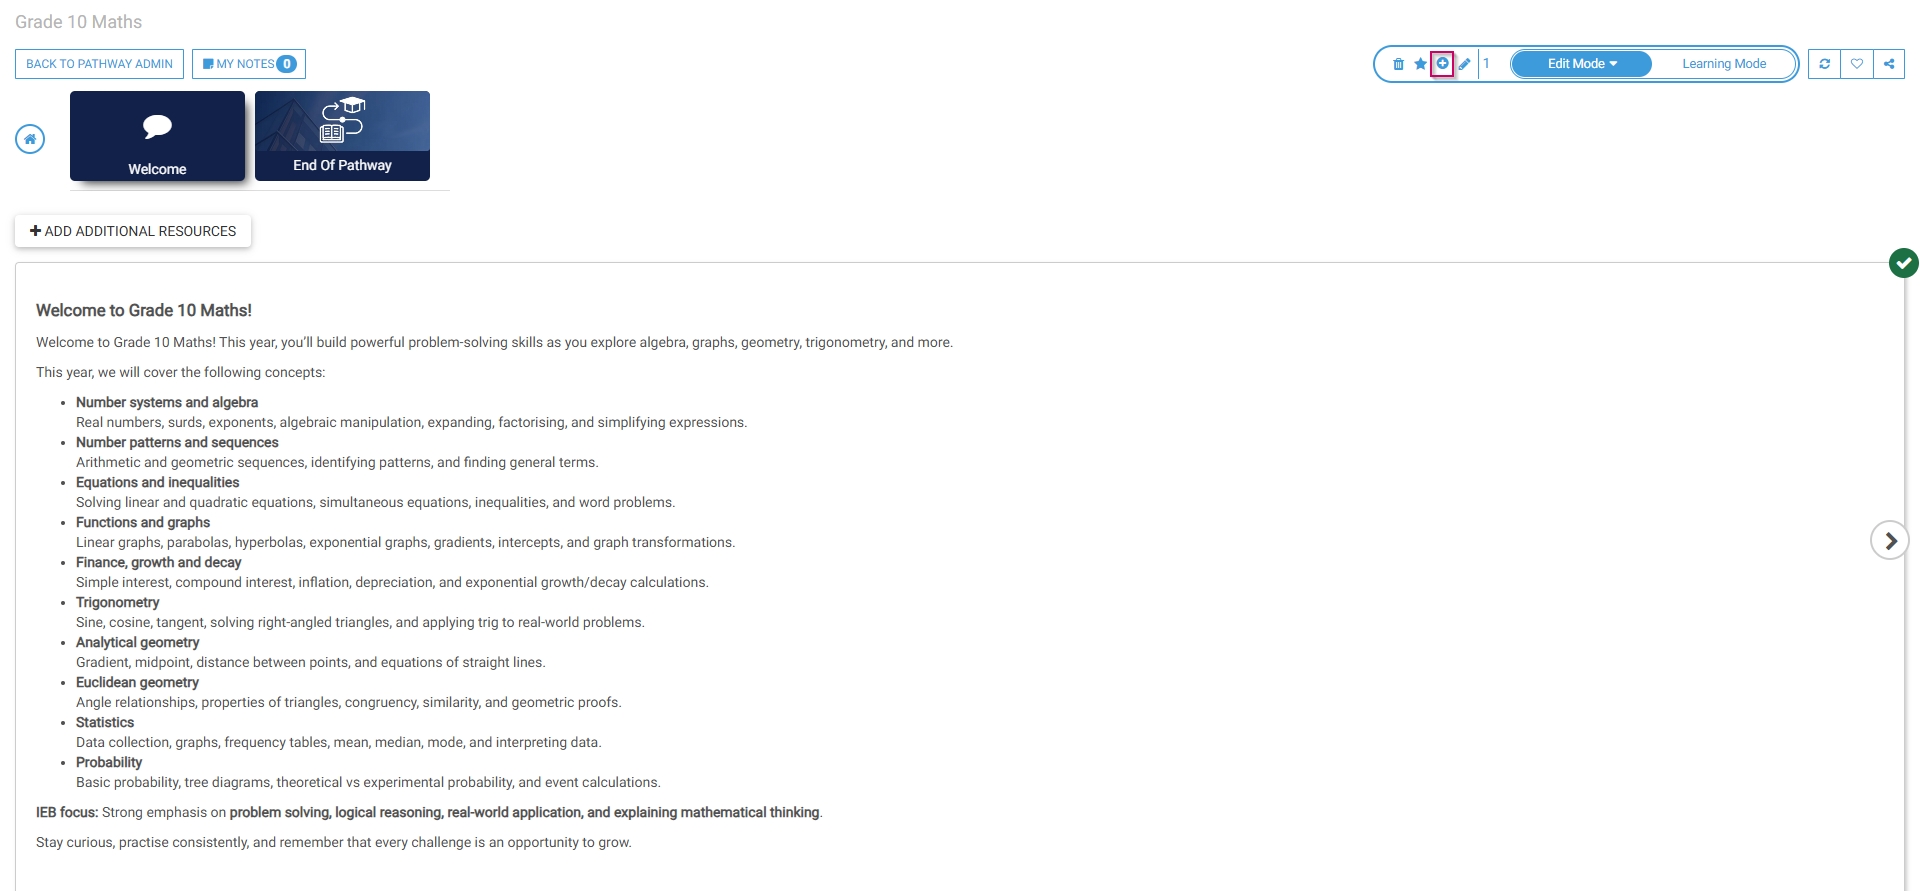
- The comment step has been successfully added to the pathway.
- To add an additional step, click the plus icon.
Document (Download)
- Select Document (Download) from the menu.
- Optionally, select an image or a custom icon for your step.
- Add a main header, or title, for this step.
- Add a subheading to the Reference Description field.
- Choose a file from your computer for users to download.
- Tick the checkbox if you would like the document to appear in this step.
- Add a description for this step.
- Click SAVE when you are finished, SAVE ADD NEW to add another document download step or click CLOSE to discard your edits.
- The document download step has been successfully added to the pathway.
Acceptance
- Select Acceptance from the menu.
- Optionally, select an image or a custom icon for your step.
- Add a main header, or title, for this step.
- Add a subheading to the Reference Description field.
- Add an acceptance title, which will display next to the tickbox learners are required to tick for this step.
- Add a description for this step.
- To log this step in the learner's record, check the box, then click the hand icon to select a training intervention to associate with this step.
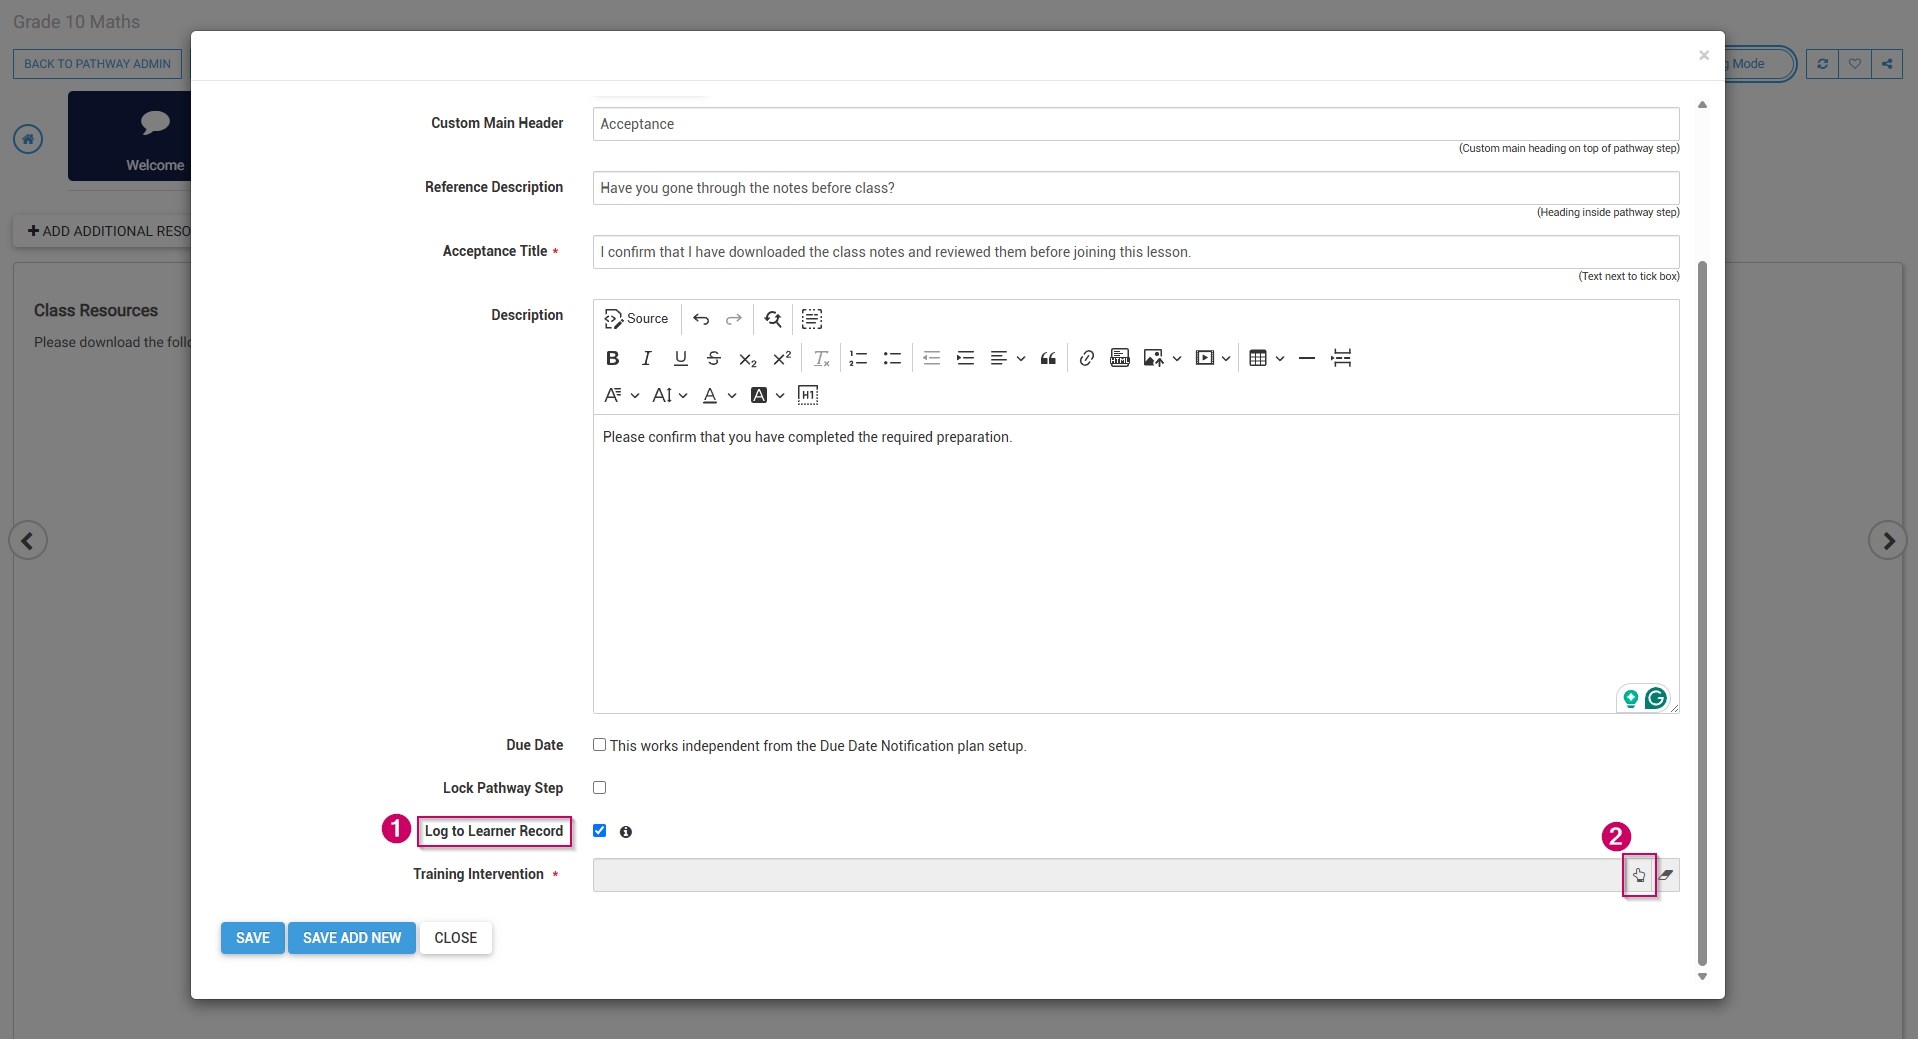
- Select the training intervention, then click SELECT.

- Click SAVE when you are finished, SAVE ADD NEW to add another acceptance step or click CLOSE to discard your edits.
- The acceptance step has been successfully added to the pathway.
SCORM/xAPI
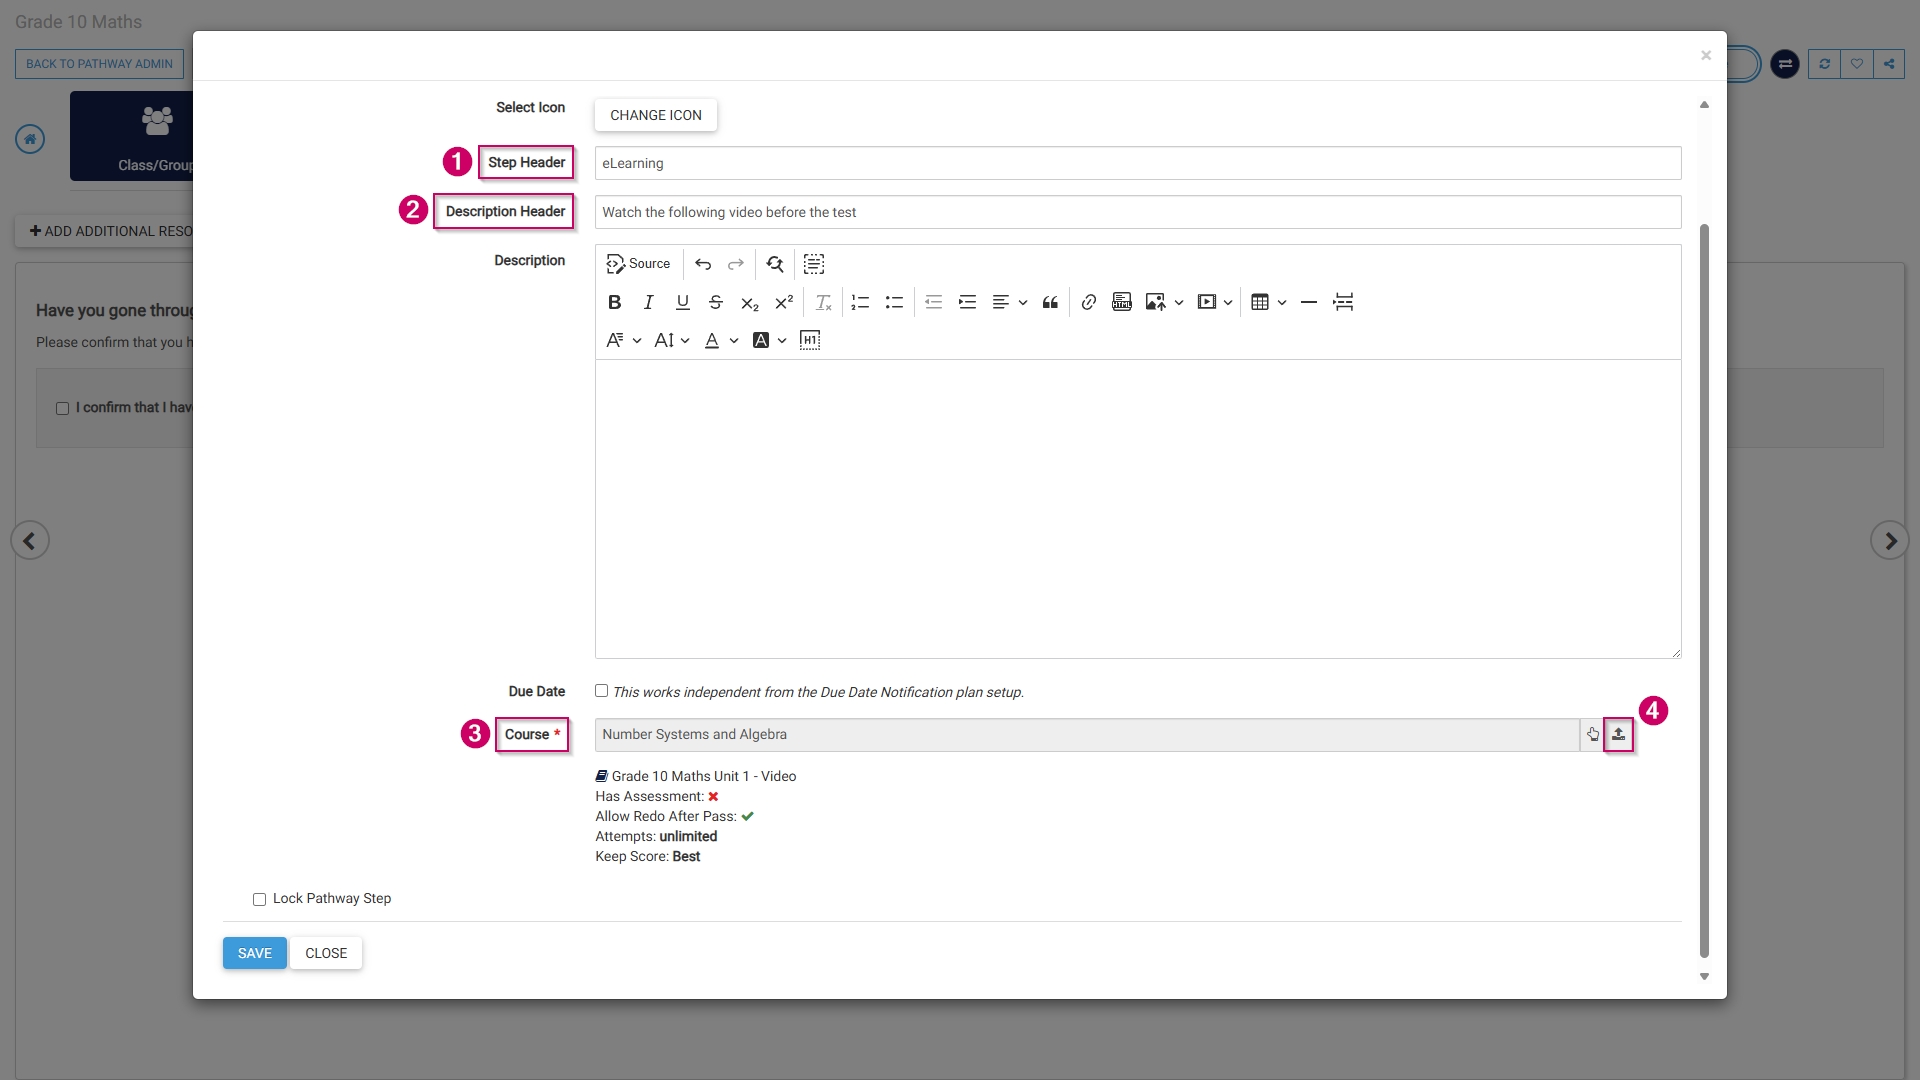
- Select SCORM/xAPI from the menu.
- Optionally, select an image or a custom icon for your step.
- Add a name for this step in the Step Header field.
- Add a description header for this step.
- Optionally, add a description.
- Select a SCORM file to add to this step by clicking the upload icon next to the Course field. The SCORM wizard will open.
- Select the radio button next to SCORM in the Learning Content Type section.
- Add a name for this step.
- Select a training intervention from the Training Intervention Library using the hand icon.
-
- Alternatively, tick the checkbox to automatically create a training intervention for this step.
- If using standardised naming conventions, ensure the name field complies with those standards.
-
- Choose a SCORM file from your computer in a .zip format.
- Customise how the SCORM activity will be set up:
-
- Tick the checkbox if the file has an assessment.
- Tick the checkbox if the learner can redo the SCORM activity.
- Set the maximum number of attempts.
- Choose which score to keep.
- Tick the checkbox if the transcript should be made available to the learner.
- Tick the checkbox if the SCORM file is active and ready for publication.
-
- Click SAVE AND UPLOAD to continue or CLOSE to discard your edits.
- The SCORM step has been successfully added to the pathway.
- These same steps can be used to add:
-
- MP4 files,
- PDFs, or
- YouTube videos.
-
Assessment (Online)
- Select Assessment (Online) from the menu.
- Optionally, select an image or a custom icon for your step.
- Add a main header, or title, for this step.
- Link a pre-loaded assessment to this step by clicking the hand icon.
- Add a description for this step.
- Click SAVE when you are finished, SAVE ADD NEW to add another assessment step or click CLOSE to discard your edits.
- The assessment step has been successfully added to the pathway.
Assignment (Upload Document)
- Select Assignment (Upload Document) from the menu.
- Optionally, select an image or a custom icon for your step.
- Add a main header, or title, for this step.
- Add a heading for this step.
- Add a description for this step.
- To log this step in the learner's record, check the box, then click the hand icon to select a training intervention to associate with this step.
- Select the training intervention, then click SELECT.
- Click SAVE when you are finished, SAVE ADD NEW to add another assignment upload step or click CLOSE to discard your edits.
- The assignment upload step has been successfully added to the pathway.
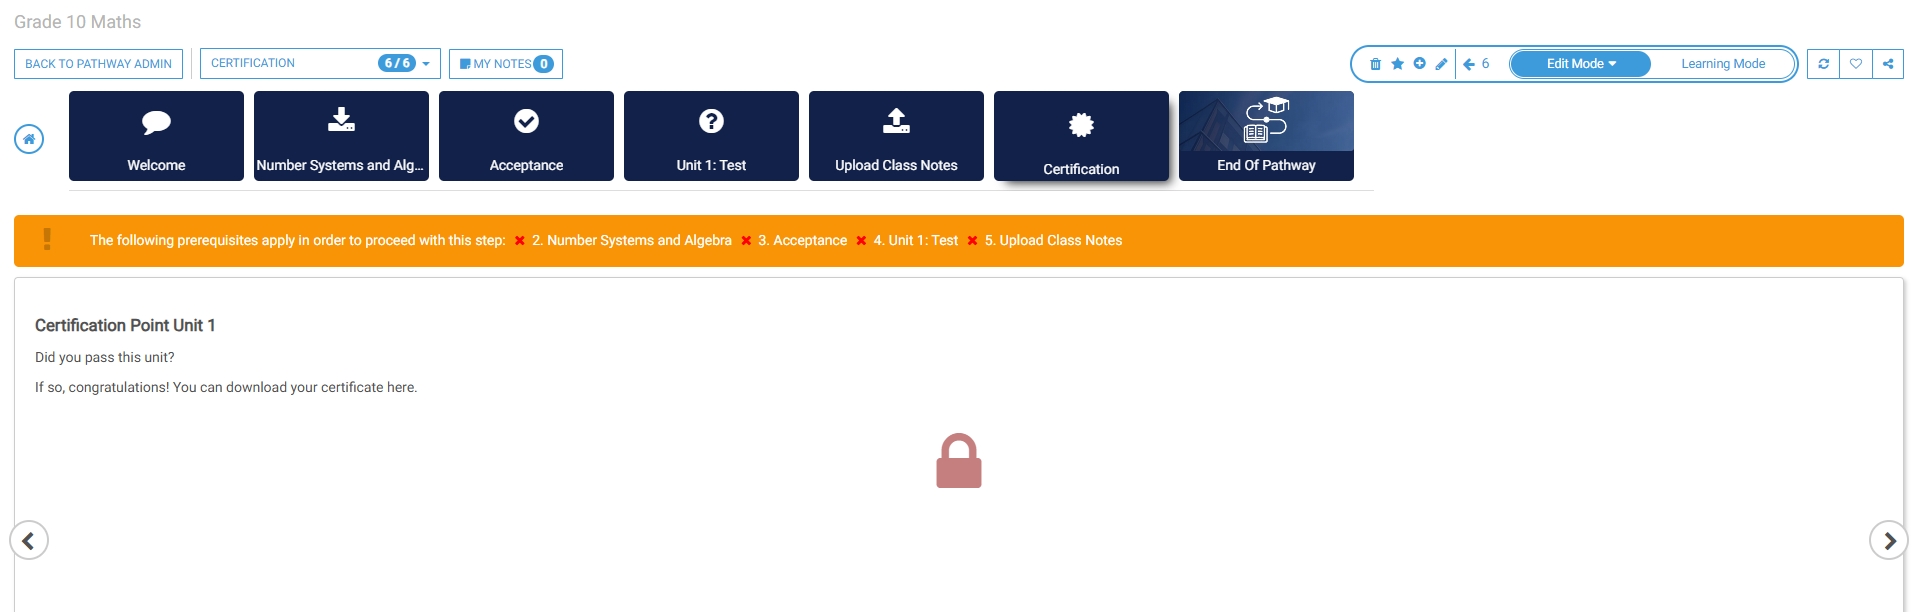
Certification point
- Select Certification Point from the menu.
- Optionally, select an image or a custom icon for your step.
- Add a main header, or title, for this step.
- Add a certification point name.
- Add a description for this step.
- To log this step in the learner's record, check the box, then click the hand icon to select a training intervention to associate with this step.
- Select the training intervention, then click SELECT.
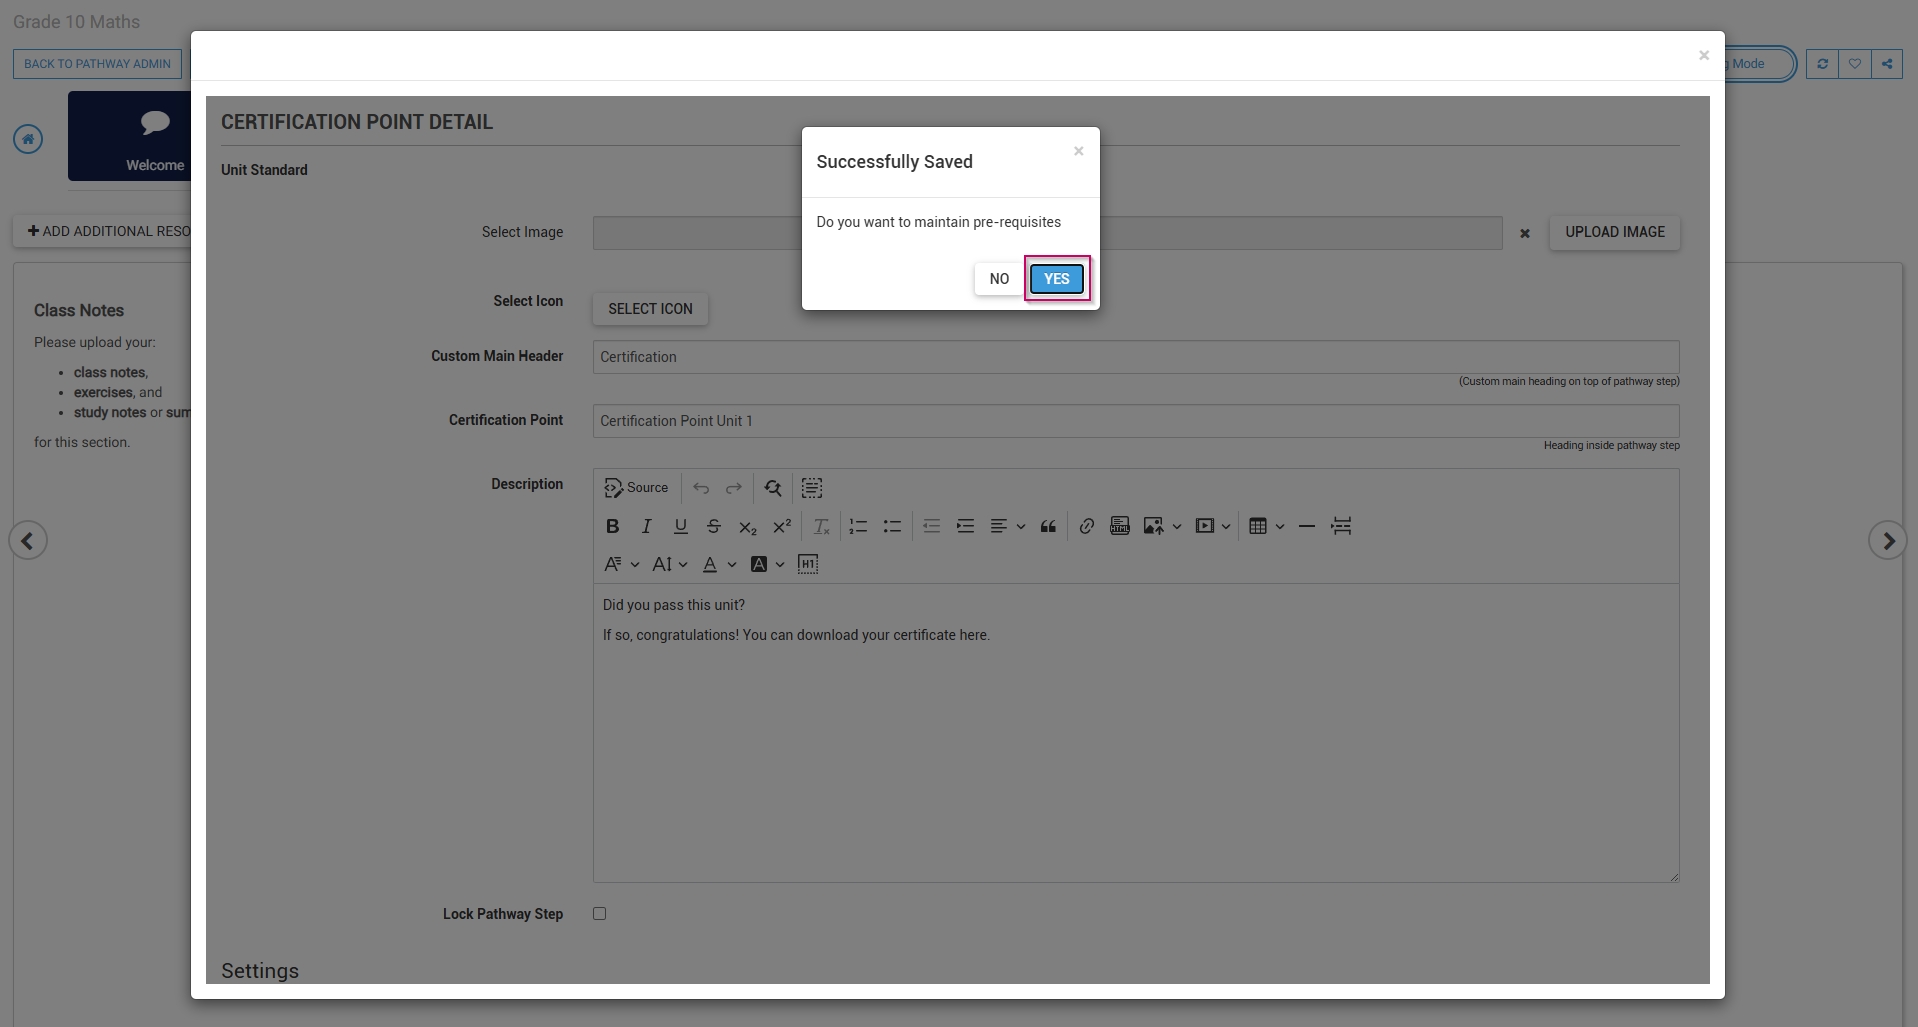
- Click SAVE when you are finished, SAVE ADD NEW to add another certification point step or click CLOSE to discard your edits.
- To maintain prerequisites for this certification point, click YES.
- Click ADD to select steps from the pathway to add as prerequisites.

- From the drop-down menu, select a pathway item.
- Select the status required to achieve this prerequisite.
- Click SAVE when you are finished, SAVE ADD NEW to add another prerequisite, or click CLOSE to discard your edits.
- The certification point step has been successfully added to the pathway.