90% The Performance Agreement - Check-ins
Process Step
Lesson Duration
About 15 minutes
What you will learn
-
When the check-in functionality becomes active
-
Using the check-in stats
-
How a manager would do a check-in on an objective, and provide feedback
-
How the employee can reply on a check-in's feedback
Doing a Check-in on Objectives
After submitting their performance objectives, employees will work on achieving them for three to five months before doing the review with their managers.
During this period, using the check-ins functionality provides a simple but effective way of keeping the objectives in focus, getting guidance and direction from a manager, and ensuring there are no surprises during the actual review.
Just note, a manager does not have to check-in on all objectives every time a check-in is done. Select a few - if guidance is needed - and give feedback only on those objectives. During the next check-in, focus on another set of objectives.
Remember, a check-in is not a replacement for a face-to-face discussion with your employee/manager, it is done in addition to regular discussions.
Activating the check-in
Using the Check-in functionality is optional and depends on a company's configuration and internal decisions.
If check-ins are enabled in the system, the CHECK-IN button will become active when an employee's objectives have been submitted and approved. See screenshot below.
The check-in statistics
When employee or manager opens the employee's check-in screen, find a summary of check-in statistics at the top of the screen. It serves to give some indication of where to focus, and this is helpful when there are lots of objectives on a performance agreement.
See below for the interpretation of the numbers.
Do a check-in (as manager)
Since the bulk of the activity on the check-in screen is from the manager's side, the following screenshots are from the manager's perspective.
- From the Manager's Performance Dashboard, locate the applicable person's contract, and click its CHECK-IN button.
- The check-in screen opens, revealing:
The check-in stats at the top.
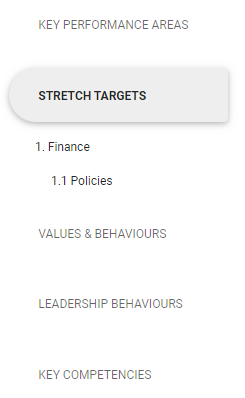
The standard section menu on the left side of the screen.
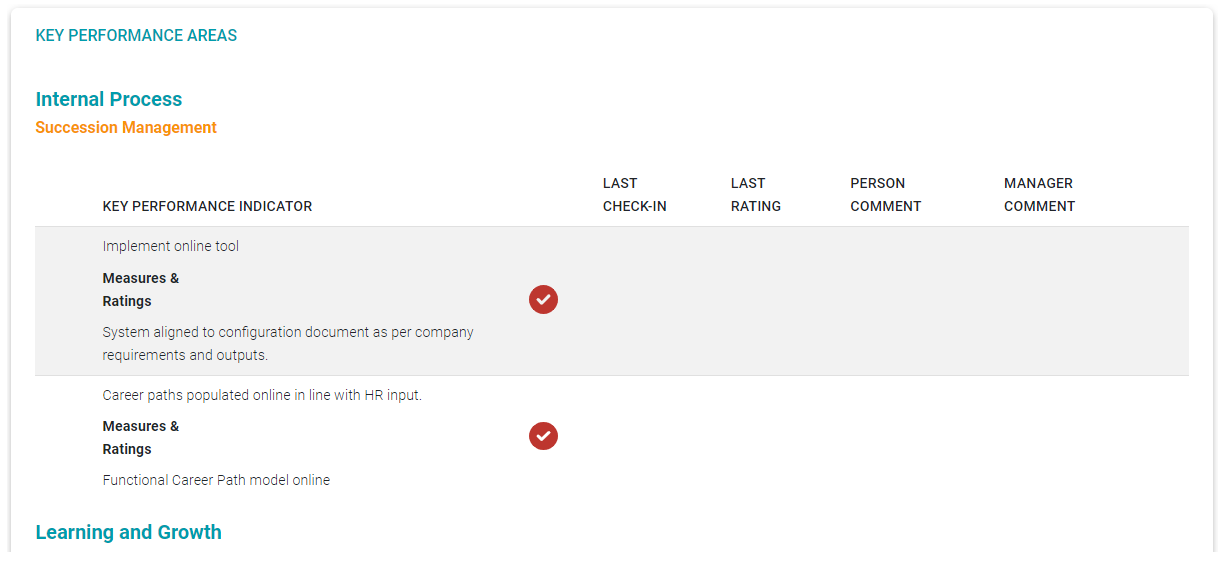
The objectives, grouped per section, in the middle of the screen.
- Locate the objective due for a check-in, and click on its record ...
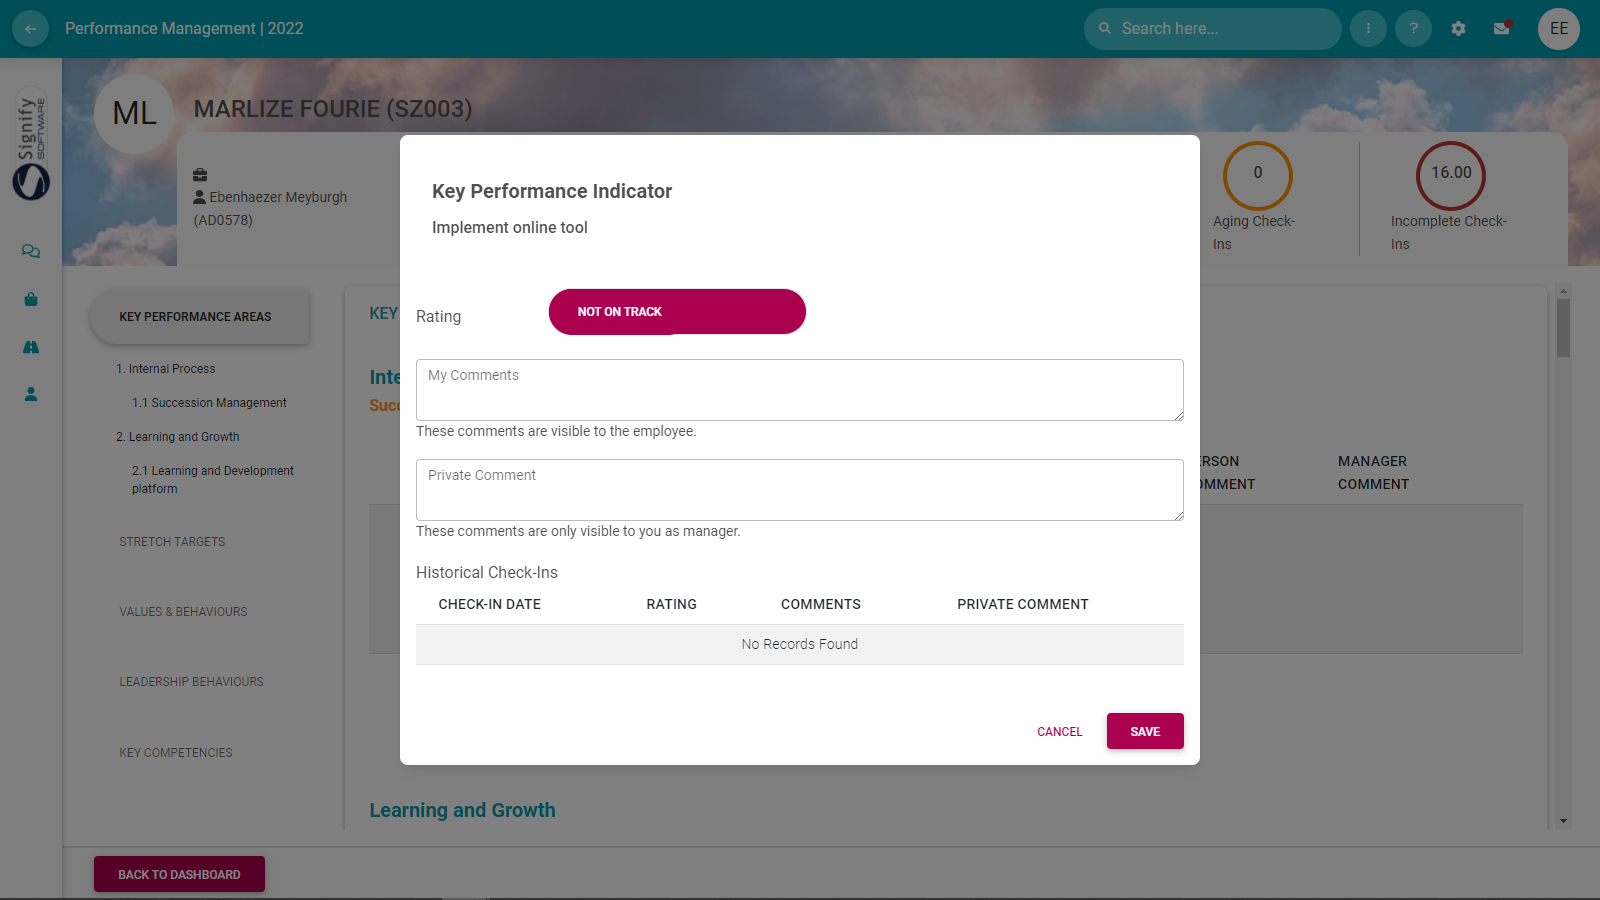
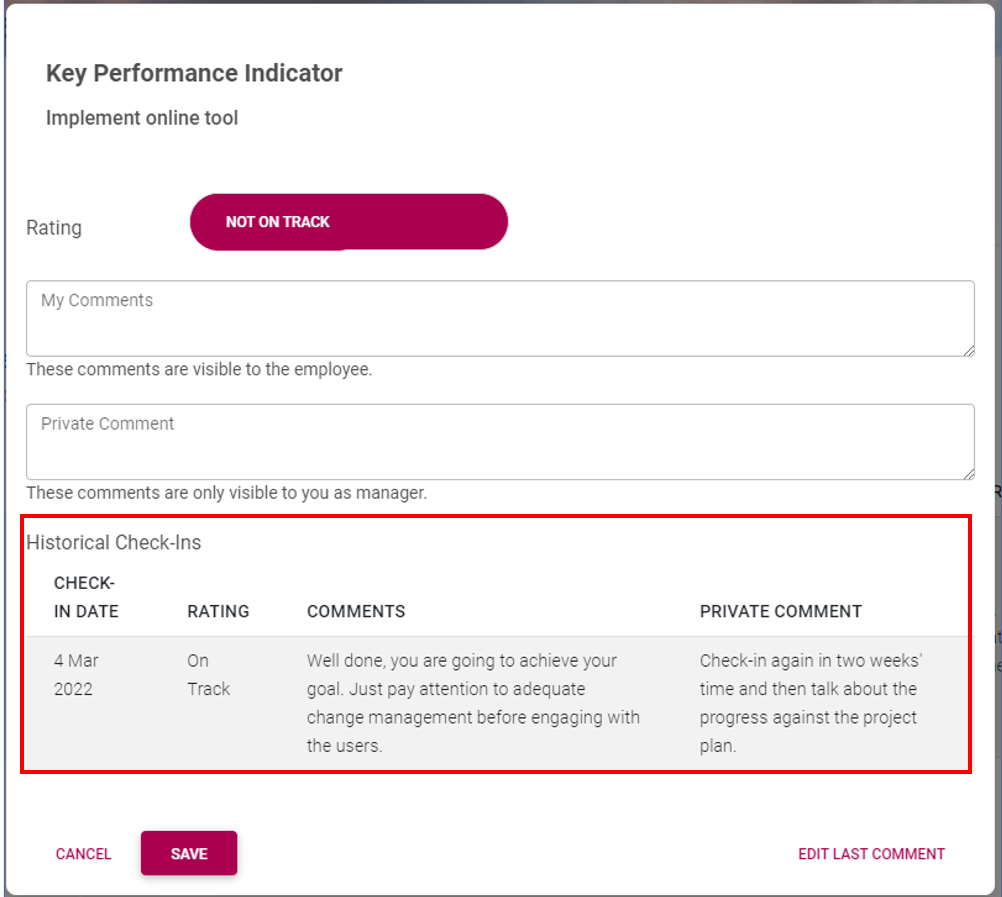
- ...to open the check-in feedback screen.
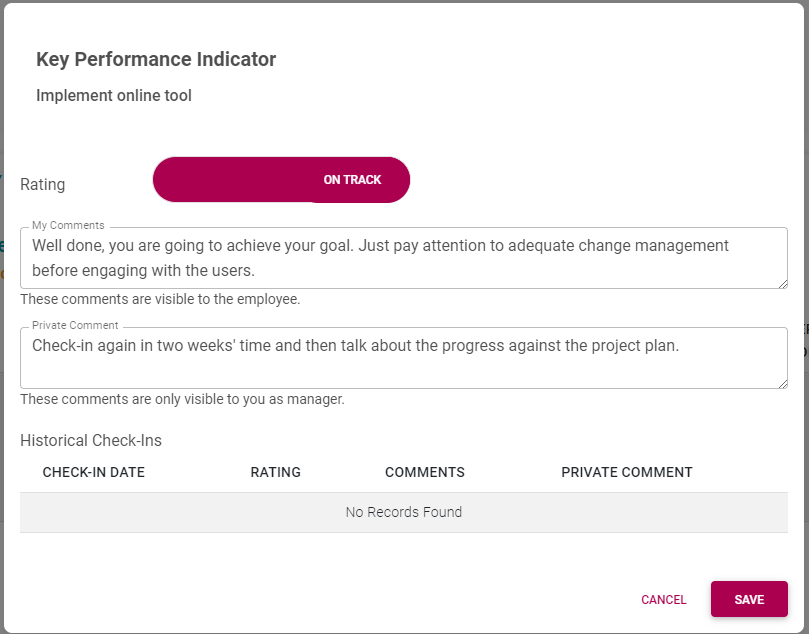
- Provide feedback as needed.
- Use the Rating toggle button to indicate current progress sentiment.
- Click SAVE when done.
- After saving the feedback, notice how the feedback is added to the history of the objective check-ins.
- In the lower, right corner, click EDIT LAST COMMENT to edit the last feedback. Note feedback is locked after a certain time and can then no longer be edited.
- The agreement screen is updated with objectives having check-ins done on them.
Reply on check-in feedback (as employee)
The Check-In functionality is used to determine whether your employee is still on track with regards to the Performance Contract’s KPAs, Company Values, Leadership Behaviours, and Key Competencies prior to the start of the Rating phase.
A check-in can be done any number of times during the employee’s performance cycle. You as manager can evaluate the employee’s progress against set targets and add suitable comments. The employee can review your comments and evaluation, and add their own comments.
Remember, a check-in is not a replacement for a face-to-face discussion with your employee, it is done in addition to regular discussions.
After logging in, navigate to your Manager Performance Management Dashboard and locate the applicable employee. Click on the Check-Ins button in the applicable review period to view the content and do the check-in evaluation.
The little counter inside the Check-ins button gives you a count of previous check-ins.
The Check-In screen opens and you will notice right at the top, the counters giving some statistics about your check-ins with your employee.
The lower half of the screen contains the Key Performance Areas, Company Values, Leadership Behaviours, and Key Competency sections, with all their content as captured on the employee's contract.
Click the down arrow of any section to expand that section.
Click on the Check-In button to add your evaluation and comments per item.
Evaluating an item is not done in terms of the regular 1 to 5 rating scale, but in the format of an On Track, or Not on Track indication.
The information in the Comments field is made available to your employee; information typed as Private Comments are not.
A detailed history is kept of every check-in evaluation.
Only the last check-in can be edited so double-check your entry before saving it.
The screen statistics is updated to reflect every new entry.
The Check-In functionality is used to determine whether you are still on-track with regards to the Performance Contract prior to the start of the Rating phase. You can add comments and view the last check-in rating and comments made by your Manager.
A check-in can be done as many times during your performance cycle as is needed.
Click on the Check-Ins button to view the content and check-in screen. The little counter inside the Check-ins button gives you an indication that your manager did a check-in with you.
The Check-Ins screen is a high-level summary of your contract, listing all its sections in the dropdowns.
At the top of the screen, you can see some statistics about the number of check-ins done on your review period.
Expand the Key Performance Areas section to see if any check-ins were done there.
You should see the indicators On Track, or Not On Track in the Last Rating column, as well as your manager’s Last Comments.
Clicking the information icon will refresh your memory as to the planned targets for a specific KPI.
If you also want to say something about the manager’s check-in, click on the Comment button to add your comments per item.
Click SAVE when done.
Your comments are saved and added to the screen.
Click Back to Employee Dashboard to exit the Check-in screen.
Recommended further reading
- Glossary of terminology and definitions.
--- End of Page ---


