FAQs for Administrators

How do I update the Master Data Library for Performance Management?
Master Data are categories of standard information used in products and functions across the system. Master Data fields and categories can be added, customised, maintained, and adjusted.
Most drop-down lists consist of Master Data categories.
Existing Master Data
To view the existing Master Data categories, login to the Signify System, click on the settings icon on the right-hand side of the screen and select Master Data.
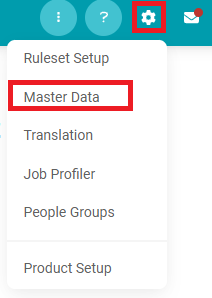
You will be redirected to the Master Data Table, where you can view existing Master Data Categories.

An indicator of the Primary Product linked to the Master Data Category is displayed, however, categories can be applied to multiple products and functions.
To view the options linked to a specific category, click on it.
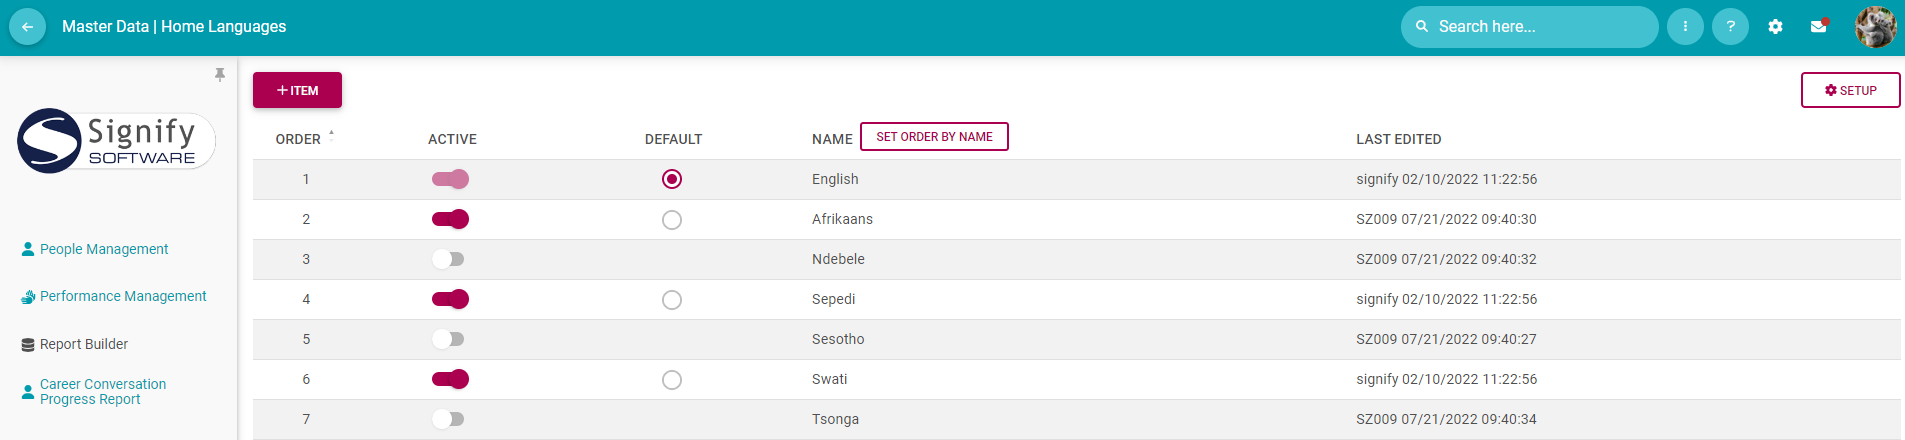
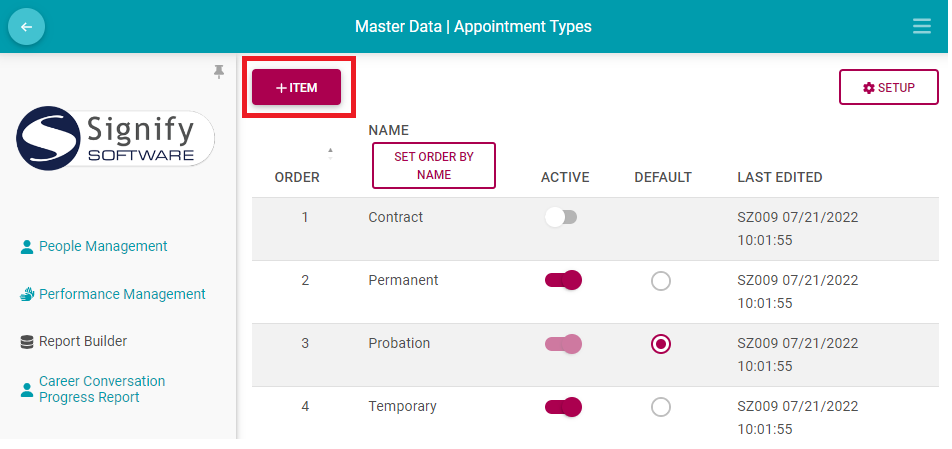
In this window, the following information is displayed:
The order in which options are displayed.
Whether the option is active or inactive.
The default option.
The name of the option that is displayed.
The date on which the option was last edited, along with the user that made the edit.
A number of adjustments can be made to the Master Data category options page, this includes:
- Rearranging option orders by clicking and dragging the option to the desired position
- Activating or deactivating an option
- Selecting the desired default option
- Deleting an option from the category
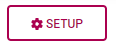
Customising the Options table
You can customise the information displayed in the options table by clicking on the Setup button.
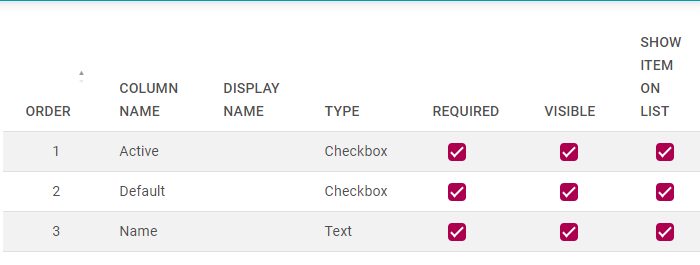
From the setup page, you can adjust the order of the columns in the options table by clicking and dragging the desired field and selecting which columns are required, visible, and shown in the options table.
Remember to click on the SAVE button before returning to the options table.
Adding Master Data Category Options
To add an option, select the category you want to modify and click on the +ITEM button in the top left corner.
In this example, 'Part-time' will be added as an Appointment Type option:
A pop-up will appear on the screen, requiring you to name the category and to decide whether the option should be active and/or set as the default option. Click on the SAVE button to add your option. Once done, the option will appear in your category option table.
How do I add a person to a review setup?
- Open the Setup and Configuration menu by clicking on the gear icon at the top of the screen (if available).
- Select the Product Setup option.
- Go to the Review Years tab and select the review year to which the phase belongs.
- Go to the Review Setups tab and click the relevant review setup you would like to adjust.
- Go to the Target Audience tab and ensure the employee has been added to the relevant group.
How do I update a person's reporting line with the correct performance manager?
- Open the People Management module and navigate to the VIEW/EDIT PEOPLE tab.
- Find the person who has the incorrect performance manager and click to manage their profile.
- On the left-hand menu, click to open their Appointment details and click Reporting Lines.
- Select their correct performance manager, then click to SAVE.
