Performance Management Implementation Guide

Activate the Performance Management module
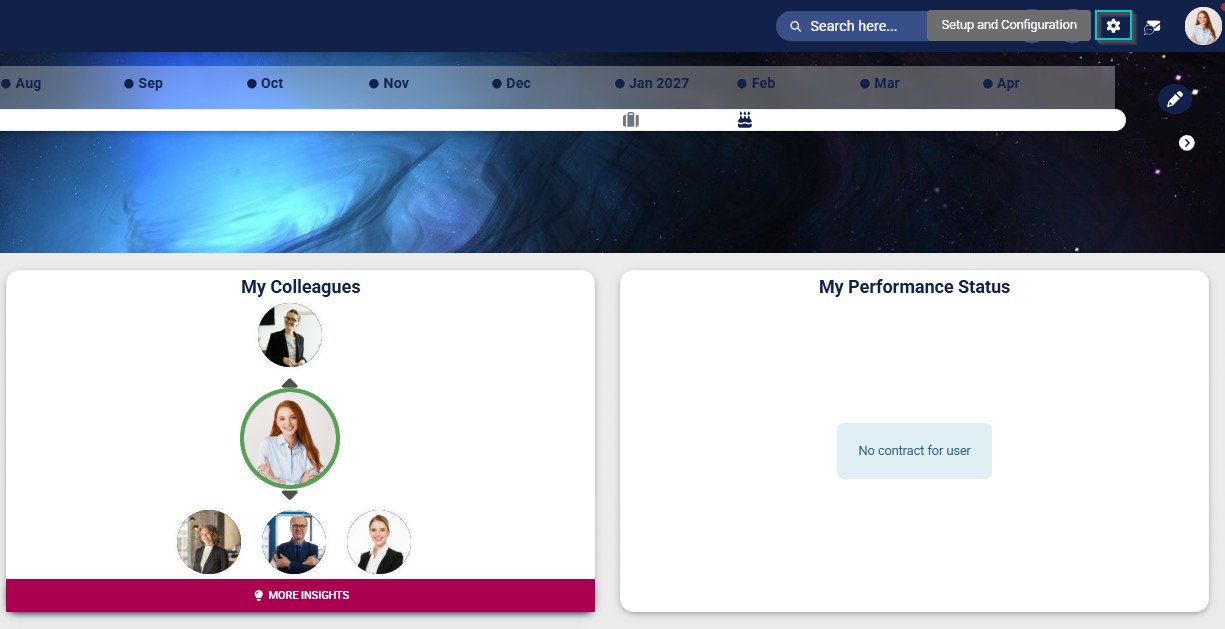
- Click the gear icon to access the Setup and Configuration menu.
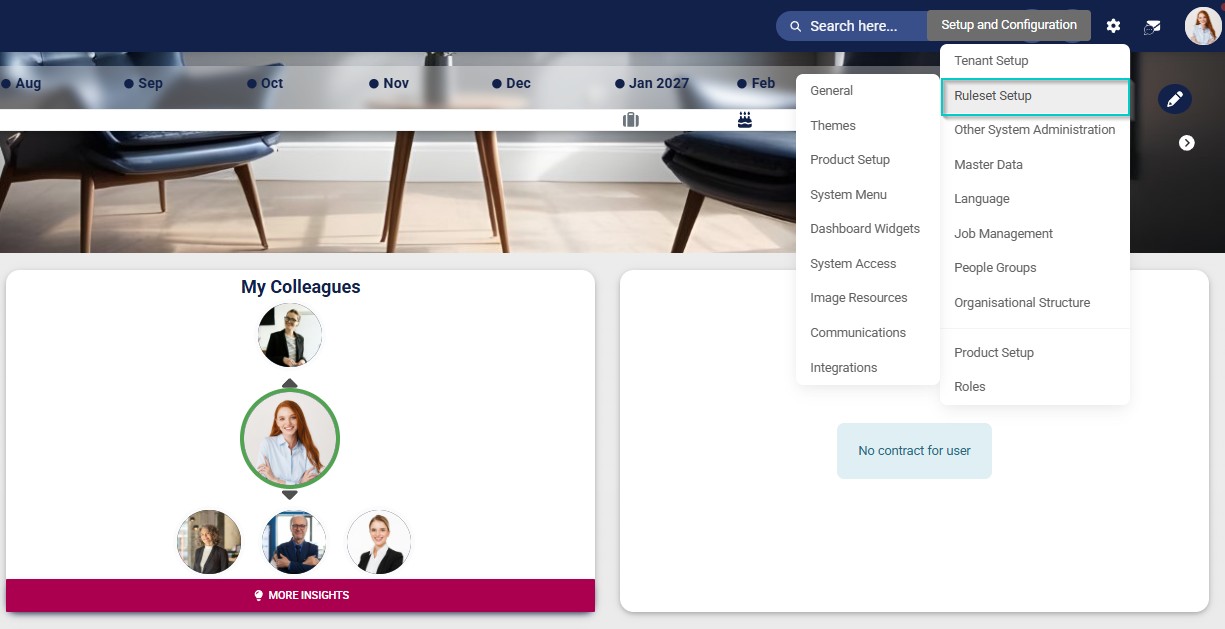
- Click Ruleset Setup.
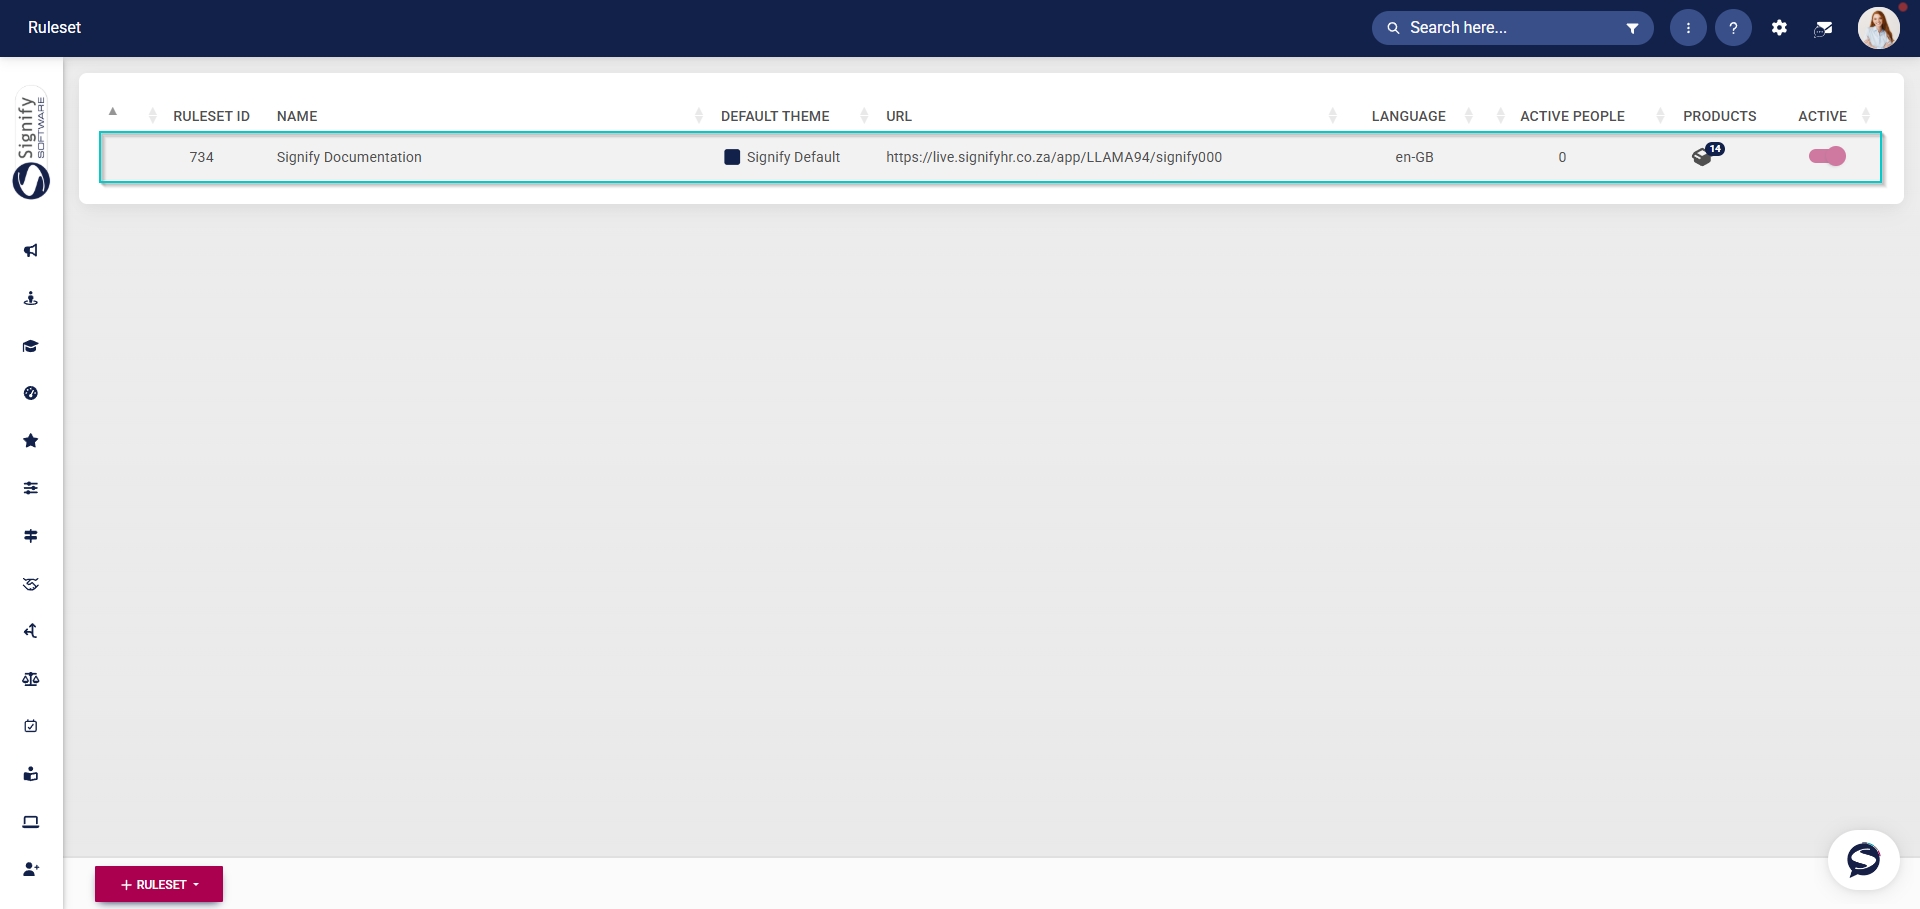
- Select the ruleset you would like to update.
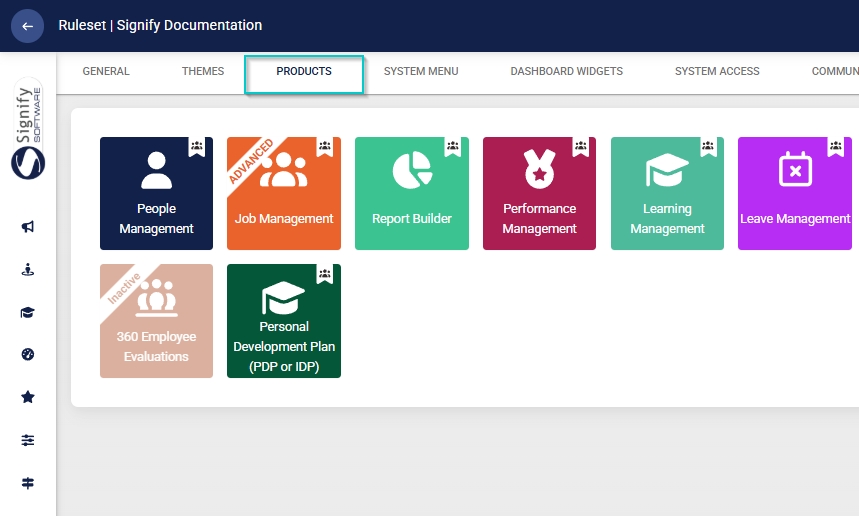
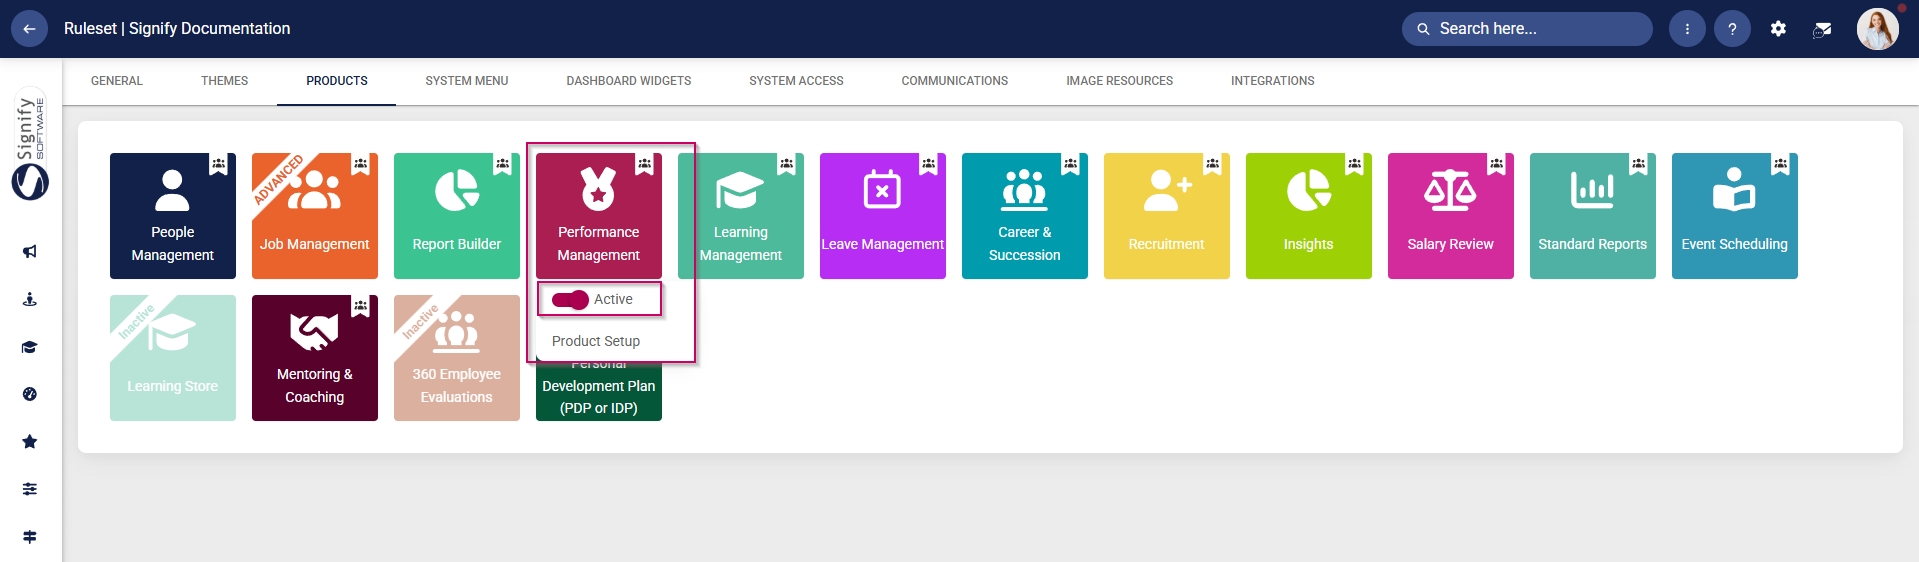
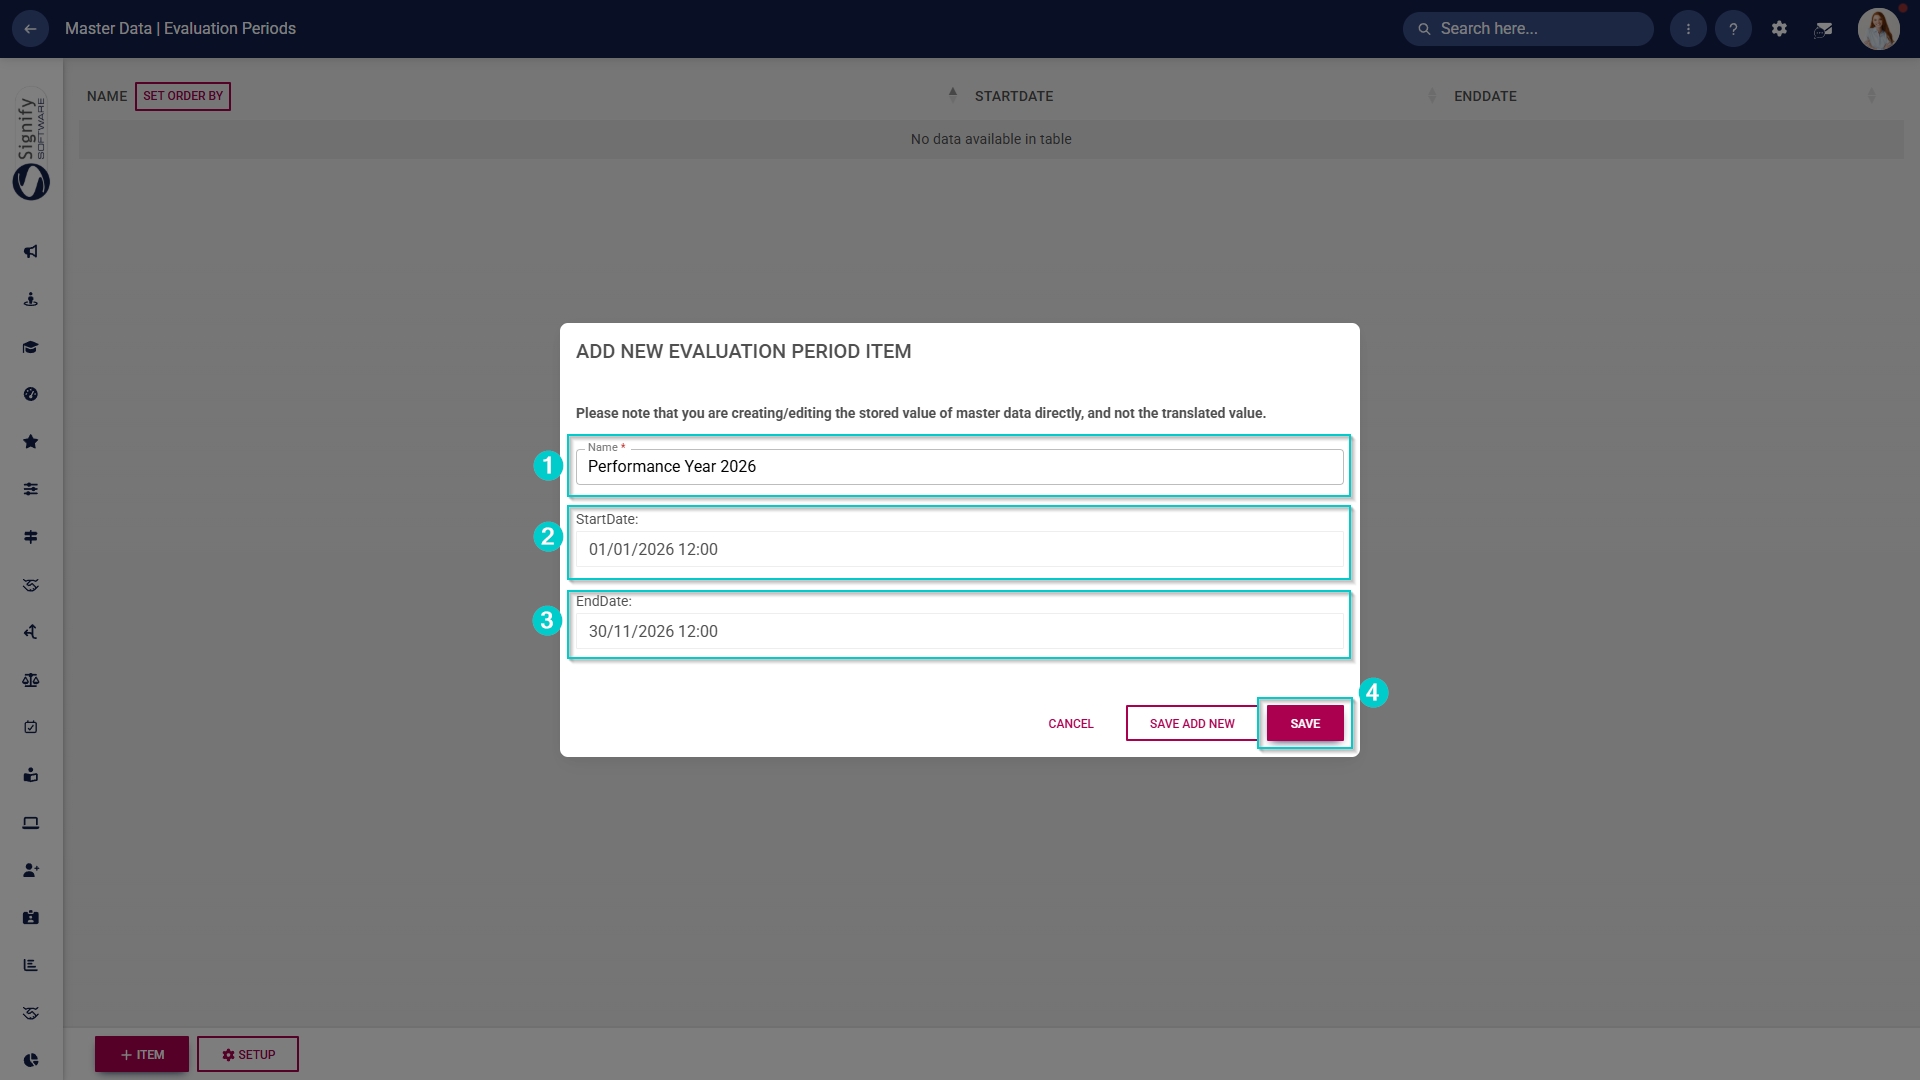
- Click on the Performance Management product card, then click the toggle button to set the product’s status to Active.
Add Performance Management to the system menu
- Click the gear icon to access the Setup and Configuration menu.
- Click Ruleset Setup.
- Select the ruleset you would like to update.
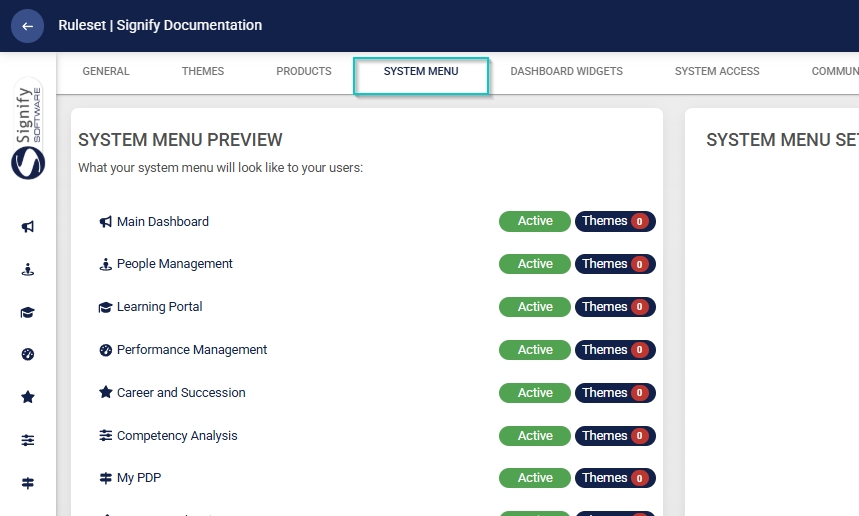
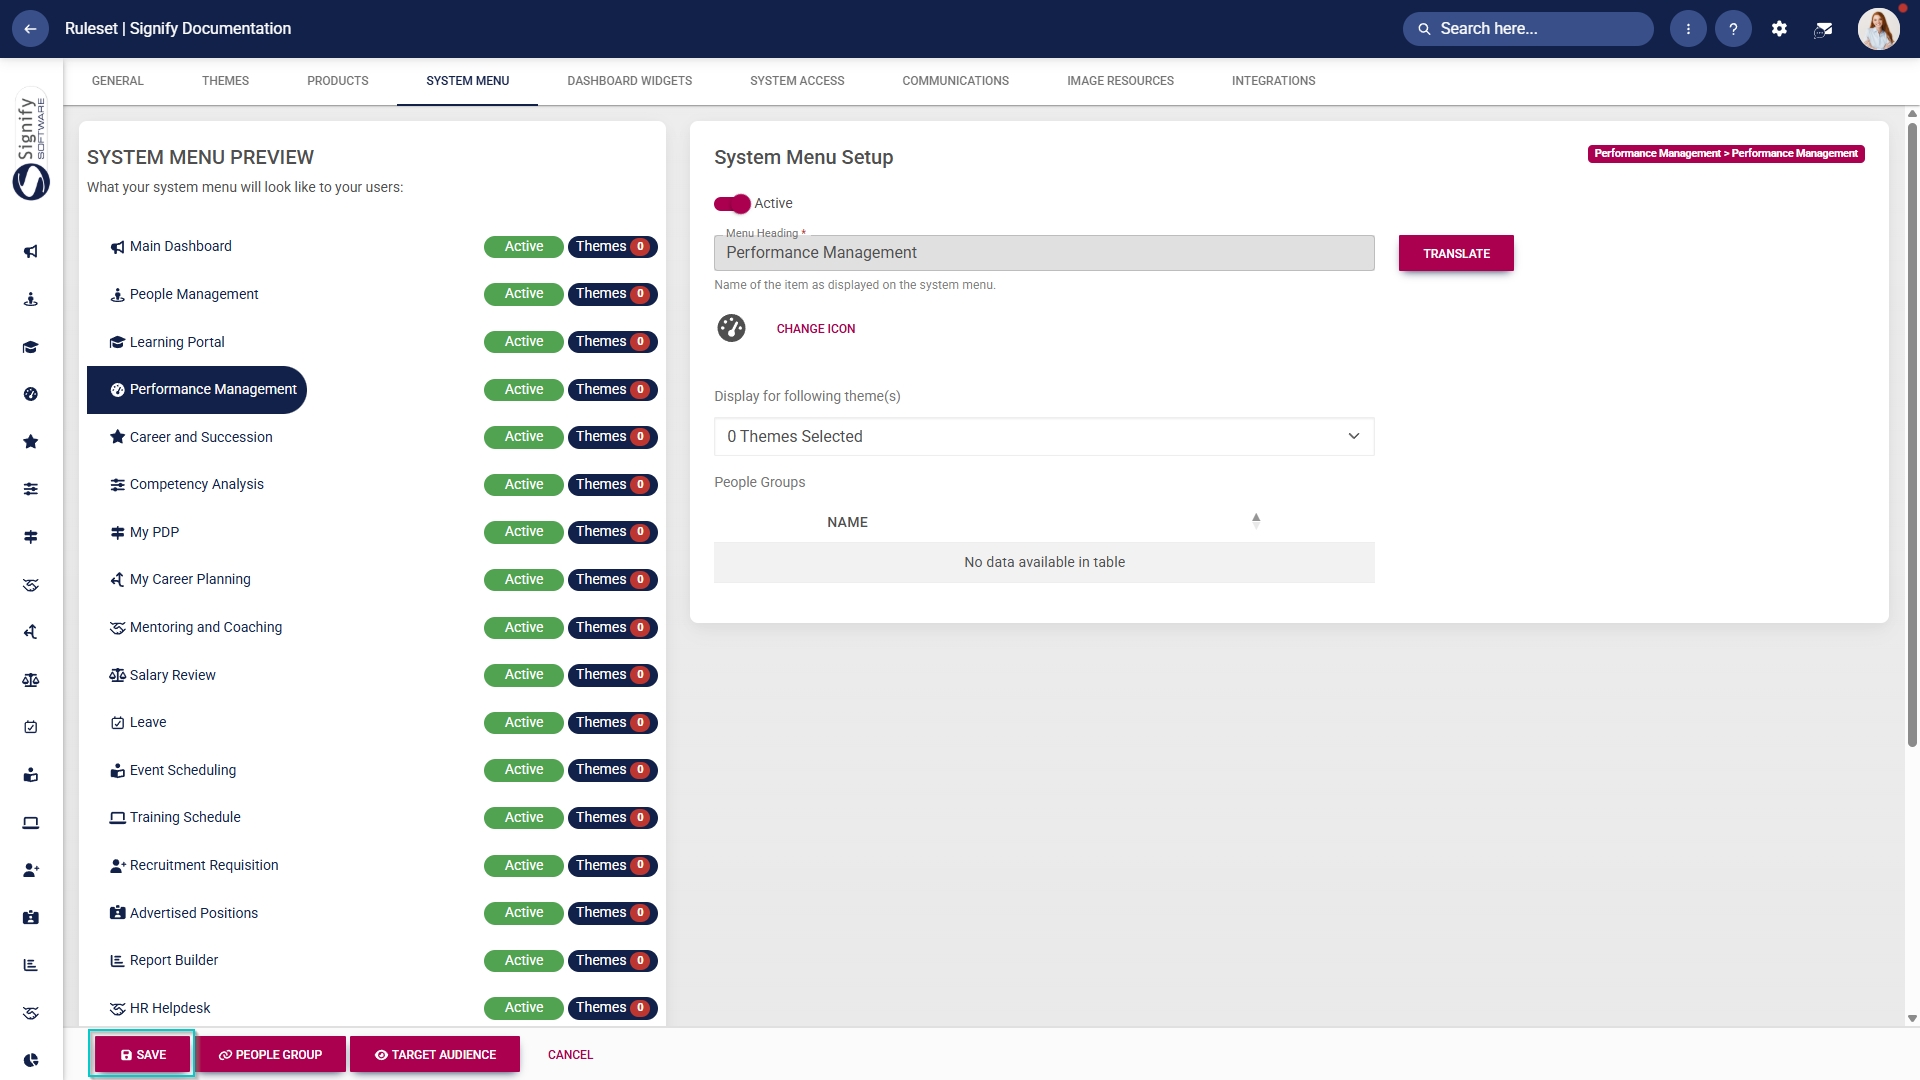
- Click the Performance Management menu item in the system menu preview.
- Click the toggle button to set the system menu item’s status to Active.
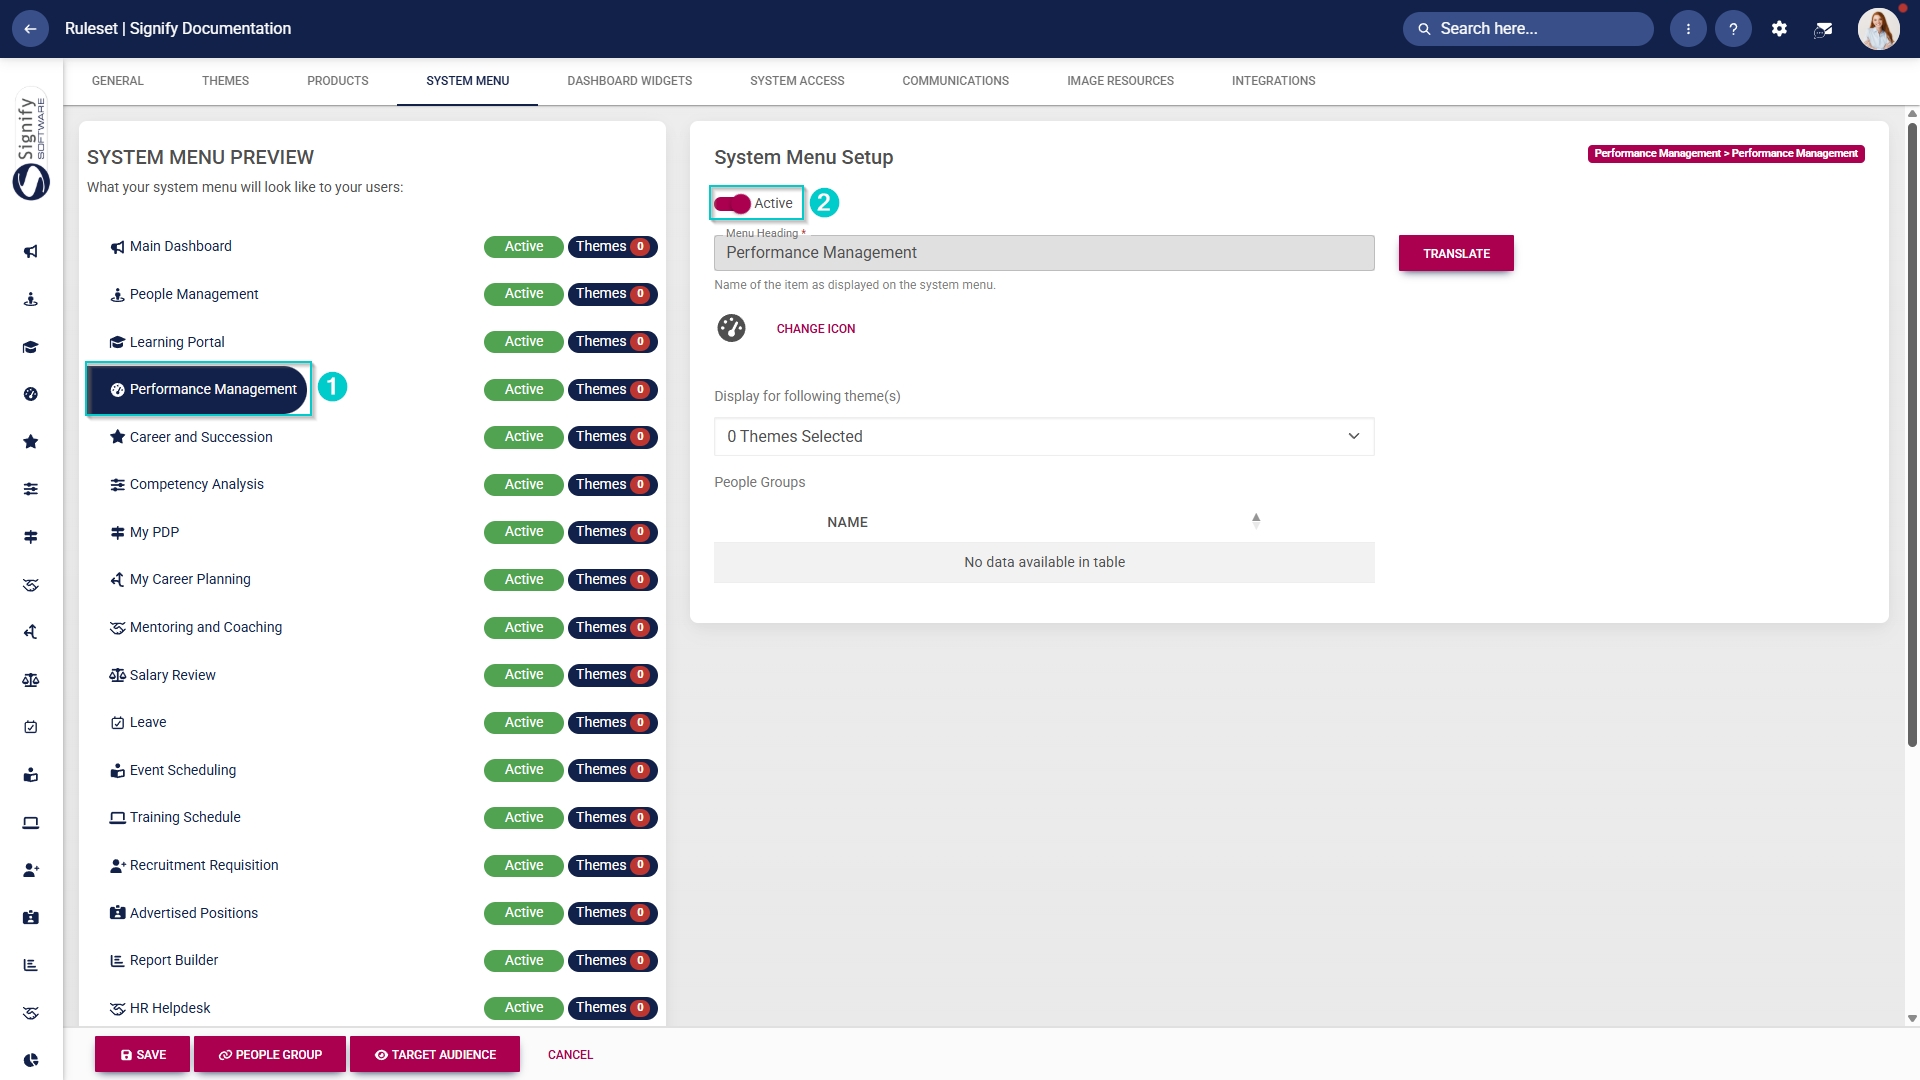
- You can select an icon for the Performance Management module by clicking CHANGE ICON.
![]()
- Click SAVE to continue or CANCEL to discard your changes.
Update the Master Data Library
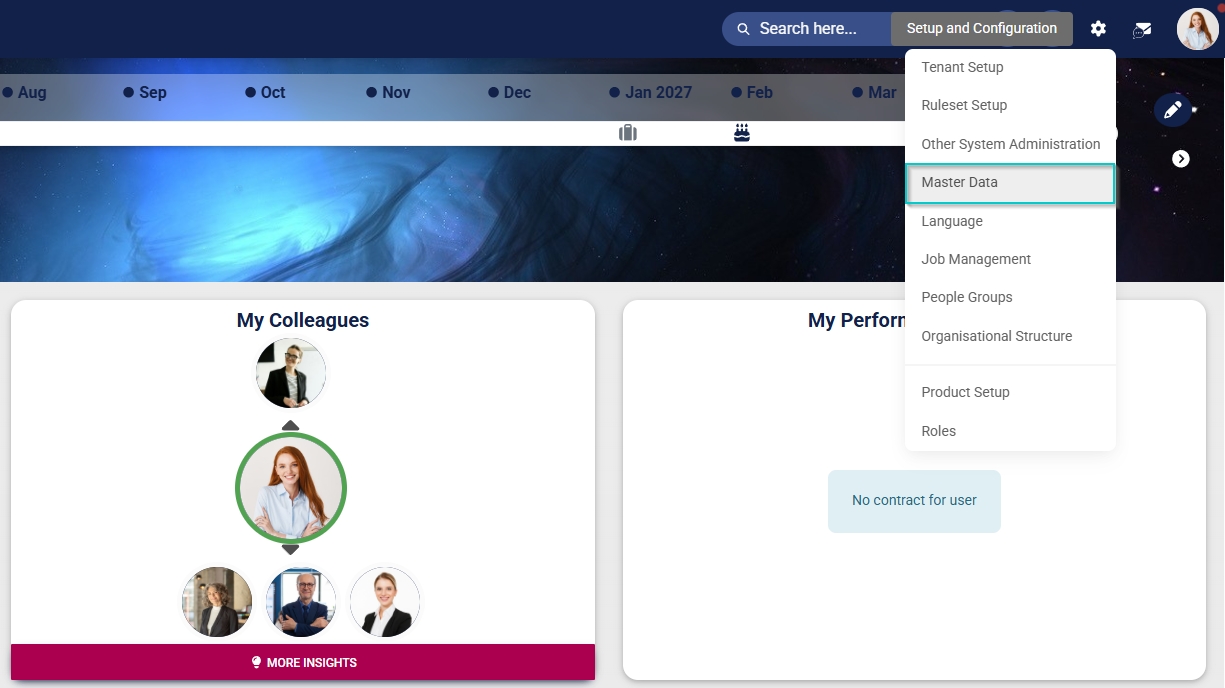
- Click the gear icon to access the Setup and Configuration menu.
- Click Master Data.
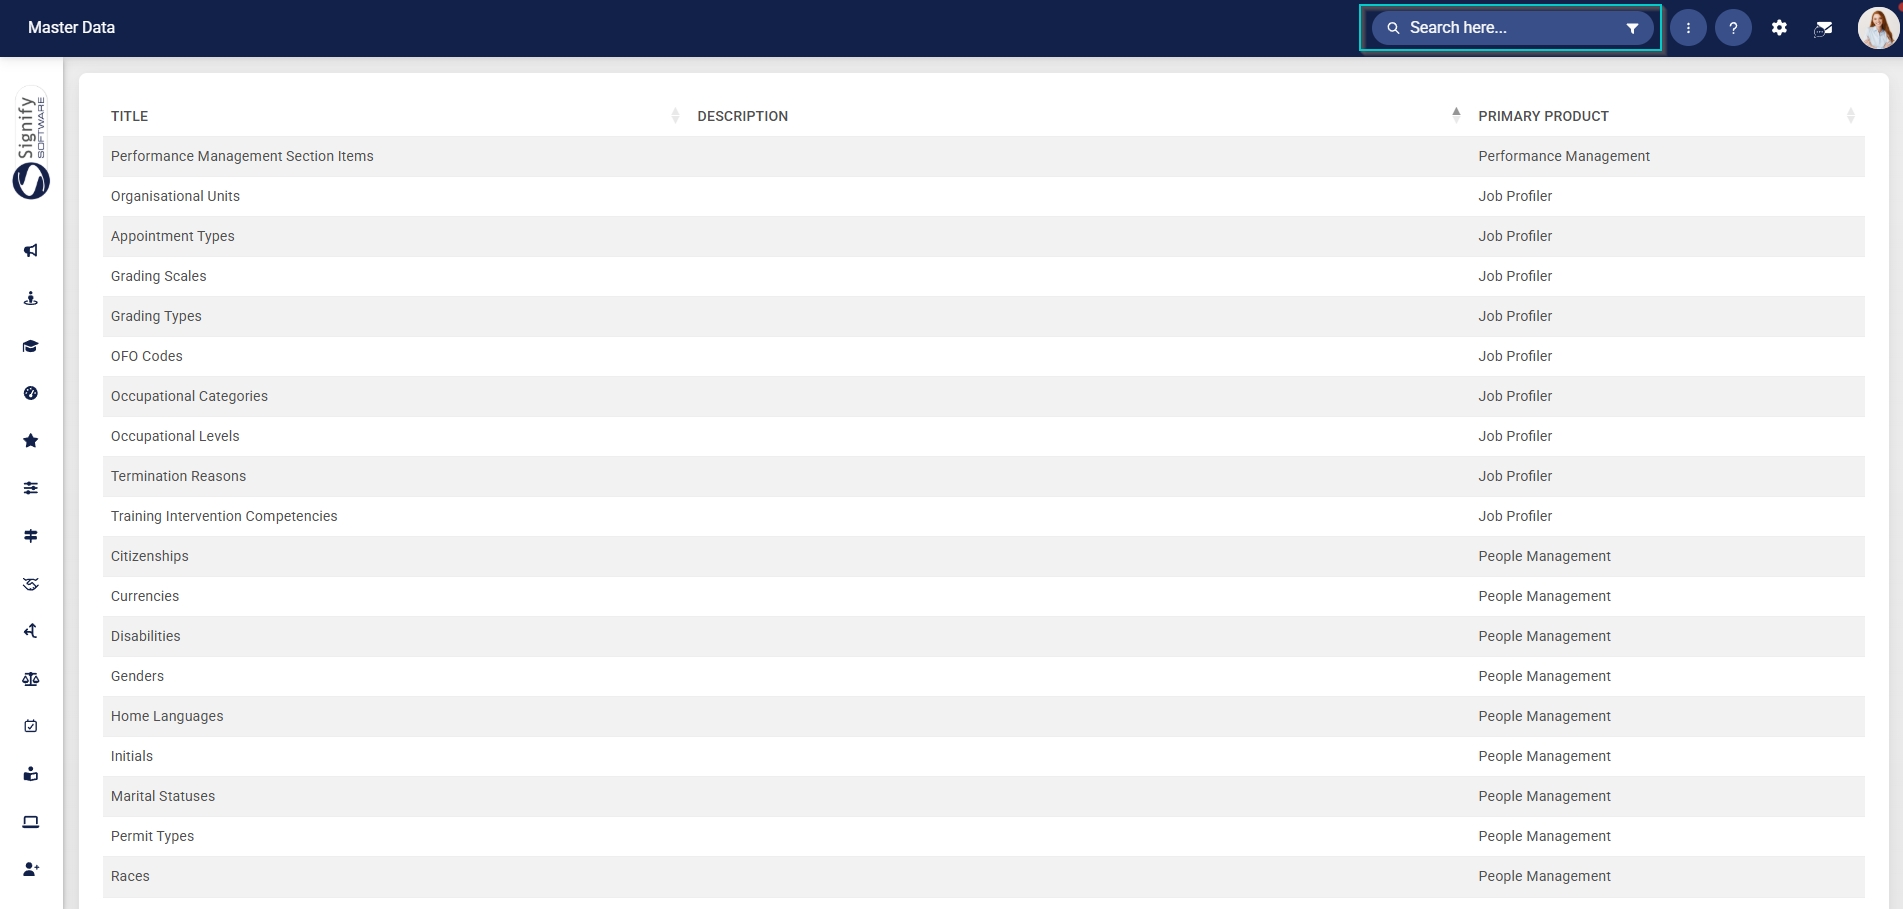
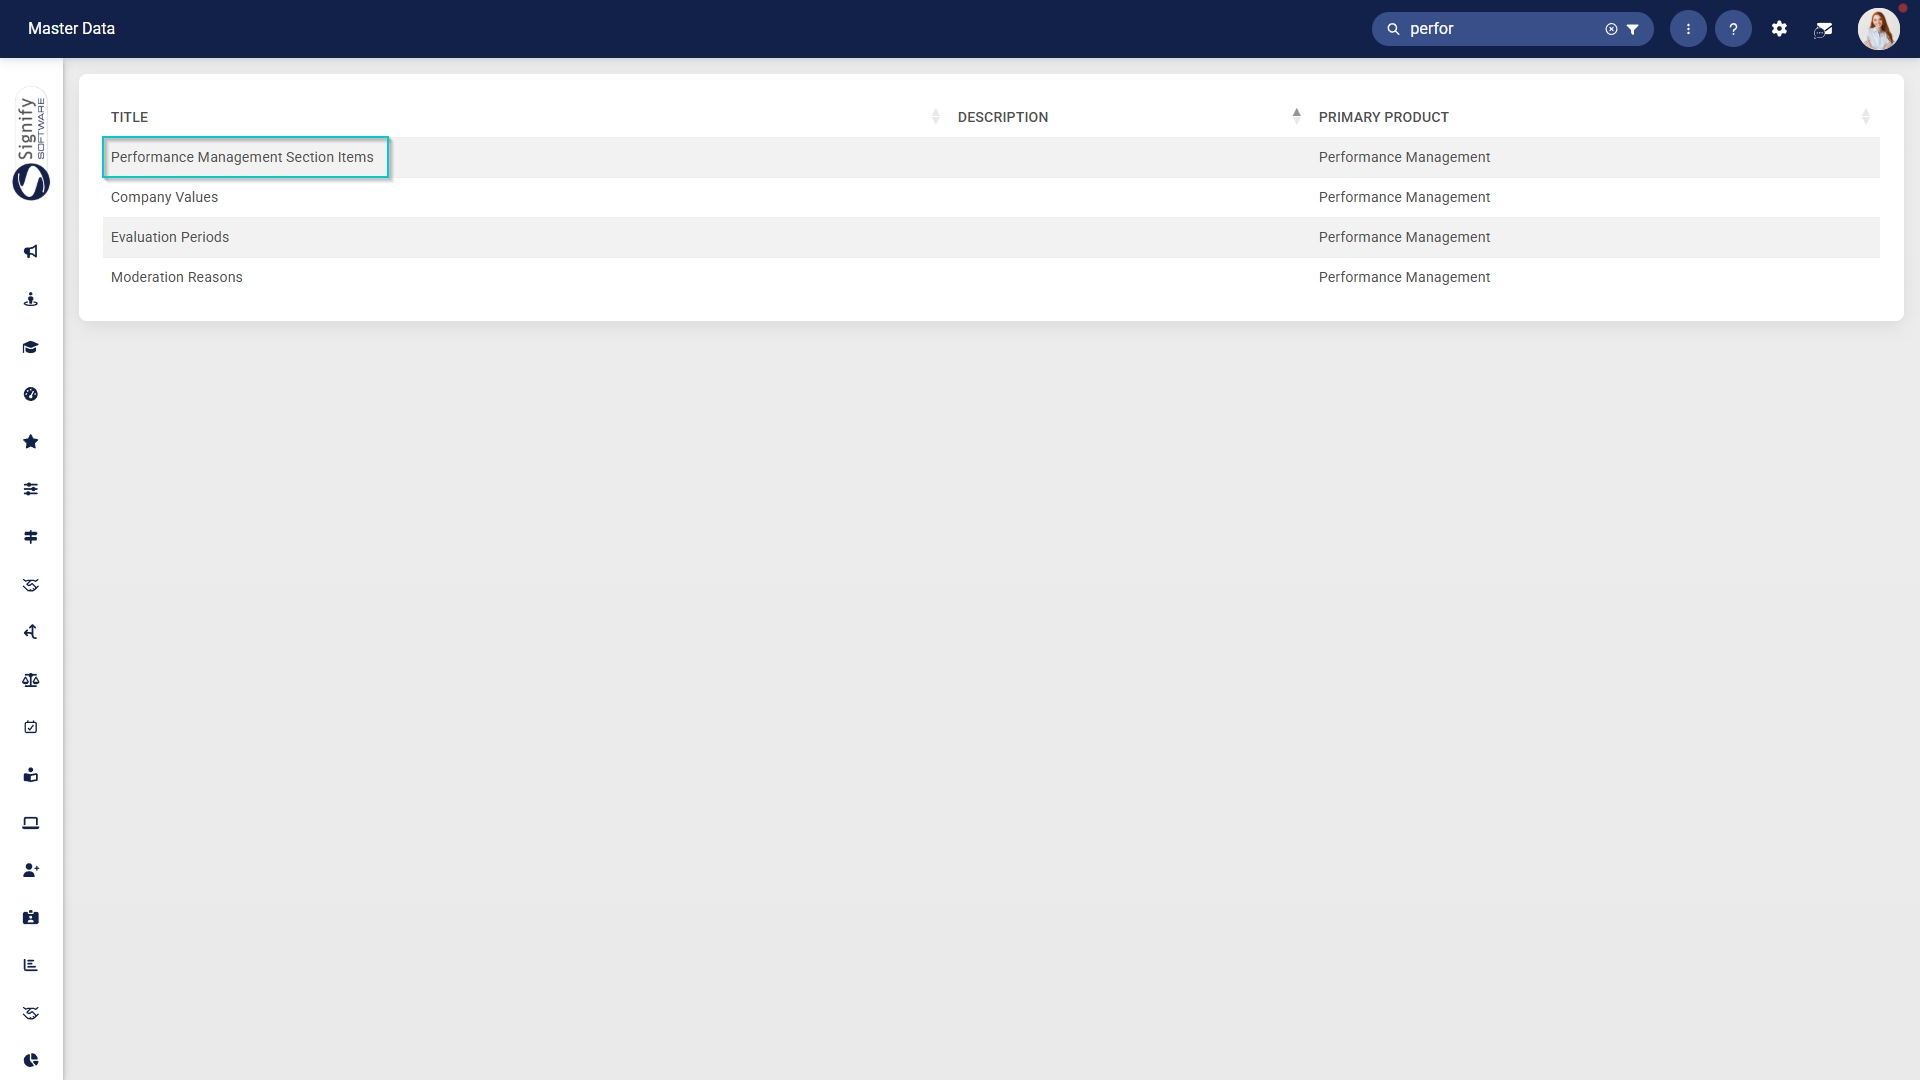
- The Master Data Library lists the categories for which administrators can create master data. Use the search bar at the top of the screen to filter the search results by Performance Management.
Configure Performance Management section items
- Click on the Performance Management Section Items category to continue.
- To add a new master data item, click on +ITEM.
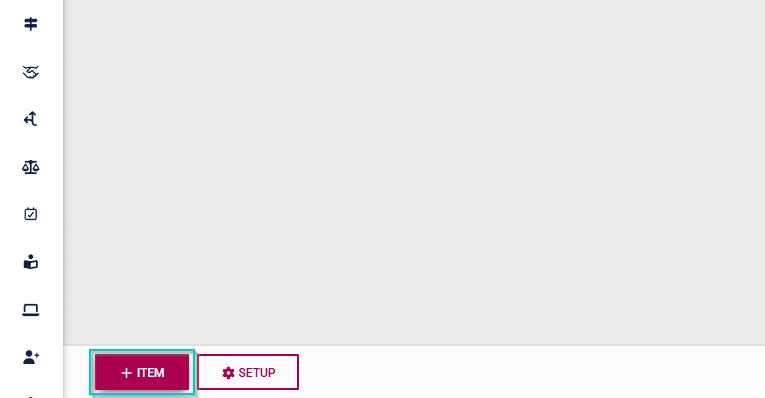
- Select the type of section item from the drop-down menu.
- Toggle the switch to set the status to active.
- Add a name for the section item.
- Add a description.
- Click SAVE when you are finished, SAVE ADD NEW to add another master data item or click CANCEL to discard your edits.
Configure evaluation periods
- Click on the Evaluation Periods category to continue.
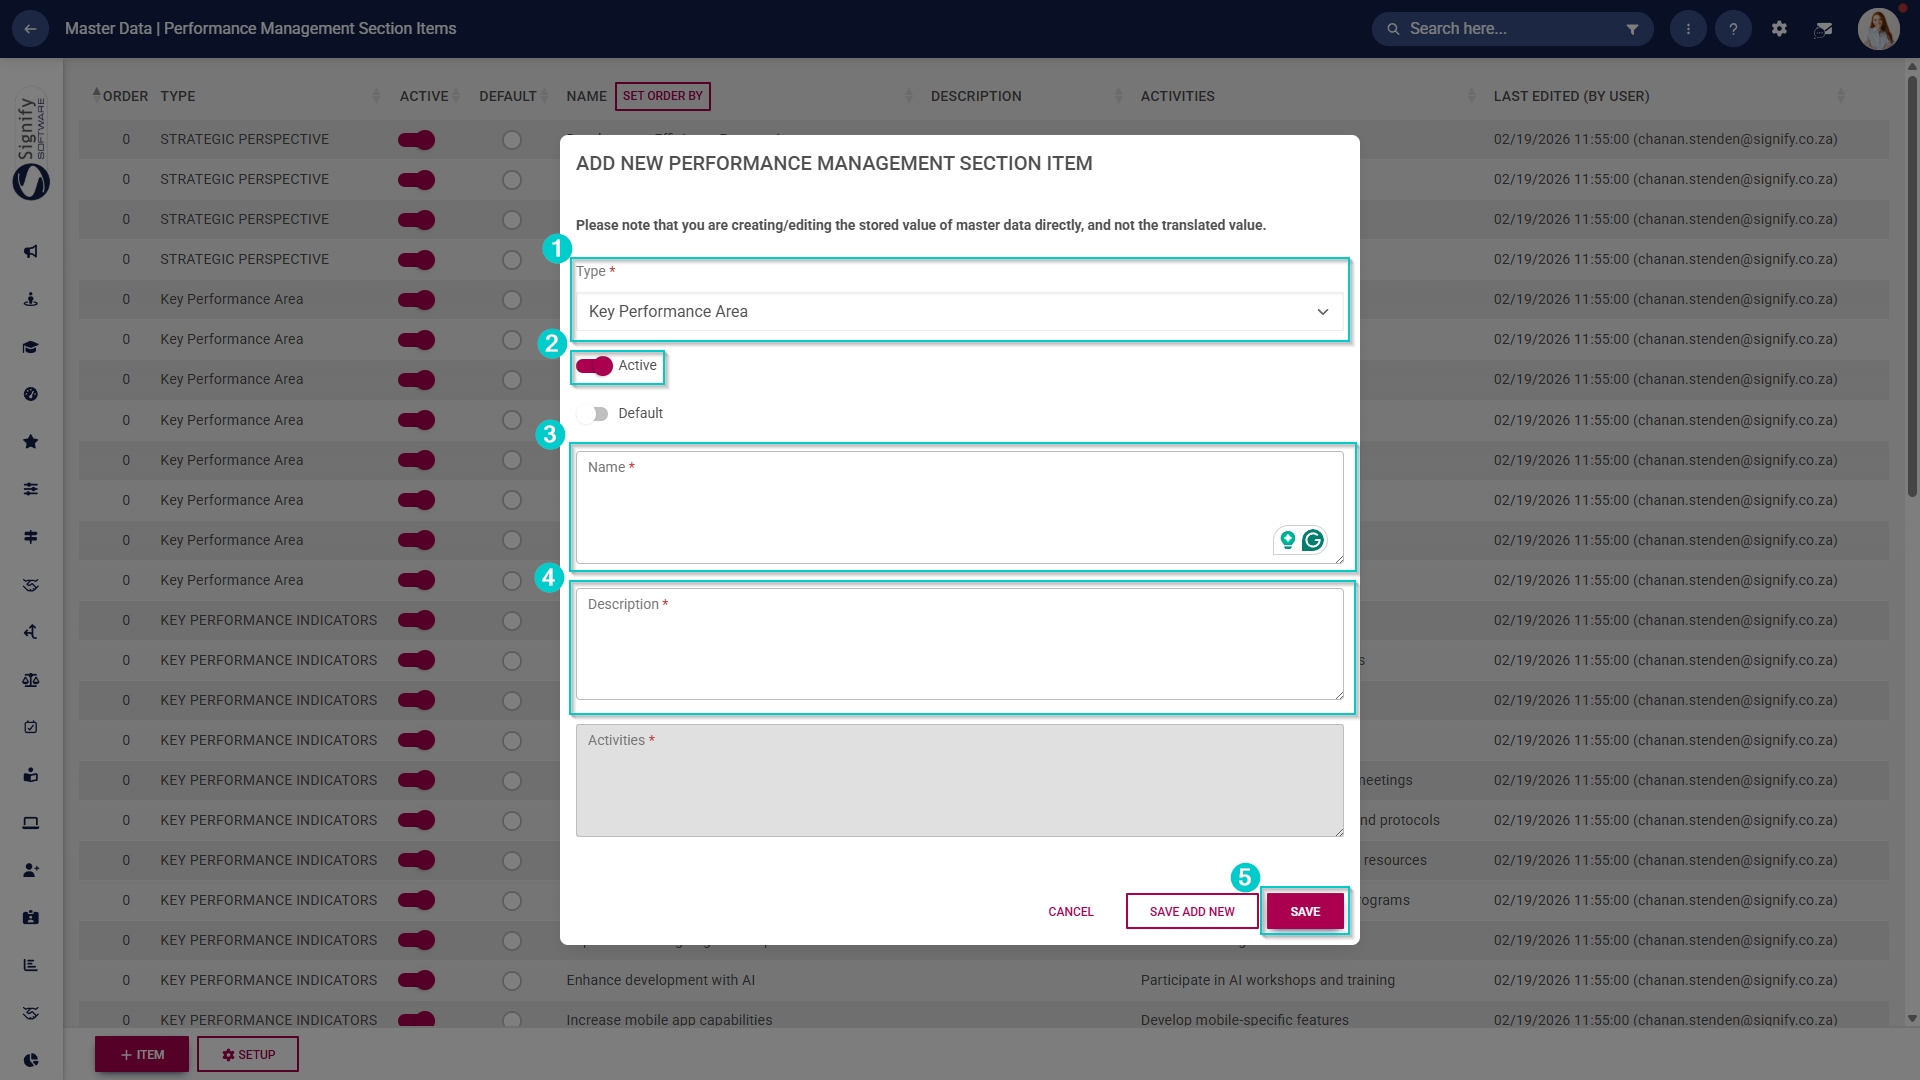
- To add a new master data item, click on +ITEM.
- Add a name for the evaluation period.
- Select a start date and an end date.
- Click SAVE when you are finished, SAVE ADD NEW to add another master data item or click CANCEL to discard your edits.
Performance Management product setup
- Click the gear icon to access the Setup and Configuration menu.
- Click Ruleset Setup.
- Select the ruleset you would like to update.
- Click on the Performance Management product card, then click Product Setup.
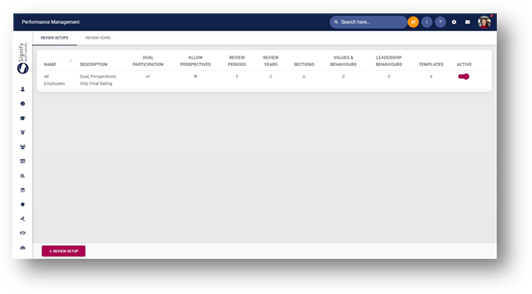
1. REVIEW SETUPS
WHY: A Review Setup consists of a set of rules and configuration. There can be more than one Review Setup if different sets of rules are used in a specific year.
WHERE: On the Performance Management Dashboard, navigate to the ![]() icon and select Product Setup. The first tab is the Review Setup.
icon and select Product Setup. The first tab is the Review Setup.
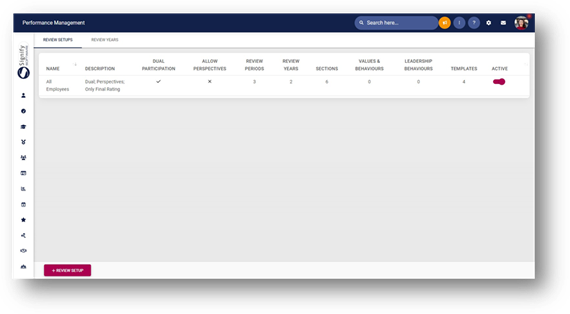
ADD A NEW REVIEW SETUP
· Click on the ![]() button located in the footer of the page.
button located in the footer of the page.
On the next page, the following sections should be completed
· Details
· Review Items
· Sections
· Templates
DETAILS
In this section, the Name and Description of the Review Setup must be completed as well as the settings the setup will use.
|
Setting Name |
Description |
|
Dual participation - Both employee and manager will take part electronically. If disabled, only the manager will take part electronically. |
Enabled: Allows employees and managers to make changes and submit the agreements
Disabled: Only the manager will be able to make changes and submit. The employee will be allowed to view the agreement. |
|
Allow the Manager to edit Review Survey Scores |
Enabled: A manager will be able to update the Review Survey Scores
Disabled: A manager will not be able to update the Review Survey Scores |
|
Allow Perspectives (Highest level of categorisation) |
Enabled: Allow this level to show
Disabled: Don’t show the level |
|
The next Review Period can only start when the previous one has been completed |
Enabled: Forces the one review period to be completed before the next one can start. Thus, if you have 2 review periods, the 1st review period needs to be finalised before you can start the 2nd period
Disabled: Both periods can be started in any order if the phases are open |
|
Person Self-Rating and Manager Rating must be approved before Final Rating can be completed
Sub-setting 1 · Show person's approved Self-Rating to manager only once the manager has approved the Manager Rating
Sub-setting 2 · Show person's approved Self-Rating to manager regardless of the Manager Rating approval status
Sub-setting 3 · Show the Manager Rating to the person only once the Final Rating has been approved. |
This setting only shows when Dual Participation has been enabled. It has sub-settings when selected. The main setting as well as the sub-setting determines how this functionality will work.
Sub-Setting 1 The person’s self-rating and the manager’s rating should be approved before the final rating can be done. The person’s self-rating will only show to the manager once the Manager Rating has been approved.
Sub-Setting 2 The person’s self-rating and the manager’s rating should be approved before the final rating can be done. The person’s approved self-rating will be shown to the manager regardless of whether the manager ratings have been approved or not
Sub-Setting 3 The person’s self-rating and the manager’s rating should be approved before the final rating can be done. The manager’s rating will only be visible to the person once the Final rating has been approved
|
|
Manager Rating and Final Rating can be completed simultaneously (Final Rating can only be approved once the person Self-Rating has been approved) |
This setting only shows when Dual Participation has been enabled.
Both the manager and final rating can be completed at the same time. The final rating can only be approved when the person’s self-ratings has been approved. The manager will only see the self-ratings once it has been approved. The employee will see the manager ratings once it has been approved and will see the final ratings when it has been approved. |
|
Only show the Final Rating column, and hide the Manager Rating column |
This setting only shows when Dual Participation has been enabled.
The manager rating column is hidden and only the self-ratings and final ratings are needed. The final rating can only be approved when the person’s self-ratings has been approved. |
|
Hide Scores and Weights during Rating Phase |
Enabled: Instead of the scores displaying, the labels will show added on the rating scales.
Disabled: The normal score will be displayed. |
|
Allow excluding Review Items |
Enabled: The Review Items can be excluded from the Overall Final Score
Disabled: All Review Items are included in the Overall Final Score |
|
Auto-copy Objective Settings - The Objective Settings from the previous Review Period will be copied as well as the status the Review Period was in (approved or in progress) |
Enabled: The objective settings from the previous review period will be automatically copied as well as the status. The pop-up will not show when clicking on the start button.
Disabled: The pop-up to select how the agreement should be created are shown. |
|
Allow other people (apart from the manager) to also rate a person on the lowest level (Example KPI level)
Sub-setting 1 · Allow Anonymous Evaluations
Sub-setting 1.1 o Show the results anonymously (Manager and Employee will not see who submitted the ratings)
Sub-setting 1.2 o Show the results anonymously only to the Employee (Manager will see who submitted the ratings, but not the Employee) |
Enabled: The ability to select people to evaluate on a specific KPI is made available
Disabled: People cannot evaluate on a KPI
Sub-setting 1 Enabled: The results of the evaluations are shown anonymously.
Disabled: The person who submitted the evaluation will be shown with the comments and ratings.
Sub-setting 1.1 This setting show when Anonymous Evaluations have been enabled. Both the manager and employee will not see who submitted the ratings.
Sub-setting 1.2 This setting show when Anonymous Evaluations have been enabled. The employee will not be able to see who submitted the ratings and comments, but the manager will be able to see who did.
|
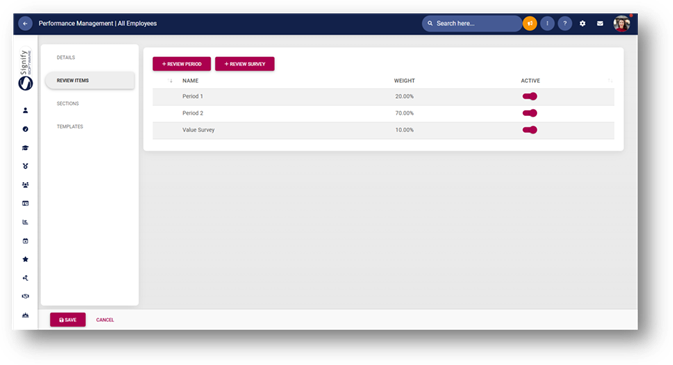
REVIEW ITEMS
· The Review Items are the Review Periods
o A period consists of 3 phases – Objective Settings, Check-Ins and Ratings
· New Review Periods and Review Surveys can be added
· The periods have their own weights – the total should always have a total weight of 100%
SECTIONS
· These are the Sections available on the Performance Agreement
o Primary Goals
o Stretch Goals
o Values & Behaviours
o Leadership behaviours
o Key Competencies
o Action Plan
The active sections should add up to 100%. Each section’s content is explained below.
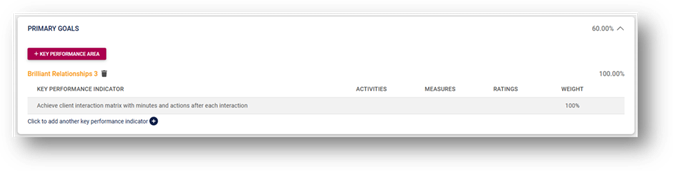
PRIMARY GOALS
|
Item |
Description |
|
Weight (%) |
This is the weight for this section |
|
Active |
This section cannot be switched off |
|
Key Performance Indicator weights must total to 100% within each Key Performance Area
Sub-setting Automatically distribute item weights |
The KPI’s within each KPA should add to 100%.
Sub-setting Instead of adding weights for each KPI, the weights are distributed equally. |
|
Key Performance Indicator weights must total to 100% for the Section |
Within the section, all KPI’s across all KPA’s should add to 100%. Example: There are 2 KPA’s. Within each KPA, there are 3 KPI’s. All 6 KPI’s should add to 100%. |
|
Allow Section Weight Change |
This allows the user to change the allocated weight. |
|
Performance Rating Scales |
These are the Rating Scales that is used when the Rating Phase is open. A rating scale can b added that is excluded from the score. |
|
Check-in Rating Scales |
These are the Rating Scales that is used when the Check-ins Phase is open. |
STRETCH GOALS
|
Item |
Description |
|
Weight (%) |
This is the weight for this section |
|
Active |
This setting determines whether the section is active or not |
|
Key Performance Indicator weights must total to 100% within each Key Performance Area
Sub-setting Automatically distribute item weights |
The KPI’s within each KPA should add to 100%.
Sub-setting Instead of adding weights for each KPI, the weights are distributed equally. |
|
Key Performance Indicator weights must total to 100% for the Section |
Within the section, all KPI’s across all KPA’s should add to 100%. Example: There are 2 KPA’s. Within each KPA, there are 3 KPI’s. All 6 KPI’s should add to 100%. |
|
Allow Section Weight Change |
This allows the user to change the allocated weight. |
|
Performance Rating Scales |
These are the Rating Scales that is used when the Rating Phase is open. A rating scale can b added that is excluded from the score. |
|
Check-in Rating Scales |
These are the Rating Scales that is used when the Check-ins Phase is open. |
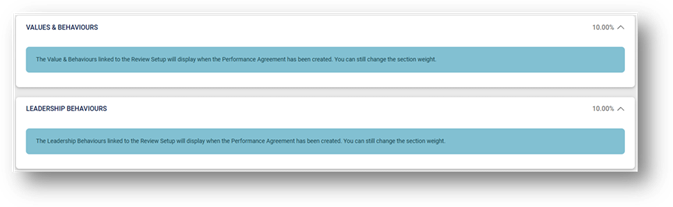
VALUES & BEHAVIOURS
|
Item |
Description |
|
Weight (%) |
This is the weight for this section |
|
Active |
This setting determines whether the section is active or not |
|
Allow Section Weight Change |
This allows the user to change the allocated weight. |
|
Automatically distribute item weights |
Instead of adding weights for each KPI, the weights are distributed equally. |
|
Allow the user to change the items in this list |
This allows other items to be linked to this section. The linked items will display on the agreement and more can be added if this setting is enabled. |
|
Performance Rating Scales |
These are the Rating Scales that is used when the Rating Phase is open. A rating scale can b added that is excluded from the score. |
|
Check-in Rating Scales |
These are the Rating Scales that is used when the Check-ins Phase is open. |
|
Linked Items |
Values & Behaviours can be linked to this section. All agreements in this review setup will have these items display on the agreements. |
LEADERSHIP BEHAVIOURS
|
Item |
Description |
|
Weight (%) |
This is the weight for this section |
|
Active |
This setting determines whether the section is active or not |
|
Allow Section Weight Change |
This allows the user to change the allocated weight. |
|
Automatically distribute item weights |
Instead of adding weights for each KPI, the weights are distributed equally. |
|
Allow the user to change the items in this list |
This allows other items to be linked to this section. The linked items will display on the agreement and more can be added if this setting is enabled. |
|
Performance Rating Scales |
These are the Rating Scales that is used when the Rating Phase is open. A rating scale can b added that is excluded from the score. |
|
Check-in Rating Scales |
These are the Rating Scales that is used when the Check-ins Phase is open. |
|
Linked Items |
Values & Behaviours can be linked to this section. All agreements in this review setup will have these items display on the agreements. |
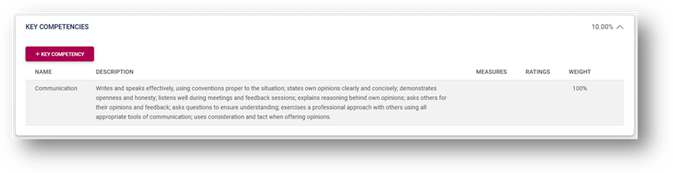
KEY COMPETENCIES
|
Item |
Description |
|
Weight (%) |
This is the weight for this section |
|
Active |
This setting determines whether the section is active or not |
|
Allow Section Weight Change |
This allows the user to change the allocated weight. |
|
Automatically distribute item weights |
Instead of adding weights for each KPI, the weights are distributed equally. |
|
Allow the user to change the items in this list |
This allows other items to be linked to this section. The linked items will display on the agreement and more can be added if this setting is enabled. |
|
Performance Rating Scales |
These are the Rating Scales that is used when the Rating Phase is open. A rating scale can b added that is excluded from the score. |
|
Check-in Rating Scales |
These are the Rating Scales that is used when the Check-ins Phase is open. |
ACTION PLAN
|
Item |
Description |
|
Active |
This setting determines whether the section is active or not |
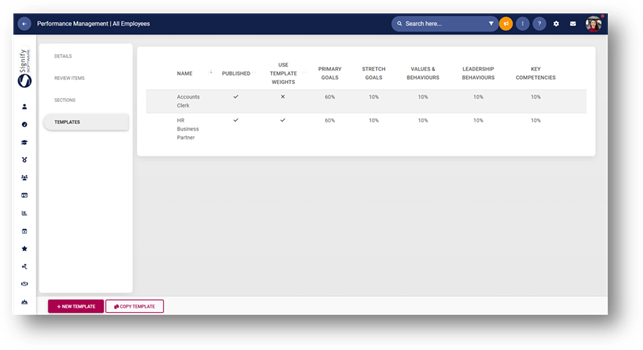
TEMPLATES
WHY: Templates are used when 2 or more people have the same content/objectives on their Performance Agreements.
WHERE: On the Performance Management Dashboard, navigate to the ![]() icon and select Product Setup. On the Review Setu tab, click to edit the Review Setup and navigate to the Templates menu. Click on the
icon and select Product Setup. On the Review Setu tab, click to edit the Review Setup and navigate to the Templates menu. Click on the ![]() button in the footer of the page.
button in the footer of the page.
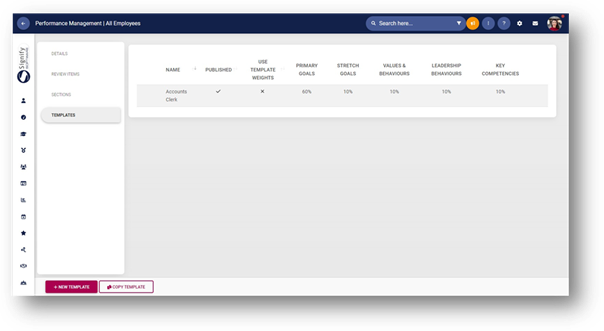
TEMPLATE DETAILS
The following details is required:
· Name
o This is the distinct name of the template to ensure that people will know what the template is
o Use names such as Job Titles for example
· Published
o When this setting is enabled, this template will be available to the people to copy from
· Use Template Weights
o The weights of the sections can be overridden when creating the templates
o If the weights of the sections should be used, disable this section
TEMPLATE CONTENT
· The sections that have been enabled is shown here
· Perspectives, Key Performance Area and Key Performance Indicators should be added for each enabled section
· Values & Behaviours and Leadership Behaviours that is linked to the Review Setup will display when the Performance Agreement has been created.
· Key Competencies should be added to the template
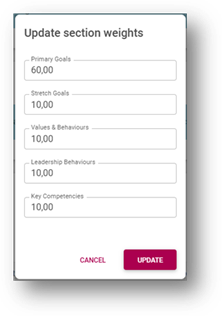
· To Update the Section weights, click on the ![]() button
button
o A pop-up will open, and the weights can be updated for each section
· Once the Template have been created, click on the ![]() button.
button.
· The template is saved and available in the list
· A template can also be copied. Click on the ![]() button
button
· A list of all available templates across Review Setups are displayed
· Click on the Template that needs to be copied and click on the ![]() button
button
· The template is copied and has “Copy of…” in front of the Name which can be updated by clicking on the row
· A template can be previewed, copied and deleted by hovering on the row

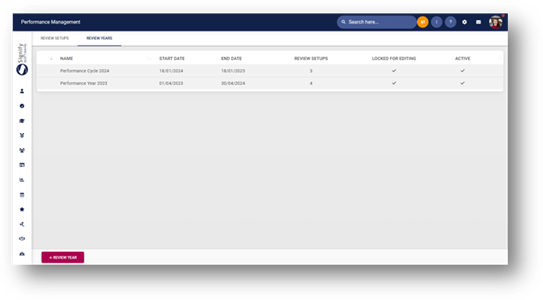
2. REVIEW YEARS
WHY: The Review Year is the cycle in which the phases are done. It consists of different setups linked and periods in which the phases should be completed. People Groups are linked to a Review Setup which is linked to the Review Year.
WHERE: On the Performance Management Dashboard, navigate to the ![]() icon and select Product Setup. On the Review Year tab. Click on the
icon and select Product Setup. On the Review Year tab. Click on the ![]() button.
button.
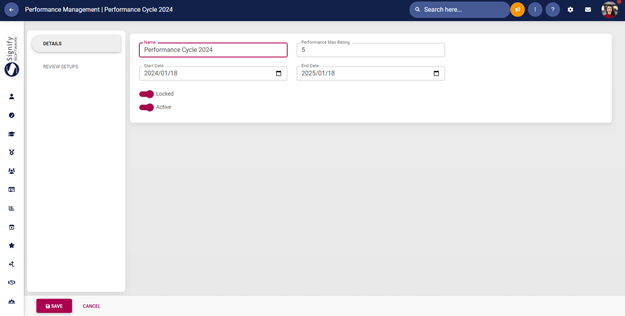
DETAILS SECTION
· The following fields should be completed:
o Name
o Performance Max Rating
§ The scores will be calculated according to the Max Rating
· Example: 2.59 out of 5.00
o Start Date
o End Date
o Locked
§ When this setting is enabled, the Agreements cannot be edited
o Active
§ When this setting is enabled, the end-user will see this year in the drop-down list of the dashboard
· Click on the ![]() button
button
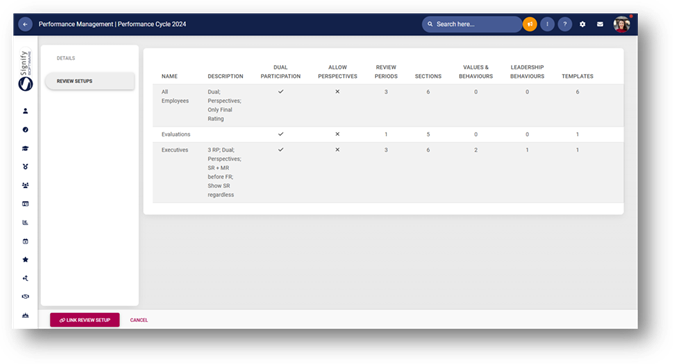
REVIEW SETUPS
· In this section, the applicable Review Setups that were created in the Review Setup tab, can be linked to the year
· To link a Review Setup, click on the ![]() button
button
· A pop-up opens with a list of all the existing Review Setups
· Click on a row to select a setup and click on the ![]() button
button
· All linked Review Setups are displayed in the list
· To complete the setup, the Review Periods and phases should be configured
· Click on the row to configure the Review Periods
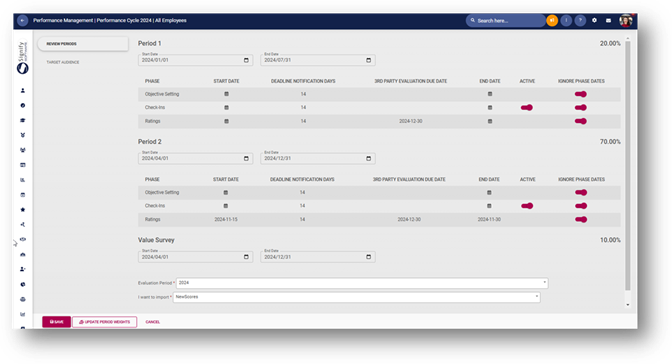
REVIEW PERIOD SECTION
· The Review Period that was configured on the Review Setup is displayed in this section
· The start and end date should be defined as well as the phase dates
· To add a phase date, click on the start date row of the phase
· A pop-up opens to add the following dates
o Start Date of the phase
o End Date of the phase
o Deadline Notification Days
o 3rd Party Evaluation Due Date (if applicable and available only for the Ratings Phase)
· When all the dates have been configured, click on the ![]() button in the footer of the page
button in the footer of the page
· The Review Survey has the following fields to be completed
o Start Date
o End Date
o Evaluation Period
§ Values are derived from the 360 Evaluations
o I want to import
§ Only New Scores
§ New Scores and overwrite already imported scores
TARGET AUDIENCE
· The last of the setup is to link People Groups to the Review Setup
o These people will be using all configuration of the Review Setup that is linked to the Review Year
· Click on the ![]() button
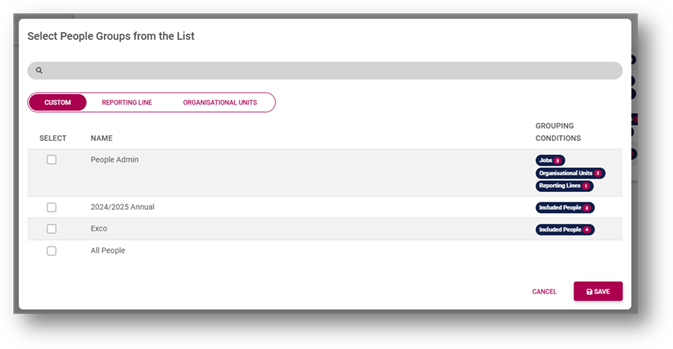
button
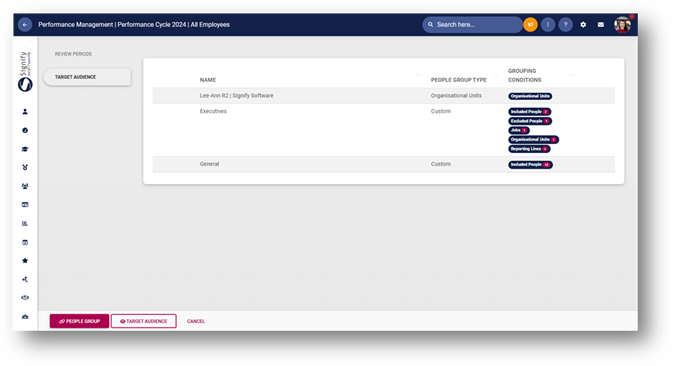
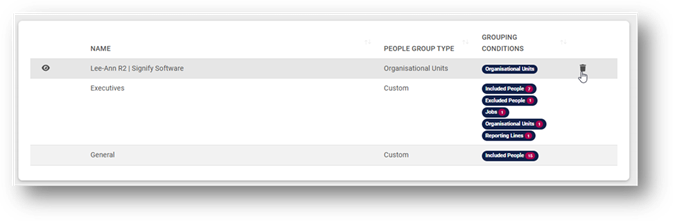
· A pop-up opens with all the created People Groups in the list
· Multiple People Groups can be selected
· Once the groups have been selected, click on the ![]() button
button
· The People Groups are now available in the list

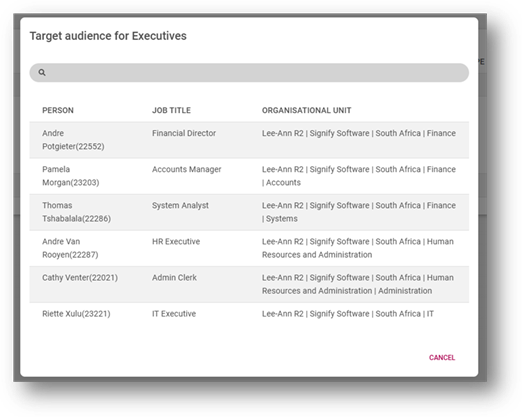
· The people linked to each group can be viewed by clicking on the view icon on the row
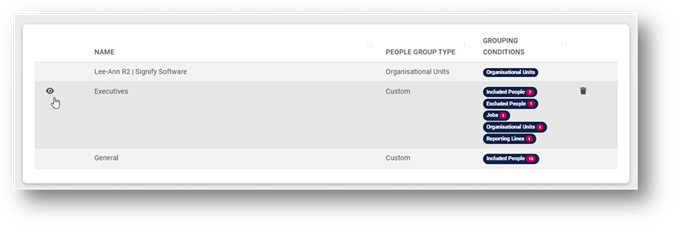
· A pop-up opens with the list of people linked to the People Group
· The People Group can be removed from the Target Audience by clicking on the delete icon on the row
· The combined list of People Groups forms part of the Target Audience
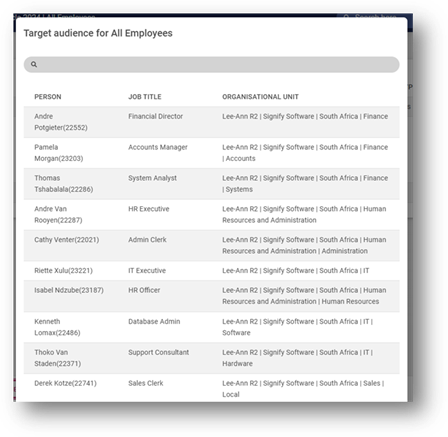
· To see the whole list, click on the ![]() button
button
· A pop-up opens with the list of people that is linked to the Review Setup for the specific Year
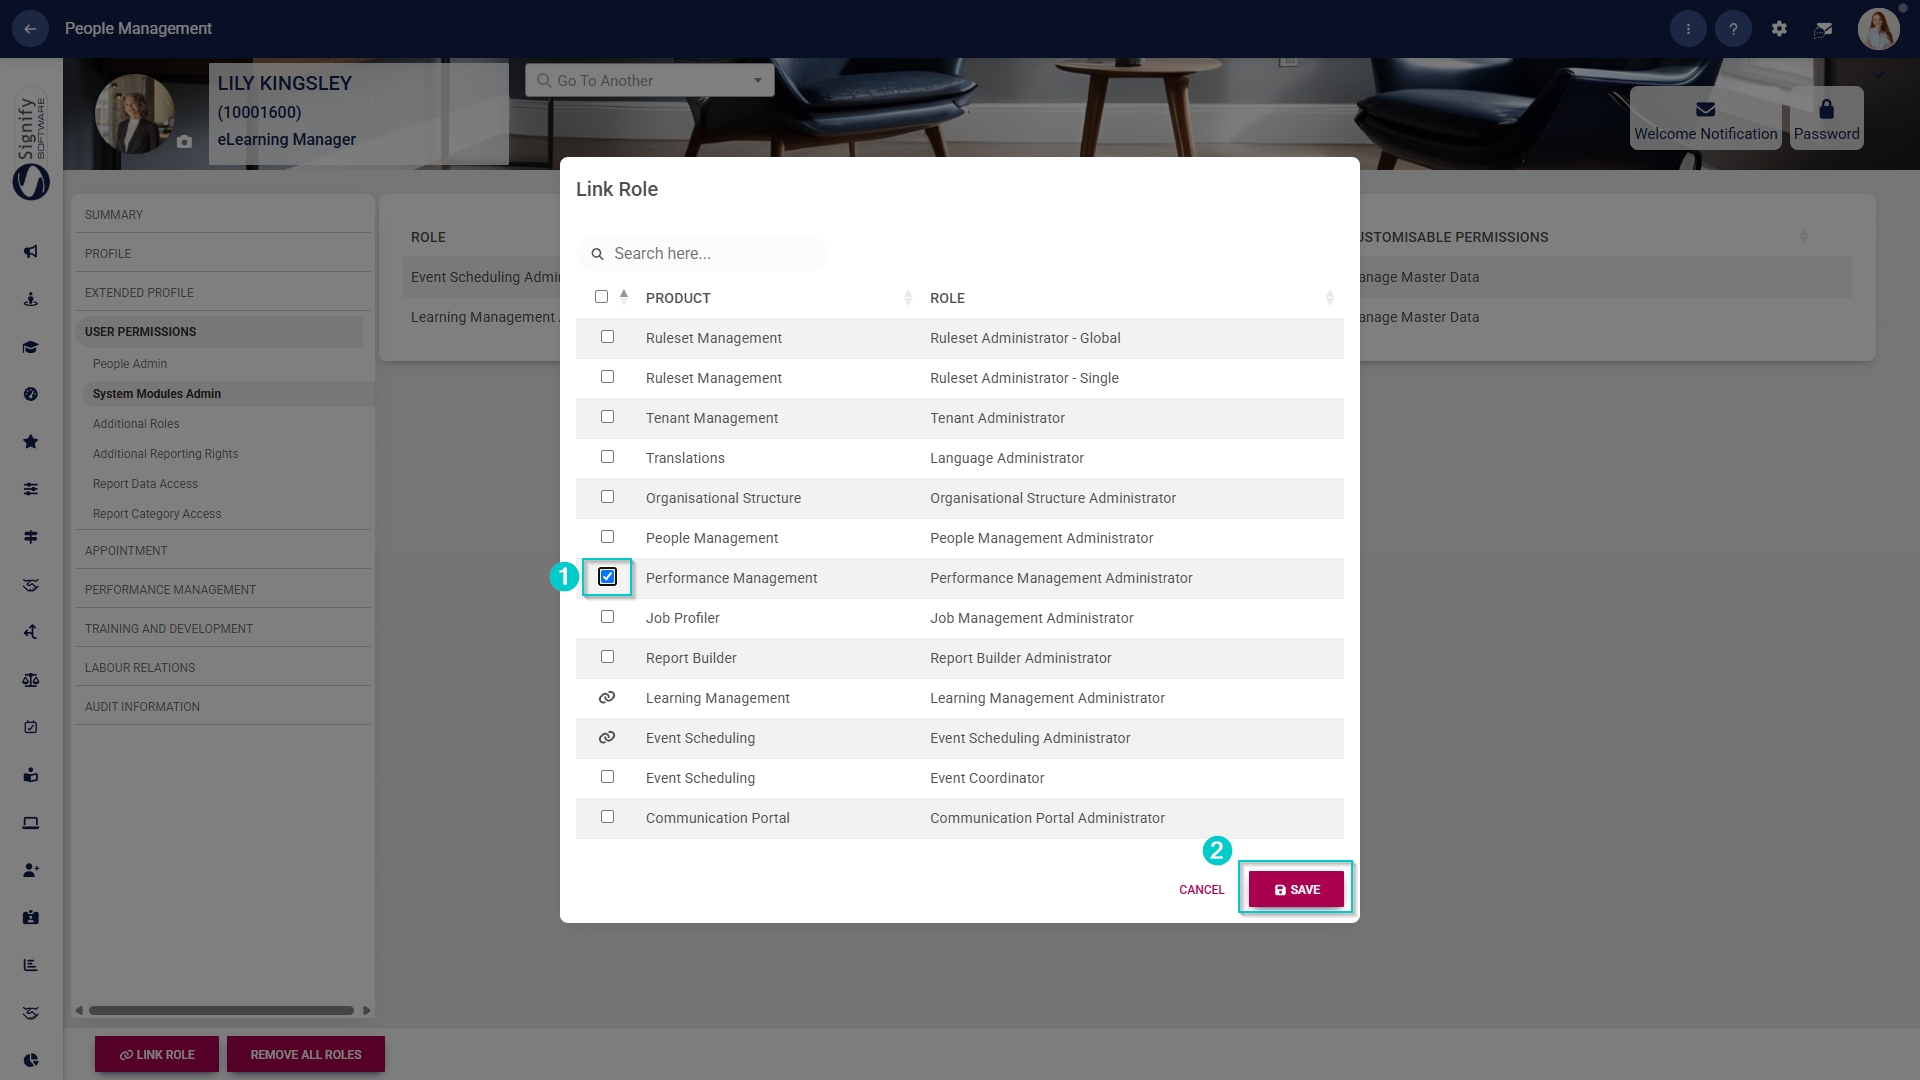
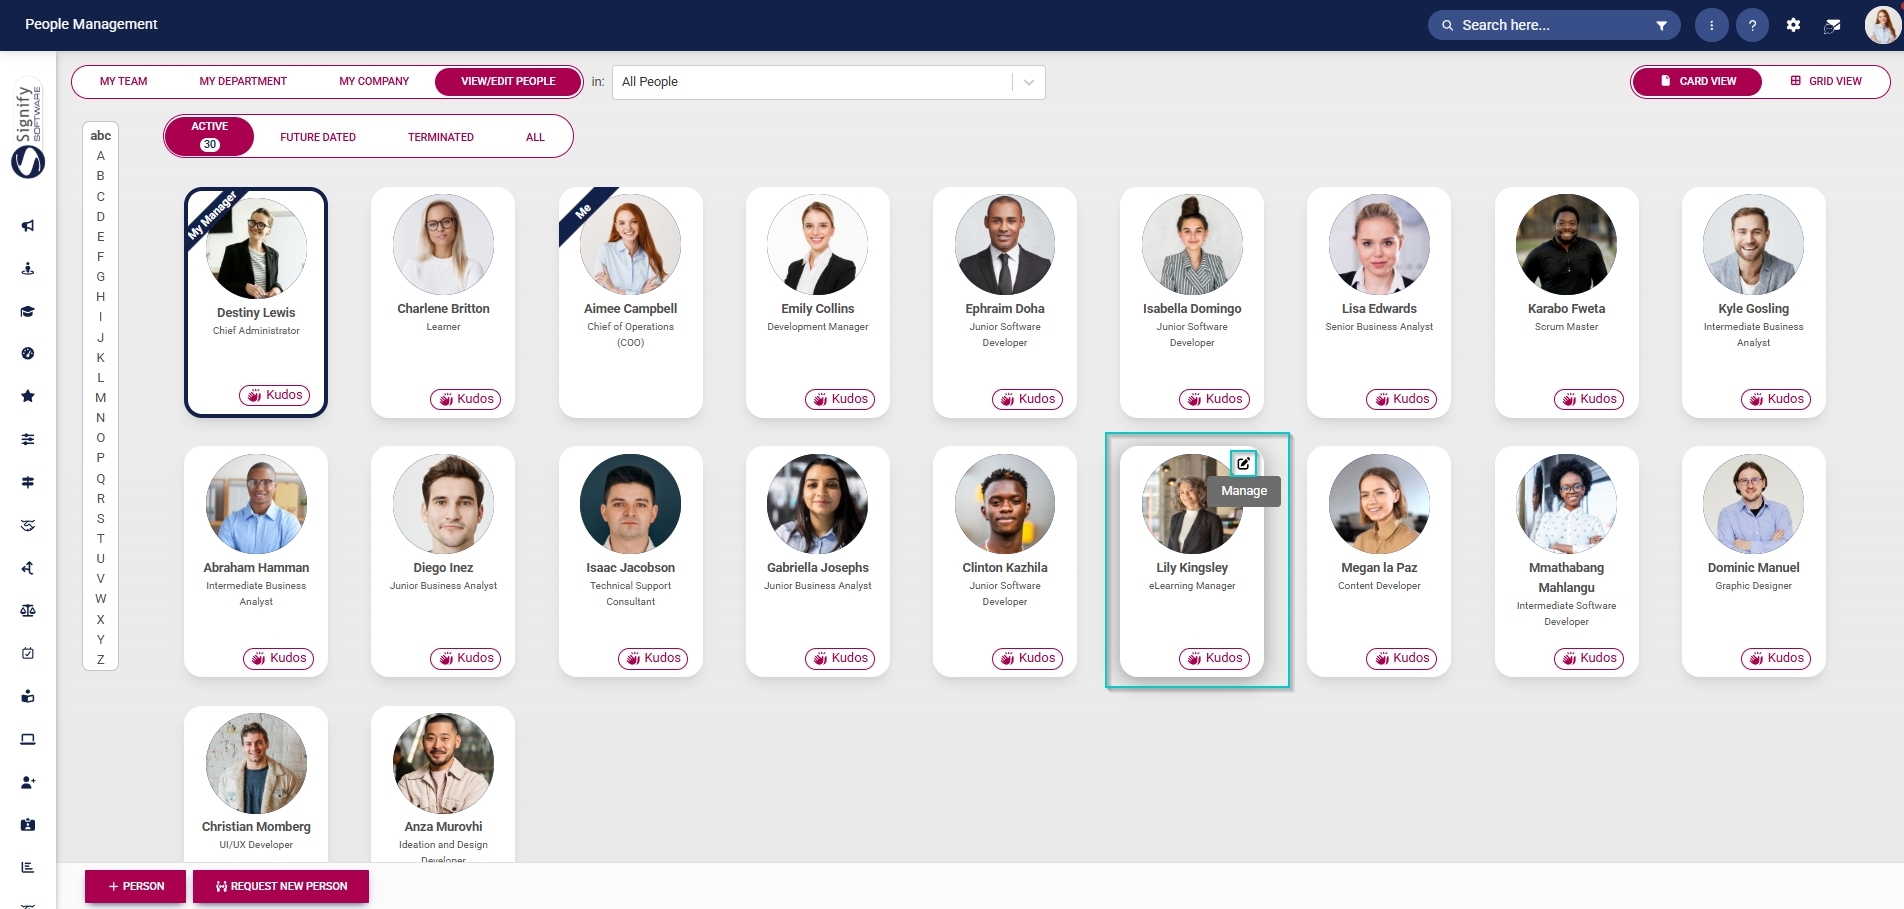
Assign the Performance Management administrator permission
- Hover over the sidebar menu, then click People Management.


- Click the pencil icon to manage the person whose profile you want to edit.
- In the left-hand menu, navigate to User Permissions, then click System Modules Admin.
- Click the LINK ROLE button.
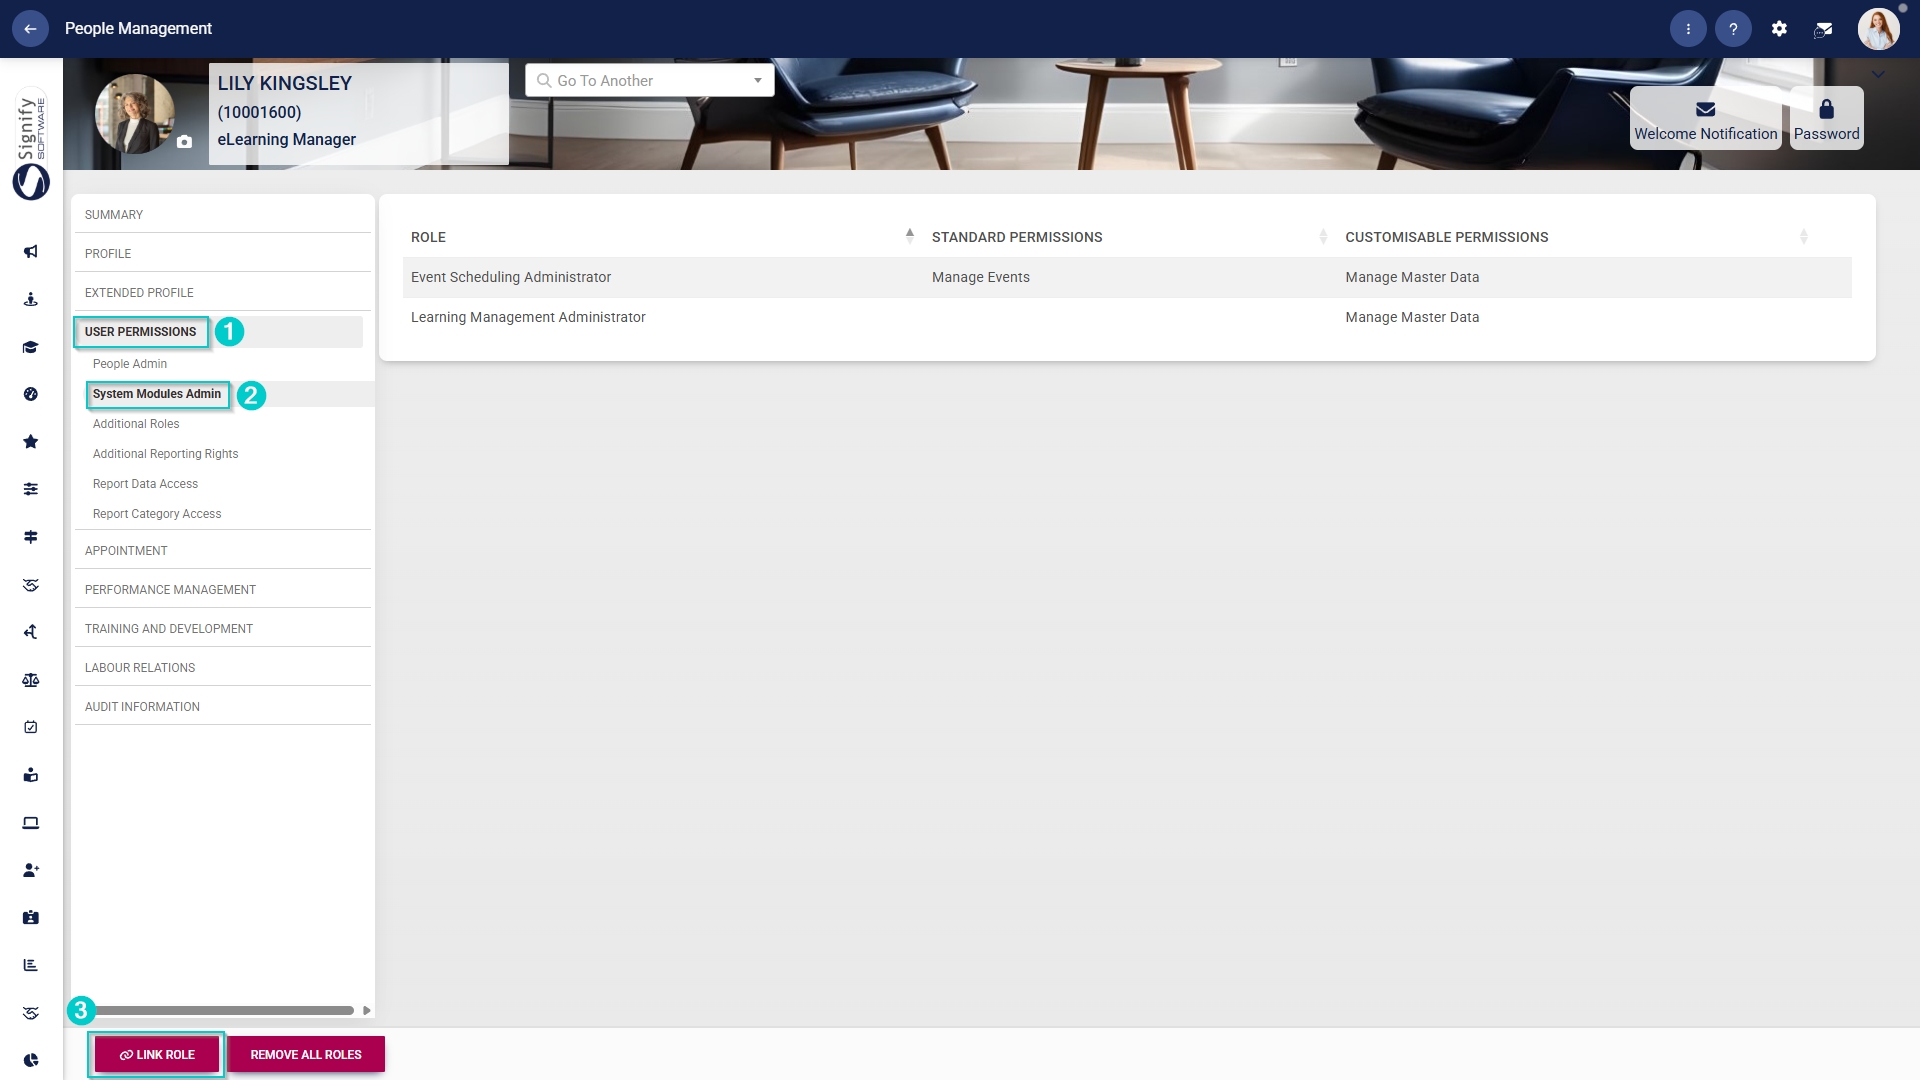
- Tick the checkbox next to Event Scheduling in the table to assign the Event Scheduling administrator role to the user.
- Click SAVE to continue or CANCEL to discard your changes.