Email setup using Token-based authentication with MS365
When setting up Signify to make use of 365 the token-based authentication option is available.
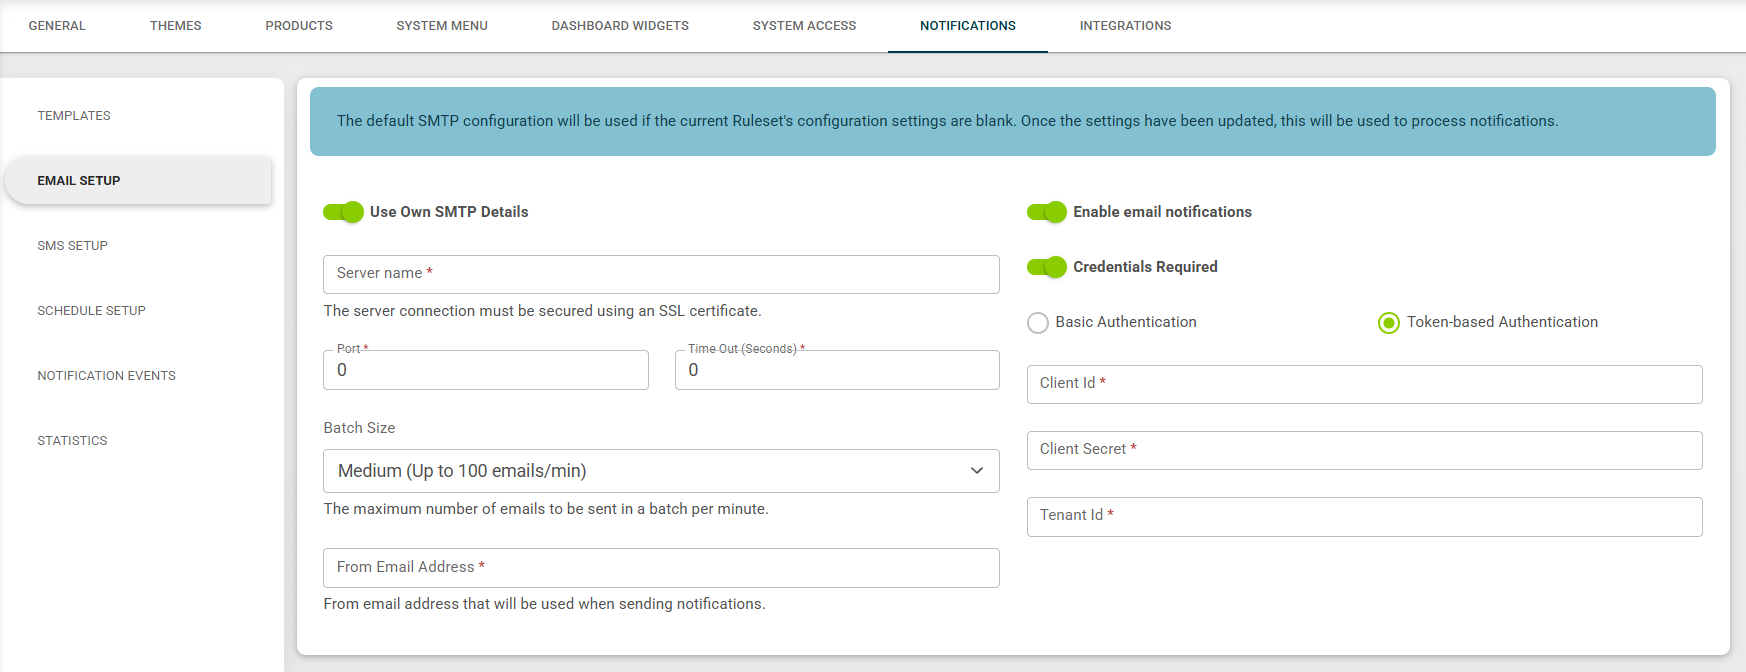
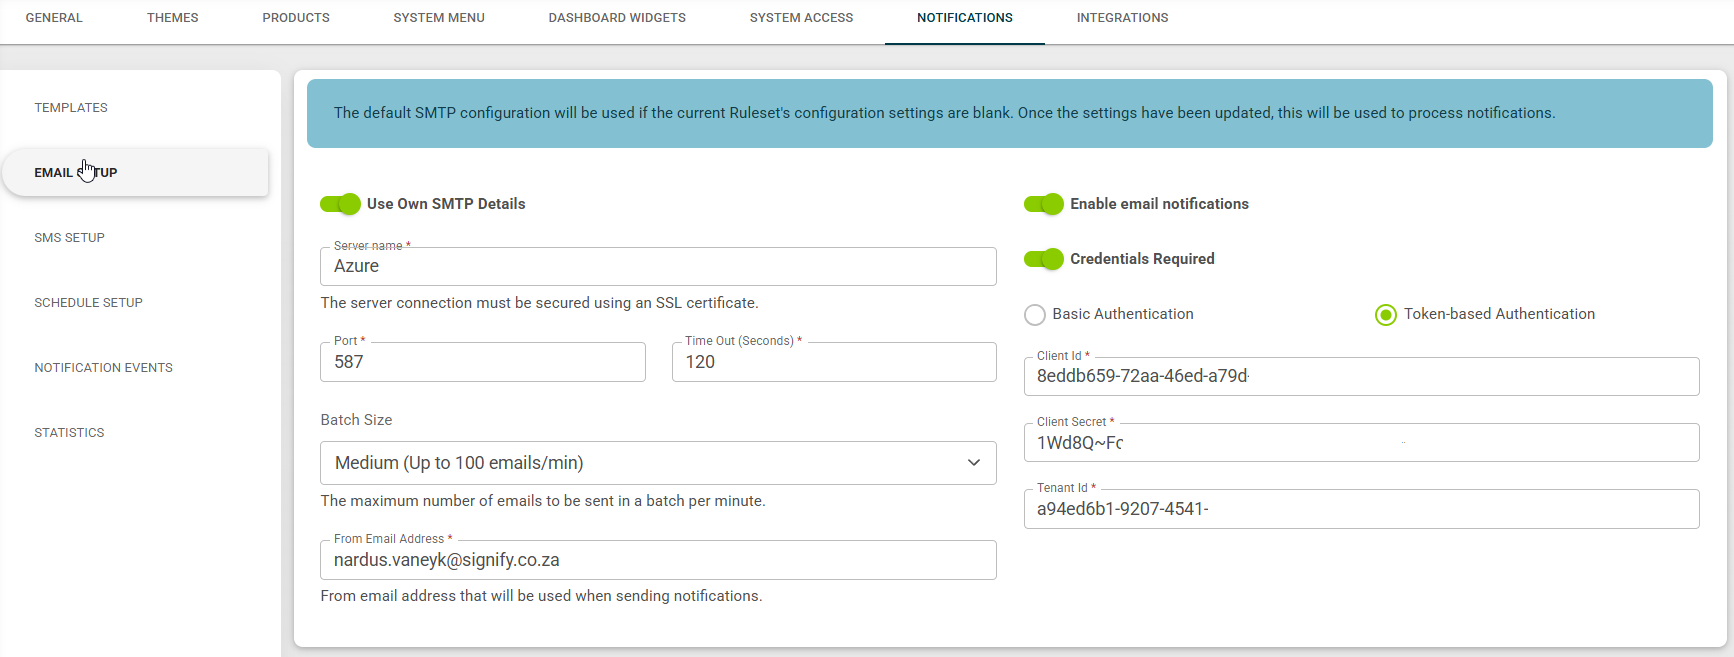
In the system this can be found under Ruleset Management | Notifications | Email Setup| Use Own SMTP Details
Setting up and retrieving the token-based authentication credentials from Microsoft
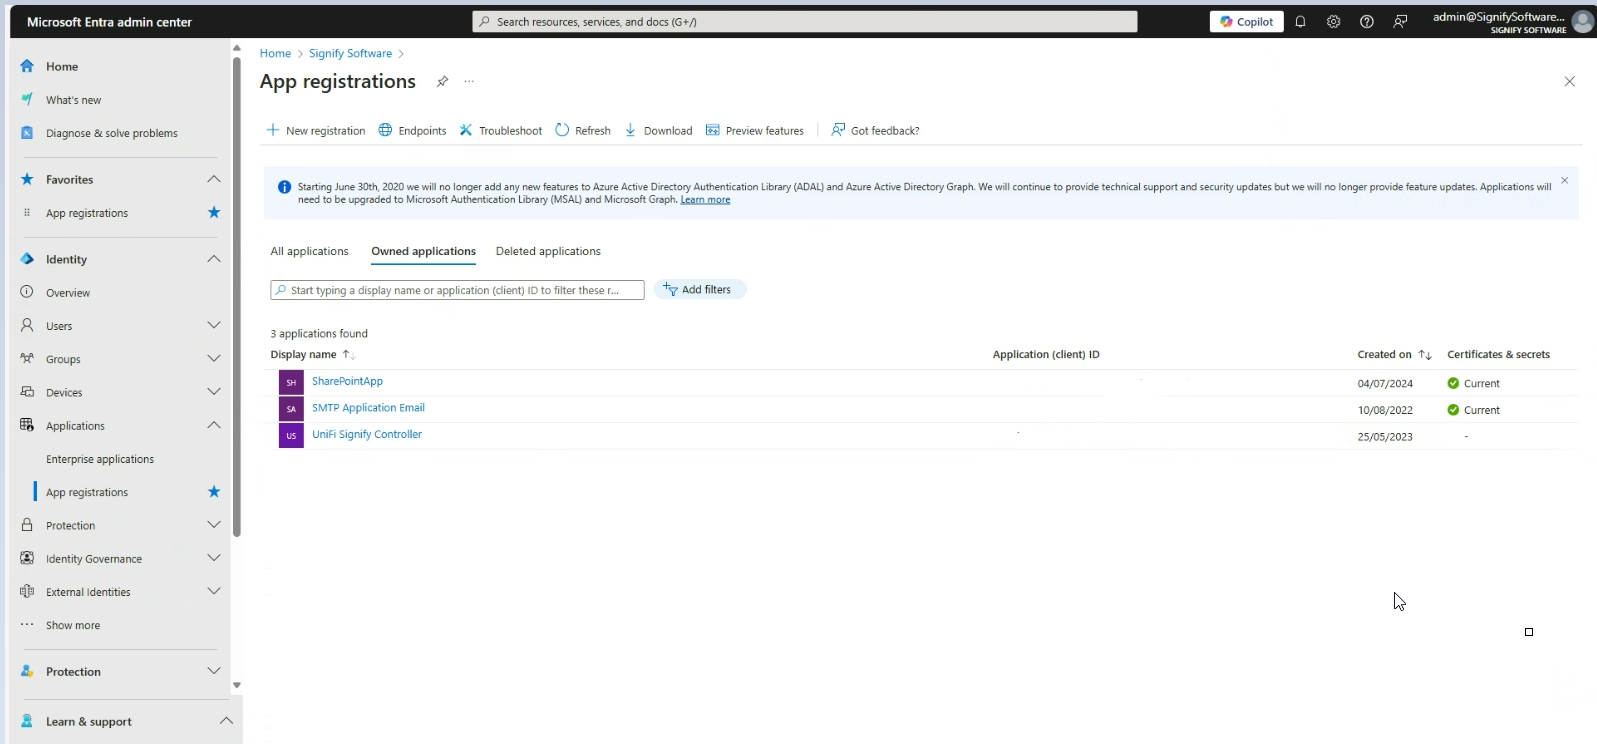
Step 1: Open the Microsoft Entra admin portal Entra admin center
Step 2: Go to Applications | App Registrations | Owned Applications in the menu
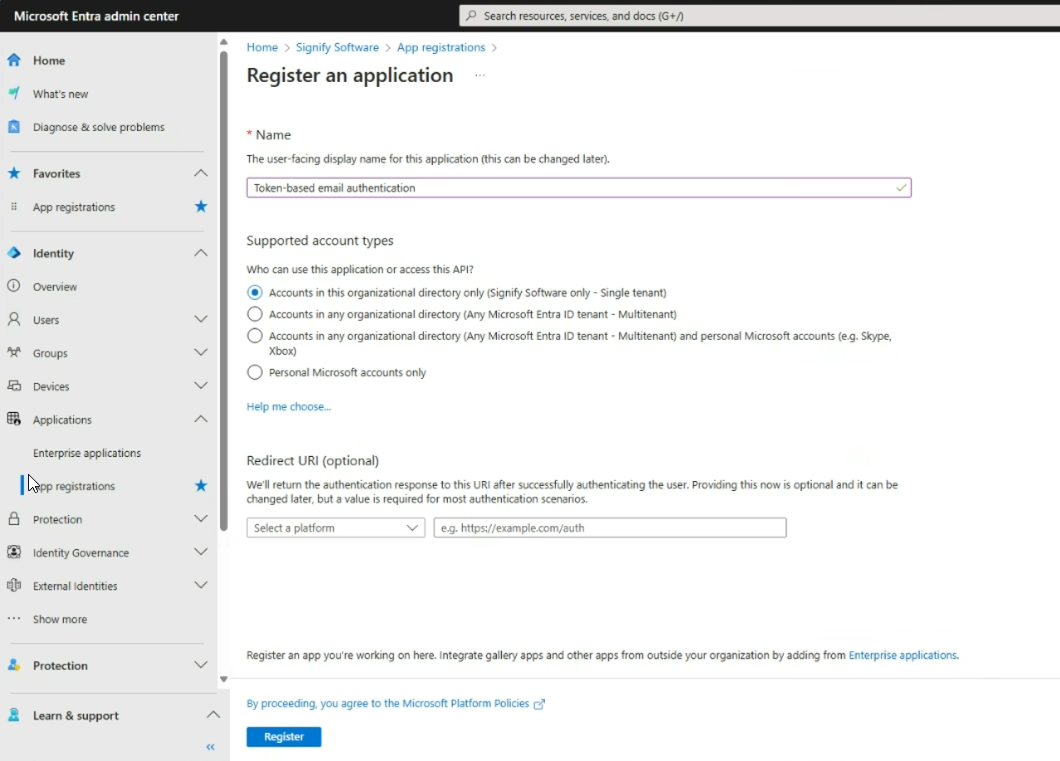
Step 3: Add a new app registration
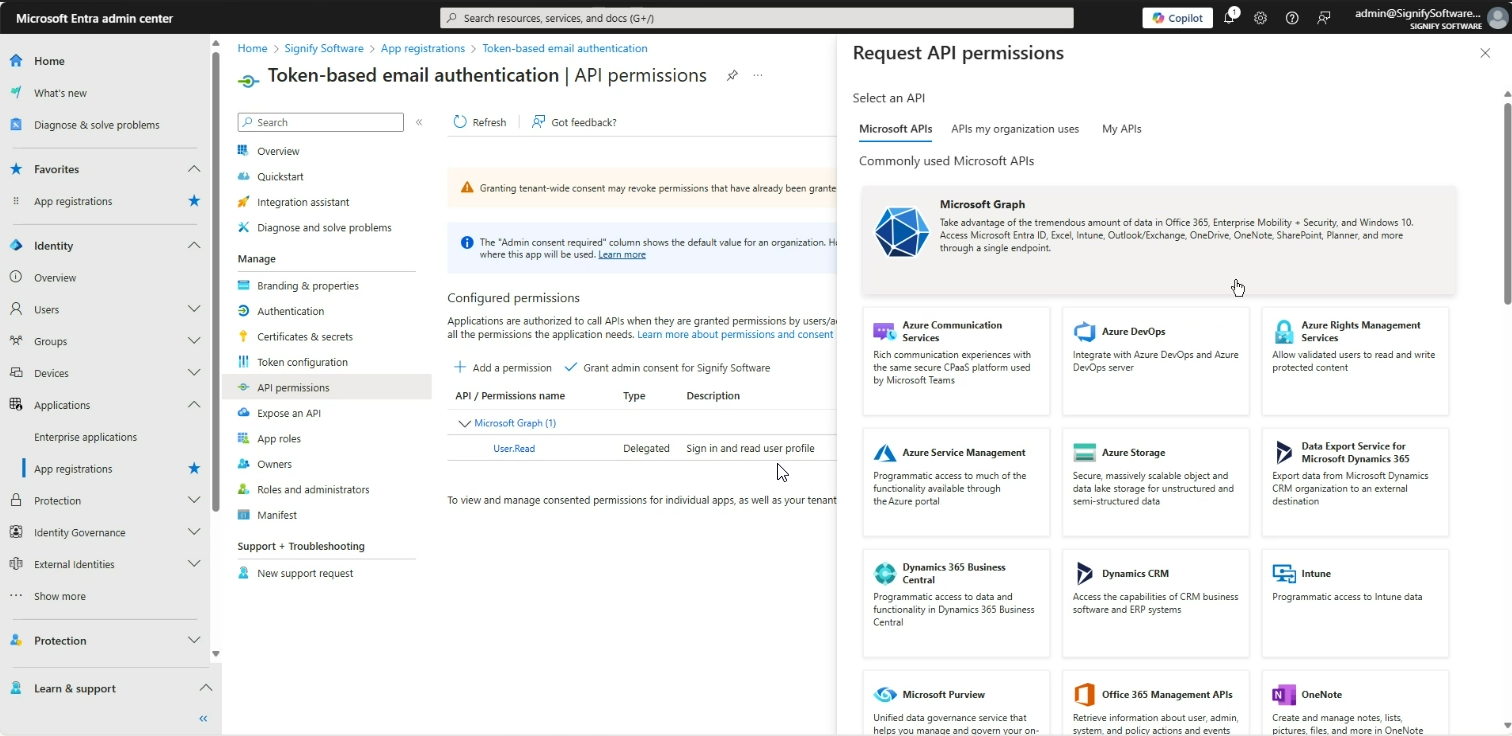
Step 3: Open the new app registration and go to API Permissions in the menu
Step 4: Setup a new SMTP exchange if one does not already exist and click Add a permission
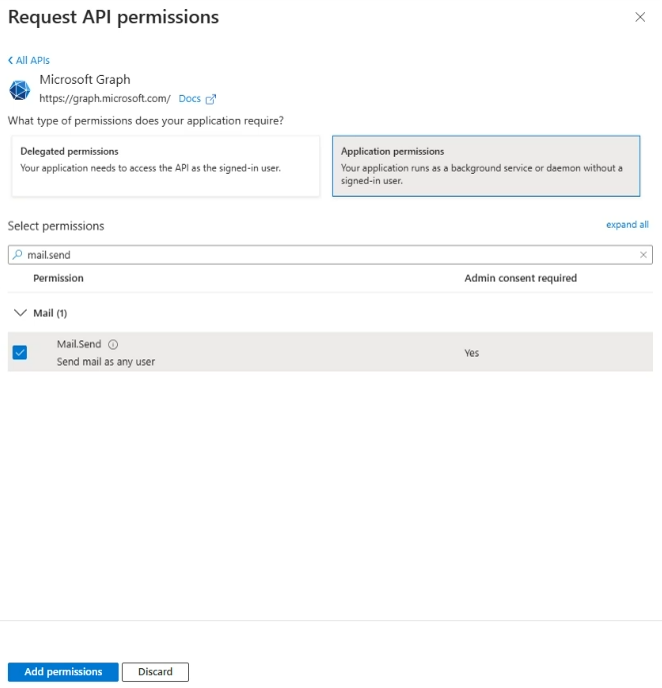
Step 5: Choose Microsoft Graph | Application Permissions, search for mail.send and select it to send mail as any user. Click Add Permission at the bottom to continue
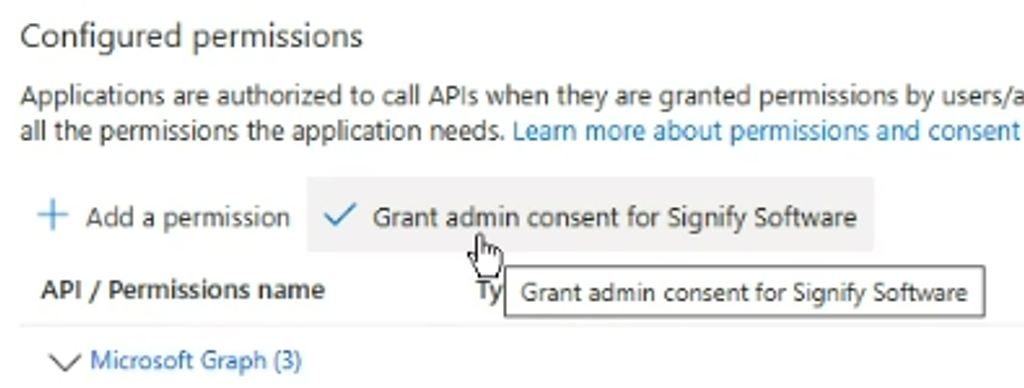
Step 6: Go the to permission section under API permission and Grant admin consent for the mail.send permission added
After clicking yes, the interface will show that the permission has been granted consent
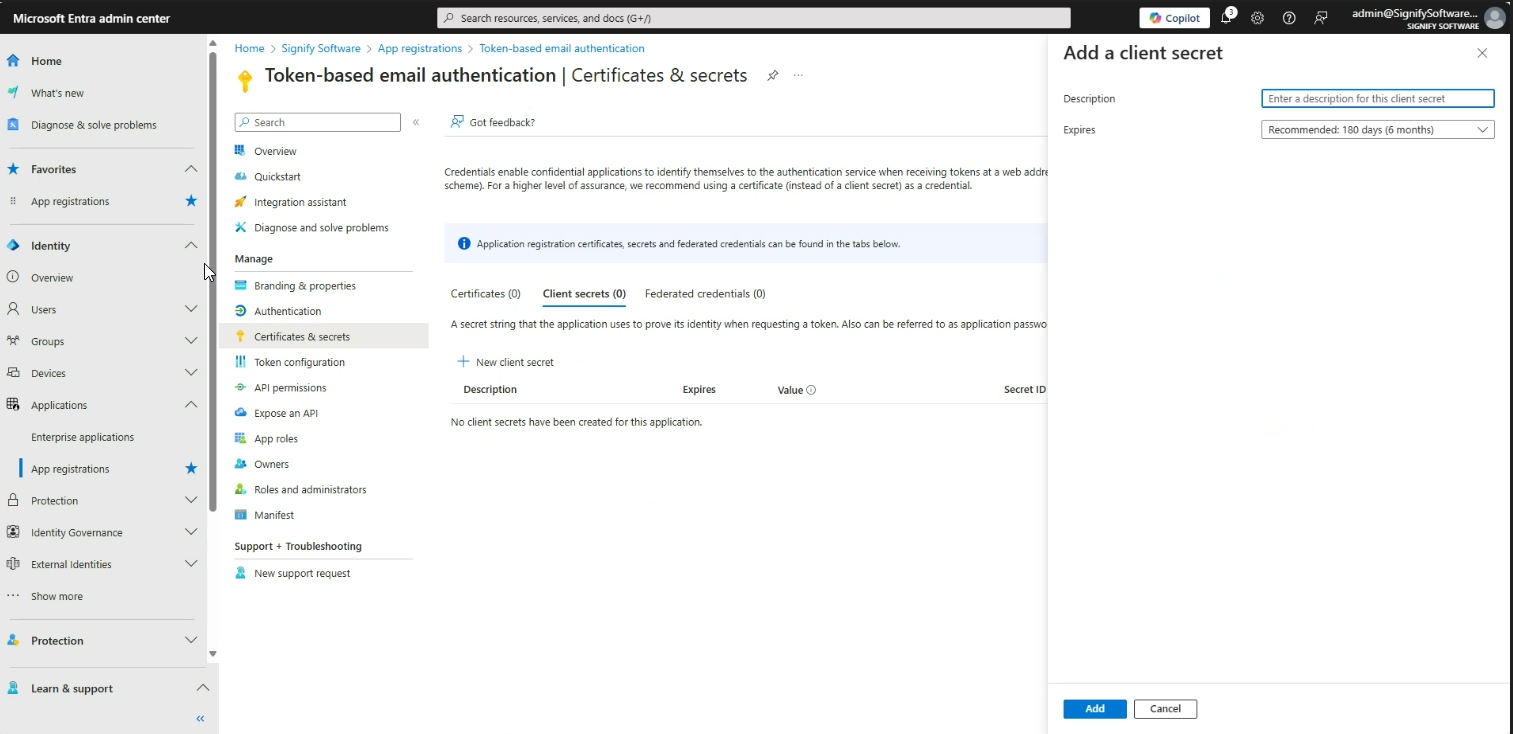
Step 7: Go to Certificates & secrets | Client secrets| New client secret
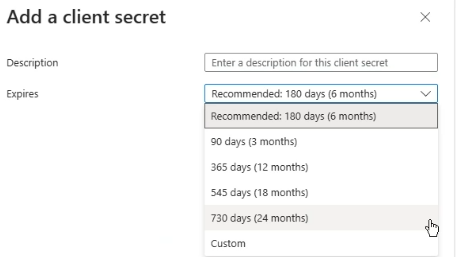
Add a description and set the Expires to the appropriate duration. We recommend 24 months to ensure the SMTP is not affected by the expiry for as long a period as possible. Click Add at the bottom to continue
Copy the value from the page for the secret added, this is your Client secret. Please store this as it will not be available later
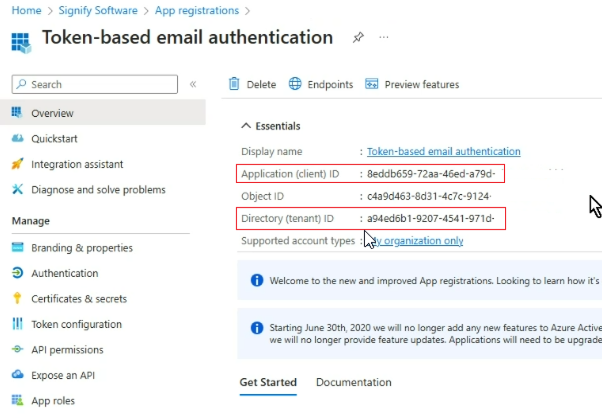
Step 7: Go to the Overview menu and copy the Application (client) ID and Directory (tenant) ID for your App registration
Step 8: Go to the Signify System, Gear | Ruleset | Notifications
Select Use Own SMTP Details and activate Credentials Required | Token-based authentication
Use the details from the Entra admin portal step 6 and step 7 to complete the credentials
Server Name: Any logical name
Port: 587
Timeout: 120
Batch Size: Medium (Recommended)
From Email Address: Any user within the tenant's email address
Client Id: Application (client) ID from step 7
Client Secret: Token Secret Value from step 6
Tenant Id: Directory (tenant) ID from step 7
Once completed click save at the bottom of the screen to save and validate the credentials. Should the validation fail please confirm the configuration.

