
Email setup using Token-based authentication with MS365

Prerequisites

Before proceeding with the setup, ensure the following:

1. Microsoft 365 Admin Access

    You must have Global Administrator or Application Administrator rights to:
      Register an app in Microsoft Entra ID (formerly Azure AD). Grant admin consent for API permissions.

      2. Exchange Online License

        The tenant must have an active Exchange Online subscription for sending emails via SMTP.

        3. SMTP Authentication Enabled (If Required)

          Modern authentication (OAuth2) is used, but ensure that SMTP AUTH is not disabled for the tenant if needed.
            You can check this in Microsoft Entra ID under Security → Authentication Policies.

            4. Microsoft Graph API Access

              The Mail.Send permission must be enabled in Microsoft Graph API. Ensure that admin consent is granted.

              5. Service Account (Optional but Recommended)

                It is best practice to create a dedicated service account for email sending.
                  This prevents access issues if an employee leaves or credentials change.

                  6. Firewall and Network Rules

                    Allow outbound traffic on port 587 (SMTP with STARTTLS). Ensure no outbound filtering that blocks Microsoft’s SMTP servers.

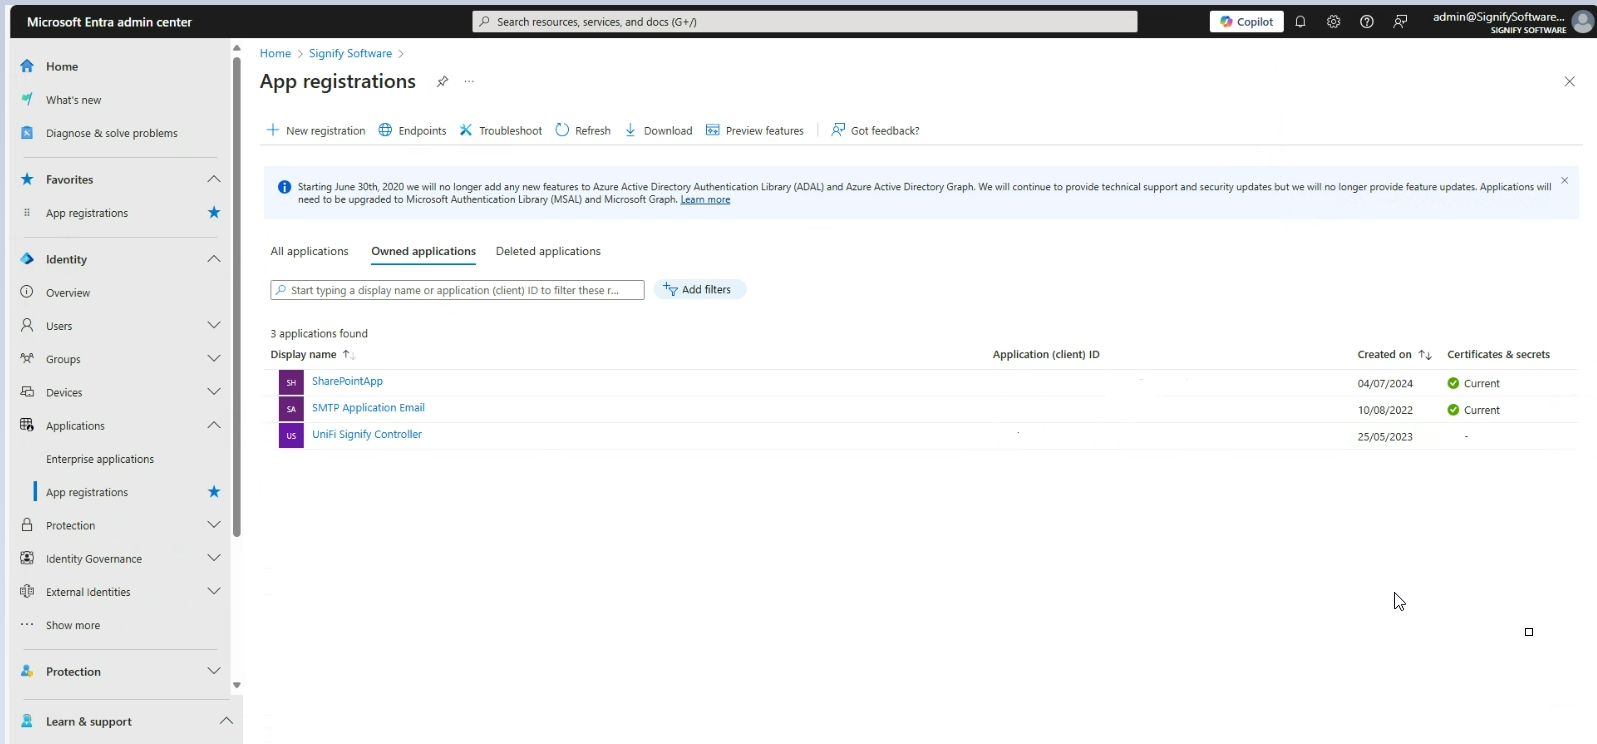
                    Microsoft 365 App Registration and Setup

                    Step 1: Open the Microsoft Entra Admin Portal

                    1. Navigate to the Microsoft Entra admin center.
                    2. Go to ApplicationsApp RegistrationsOwned Applications.

                    image.png

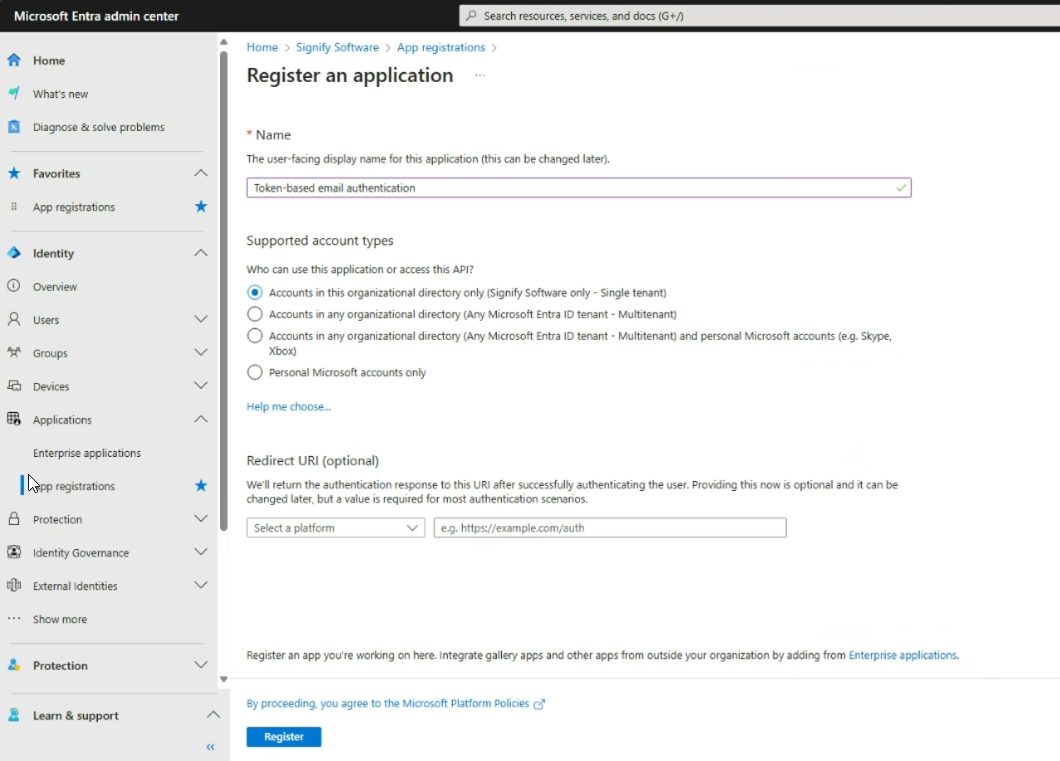
                    Step 2: Register a New Application

                    1. Click New App Registration.
                    2. Open the newly created app registration.
                    3. Navigate to API Permissions in the menu.

                    image.png

                    image.png

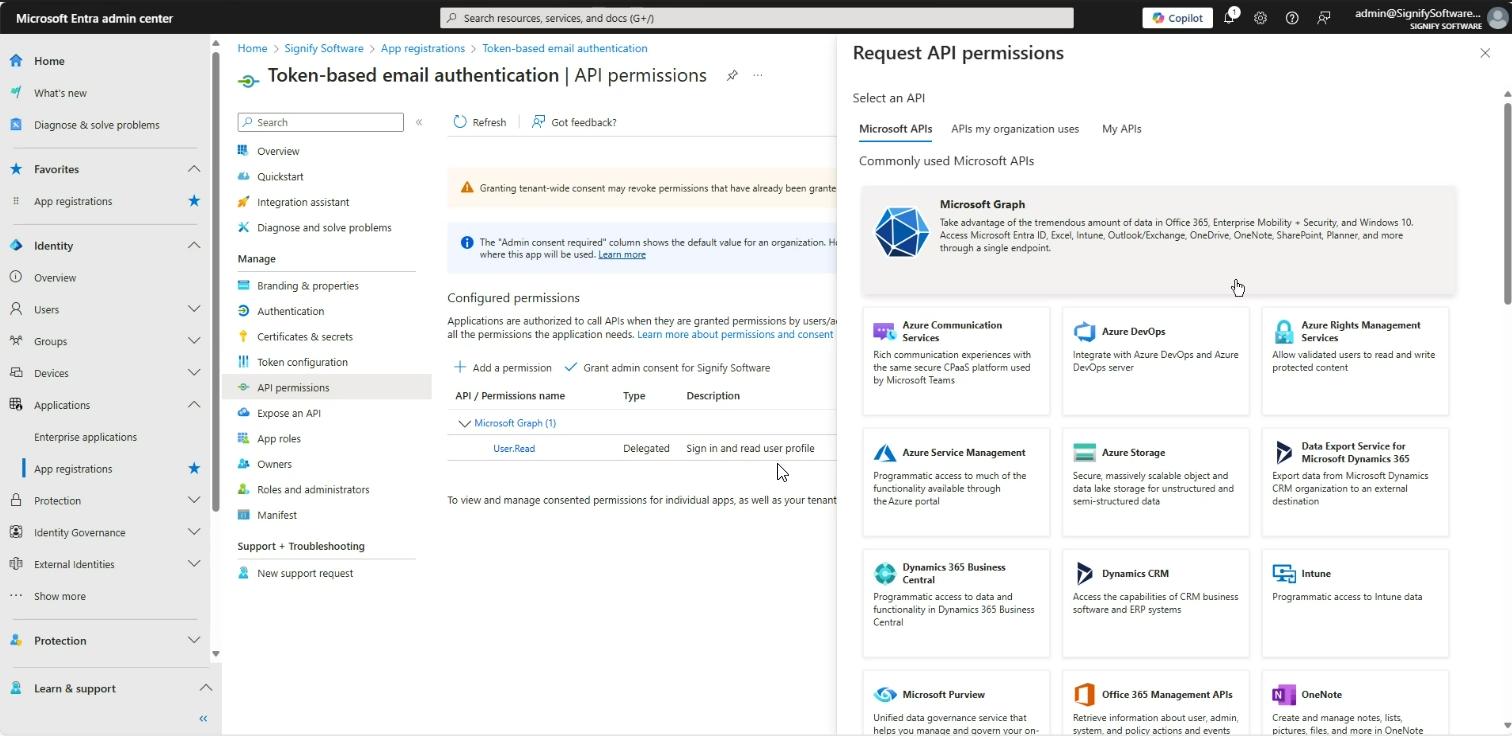
                    Step 3: Configure API Permissions

                    1. If an SMTP exchange does not exist, set up a new one.
                    2. Click Add a Permission.
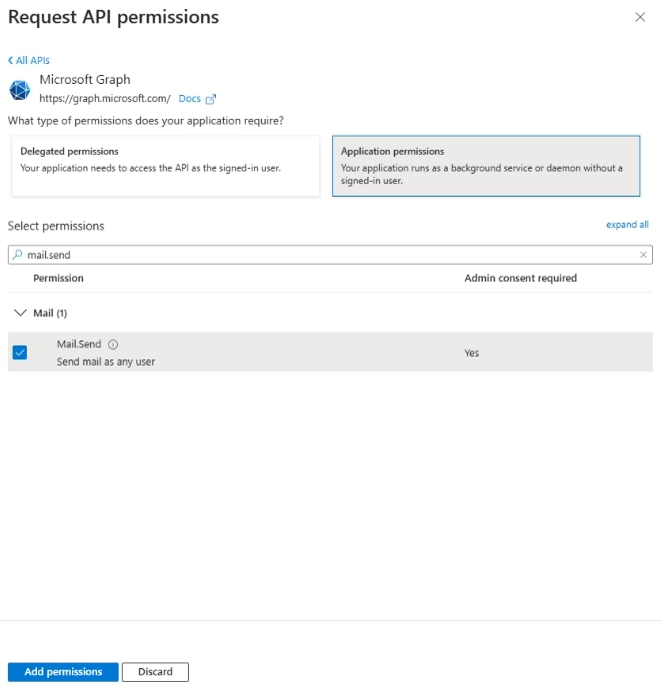
                    3. Select Microsoft GraphApplication Permissions.
                    4. Search for Mail.Send and select it.
                    5. Click Add Permission.

                    image.png

                    Step 4: Grant Admin Consent

                    1. Under API Permissions, locate the Mail.Send permission.
                    2. Click Grant Admin Consent.image.png
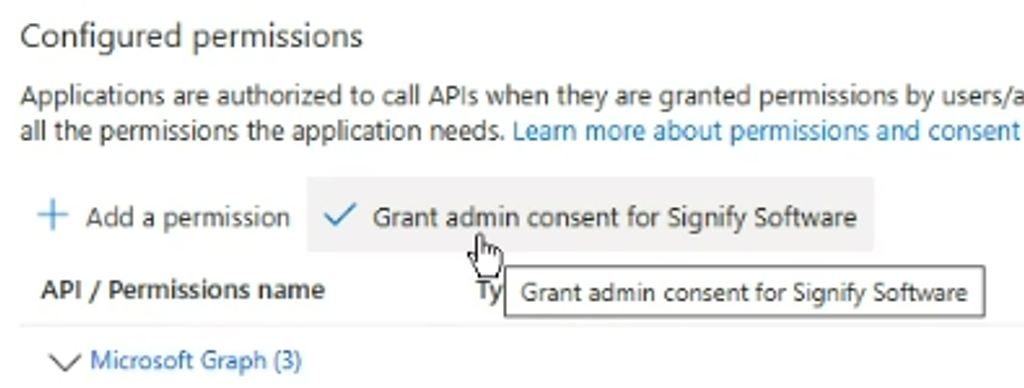
                    3. Confirm by clicking Yes.image.png
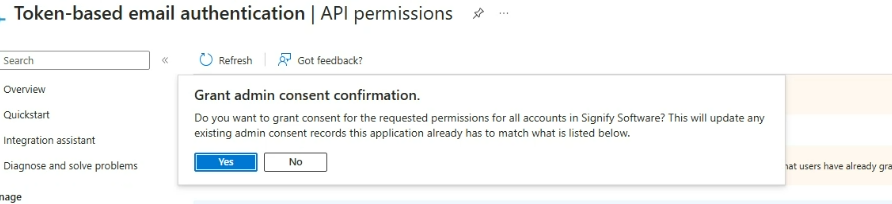
                    4. The interface will confirm that consent has been granted.image.png

                    Step 5: Generate Client Secret

                    1. Navigate to Certificates & SecretsClient Secrets.
                      image.png
                    2. Click New Client Secret.
                      image.png
                    3. Enter a description and set an expiration period (24 months recommended).
                    4. Click Add.
                    5. Copy and store the Client Secret Value immediately (it will not be available later).
                      image.png

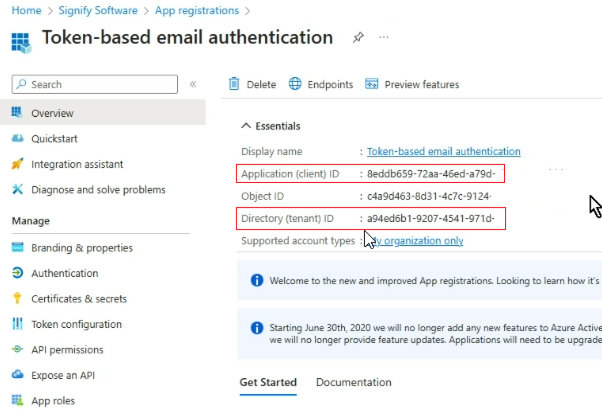
                    Step 6: Retrieve App Credentials

                    1. Go to the Overview section of your app registration.
                    2. Copy the following details:
                      • Application (Client) ID
                      • Directory (Tenant) ID

                    image.png


                    Signify Email Setup Using Token-Based Authentication

                    1. Open Signify System.

                    2. Navigate to GearRulesetNotifications.

                    3. Enable Use Own SMTP Details.

                    4. Activate Credentials Required | Token-Based Authentication.

                    5. Enter the details obtained from Microsoft Entra:

                      Field Value
                      Server Name Any logical name
                      Port 587
                      Timeout 120
                      Batch Size Medium (Recommended)
                      From Email Any user within the tenant
                      Client ID Application (Client) ID (Step 6)
                      Client Secret Token Secret Value (Step 5)
                      Tenant ID Directory (Tenant) ID (Step 6)
                    6. Click Save to store and validate credentials.

                    7. If validation fails, review your configuration settings.