Appoint, Transfer, or Terminate a Person

This guide focuses on the People Management module and the features available to the administrator. By following the outlined procedures, administrators can:
- Add users manually
-
- Create an organisational structure
- Define job titles and positions
- Appoint a person in a position
-
- Add users using an import
- Transfer a person to a different position
- Terminate a person
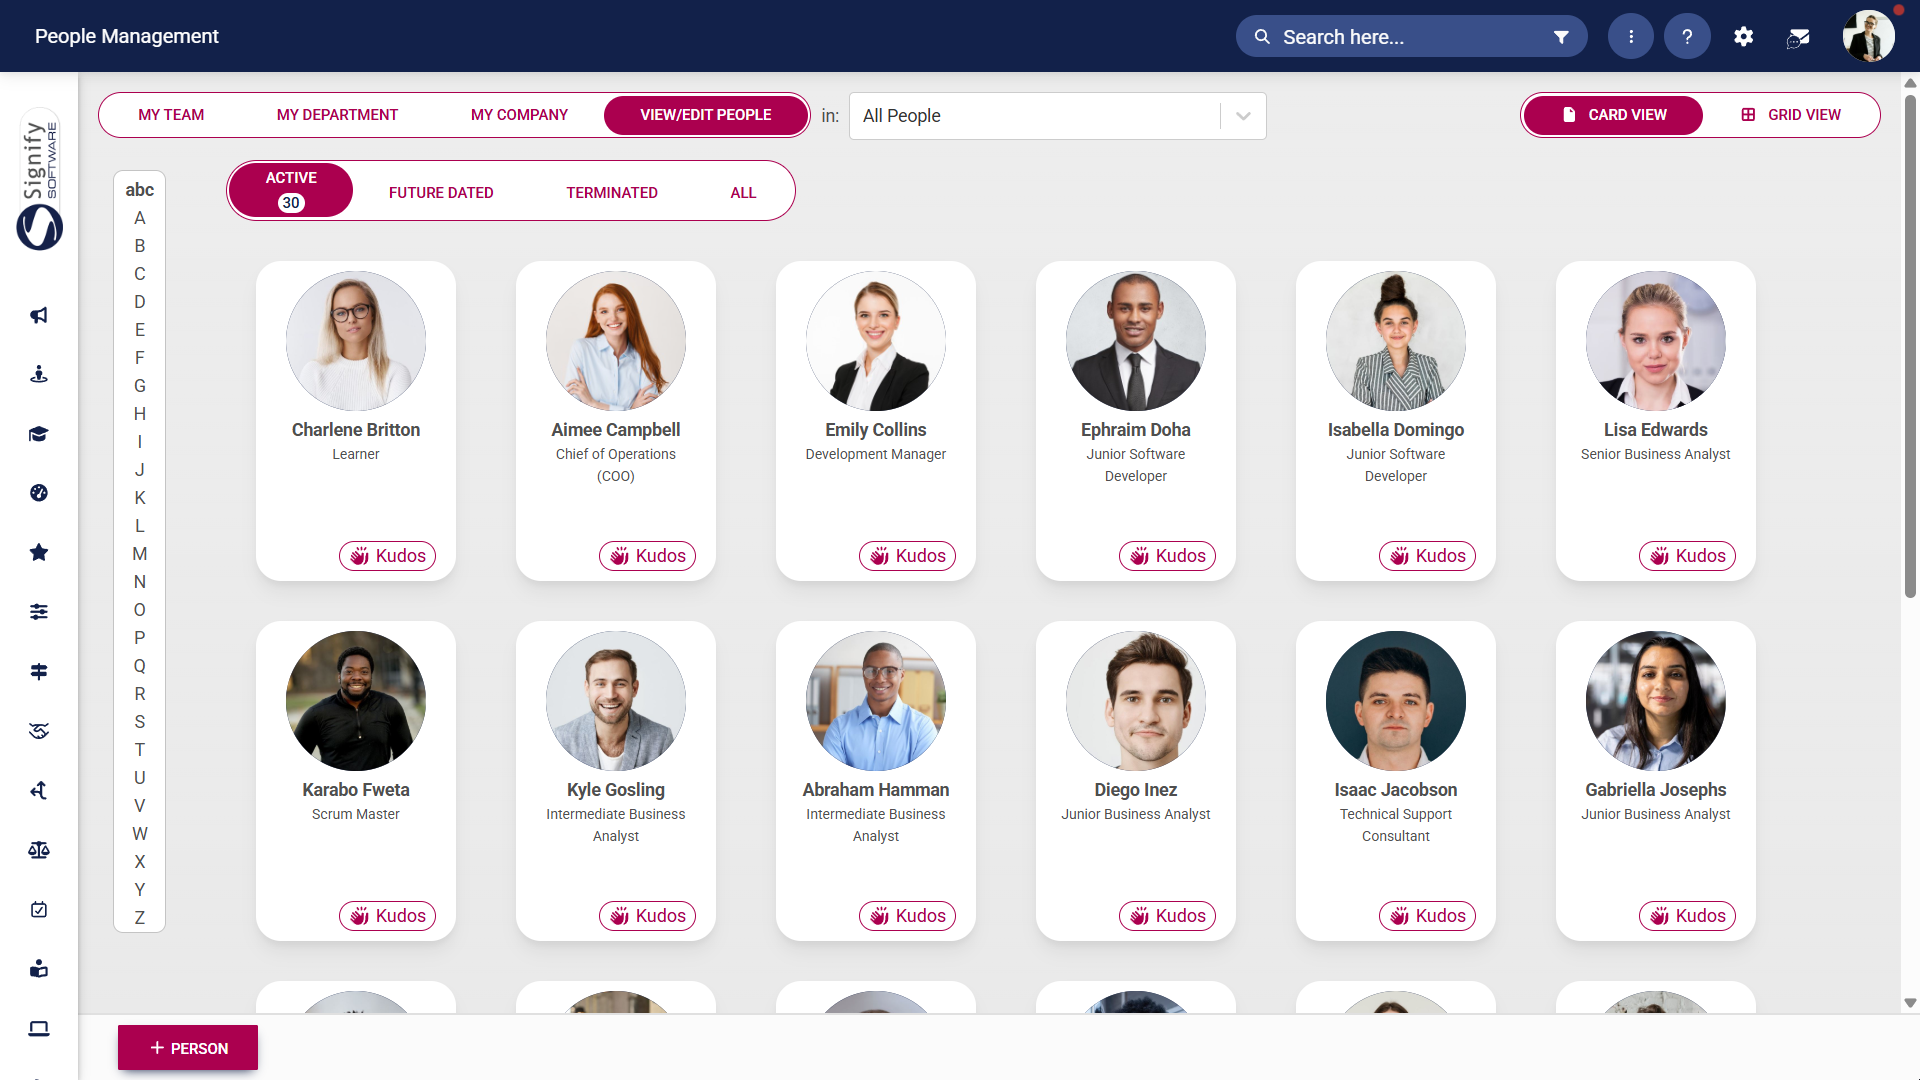
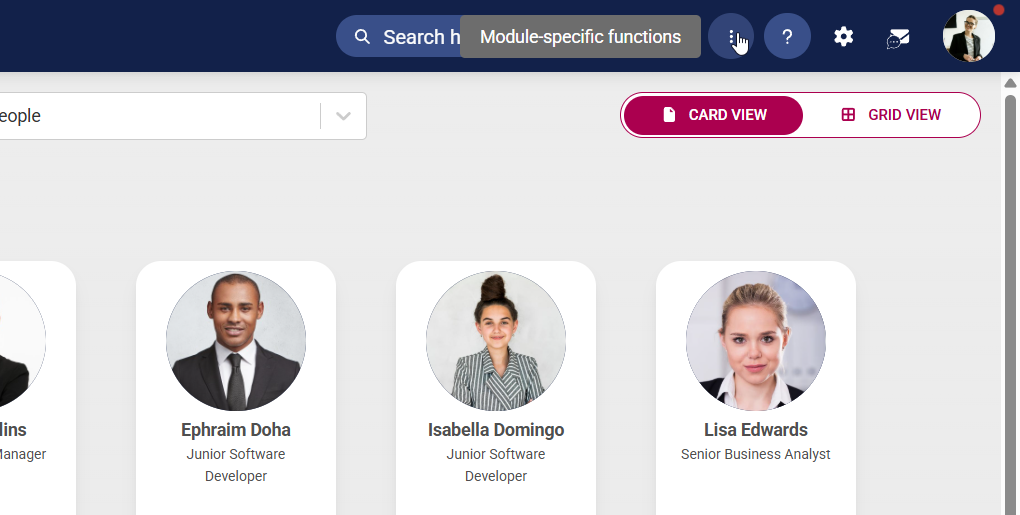
Add users
Users can be added to the system in two ways:
- Manually, using the Organisational Structure, Job Management, and View/Edit People functionalities, or
- Using the import sheet.
This guide will show both methods.
Method 1: Add users manually
To add new users to the system manually, it is essential that the following prerequisites are established:
- The organisational structure must be developed.
- Job titles and positions should be defined in the Job Management module.
Create an organisational structure
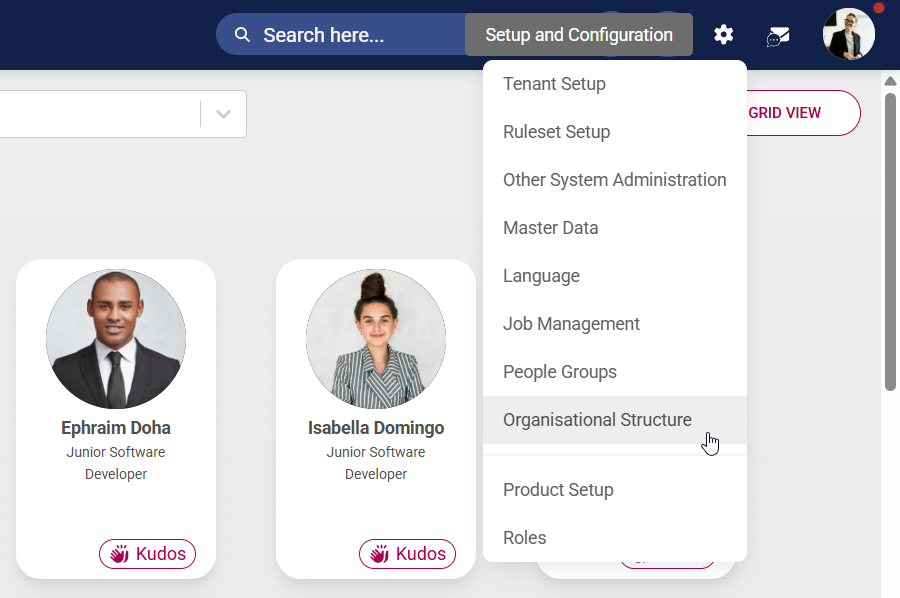
- Click the gear icon to access the Setup and Configuration menu.
- Select Organisational Structure from the drop-down menu.
- Create an organisational structure based on the organisation’s size, goals, industry, and work style. Some examples of organisational structures:
-
- Hierarchical structure – based on levels of authority and responsibility
- Functional structure – focuses on specialised roles or departments
- Divisional structure – based on product lines, geographical locations, or customer types
- Team-based structure – centred around project teams or cross-functional units
- Process-based structure – focuses on workflow and end-to-end processes
-
Hover over the name of a level to access the editing options. You can rearrange organisational levels by using the drag-and-drop feature.

- To add a subordinate level, click the plus icon next to the relevant level name.
![]()
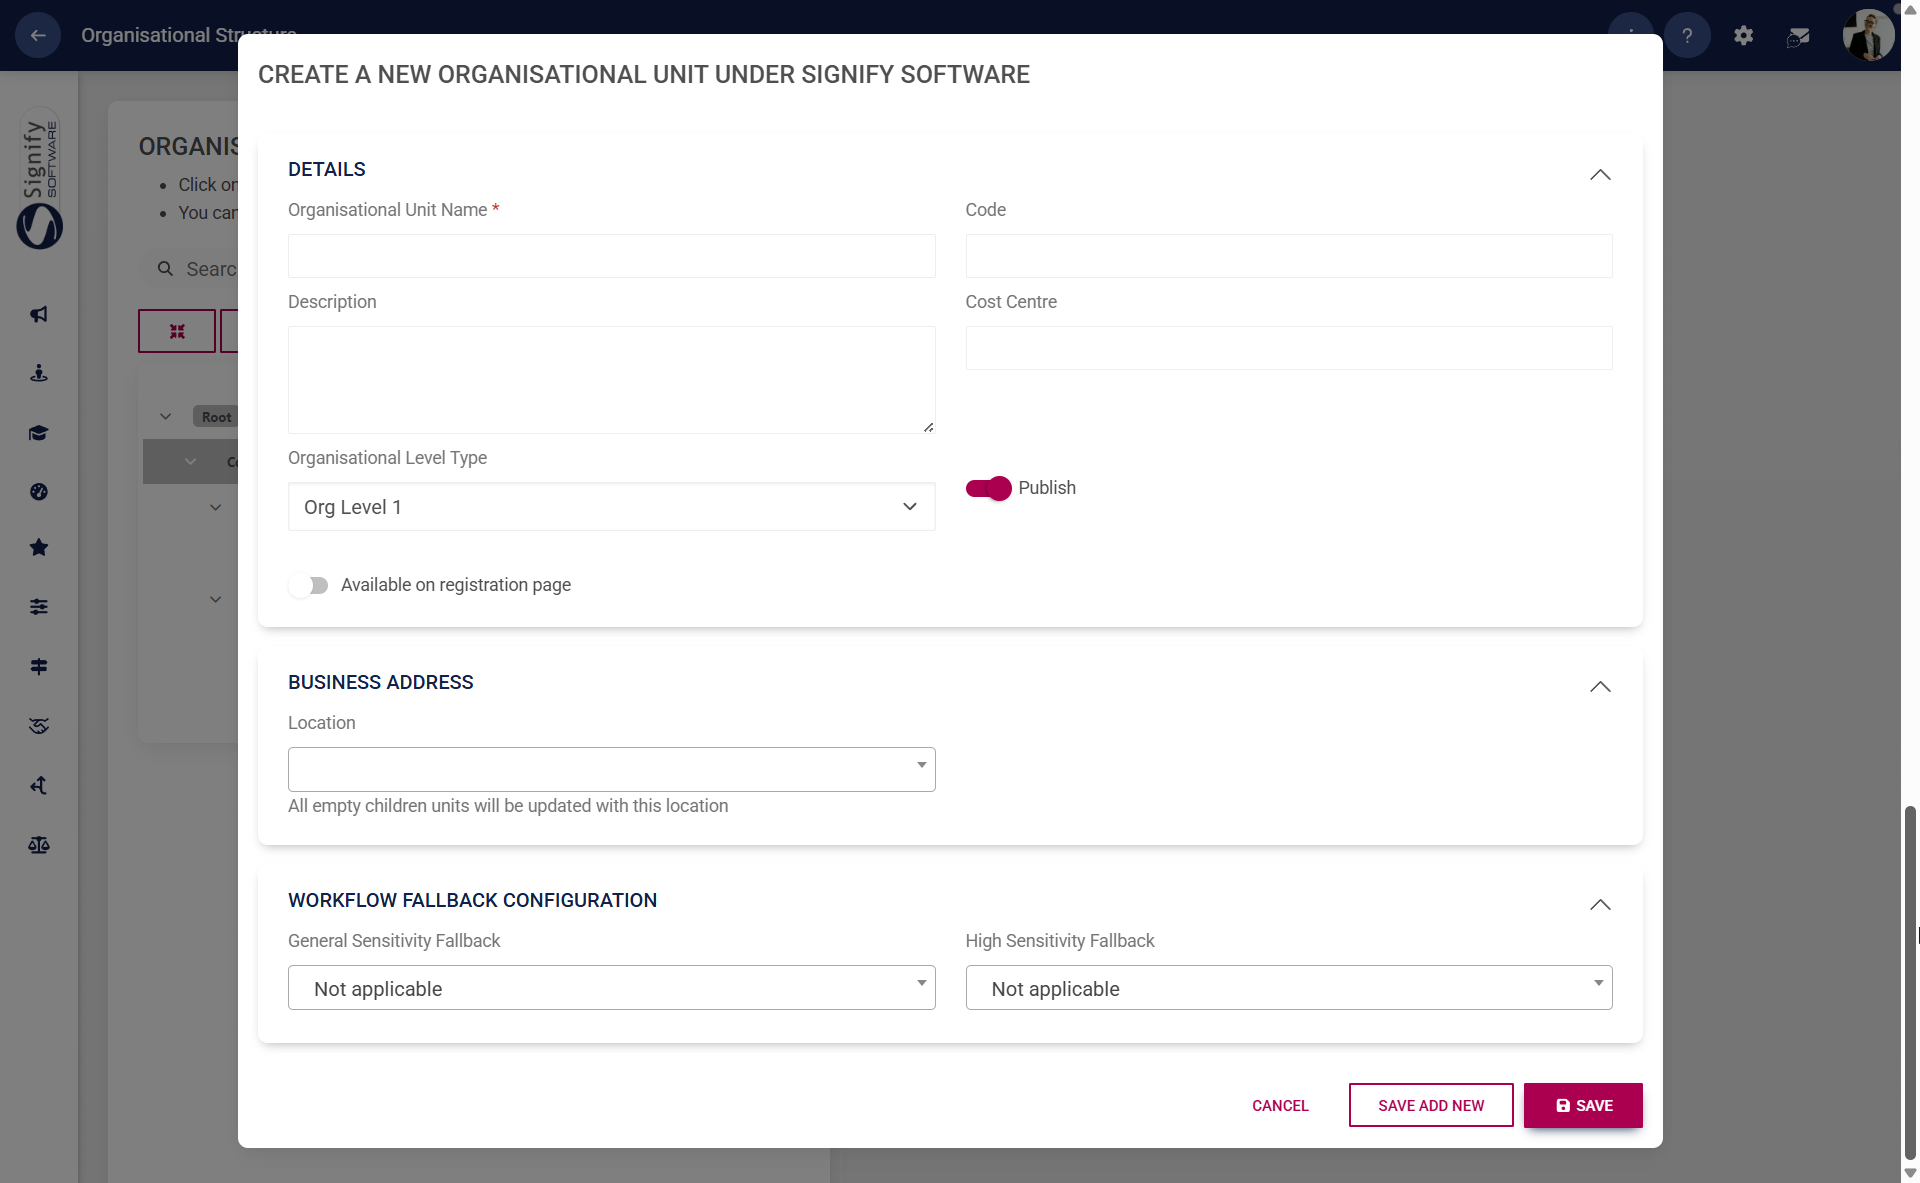
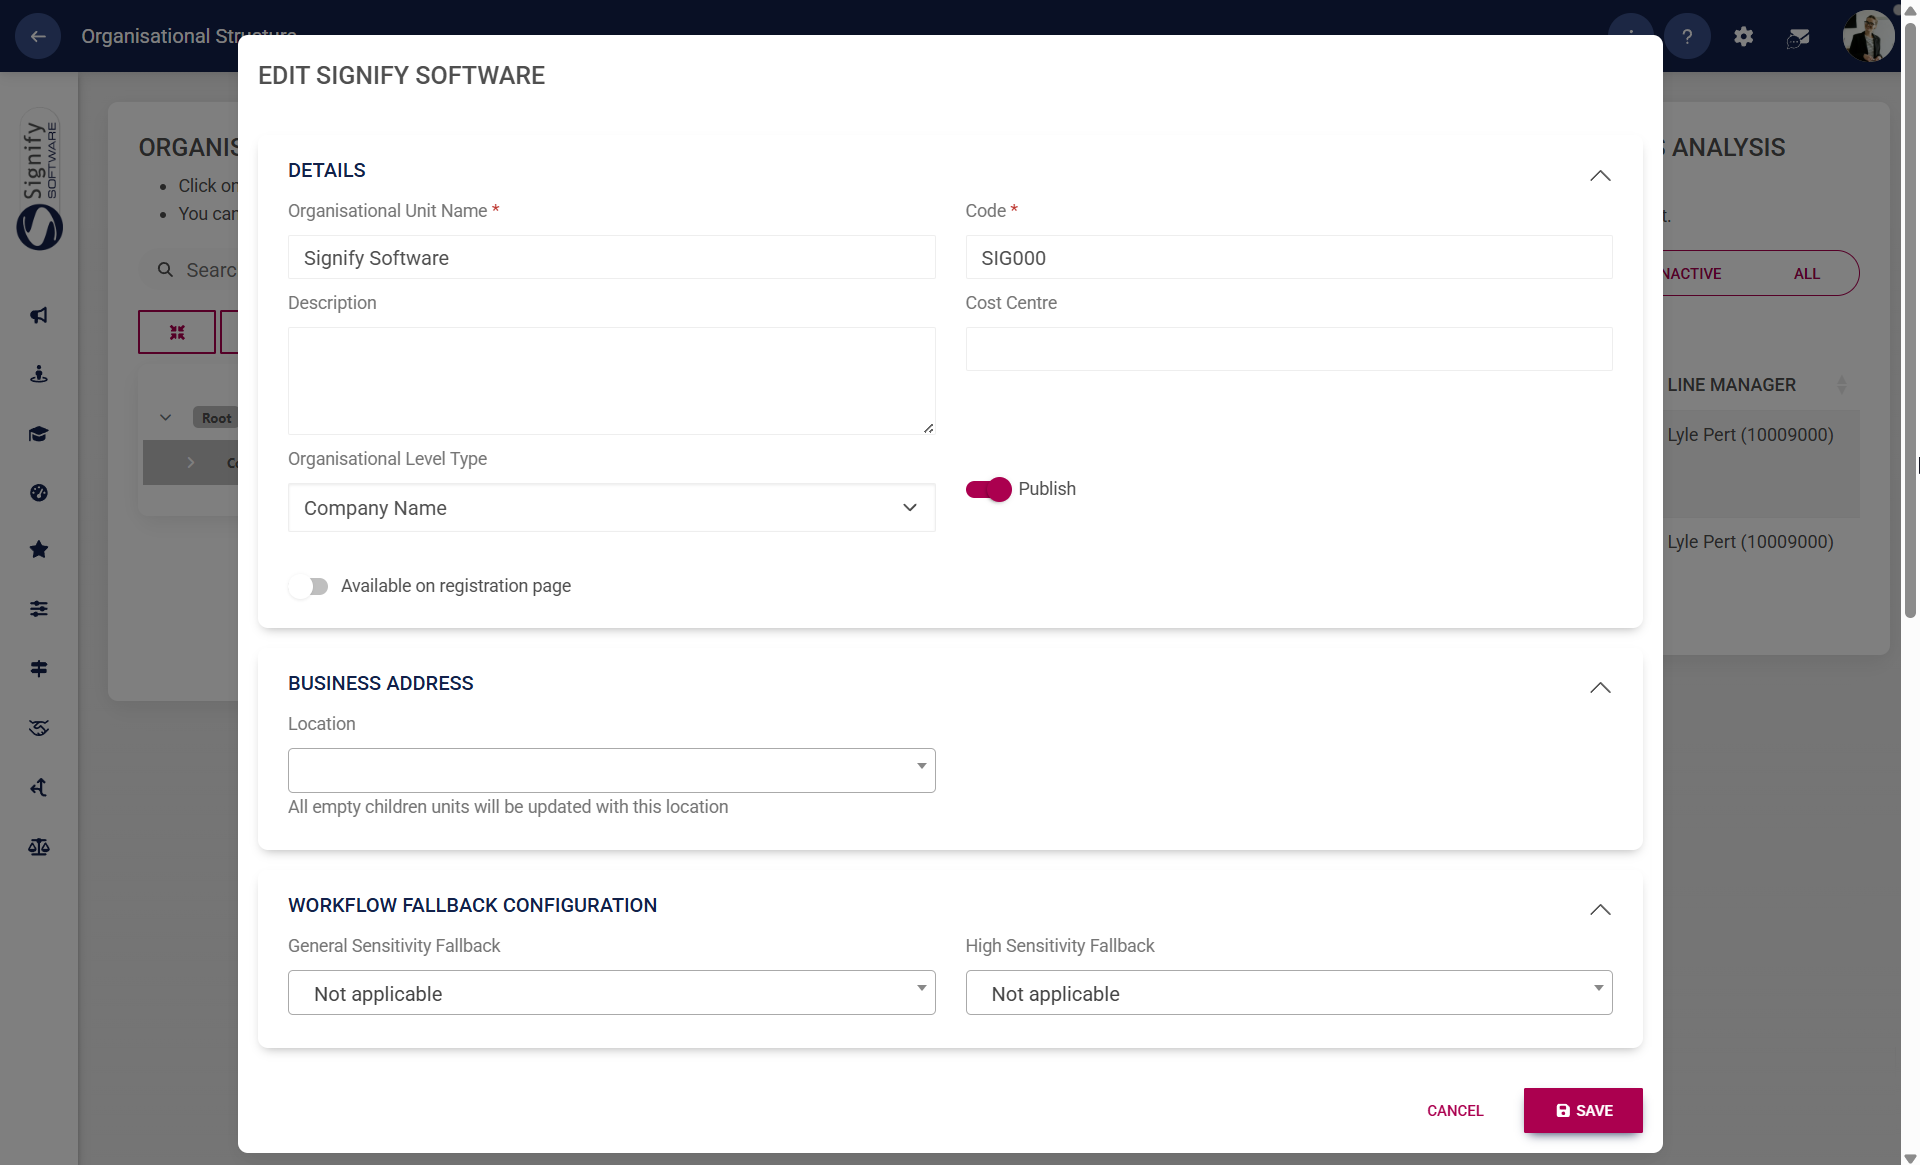
- Complete the details of the organisational unit.
-
- Enter the name and code of the organisational unit.
- Choose the appropriate organisational level type from the dropdown menu.
- Toggle the Publish option on or off as needed.
- Toggle to enable new registrants to select this organisational unit when registering on the system.
- If configured in the master data, the business location can be selected. To learn more about master data, navigate to the Master Data Maintenance part of this chapter.
- Other additional information about the organisational unit can be added, but is not required.
-
Click SAVE ADD NEW to add another subordinate level to the same organisational unit. Click SAVE when finished or click CANCEL to discard any changes.
- Click the pencil icon next to the name of an organisational level to edit.
![]()
- Update the details of the organisational level. Click SAVE when finished or click CANCEL to discard any changes.
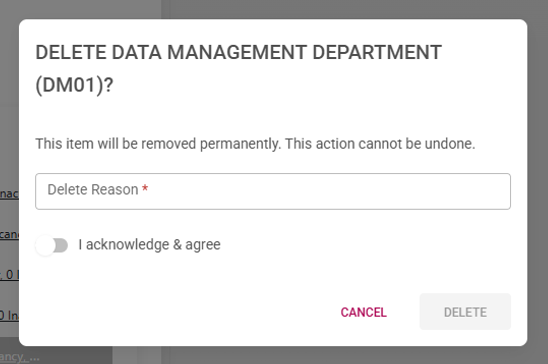
- To delete a level, click on the trash bin icon next to its name. Please note that a level cannot be deleted if it has:
-
- subordinate levels,
- vacant positions, or
- active positions.
-
![]()
- When deleting, provide a valid reason for the deletion, confirm that you acknowledge and agree to the action, and then click DELETE. If you wish to cancel the operation, click CANCEL to discard any changes.
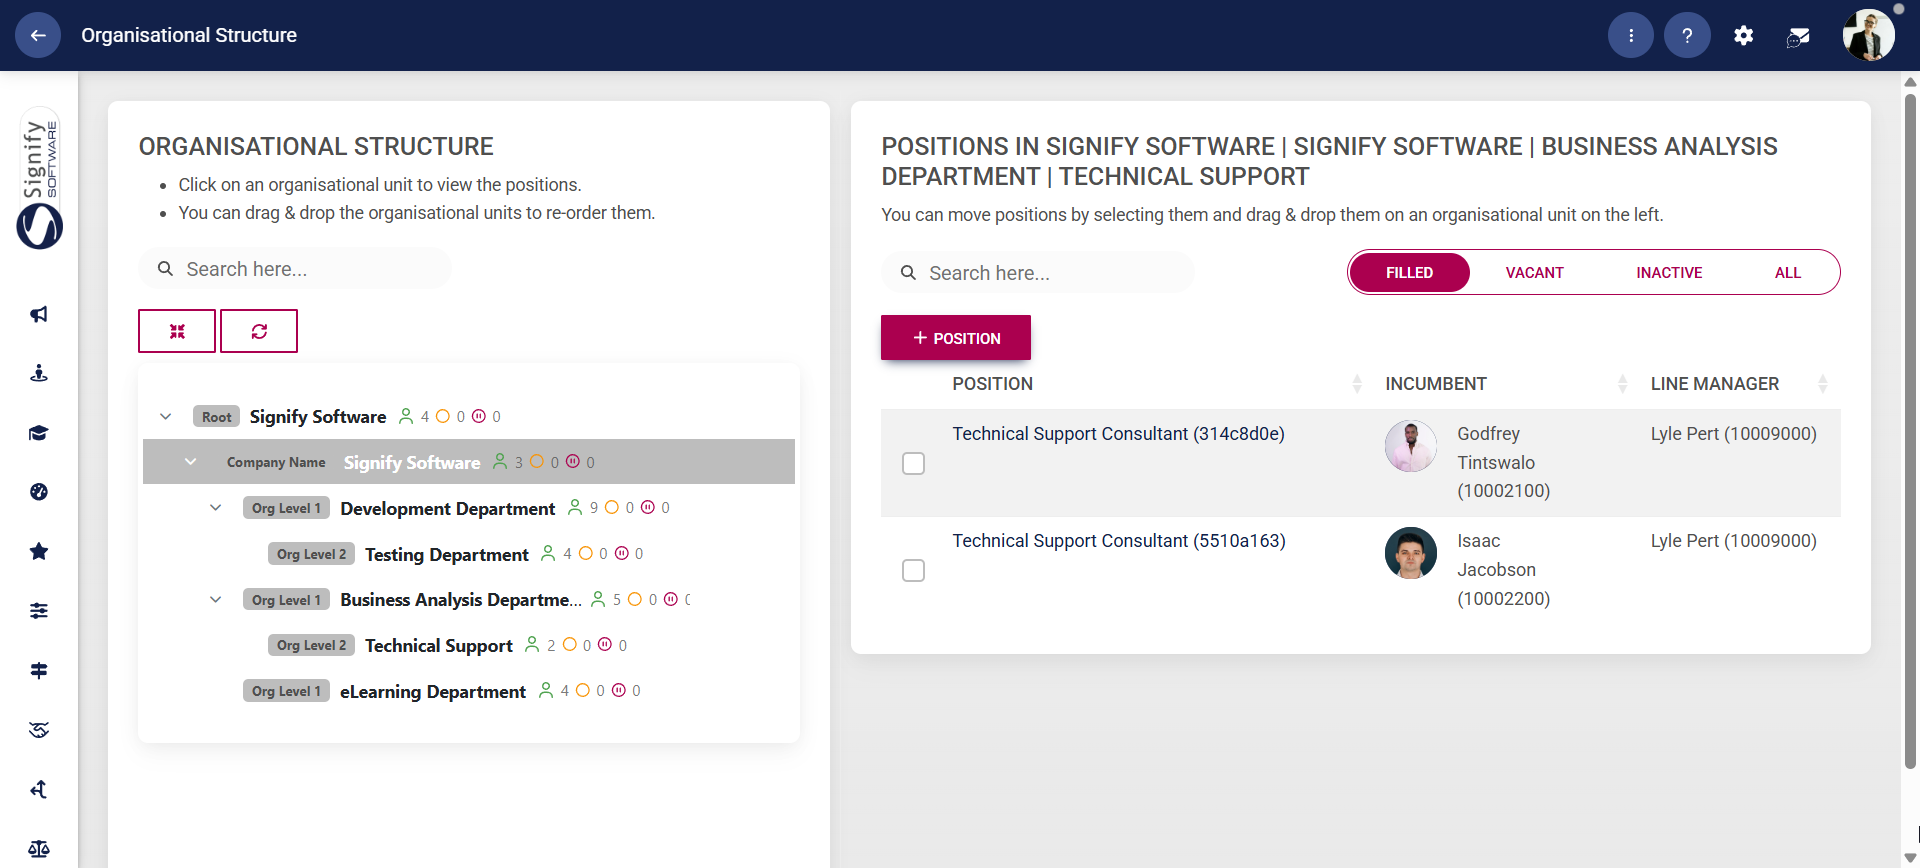
- The green, yellow, and red icons next to an organisational level's name indicate filled, vacant, and inactive job positions, respectively. In our example, there are four filled positions, and no vacant or inactive positions.
![]()
- By clicking on the organisational level's name, the filled, vacant, and inactive job positions can be viewed on the right. To move a position to another organisational unit, drag and drop it into the appropriate unit on the left.
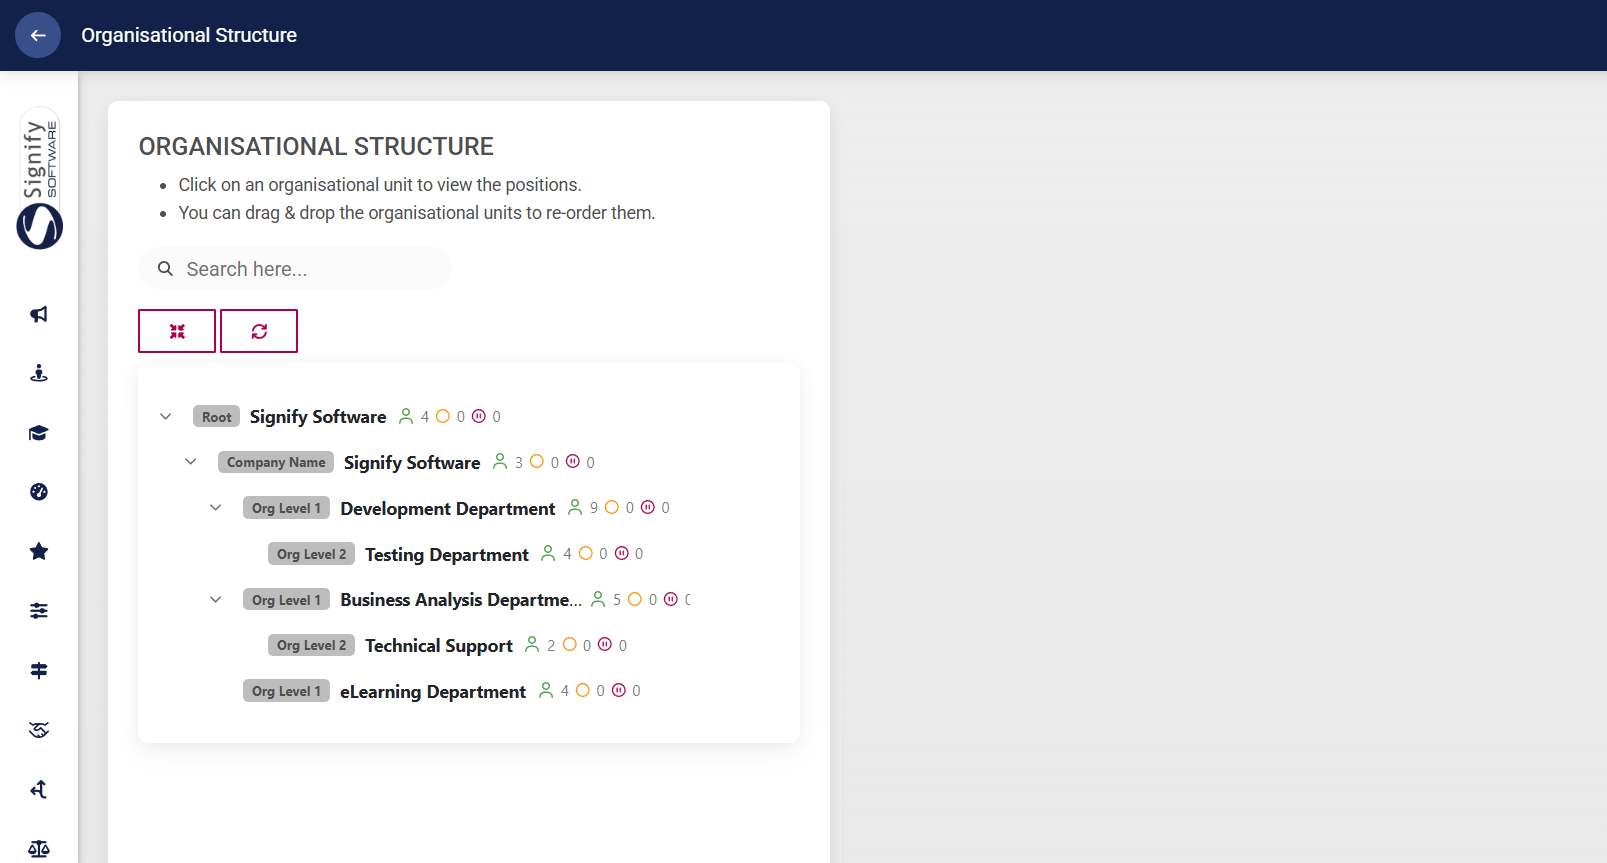
- Once you have finished creating your organisational structure, it may look similar to our example.
Define job titles and positions
After establishing the organisational structure, we can proceed with creating job titles and positions using the Job Management functionality.
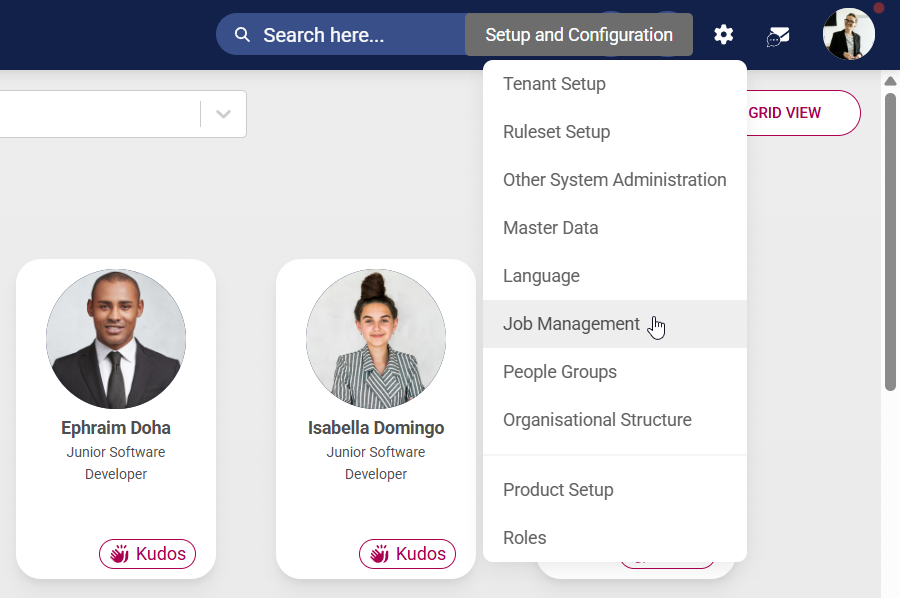
- Click the gear icon to access the Setup and Configuration menu.
- Select Job Management from the drop-down menu.
- This screen shows all the job titles, positions, and vacancies within your organisation.
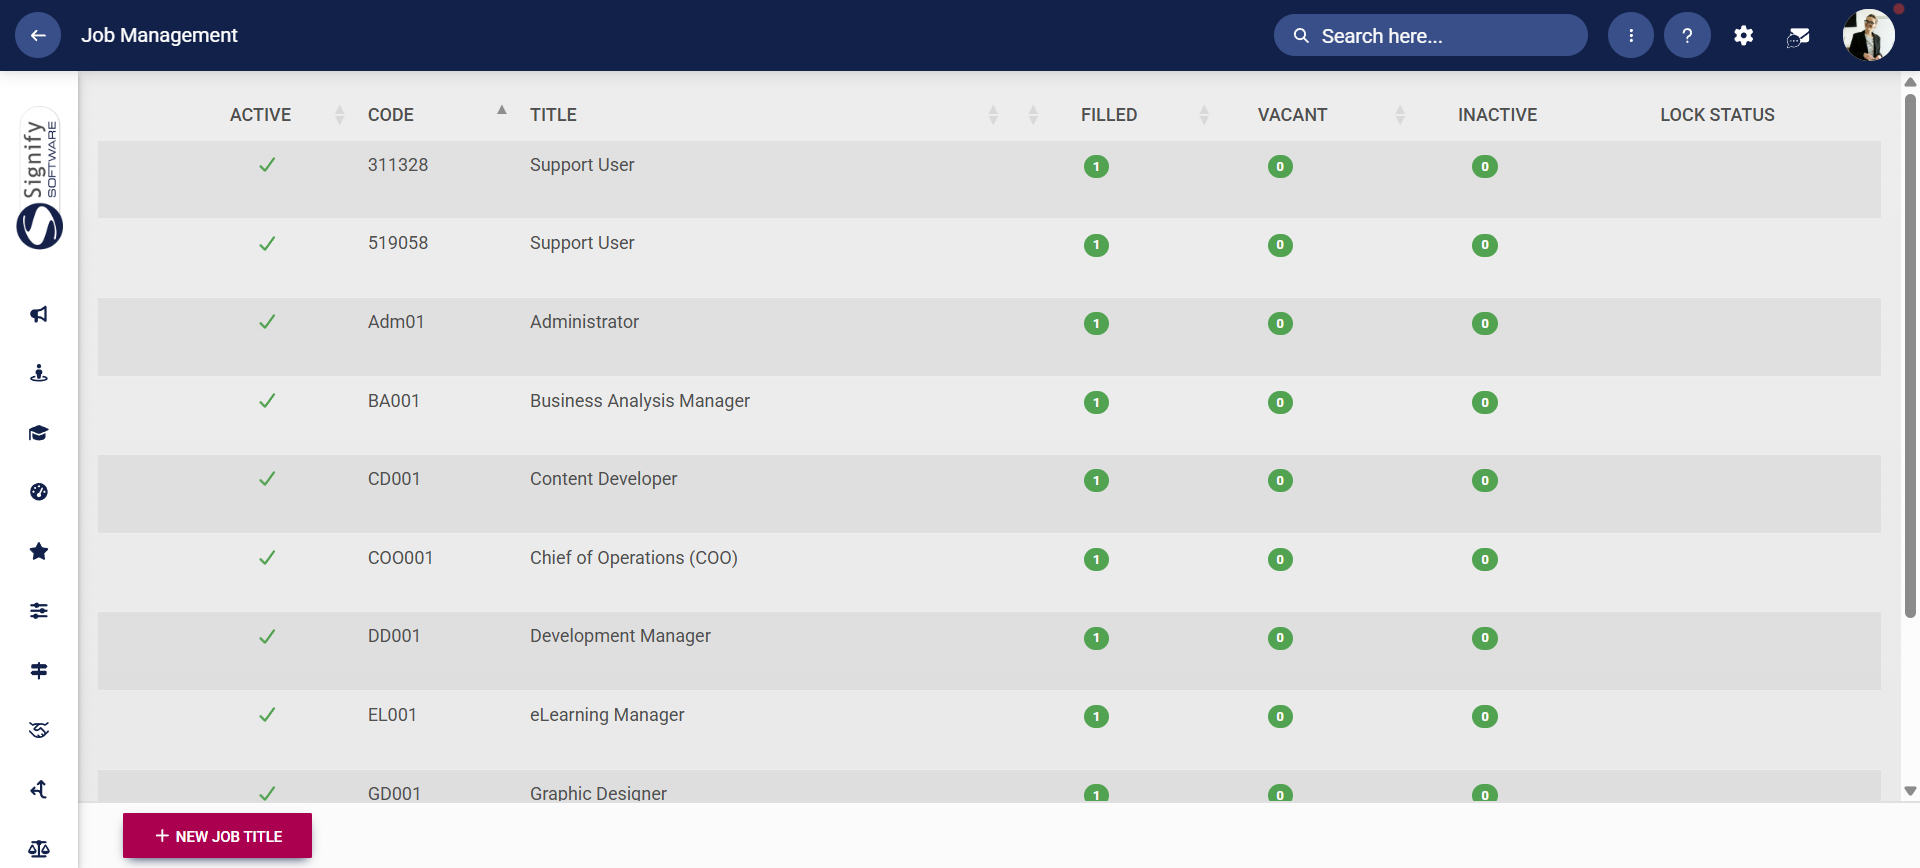
- Click +NEW JOB TITLE to add a new job title.
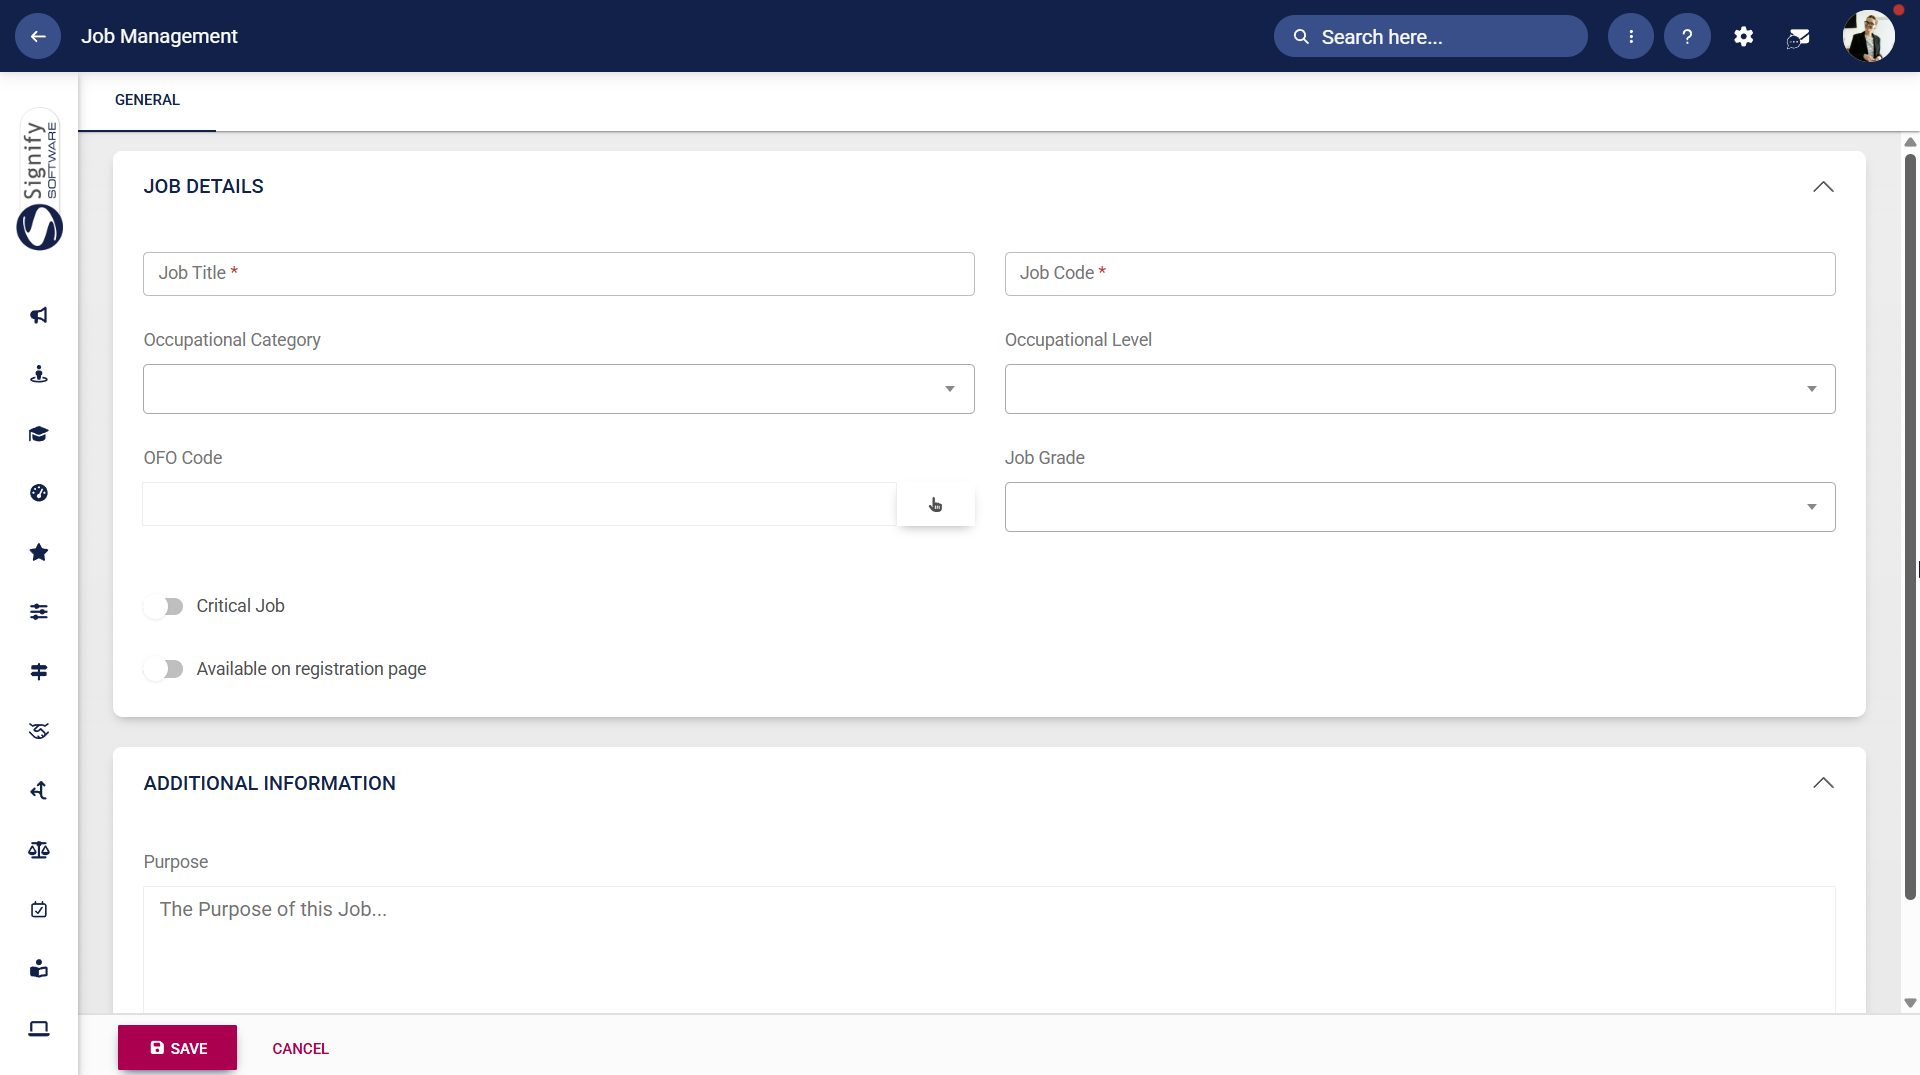
- The job details screen will appear.
-
- Enter the job title and job code.
- If the master data for the occupational category, occupational level, OFO code, and job grade data fields has been set up, you can select the appropriate data from the drop-down menus. To learn more about master data, navigate to the Master Data Maintenance part of this chapter.
- You can toggle the Critical Job switch on and off as required.
- Toggle to enable new registrants to select this job title when registering on the system.
- Other additional information about the job title can be added, but is not required.
-
Click SAVE when you are finished or click CANCEL to discard your edits.
- A message will appear to confirm the successful creation of the job title.
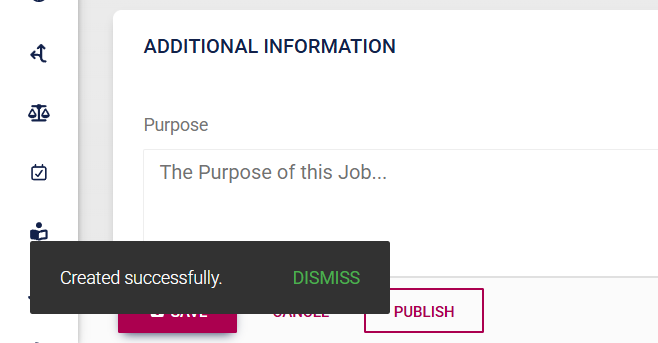
- After saving the new job title, click PUBLISH to finalise and share it.
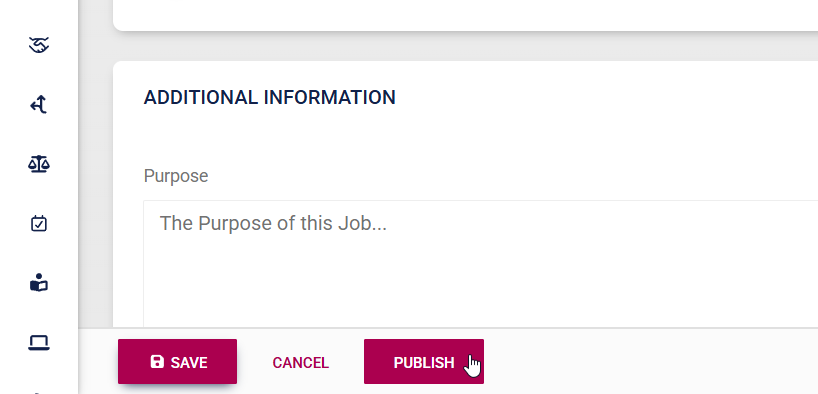
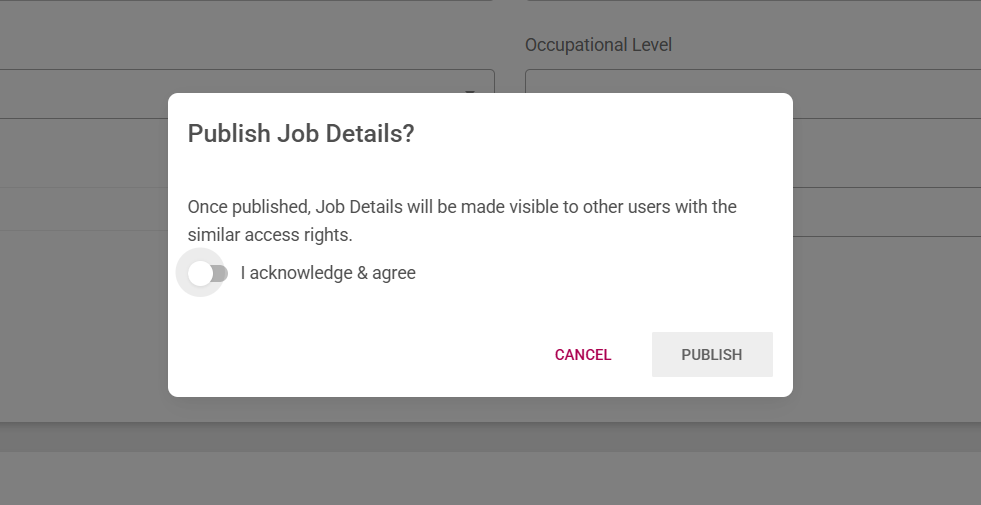
- Toggle to confirm that you acknowledge and agree to the changes, then click PUBLISH.
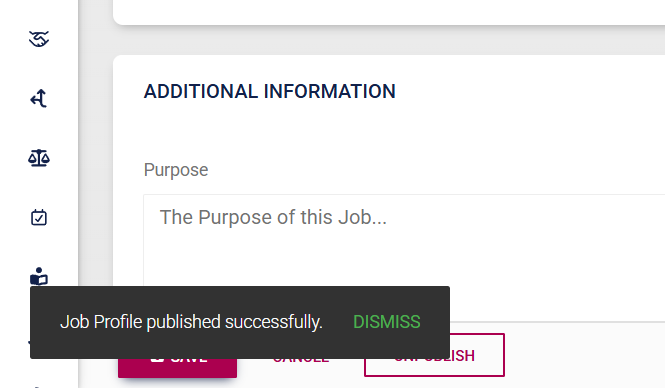
- A message will appear to confirm that the job title was published successfully.
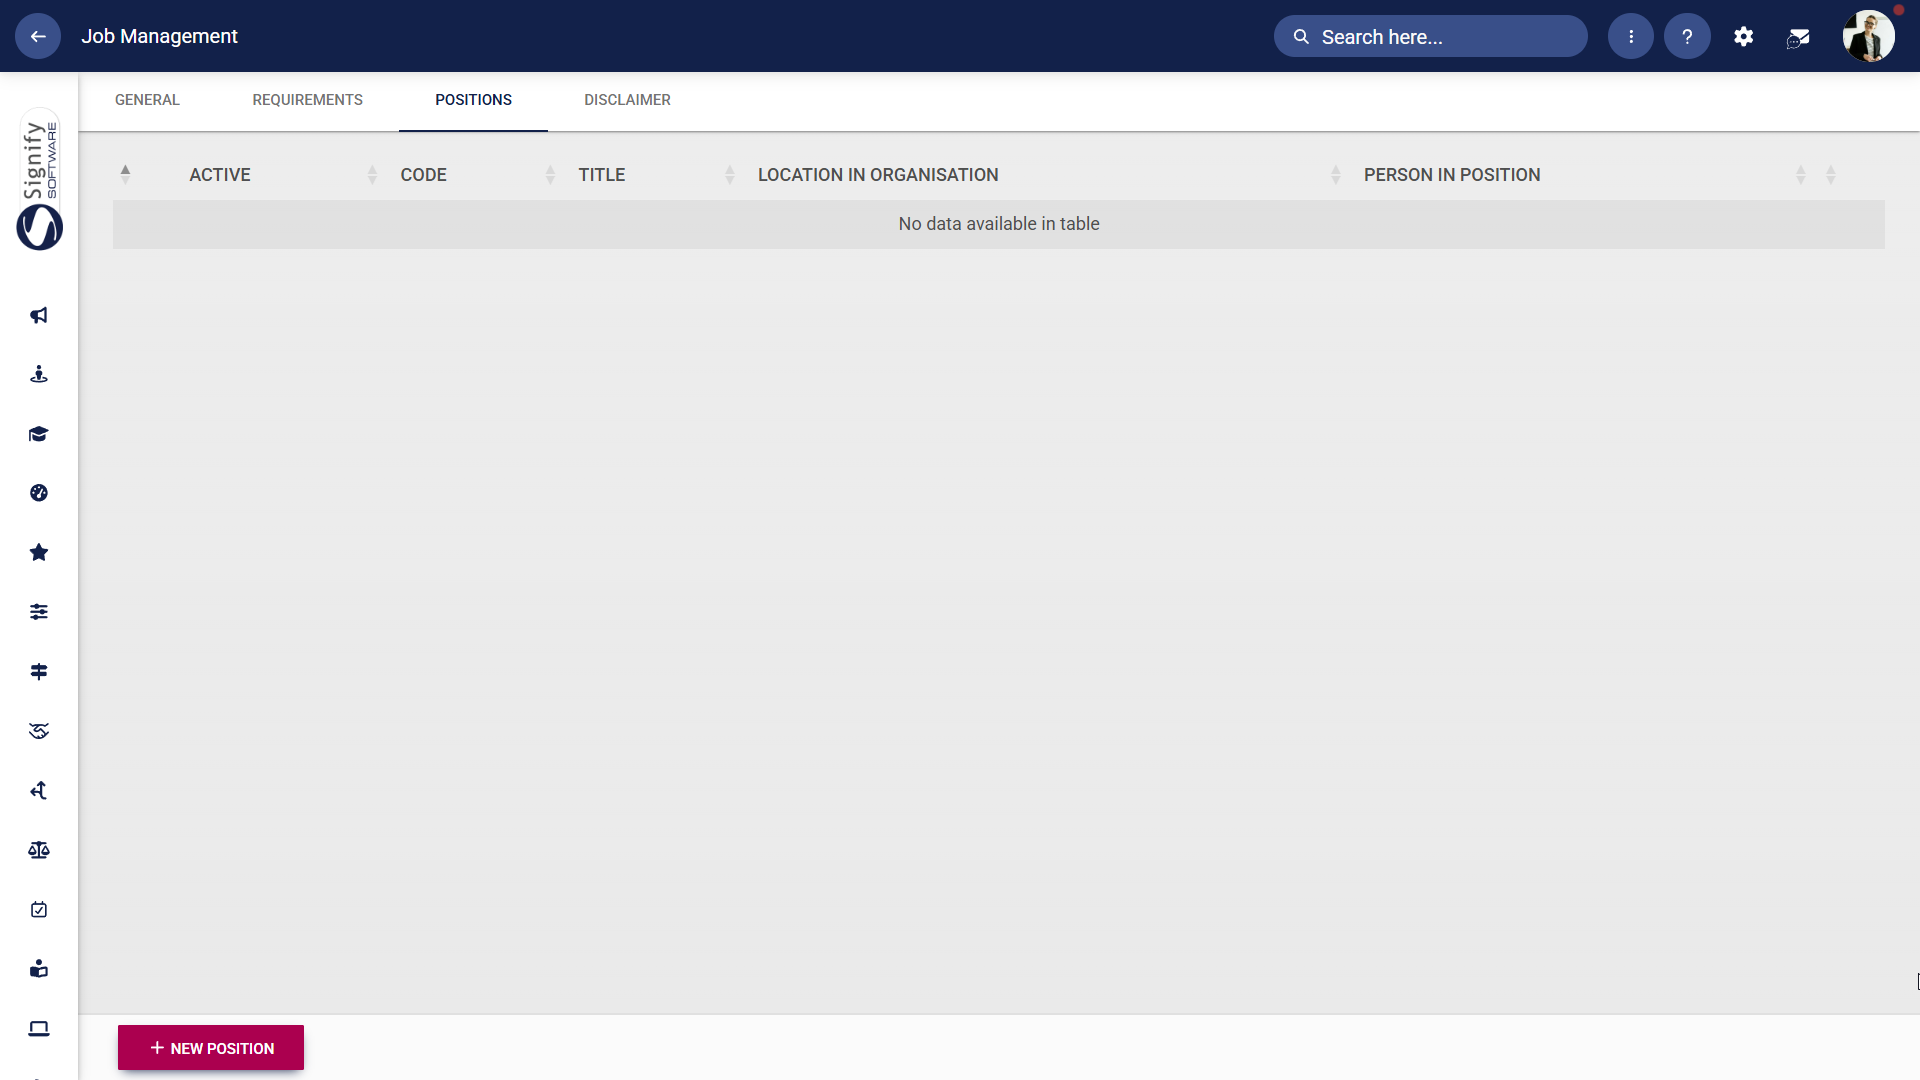
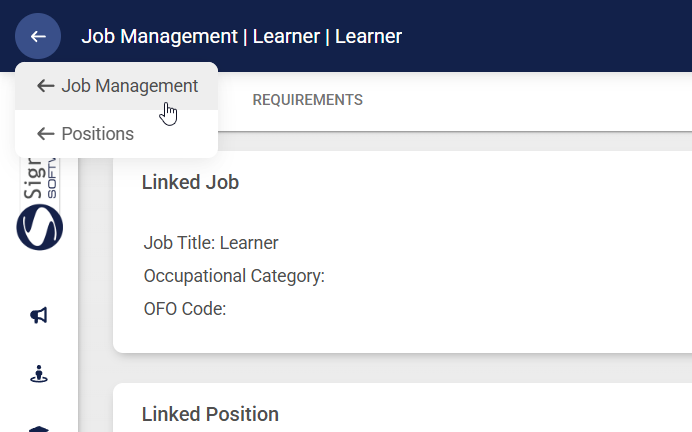
- Once the job title has been created, additional tab options will appear at the top of the screen. You can either set the Requirements for the role or click on the Positions tab to add new job positions associated with that role. Click on Positions to proceed.
- The current positions linked to the job title will be displayed. Click +NEW POSITION to add a new position.
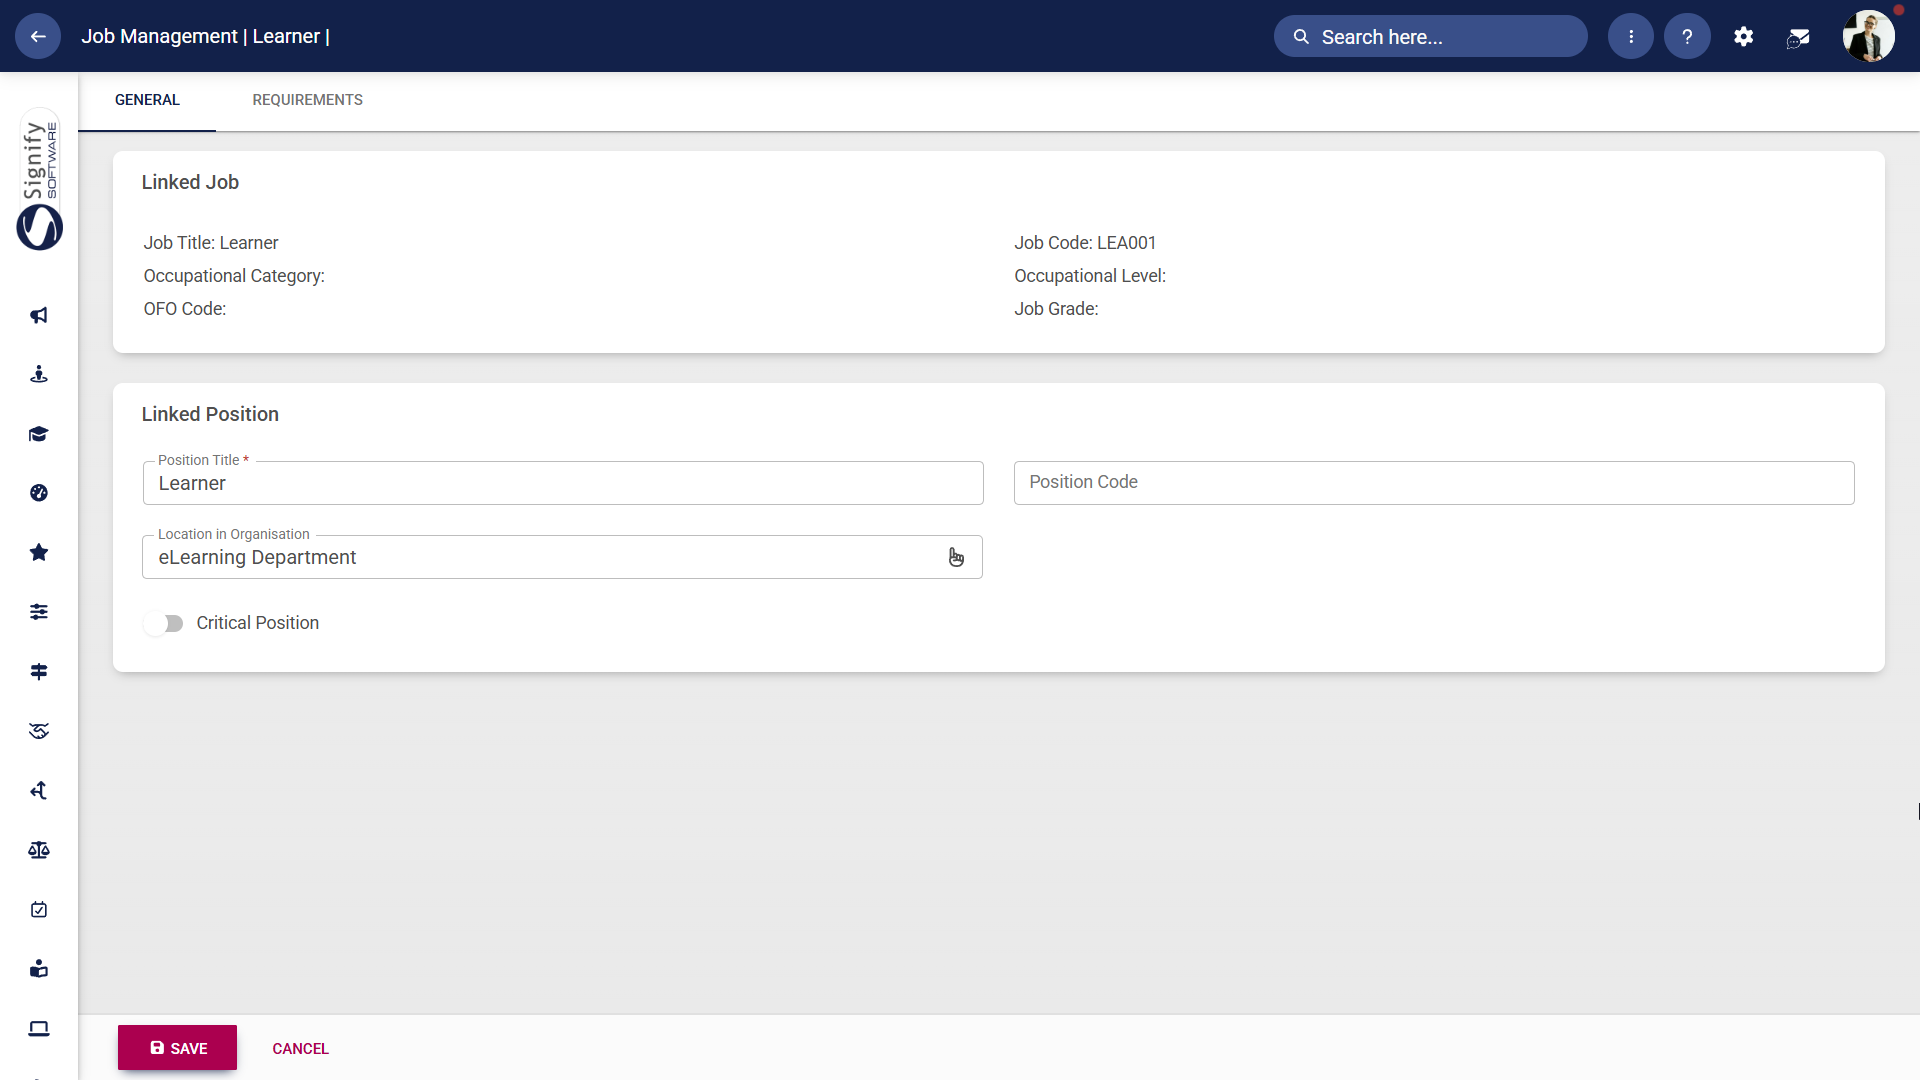
- The position details screen will appear.
-
- Enter the position title. The position code will be automatically generated.
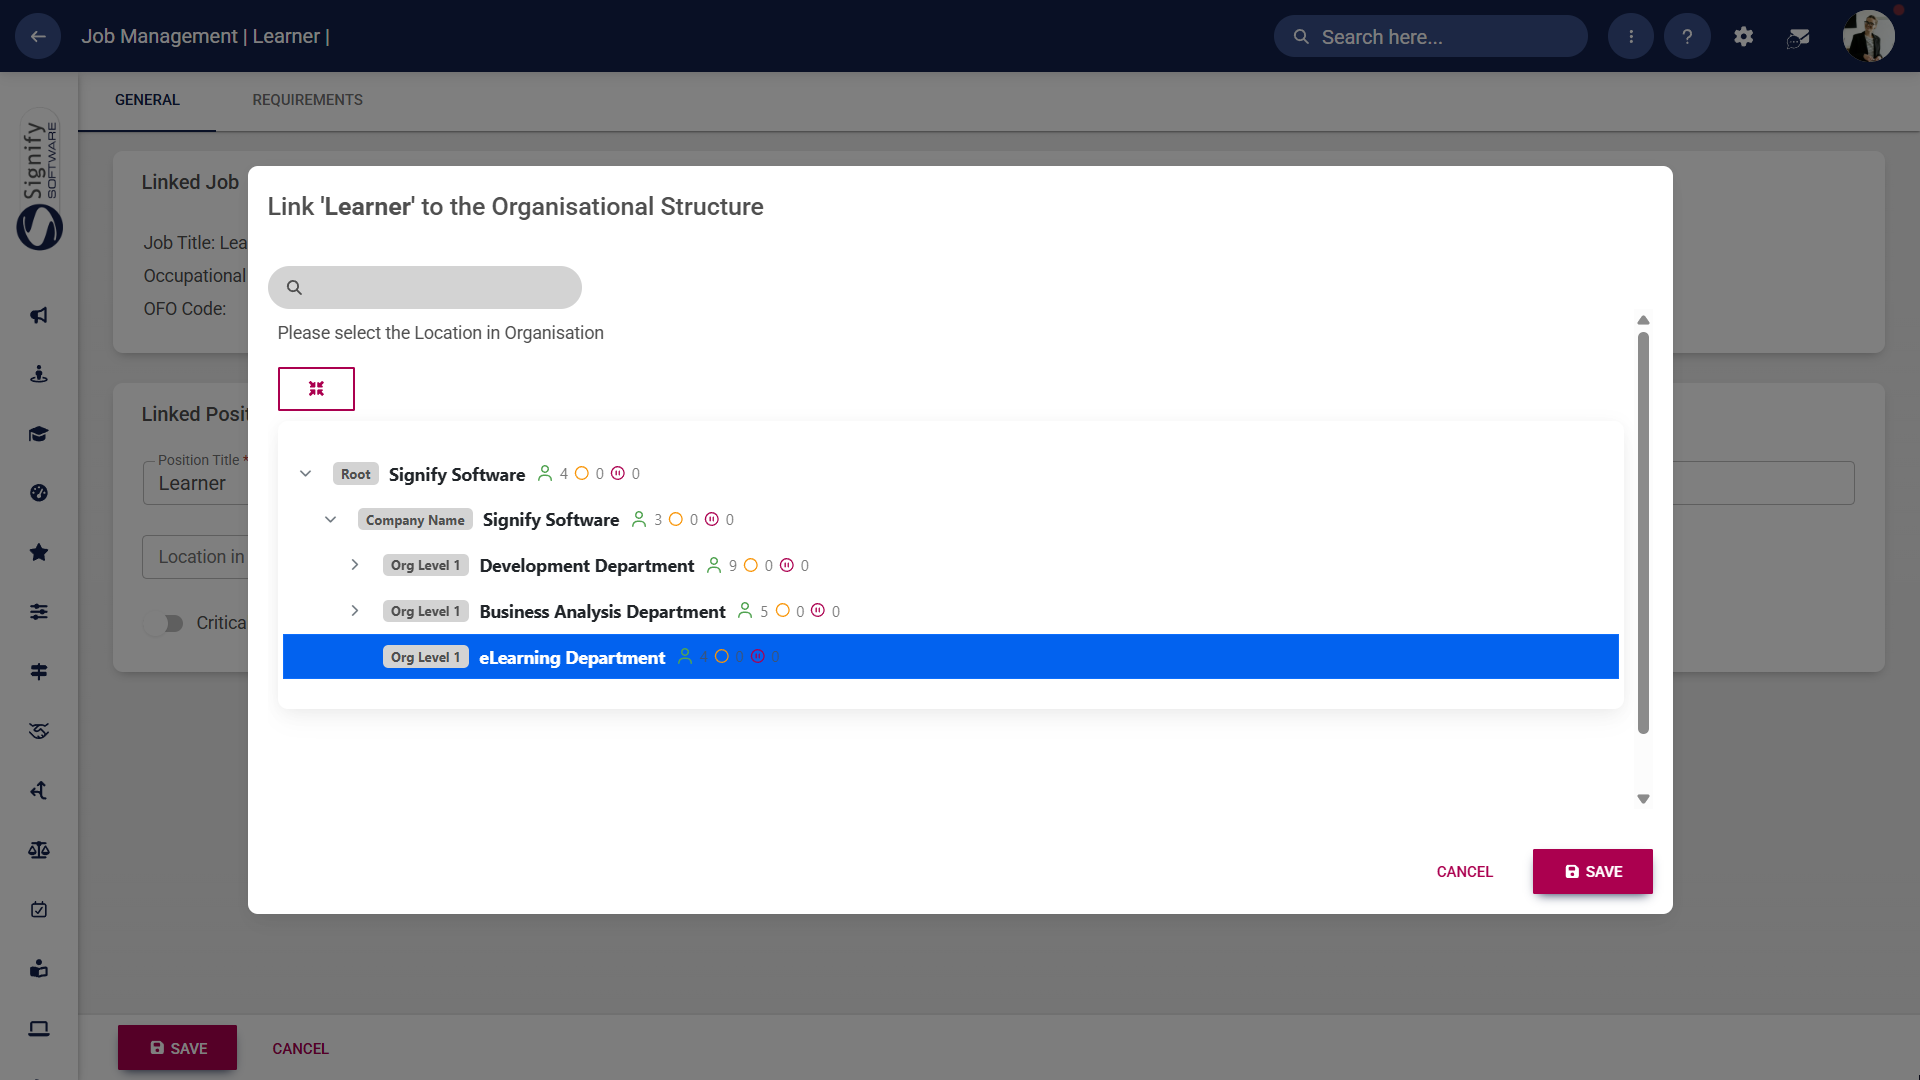
- Click the hand icon to select the location in the organisation.
- Click the Critical Position toggle if required.
-
Click SAVE when you are finished or click CANCEL to discard your edits.
- You can return to Job Management to continue adding job titles and positions as needed.
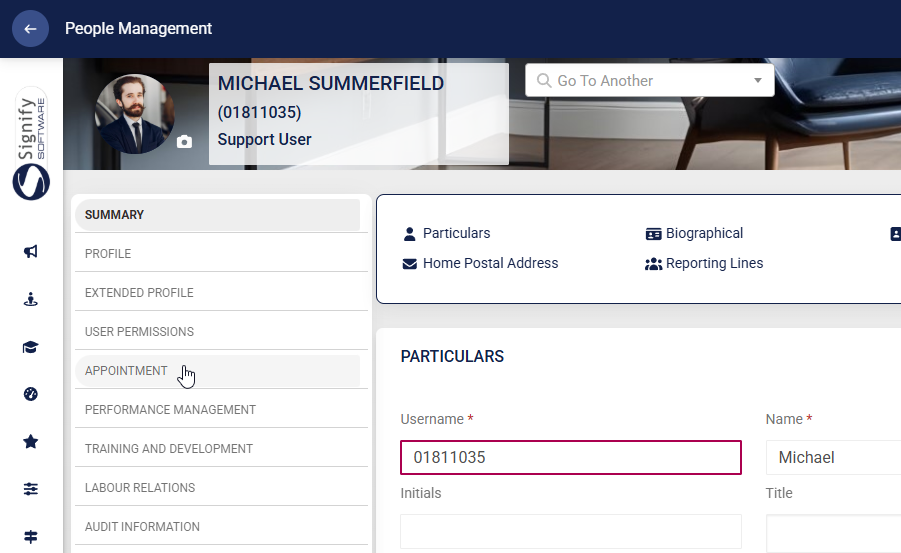
Appoint new users manually
Since the organisational structure and the job titles and positions have been created, we can now add a new person to the system.
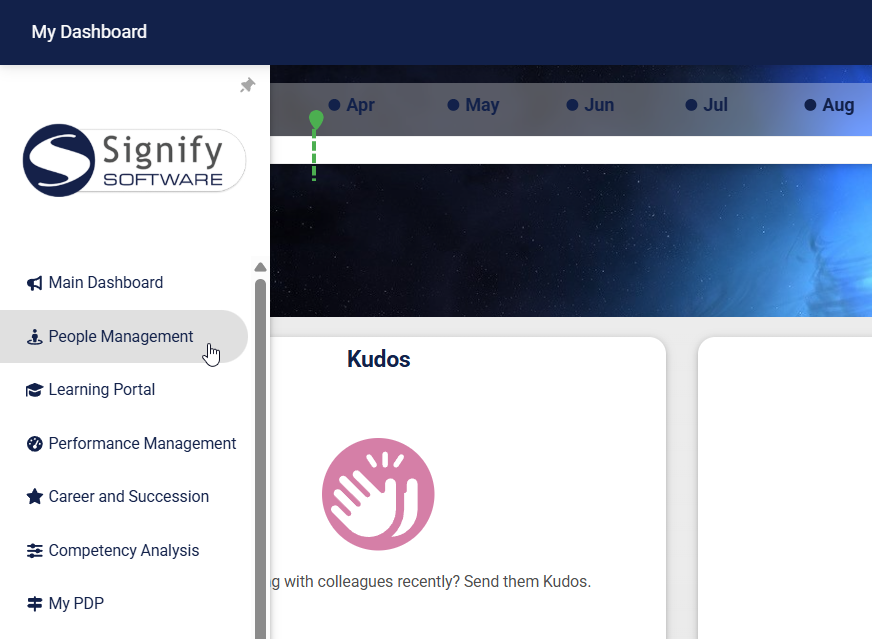
- Hover over the sidebar menu and click People Management.
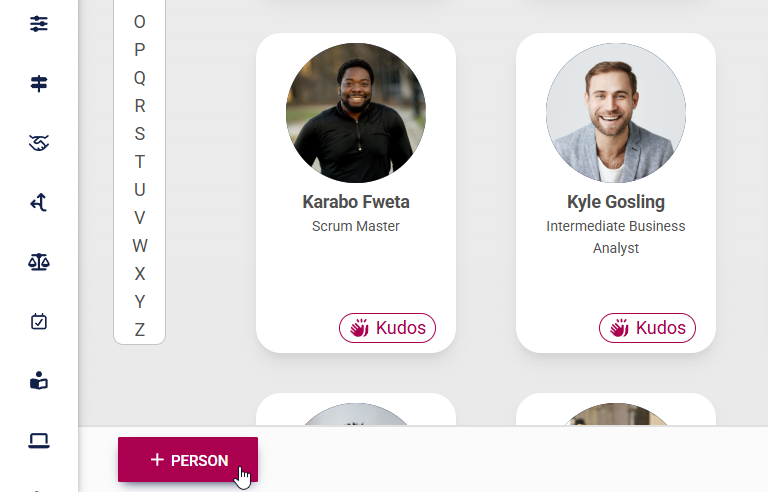
- Click +PERSON.
- Expand the organisational units to find the new
Positionposition you have just created.
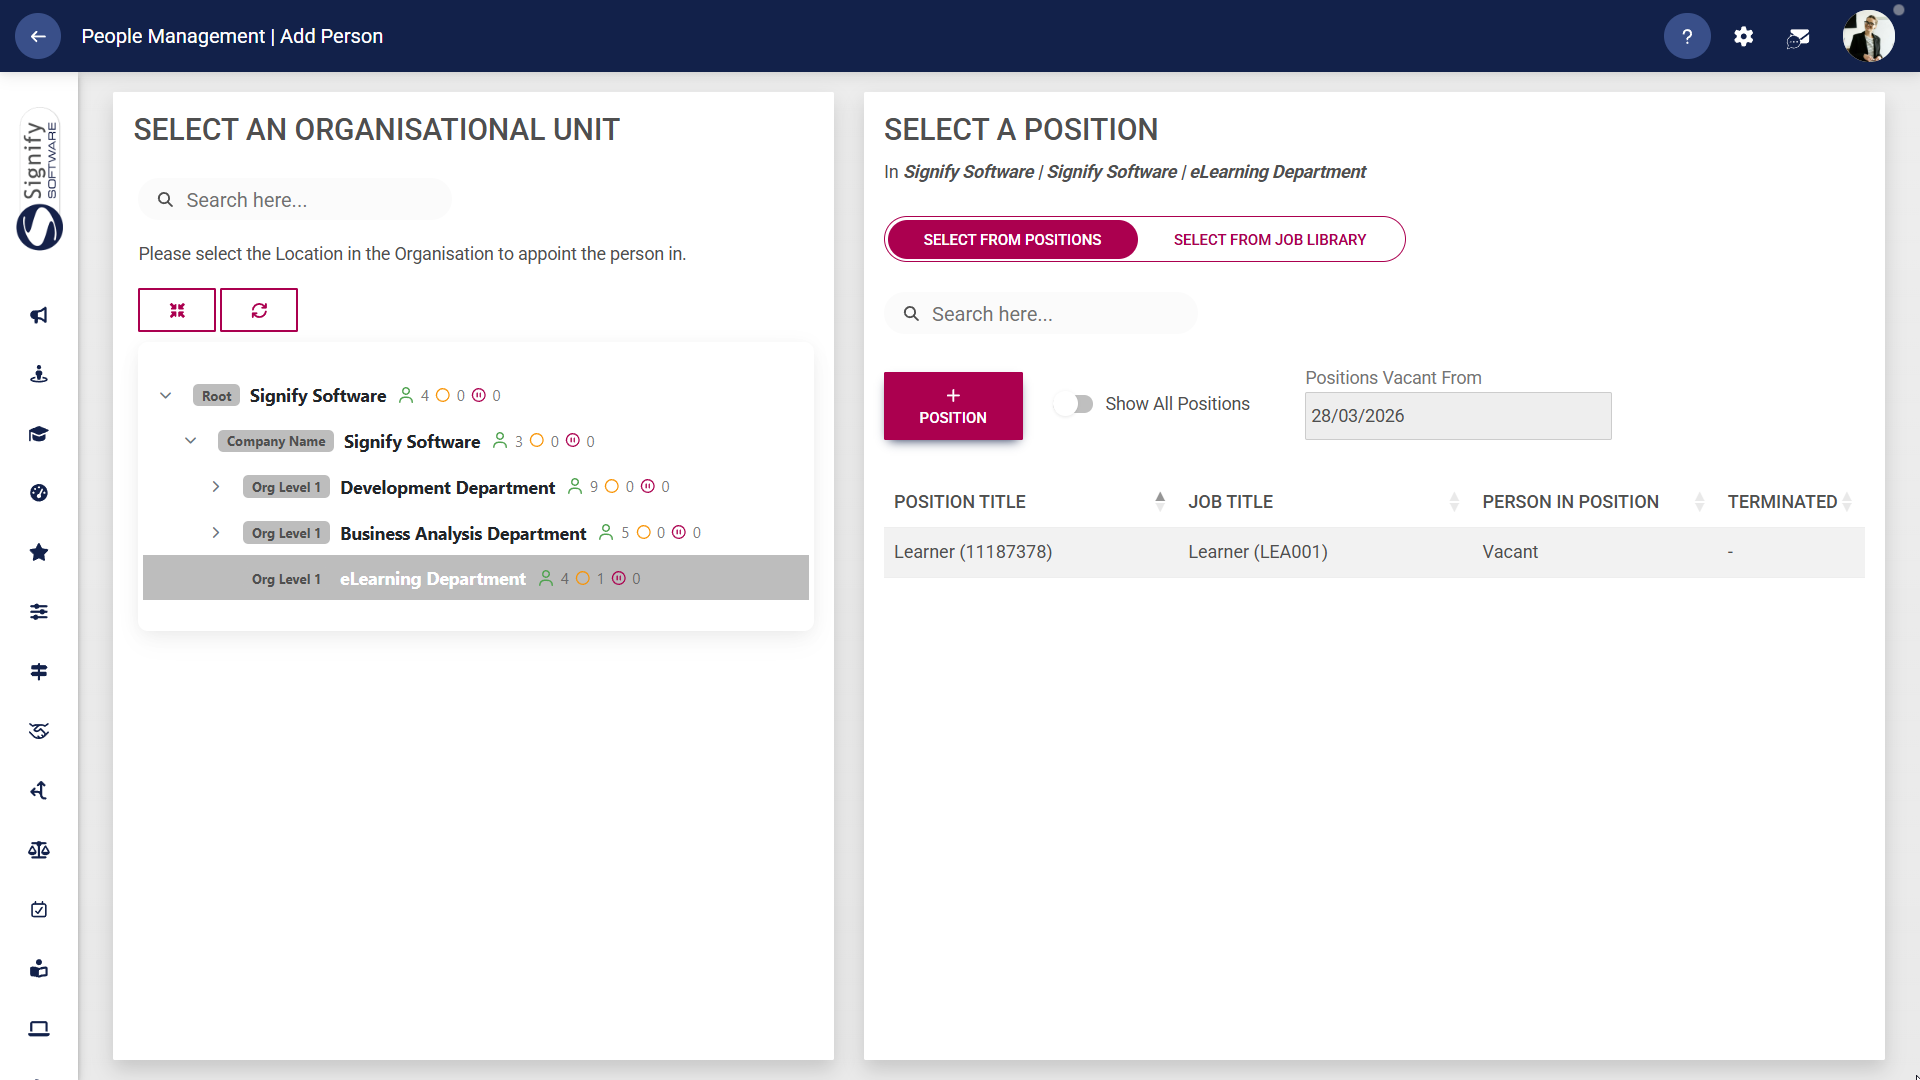
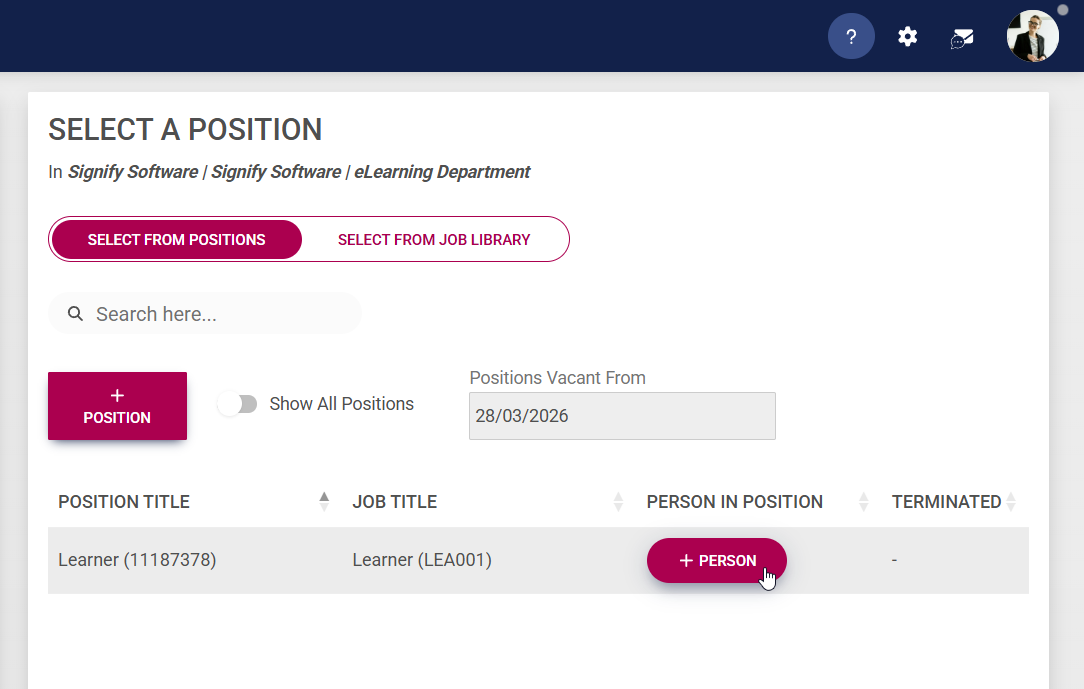
- Ensure the job title and the position title are correct, then click +
PersonPERSON to add a new person.


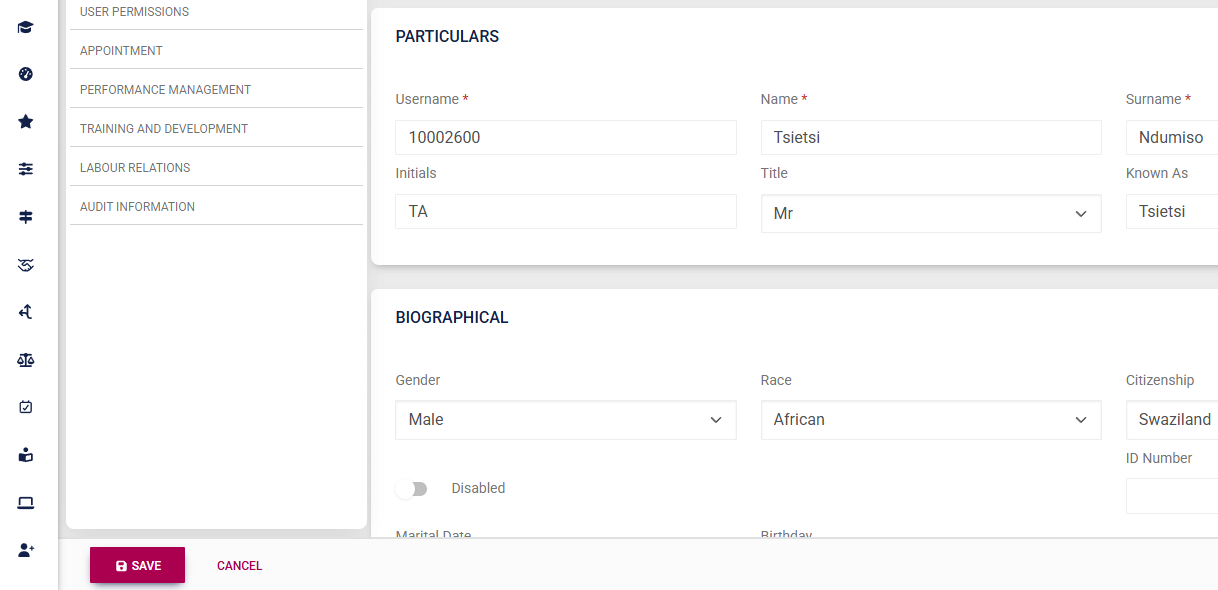
- You may
choose tofurther revise the user's informationwithinin their profile, including updates to biographical details, appointment history, or access rights. Click SAVE when you are finished or click CANCEL to discard your edits.
Follow the above procedure to add users manually. This method is also effective for adding small numbers of users at a time. Alternatively, follow Method 2 below if you prefer to streamline the process and add many users at a time.
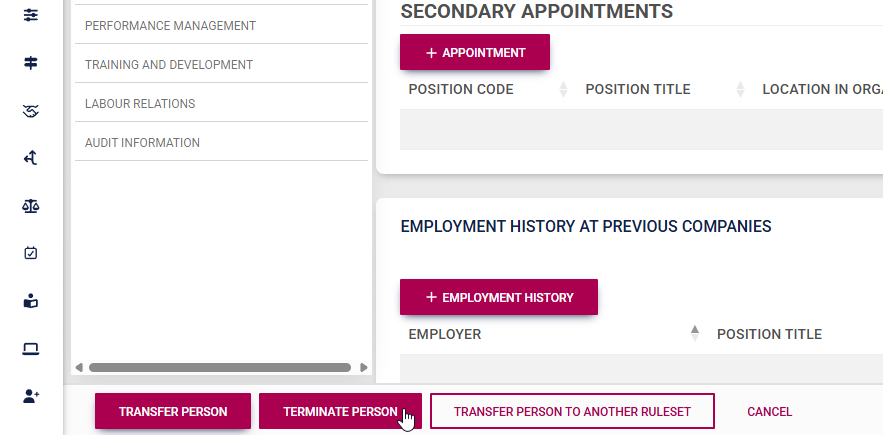
TRANSFERRING
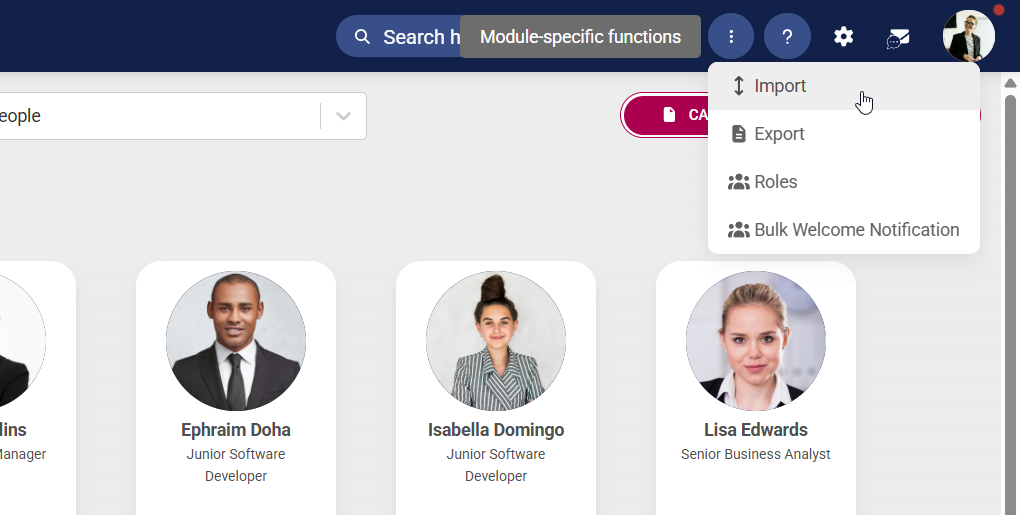
Method a2: person’sAdd role or position in the company changes, they can be transferred on the systemusers using the Peopleimport Management module.
1. Hover over the sidebar menu and click People Management.
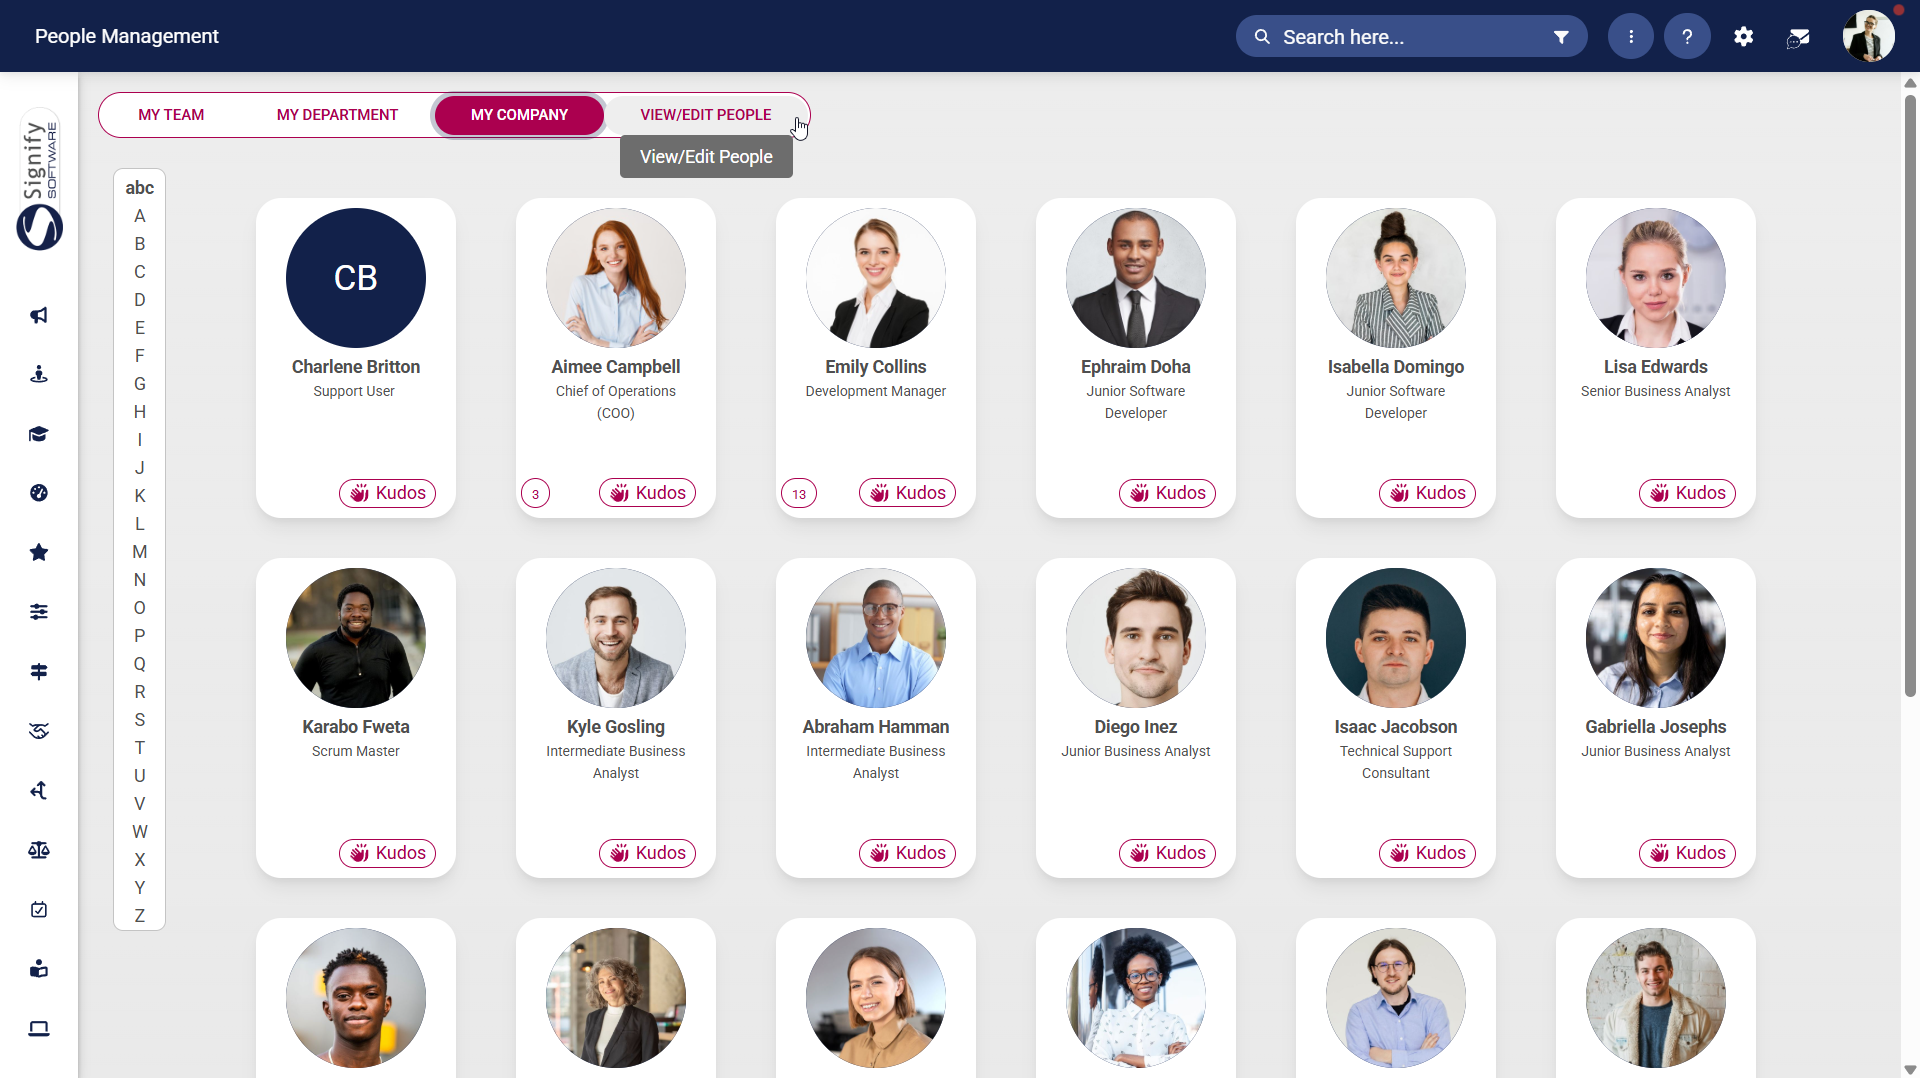
2. Navigate to the Manage People tab.
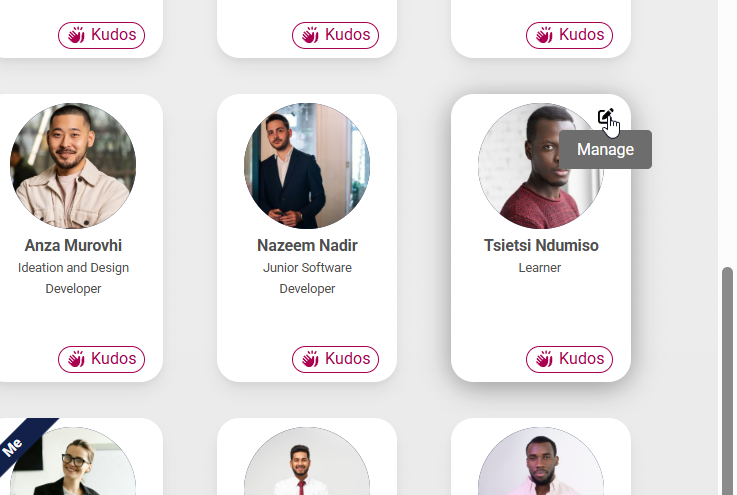
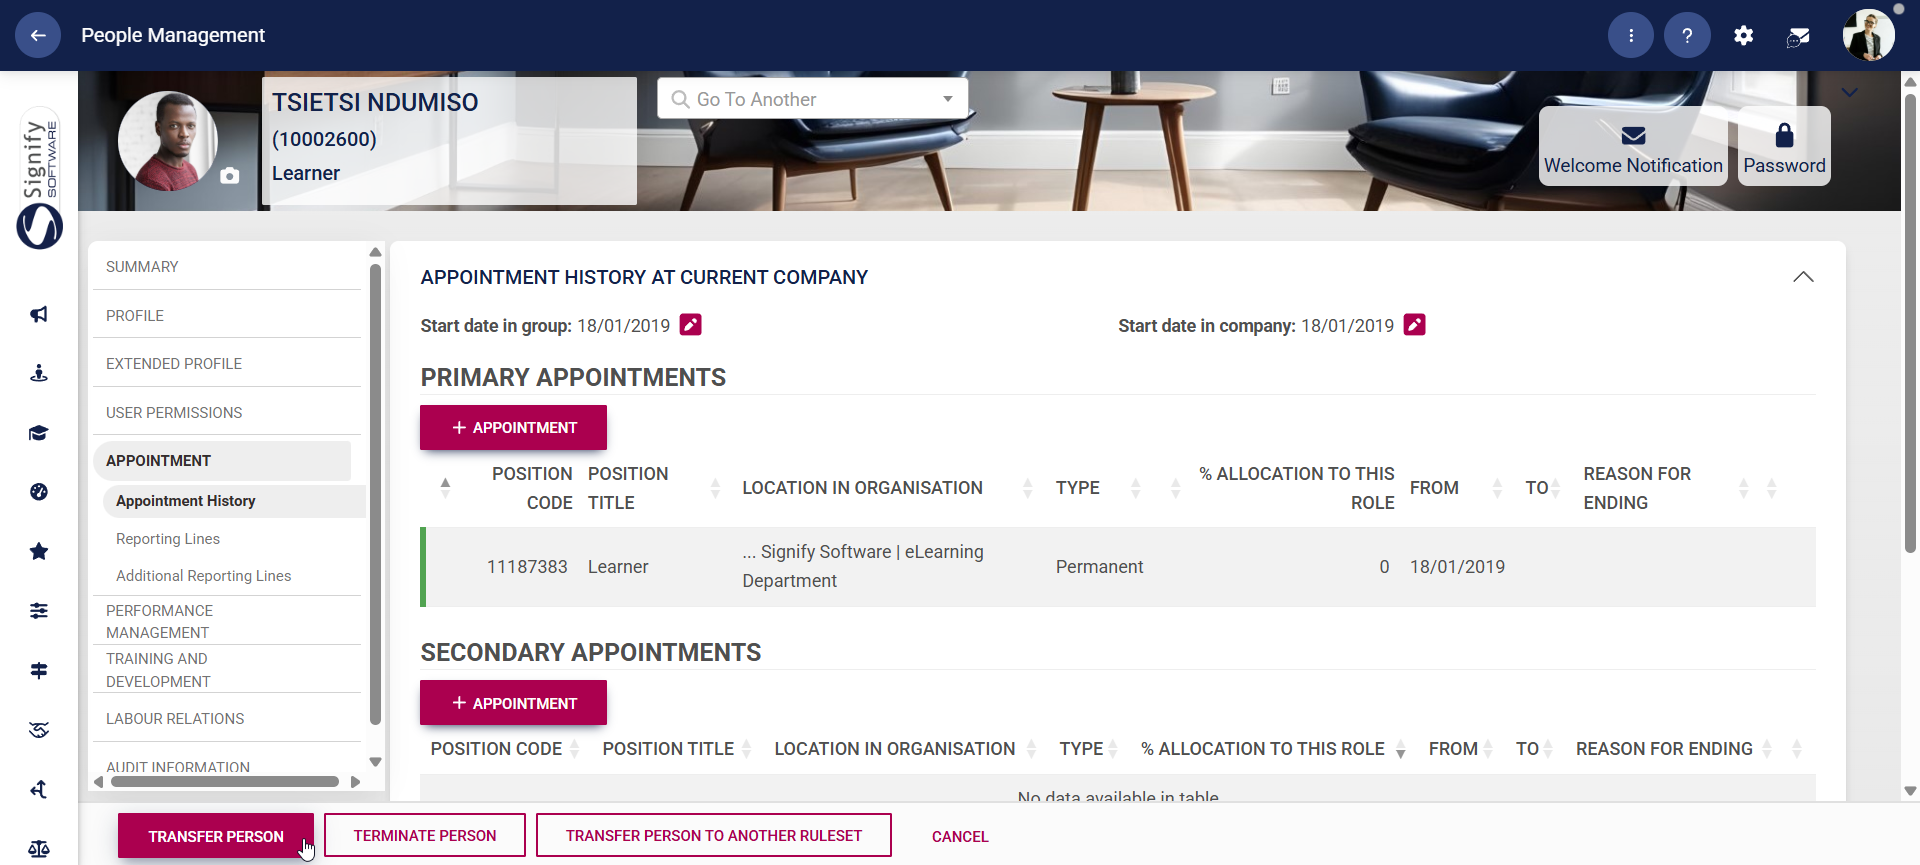
3. Hover over the card of the person you would like to transfer and click on the pencil icon to manage their profile.
sheet
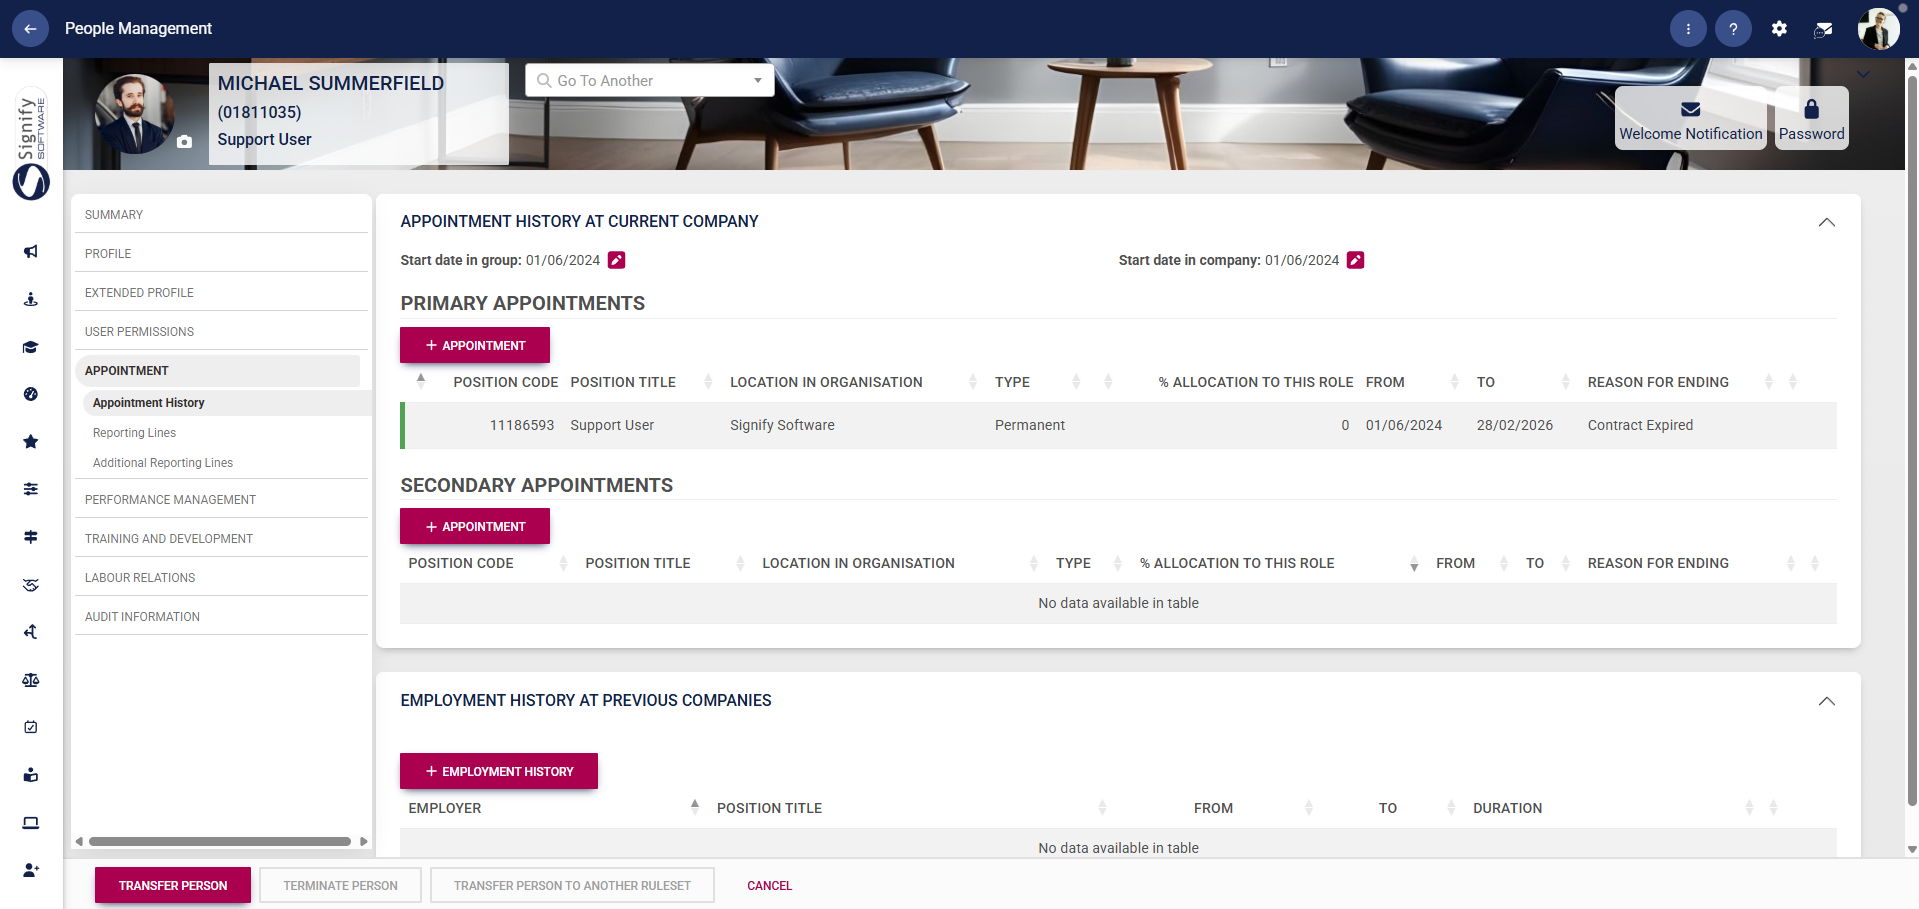
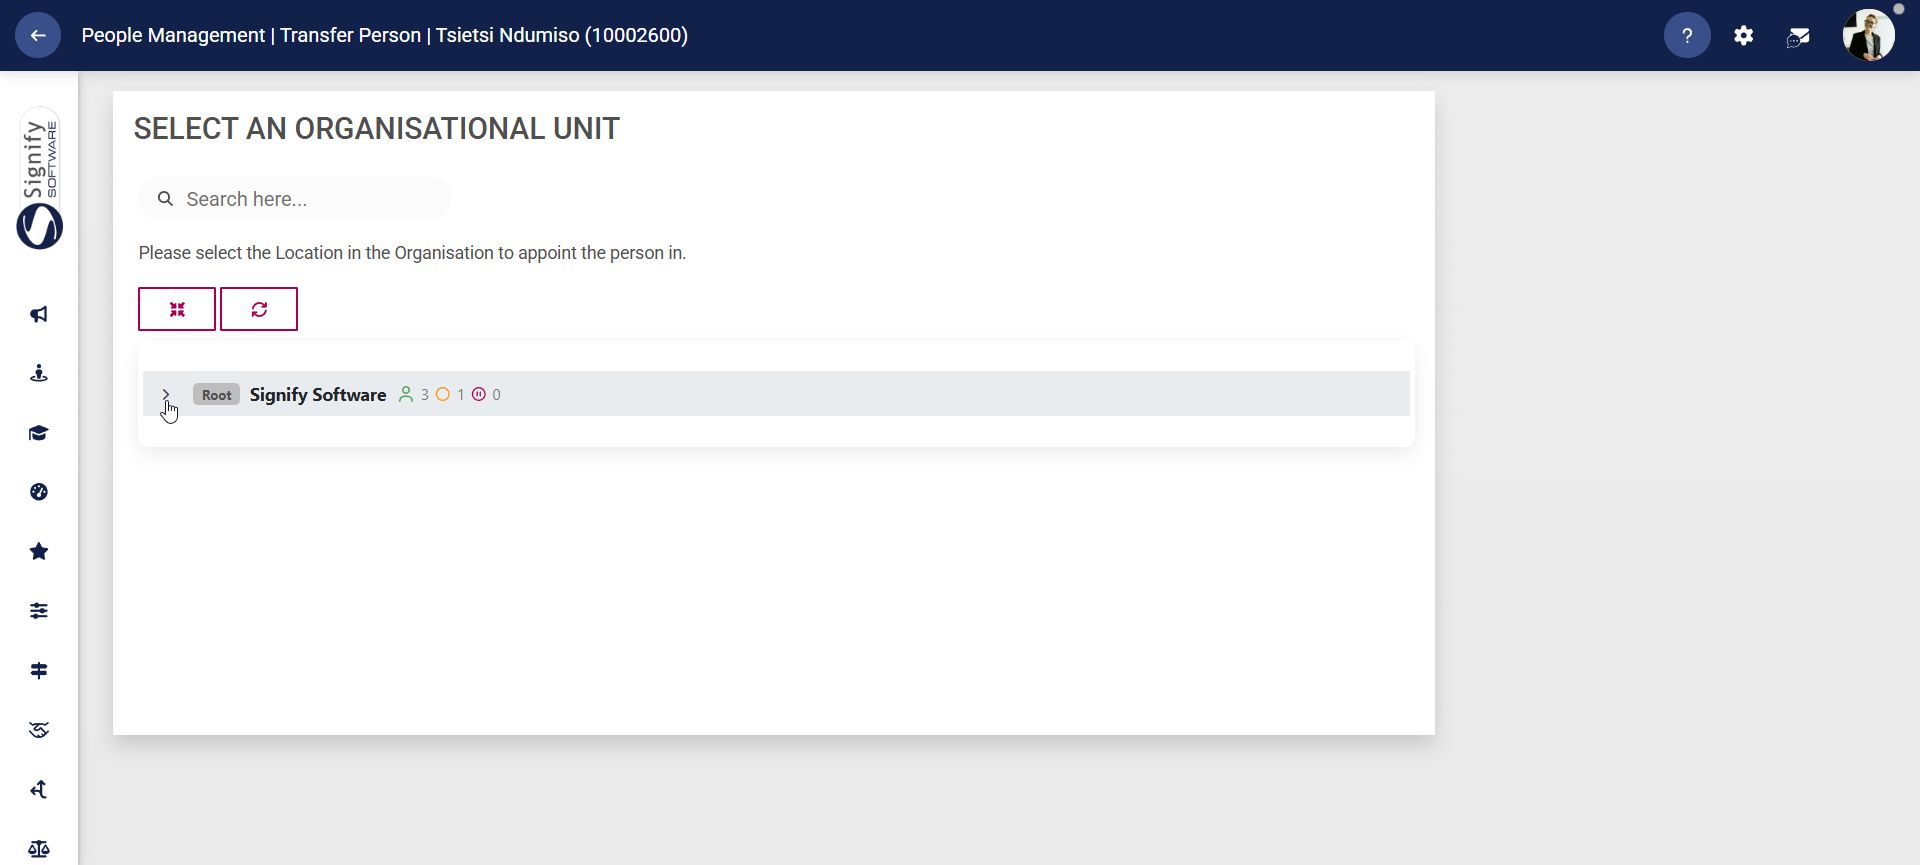
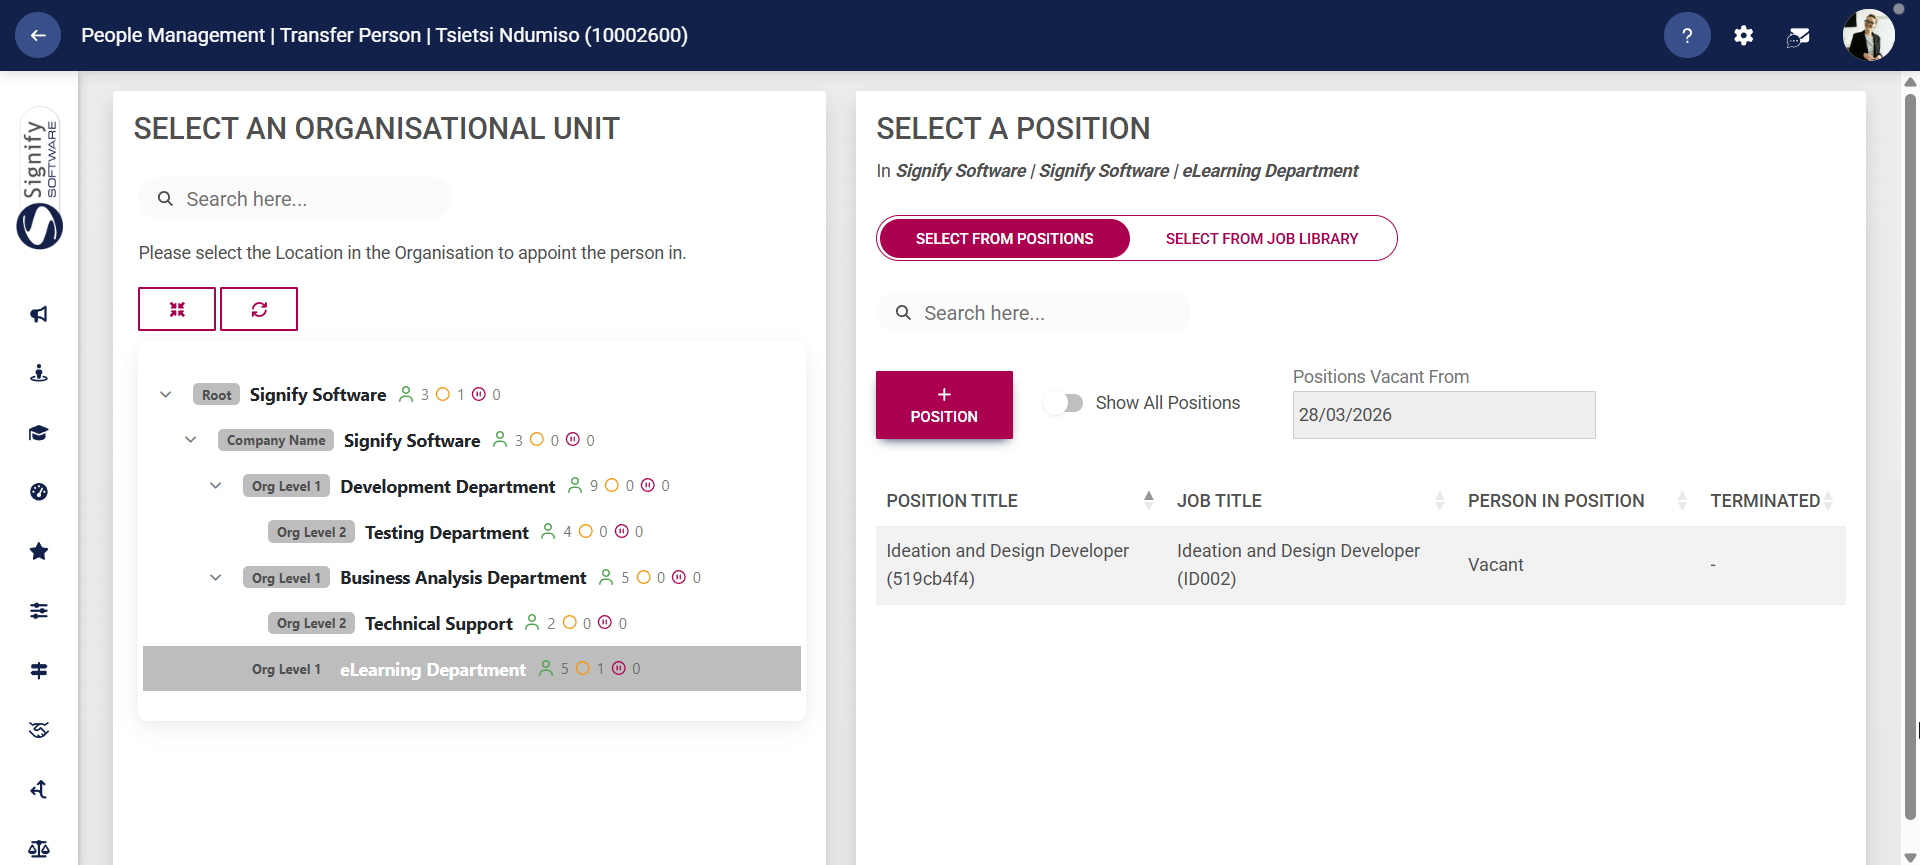
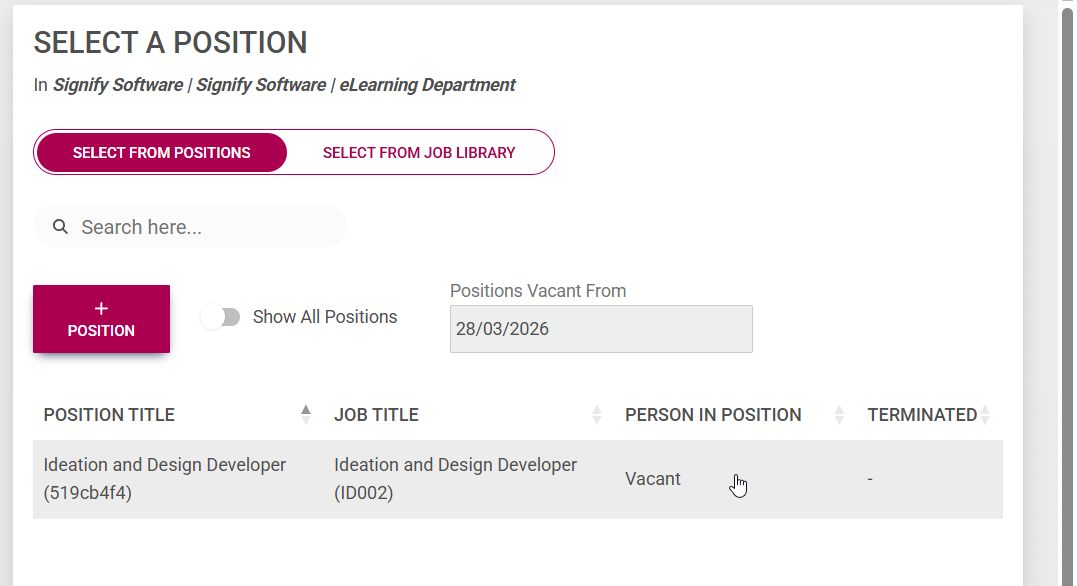
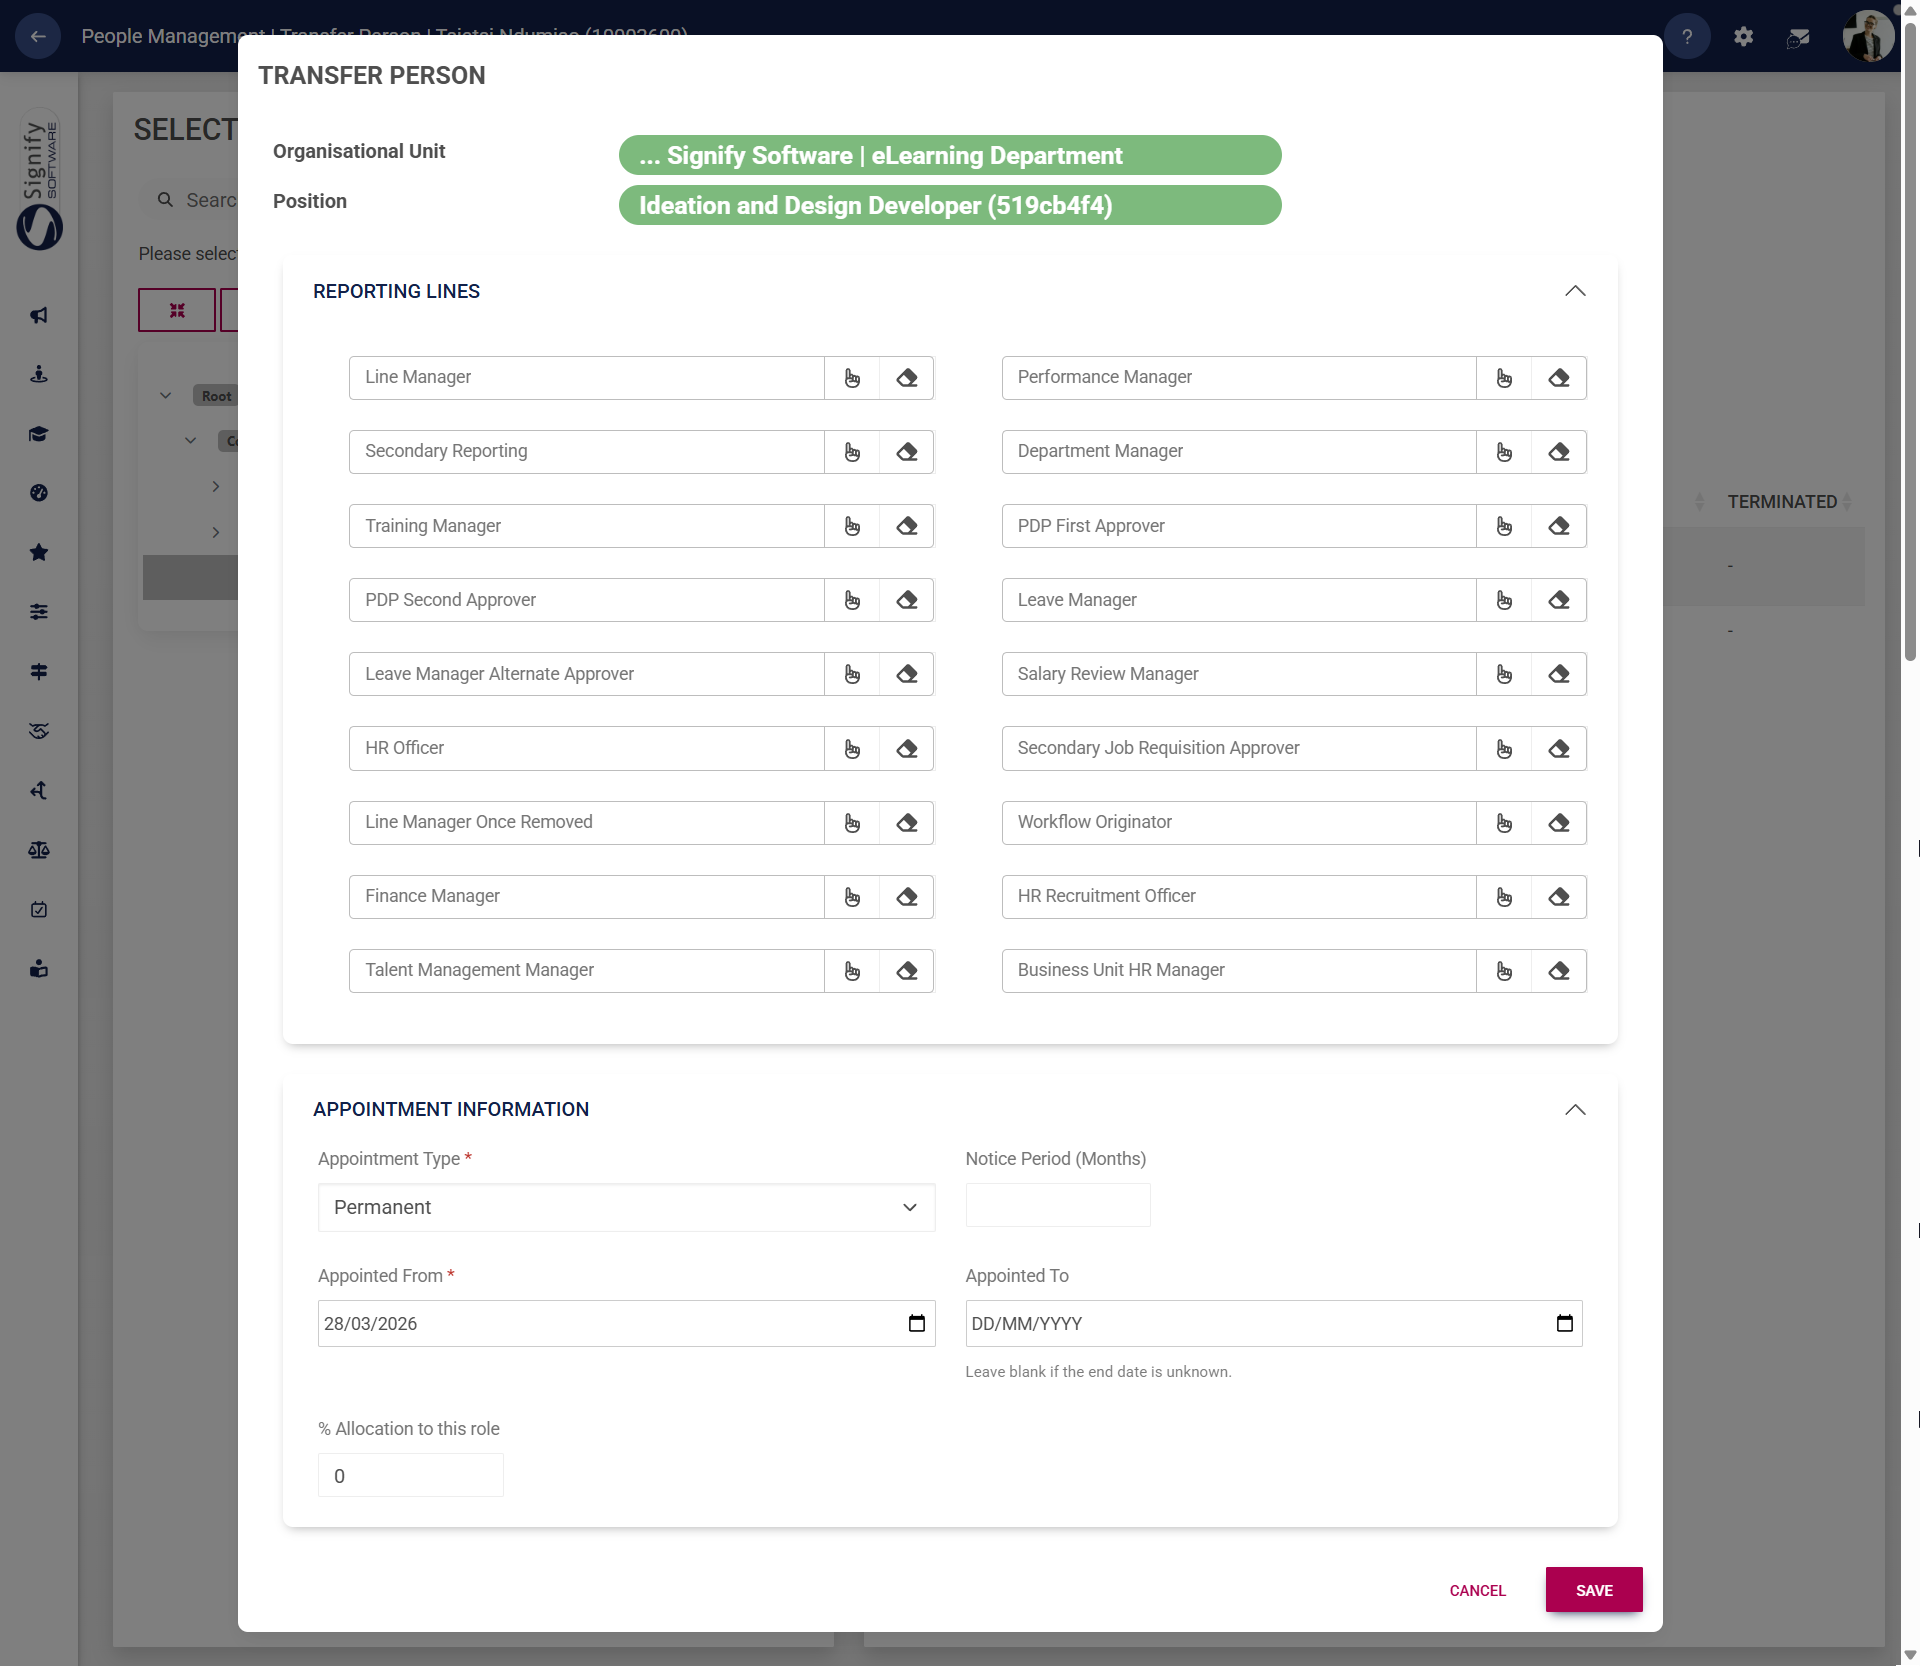
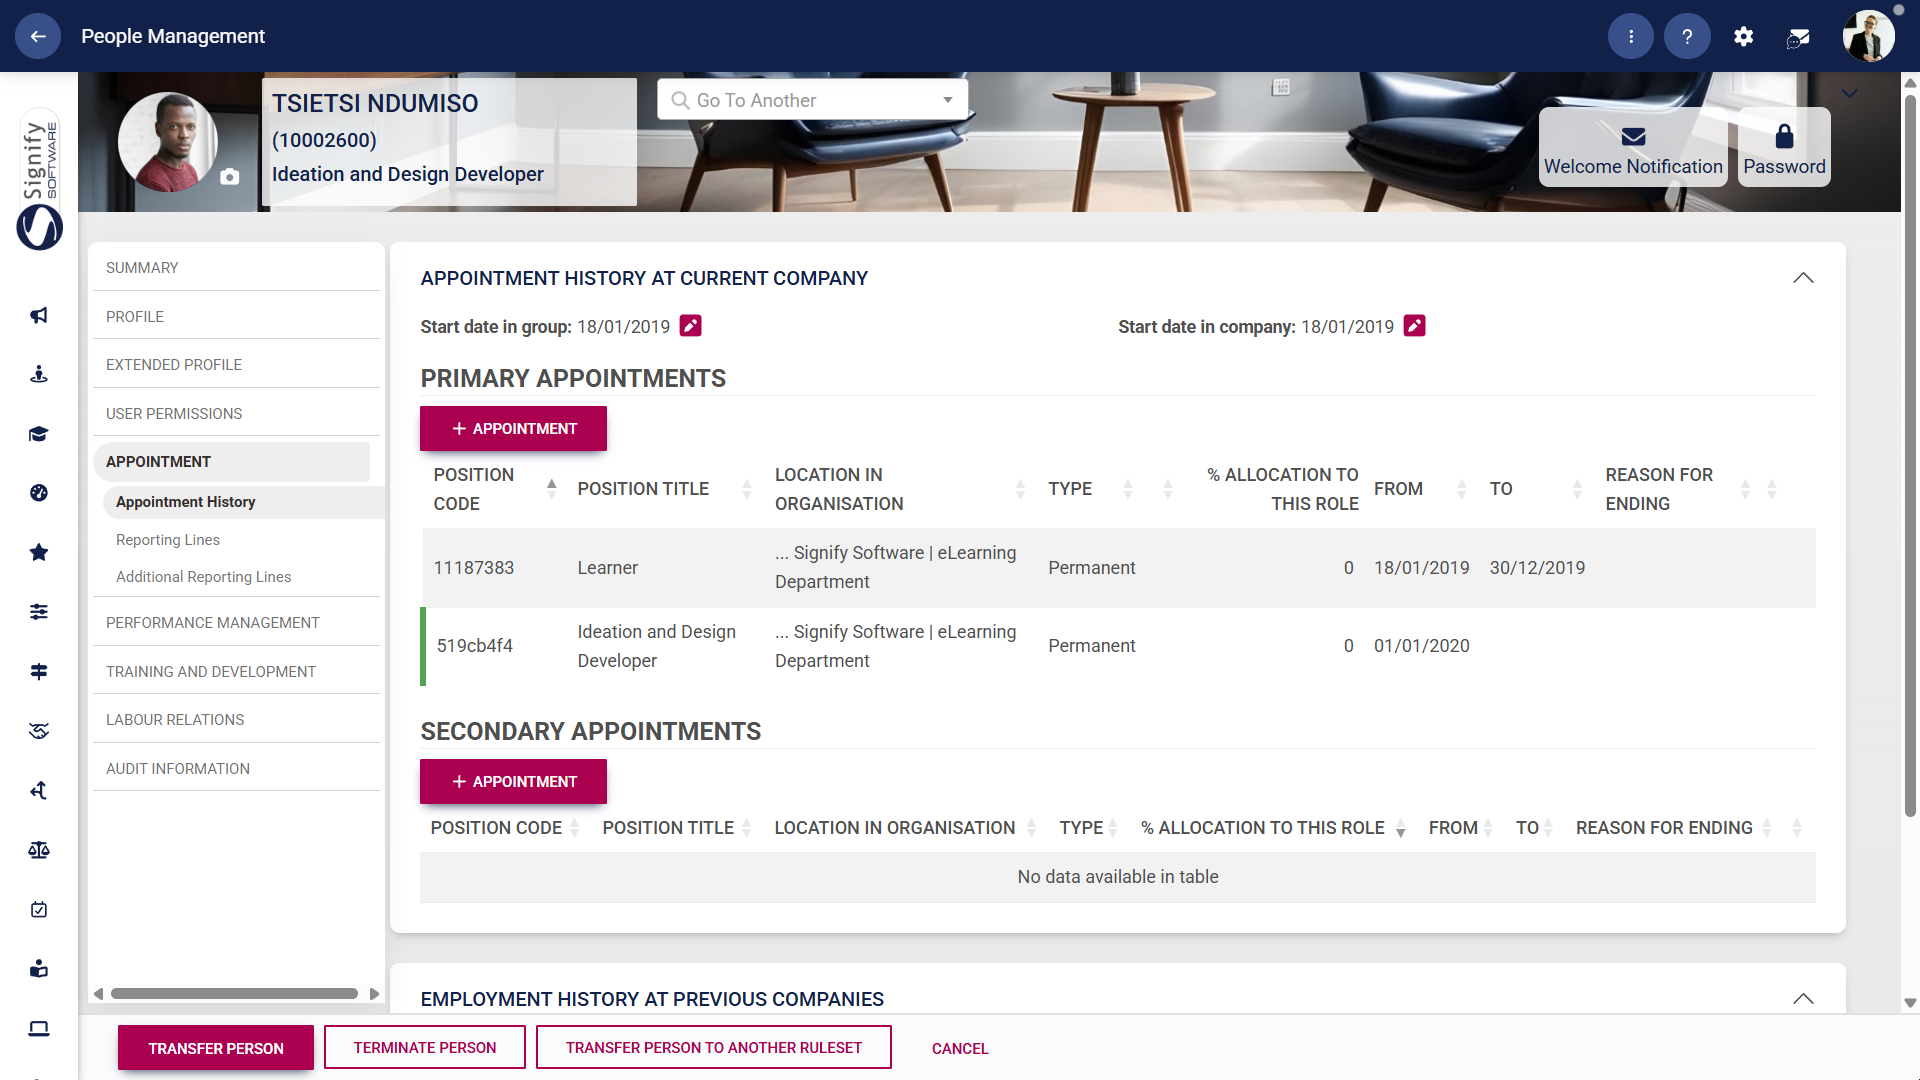
4. On the lefthand menu, click on Appointment. 5. At the bottom of the screen, click on Transfer Person. 6. Expand the organisational structure to find the location in the organisation to which the employee is being transferred to. 7. Click on the employee’s new position on the right of the screen. If the new position has not been created, you can do so by clicking +Position. Alternatively, you can select an existing position from the Job Library. 8. Complete the appointment information, then click Save to proceed, or Cancel to discard your changes. 9. The employee’s previous appointment, as well as their new role, is recorded in the Appointment History tab on the employee's profile. METHOD 2: ADD USERS USING THE IMPORT
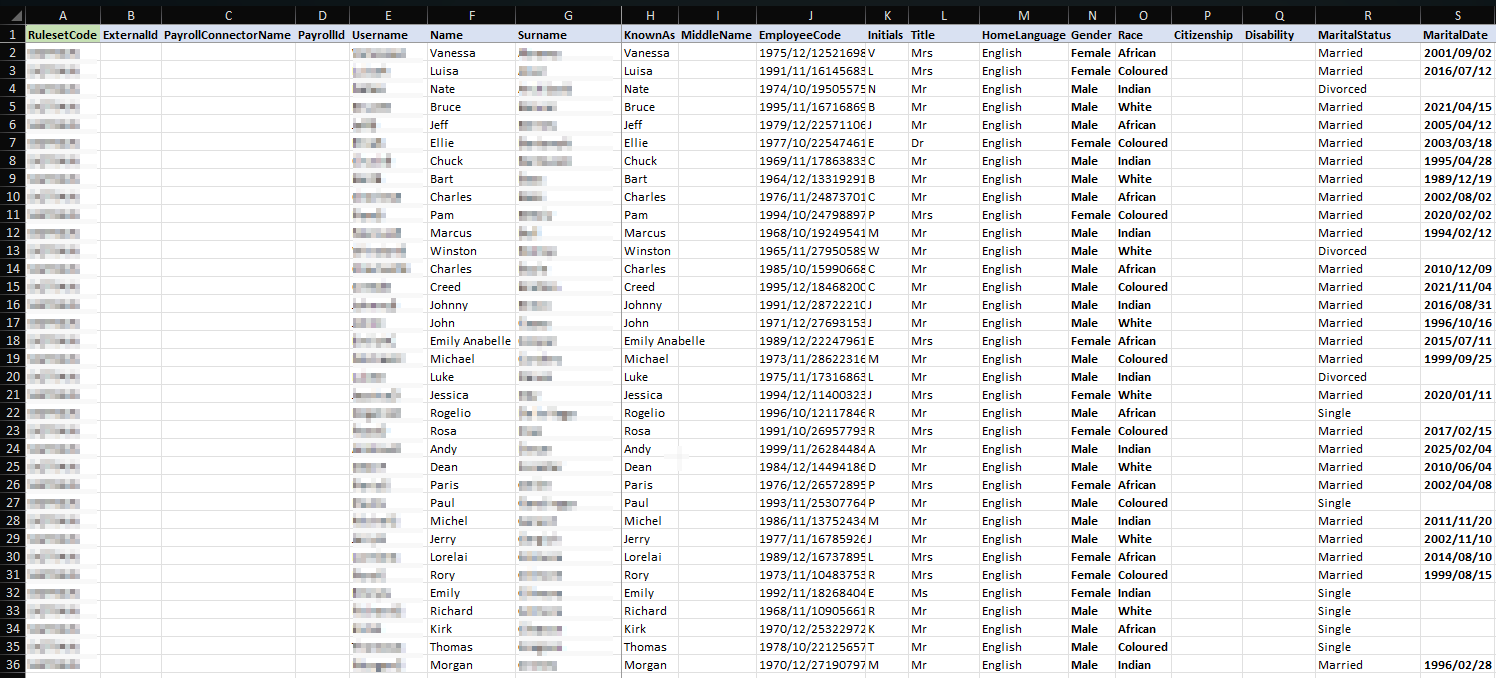
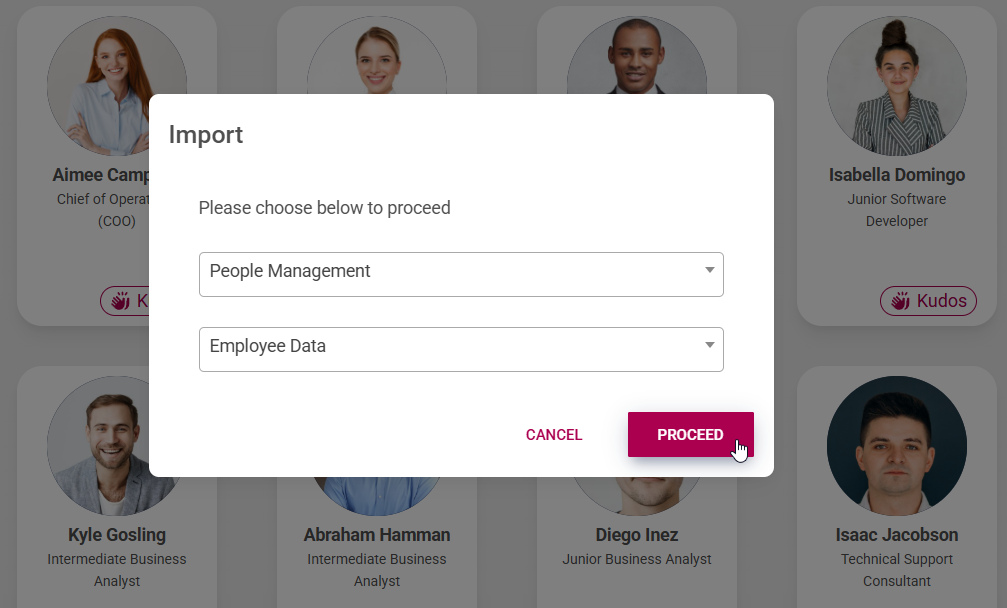
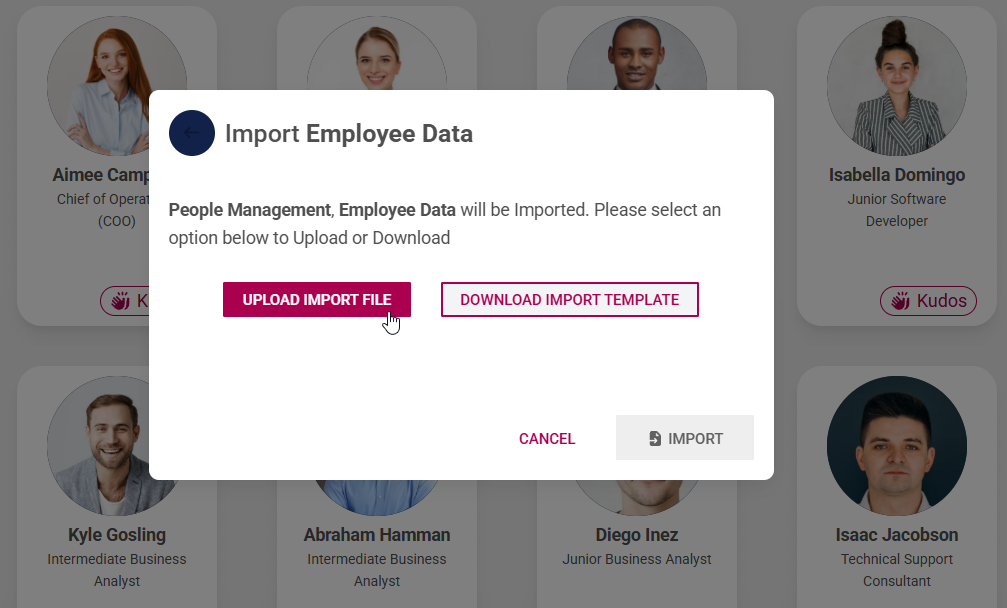
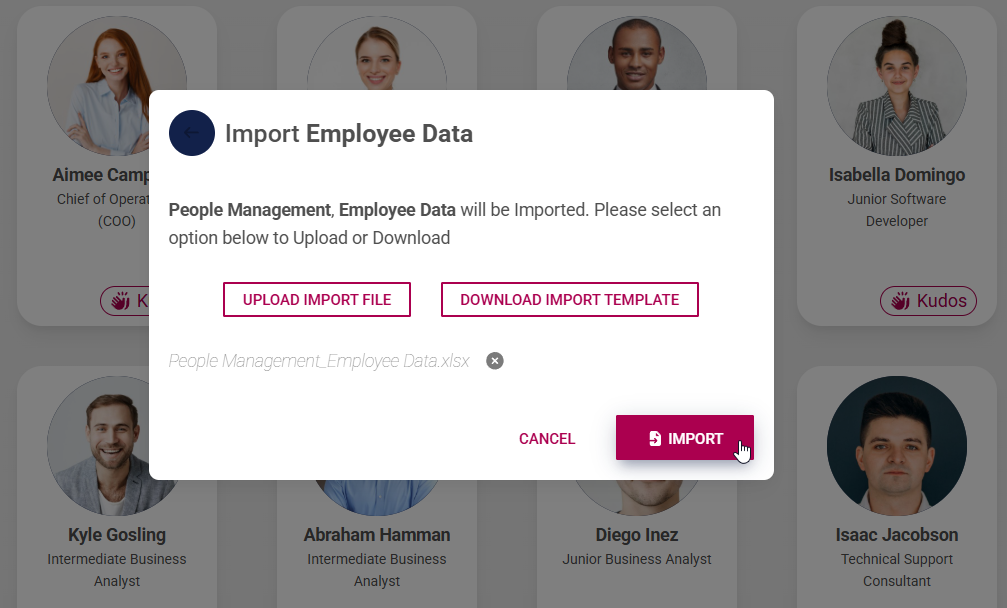
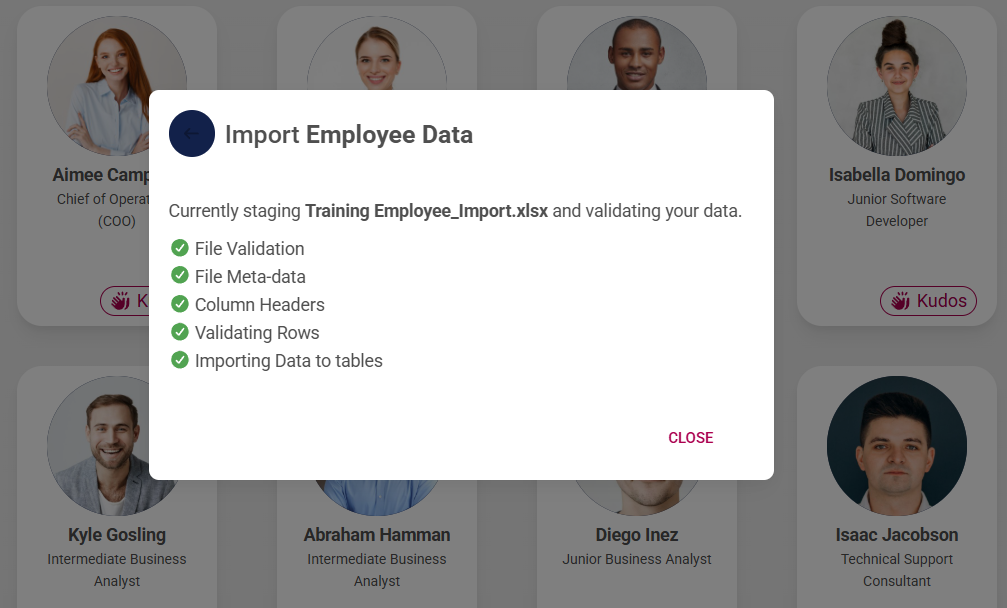
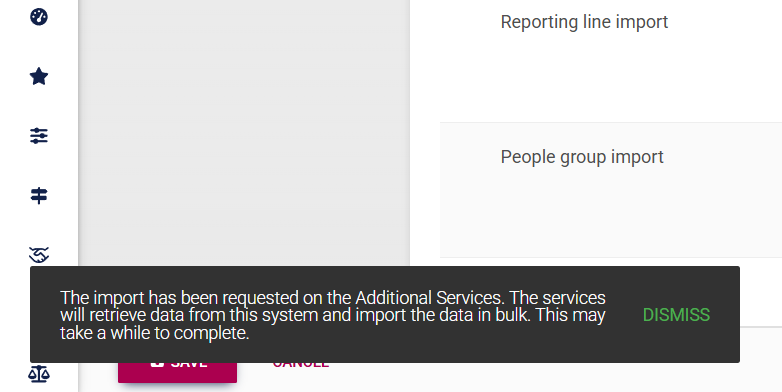
Using an import sheet, you willwill:
Management.
Functions
TEMPLATE.
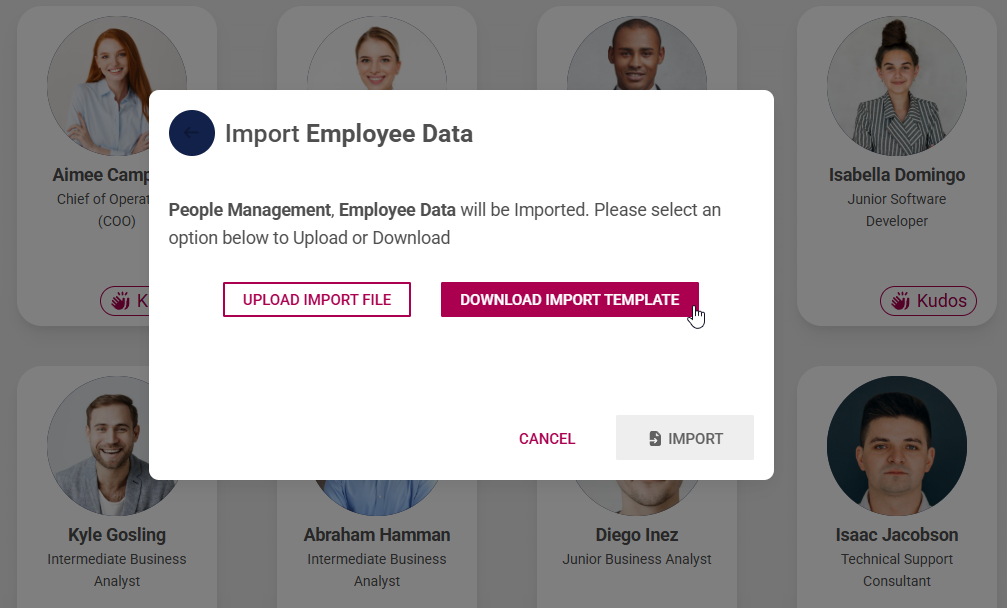
FILE.
Transfer users
Once a person’s role or position in the company changes, they can be transferred using the People Management module.

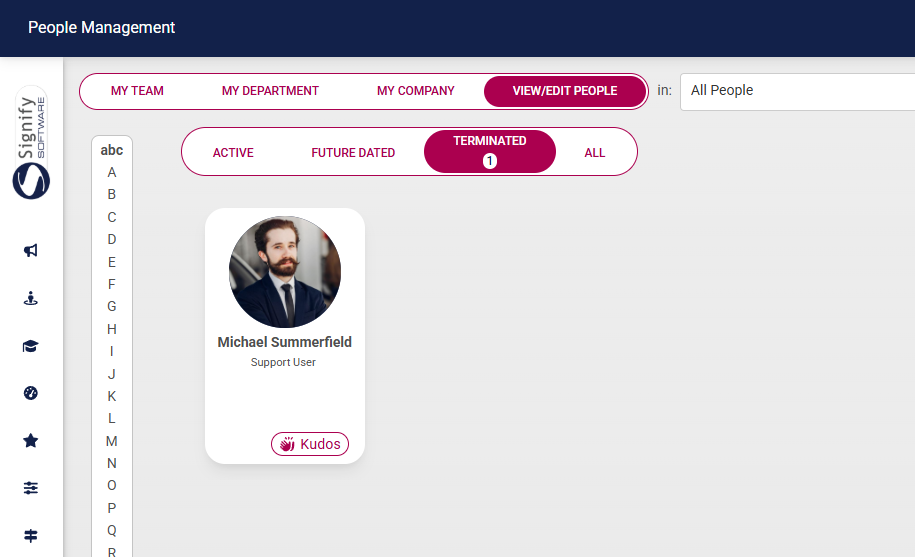
Terminate users
When an employee's journey with a company concludes, they can be terminated using the People Management module.