Event Scheduling Implementation Guide

This guide focuses on the Event Scheduling module and the features available to administrators.
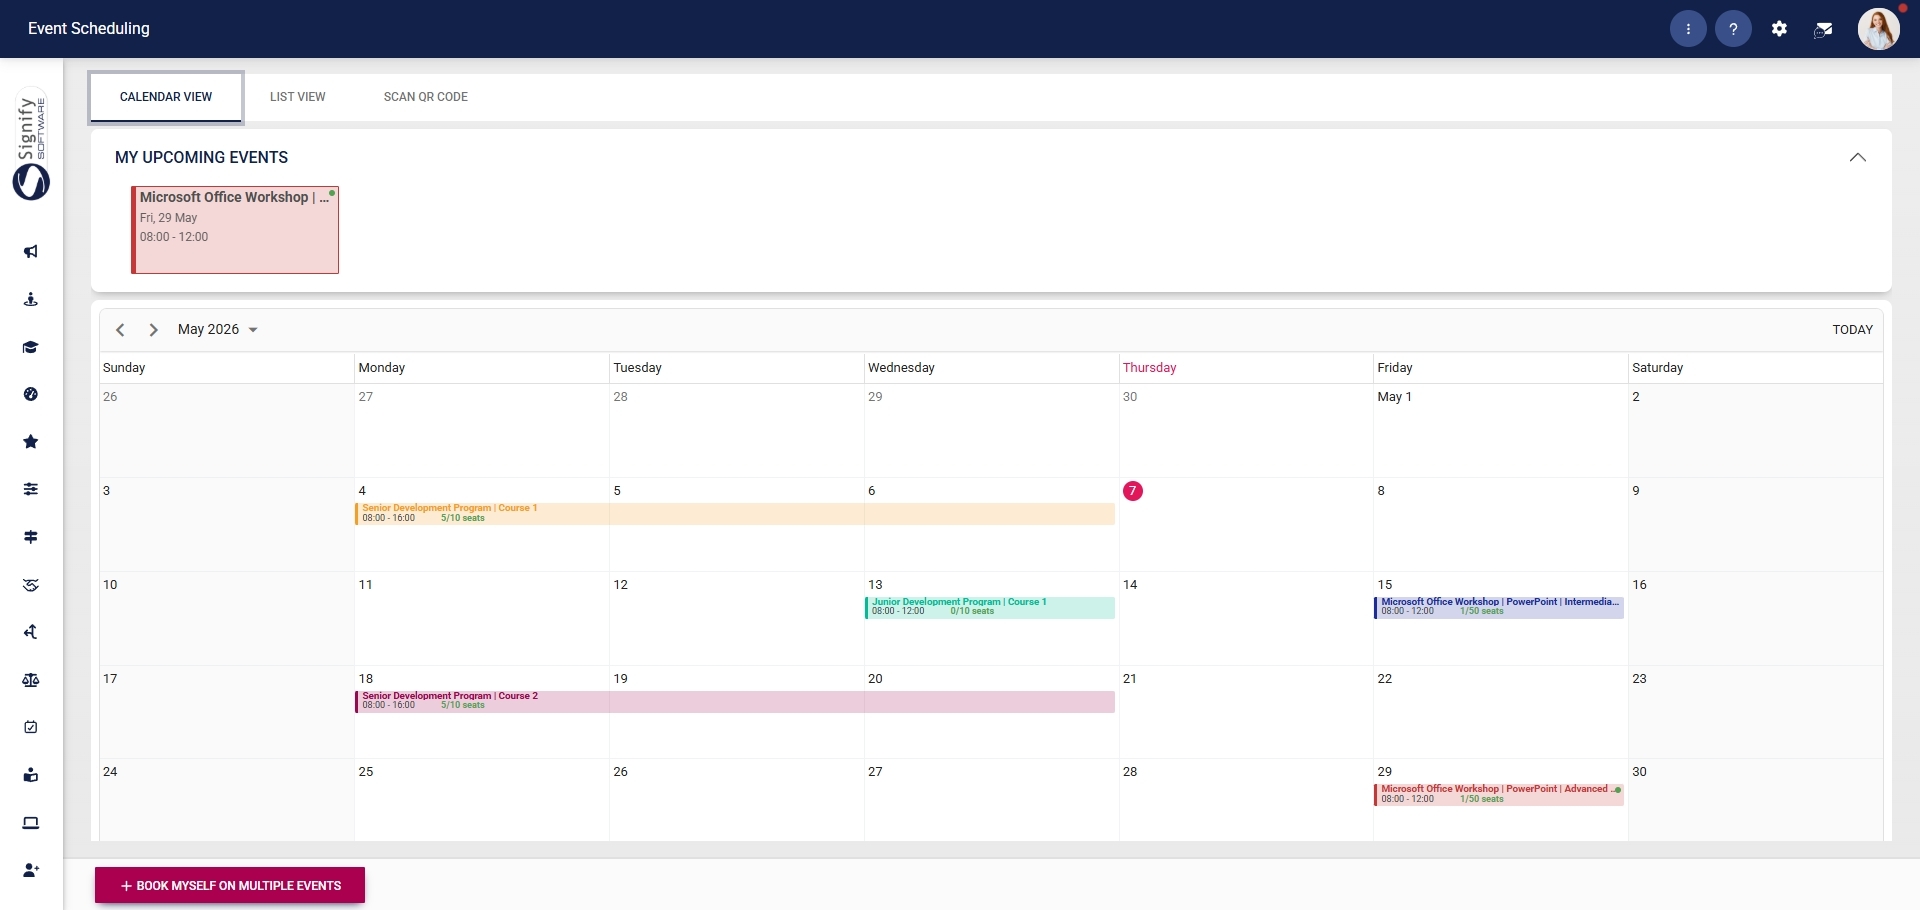
Beyond training, the module can serve as a central coordination tool for structured events, such as workshops, onboarding sessions, or internal initiatives.
- Companies can manage venues, facilitators, approvals, and attendance in one place, reducing administrative overhead and duplication.
- HR or employee development teams can schedule recurring programmes, segment employees into targeted groups, and monitor completion and competence levels.
By following the outlined procedures, administrators can:
- Configure the Event Scheduling module and permissions,
- Set up the master data required,
- Create and manage events, and
- Record attendance and completion.
Before you can configure and use the Event Scheduling module, you must activate the module and assign the required user permissions.
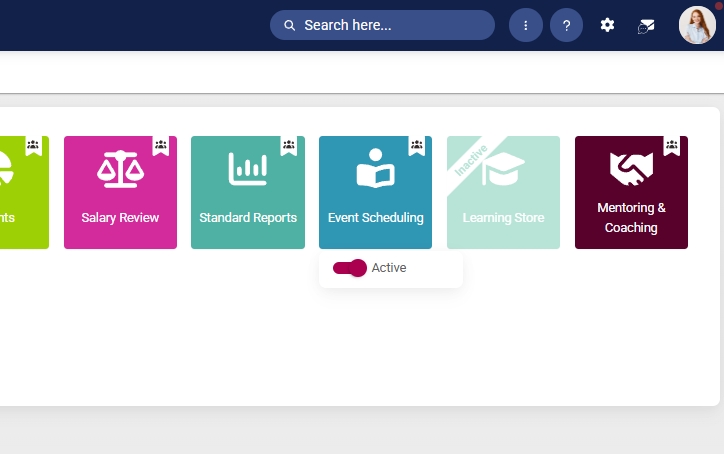
Activate the Event Scheduling module
- Click the gear icon to access the Setup and Configuration menu.
- Click Ruleset Setup.
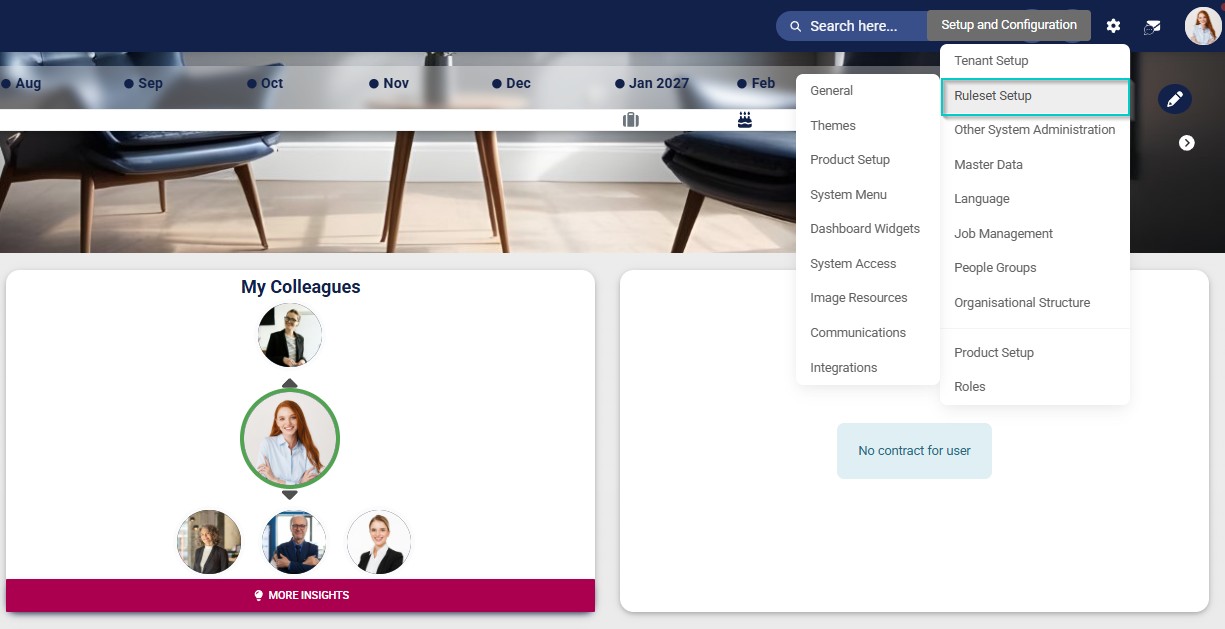
- Select the ruleset you would like to update.
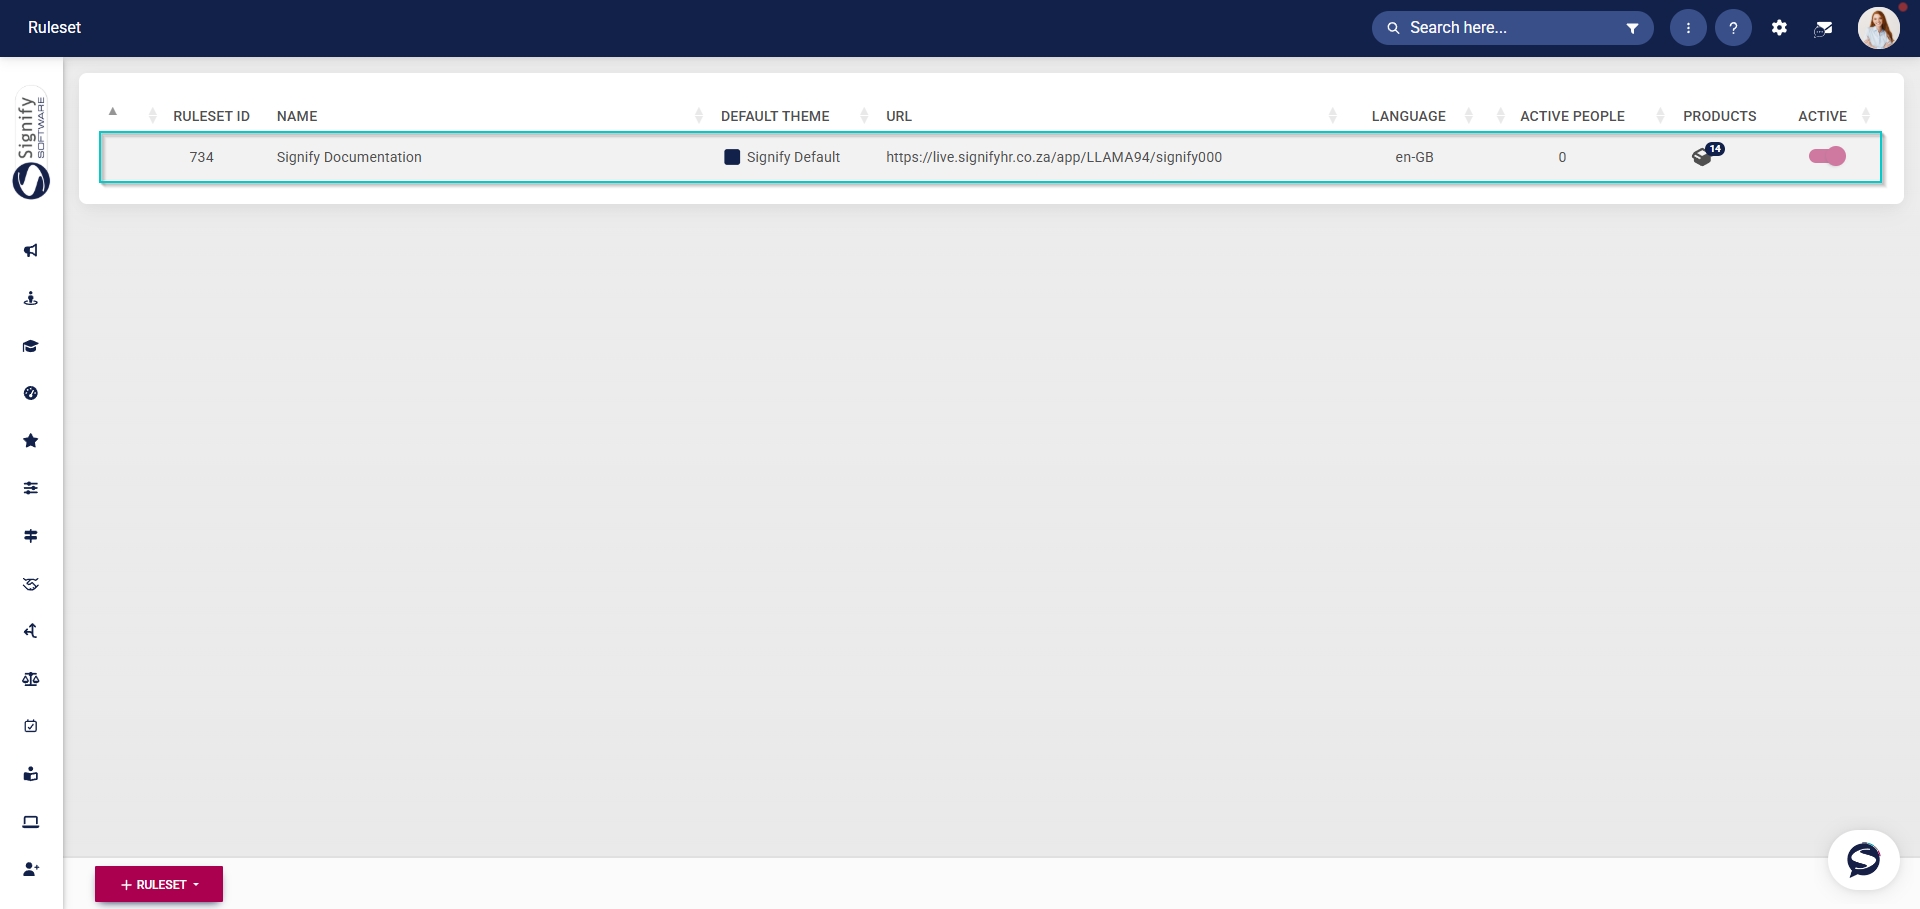
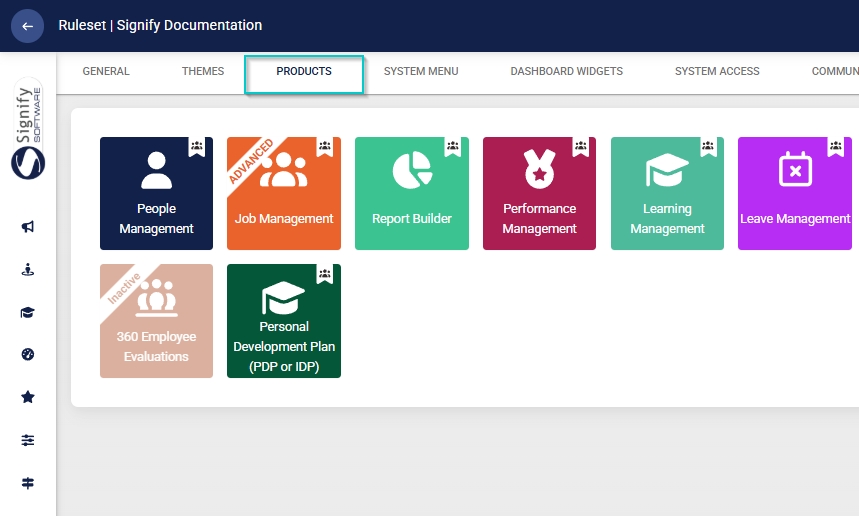
- Click on the Event Scheduling product card, then click the toggle button to set the product’s status to Active.
Add Event Scheduling to the system menu
- Click the gear icon to access the Setup and Configuration menu.
- Click Ruleset Setup.
- Select the ruleset you would like to update.
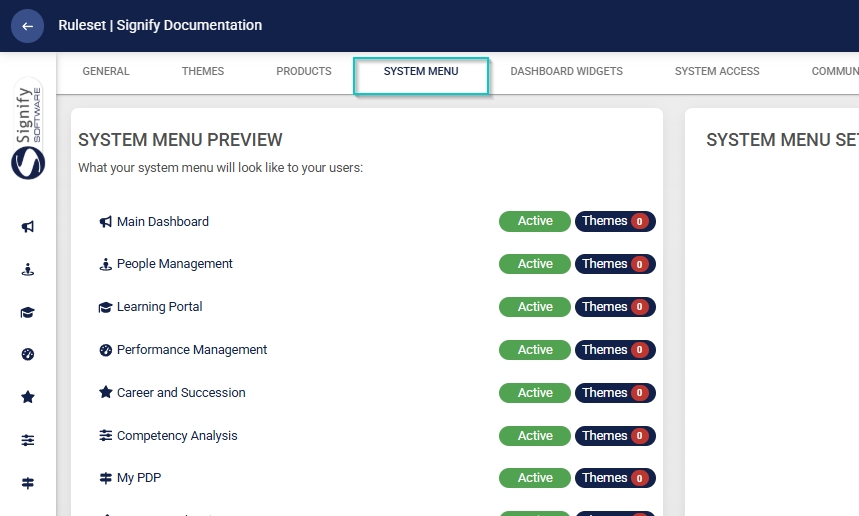
- Click the Event Scheduling menu item in the system menu preview.
- Click the toggle button to set the system menu item’s status to Active.
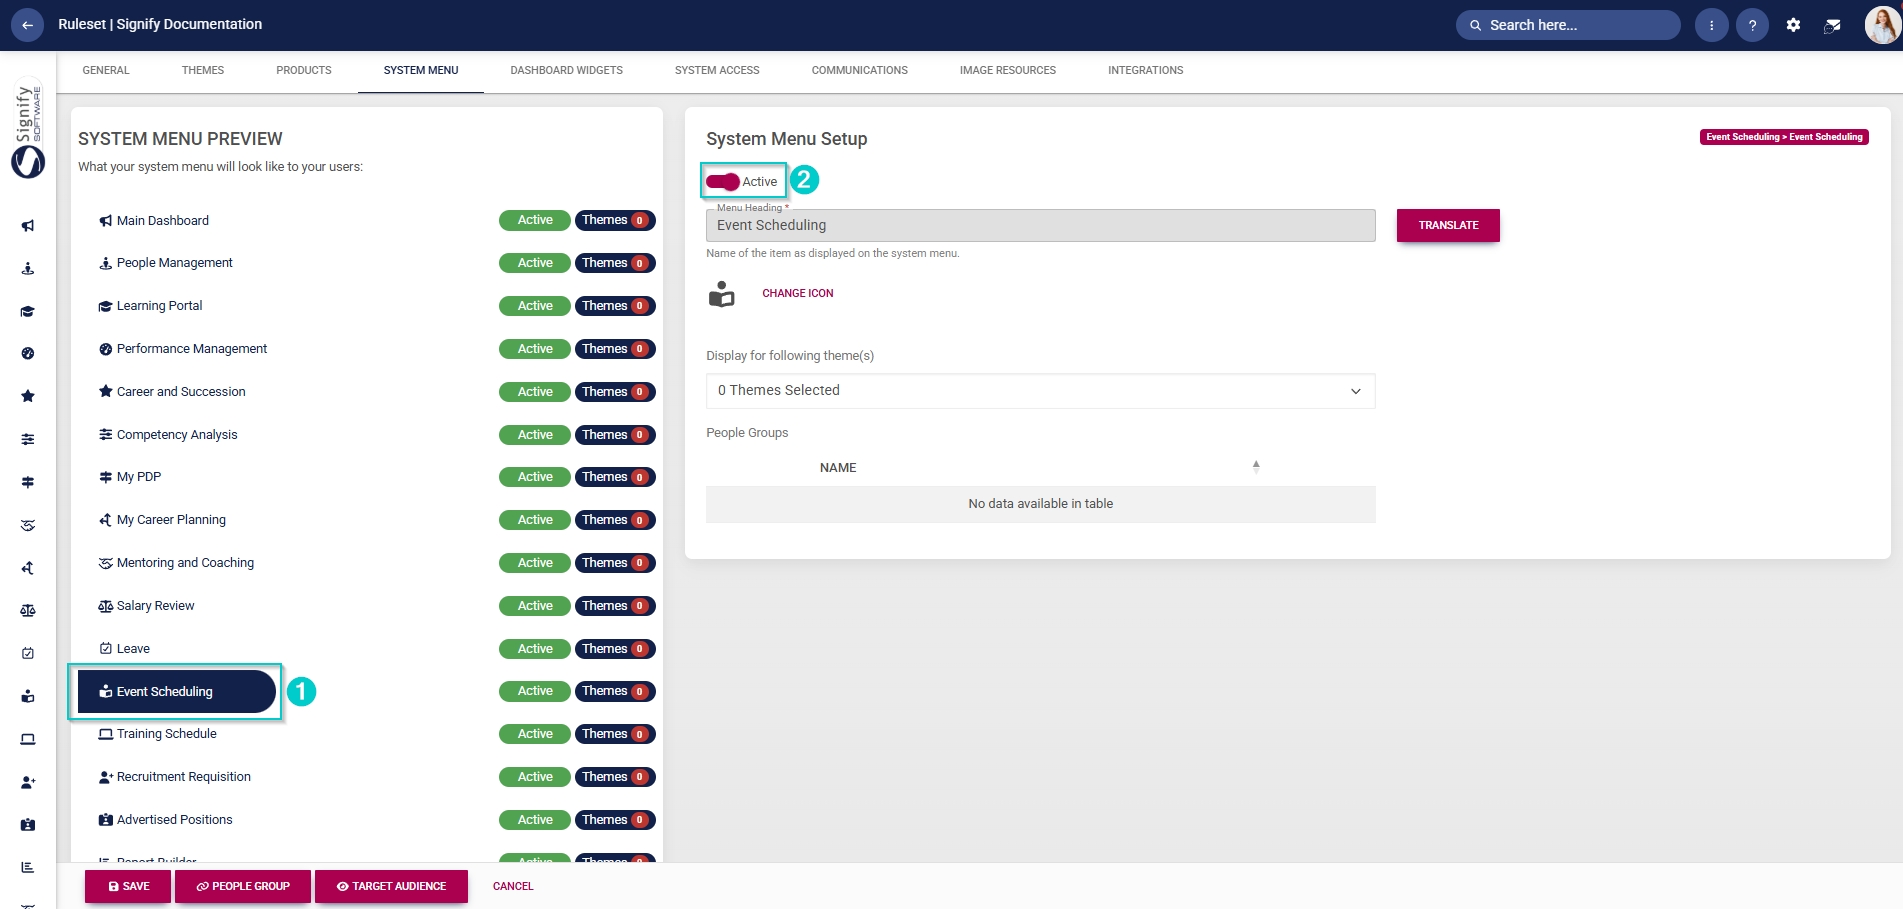
- You can select an icon for the Event Scheduling module by clicking CHANGE ICON.
![]()
- Click SAVE to continue or CANCEL to discard your changes.

Assign the Event Scheduling administrator permission
- Hover over the sidebar menu, then click People Management.


- Click the pencil icon to manage the person whose profile you want to edit.
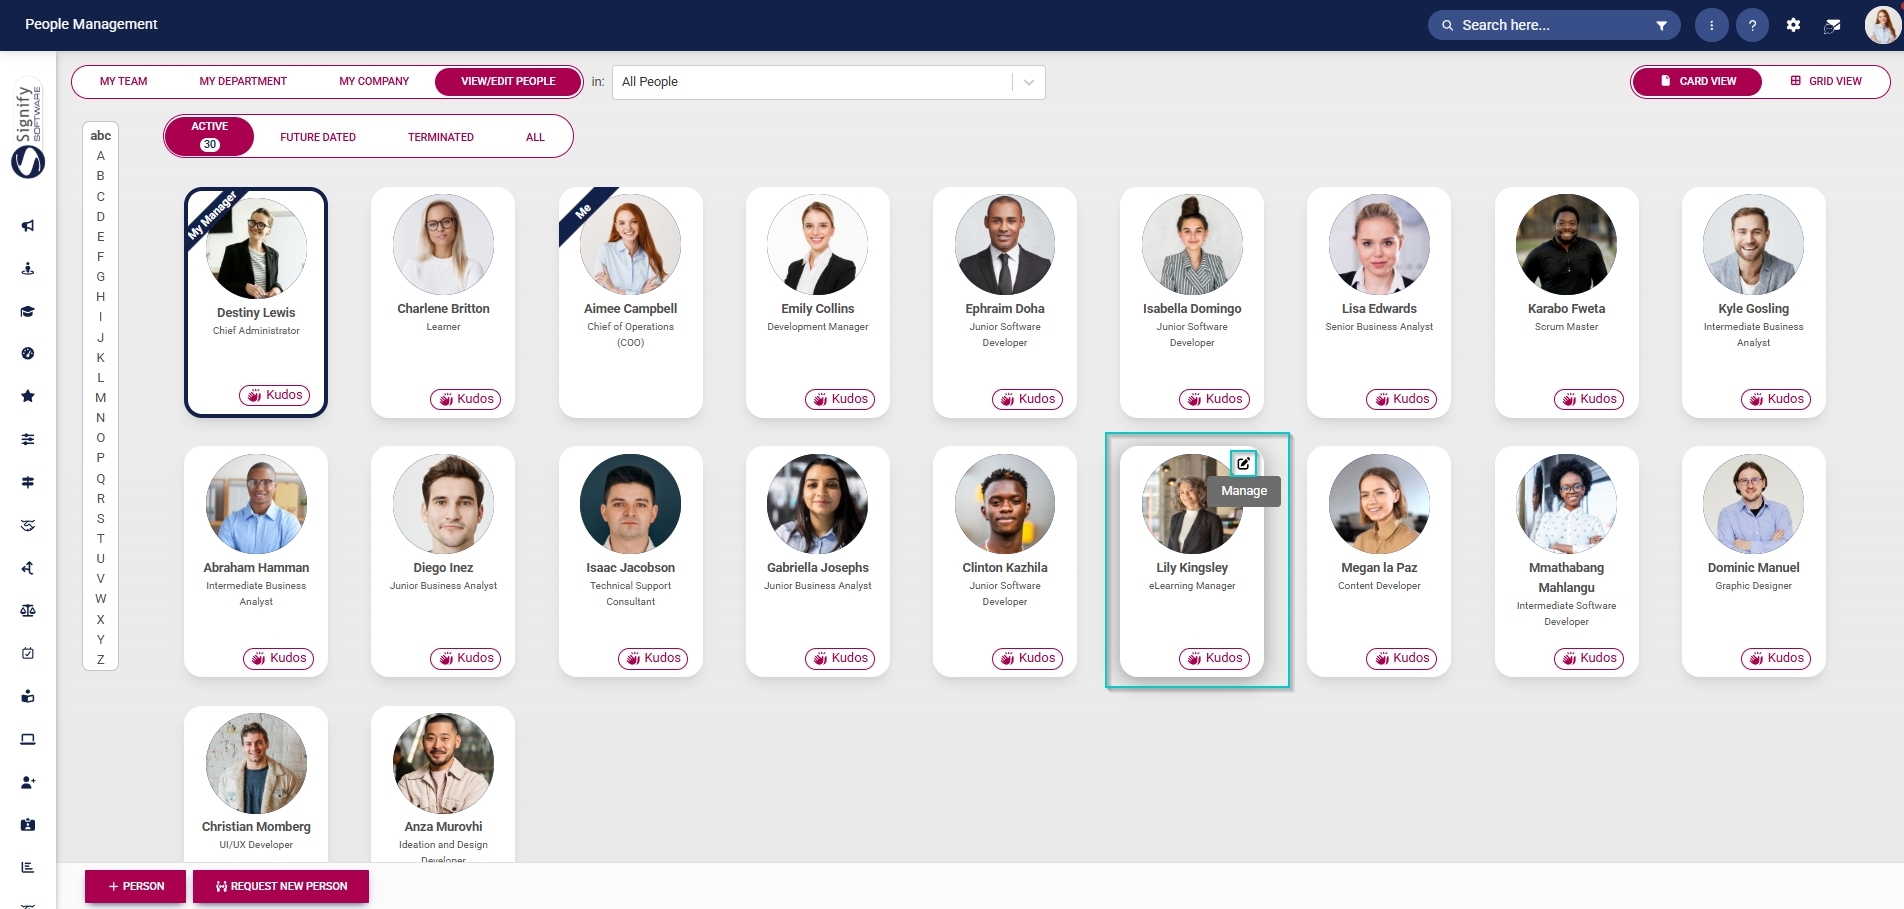
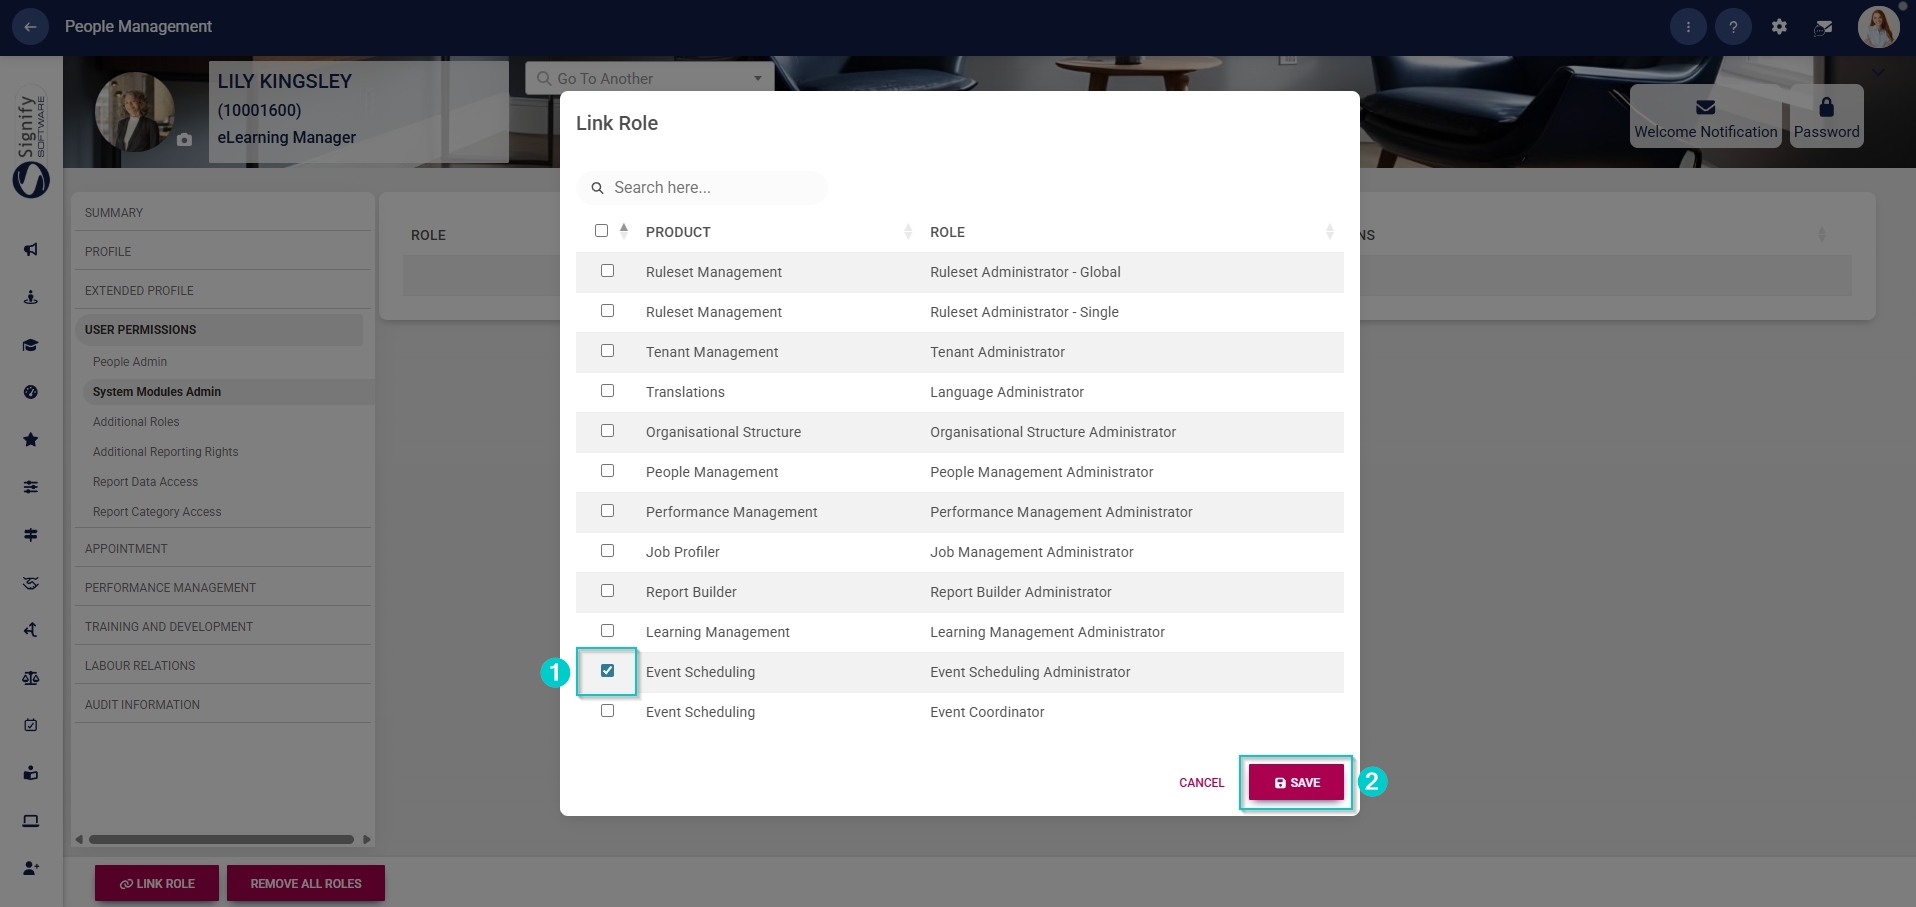
- In the left-hand menu, navigate to User Permissions, then click System Modules Admin.
- Click the LINK ROLE button.

- Tick the checkbox next to Event Scheduling in the table to assign the Event Scheduling administrator role to the user.
- Click SAVE to continue or CANCEL to discard your changes.
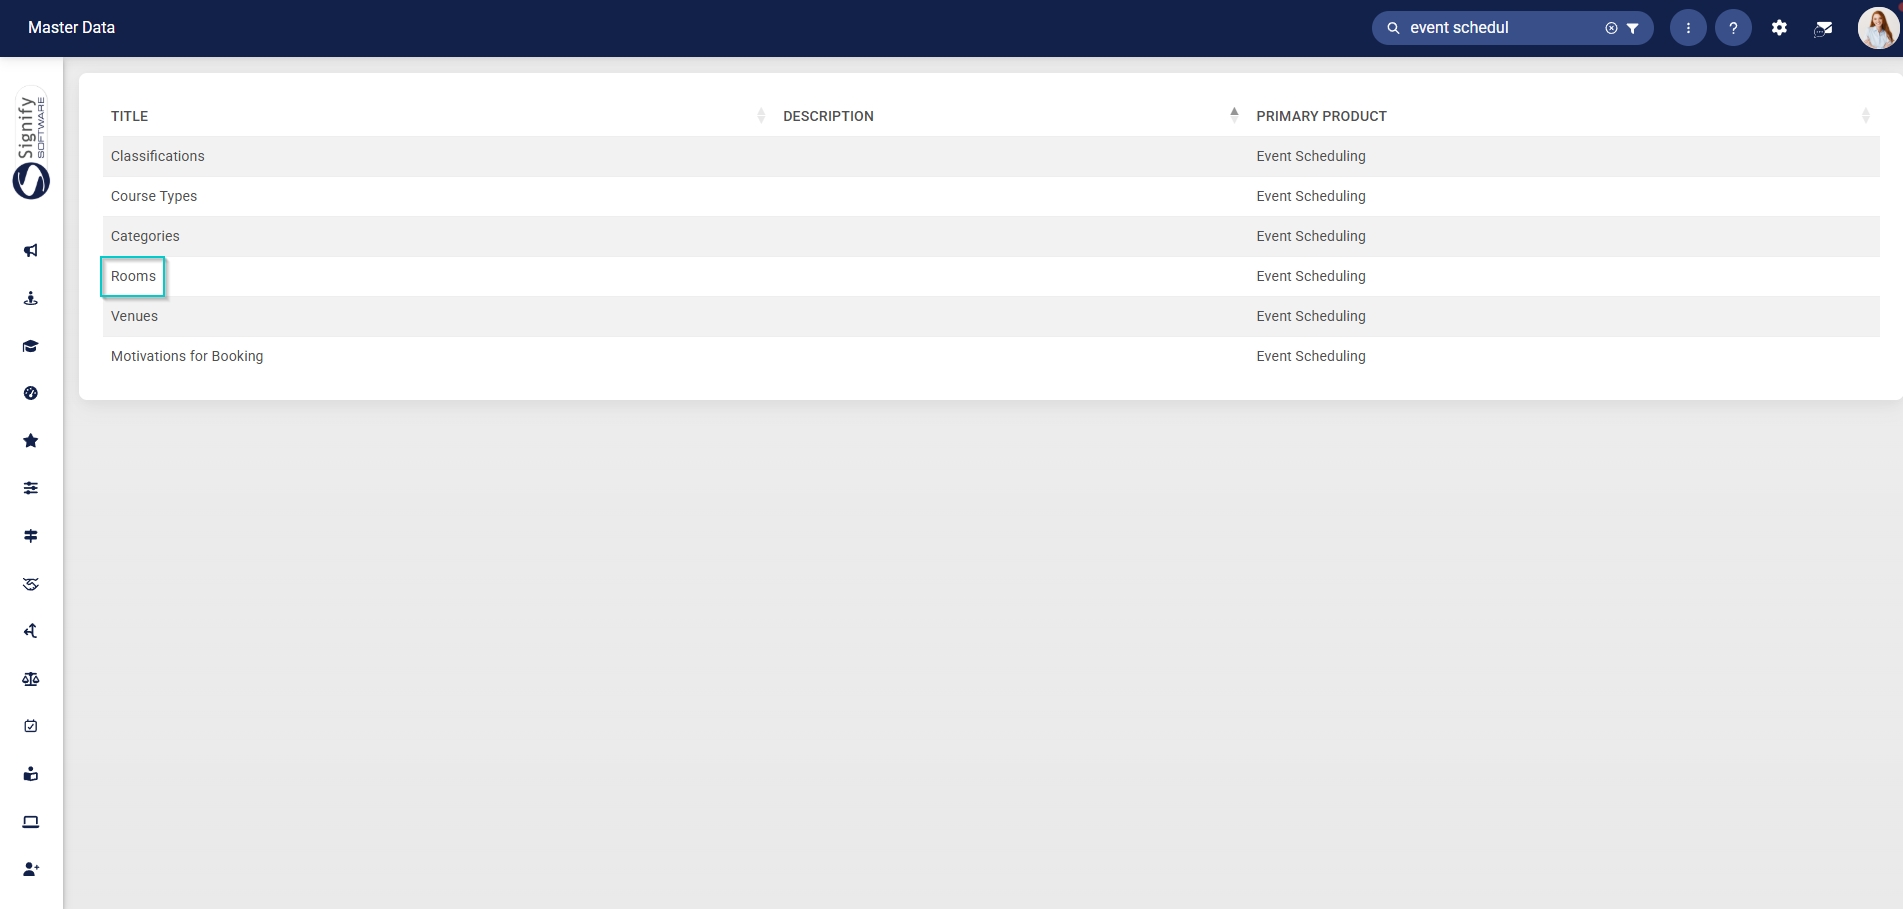
Update the Master Data Library
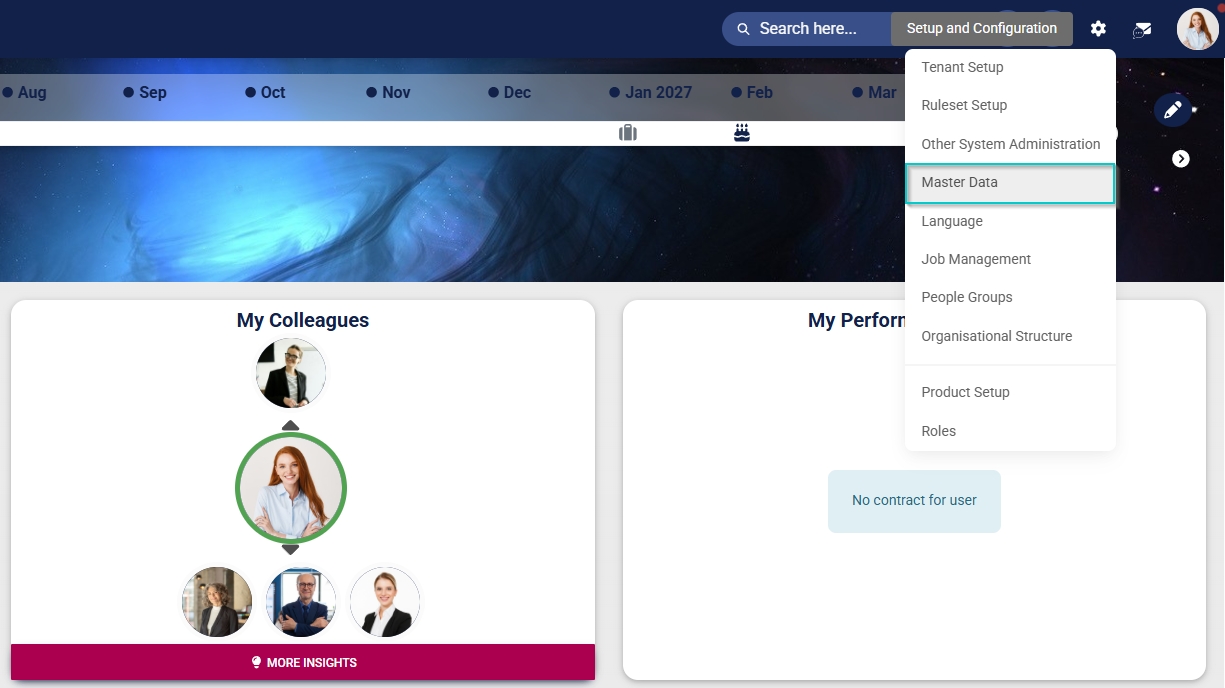
- Click the gear icon to access the Setup and Configuration menu.
- Click Master Data.
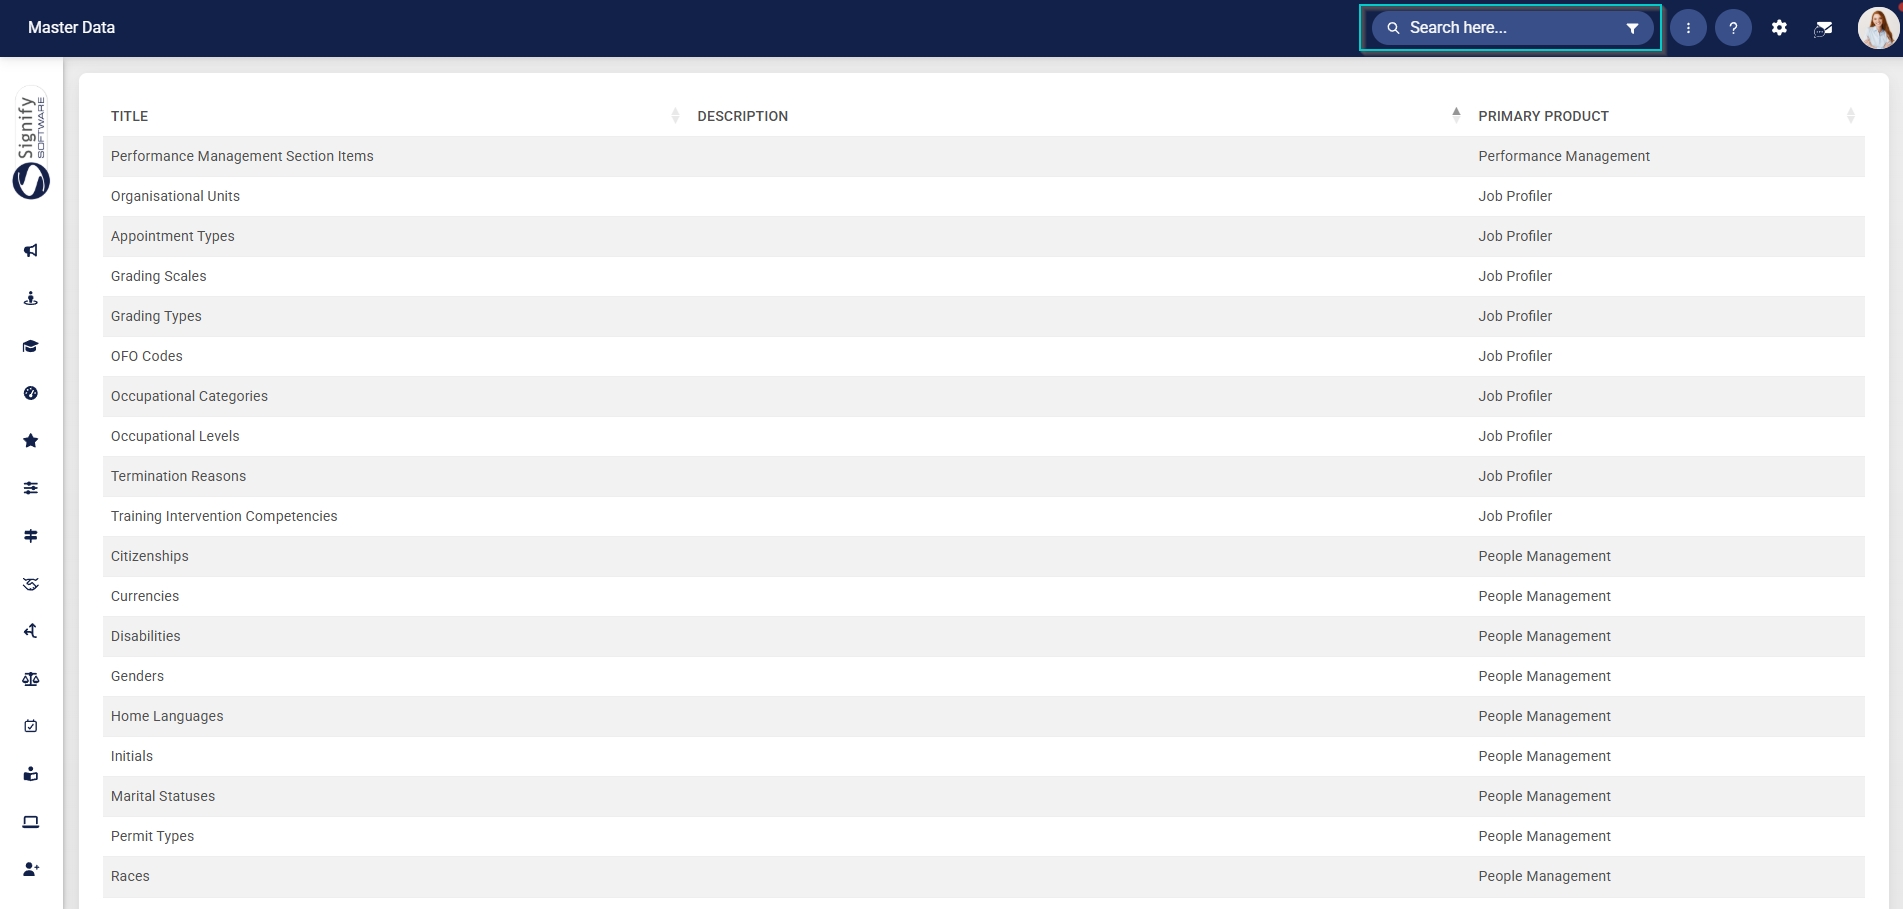
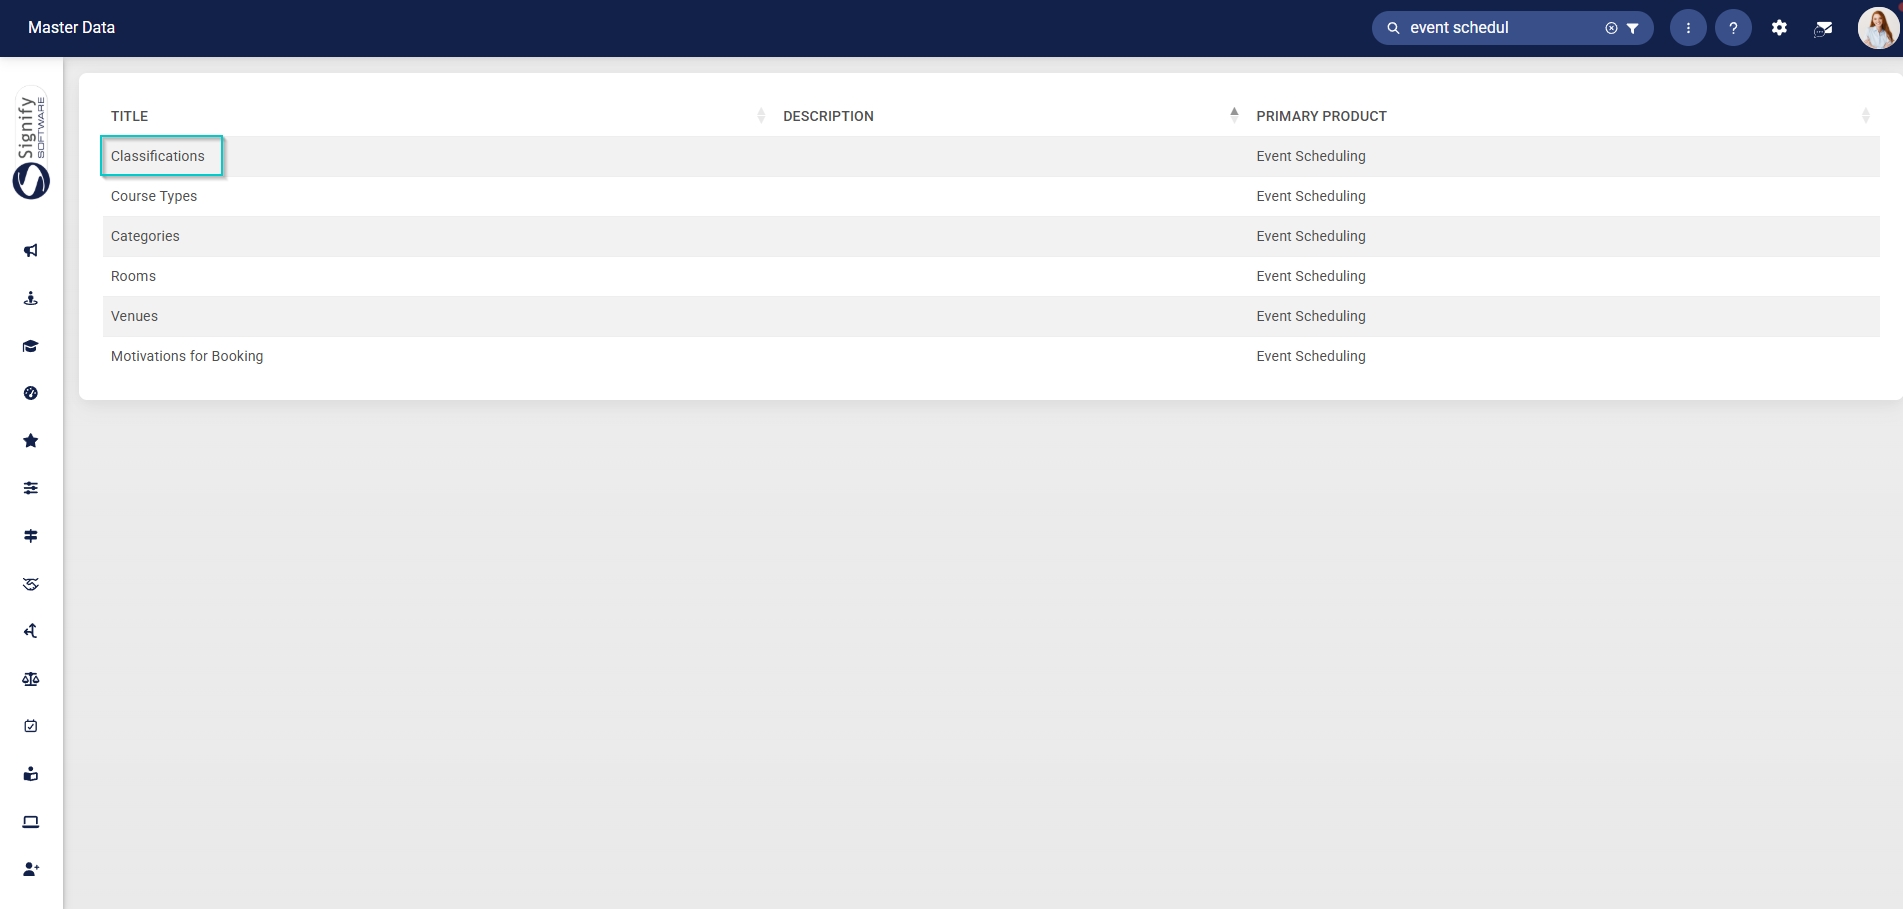
- The Master Data Library lists the categories for which administrators can create master data. Use the search bar at the top of the screen to filter the search results by Event Scheduling.
Classifications
- Click on the Classifications category to continue.
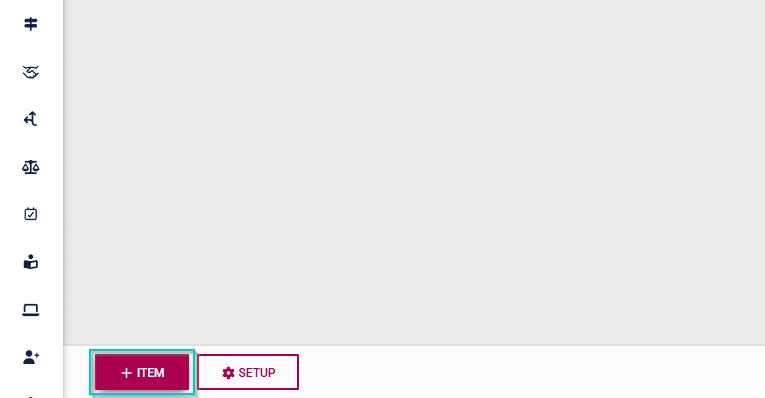
- To add a new master data item, click on +ITEM.
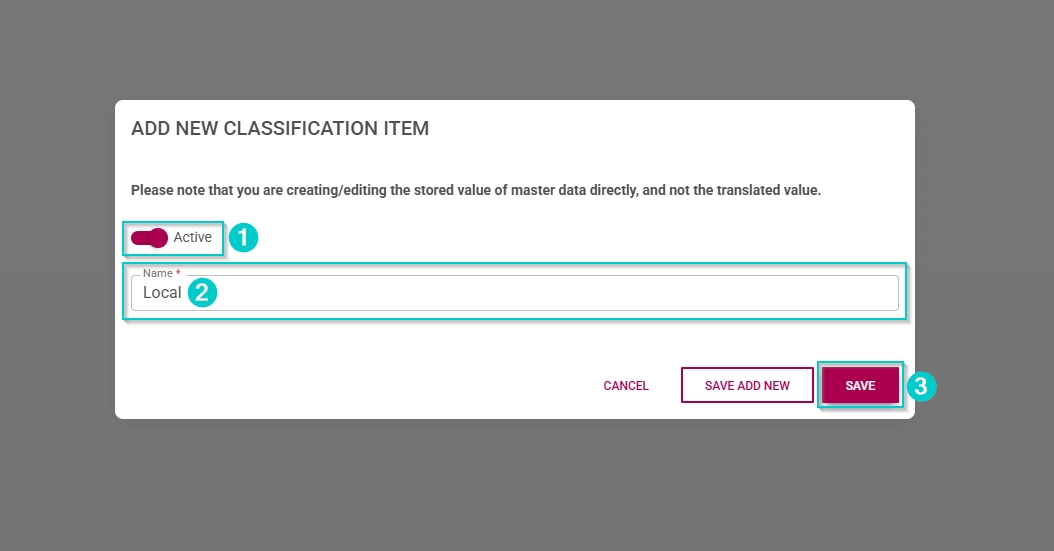
- Click the toggle button to set the classification’s status to Active.
- Enter a name for the classification.
- Click SAVE when you are finished, SAVE ADD NEW to add another master data item or click CANCEL to discard your edits.
- Click the back arrow to navigate back to the Master Data Library once you are finished.
![]()
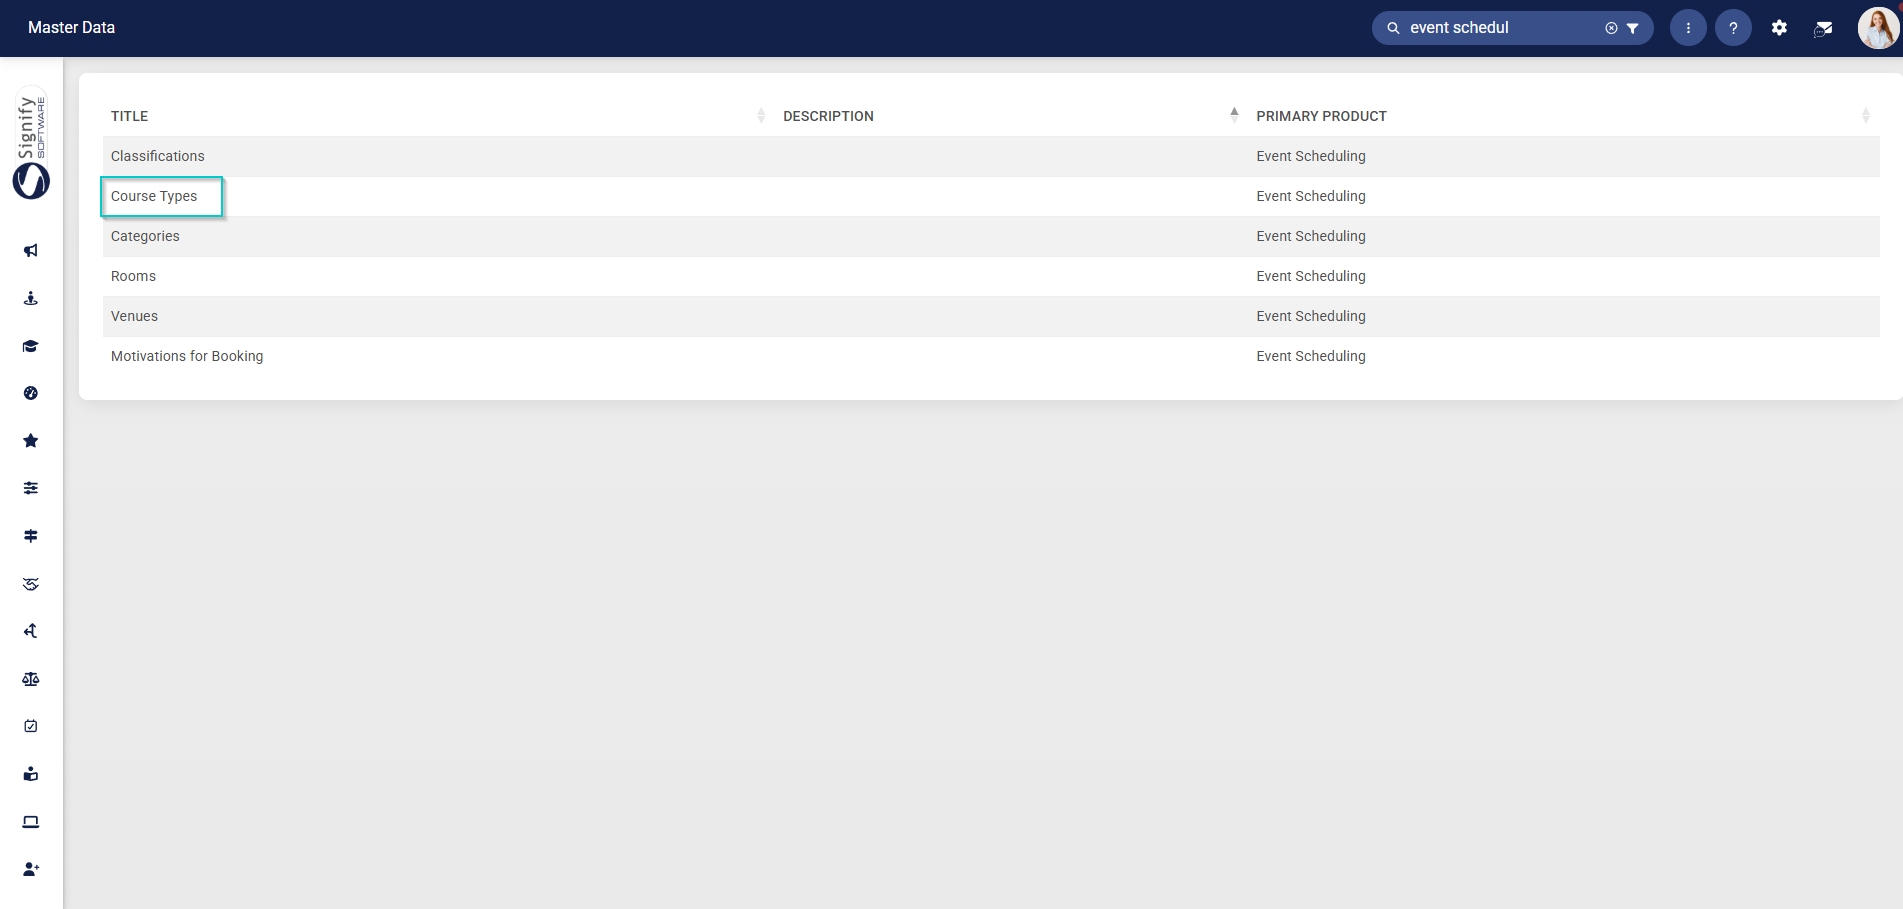
Course Types
- Click on the Course Types category to continue.
- To add a new master data item, click on +ITEM.
- Click the toggle button to set the course type’s status to Active.
- Enter a name for the course type.
- Click SAVE when you are finished, SAVE ADD NEW to add another master data item or click CANCEL to discard your edits.
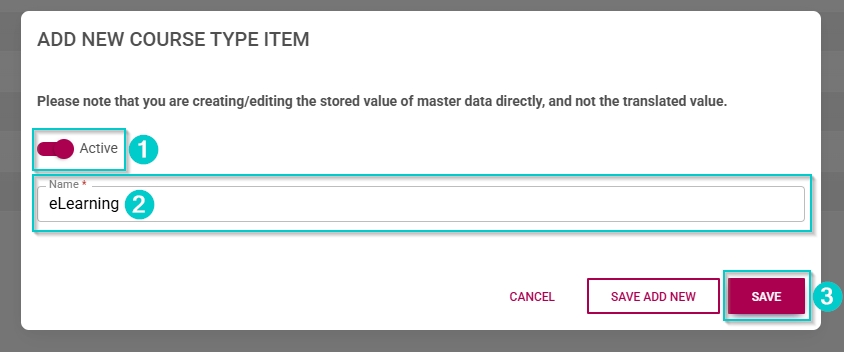
- Click the back arrow to navigate back to the Master Data Library once you are finished.
![]()
Categories
- Click on the Categories category to continue.

- To add a new master data item, click on +ITEM.
- Click the toggle button to set the category’s status to Active.
- Enter a name for the category.
- Click SAVE when you are finished, SAVE ADD NEW to add another master data item or click CANCEL to discard your edits.
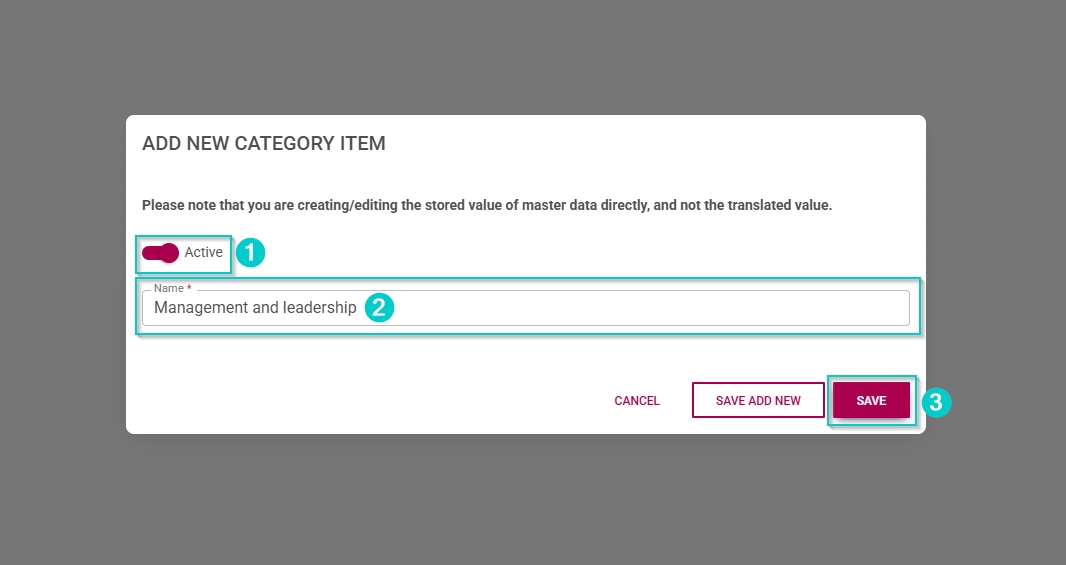
- Click the back arrow to navigate back to the Master Data Library once you are finished.
![]()
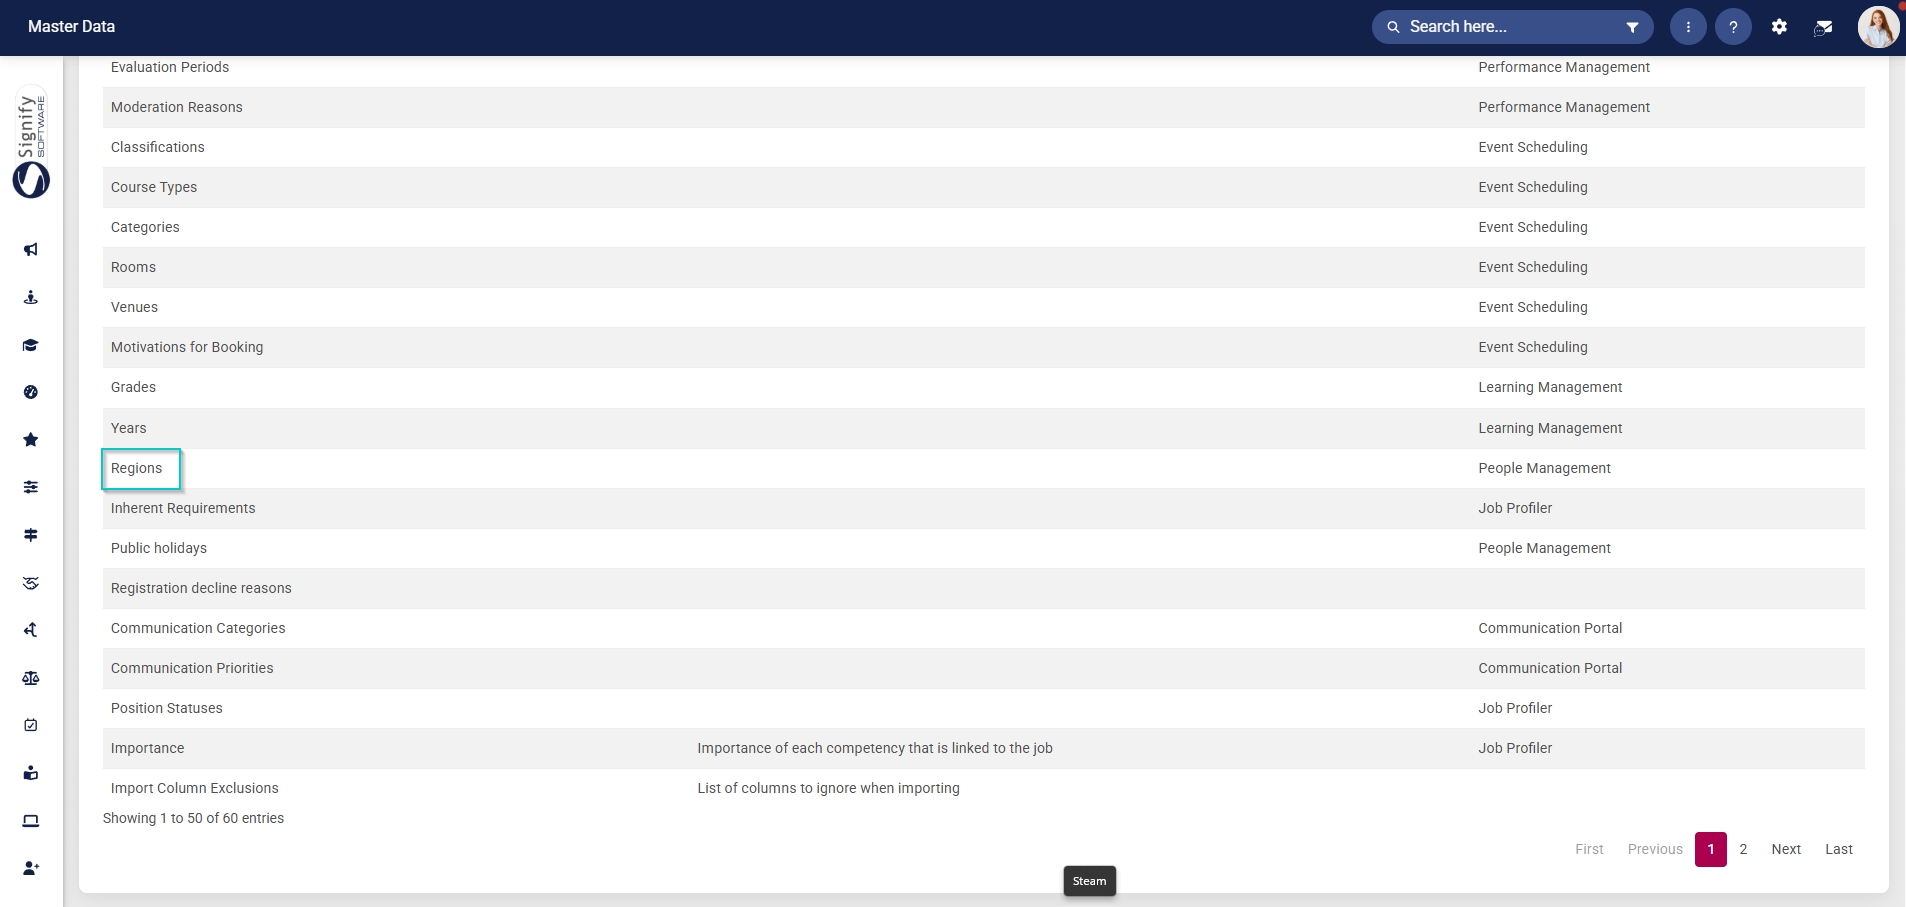
Regions
- Click on the Regions category to continue.
- To add a new master data item, click on +ITEM.
- Click the toggle button to set the region’s status to Active.
- Select the country from the dropdown menu.
- Enter a name for the region.
- Click SAVE when you are finished, SAVE ADD NEW to add another master data item or click CANCEL to discard your edits.
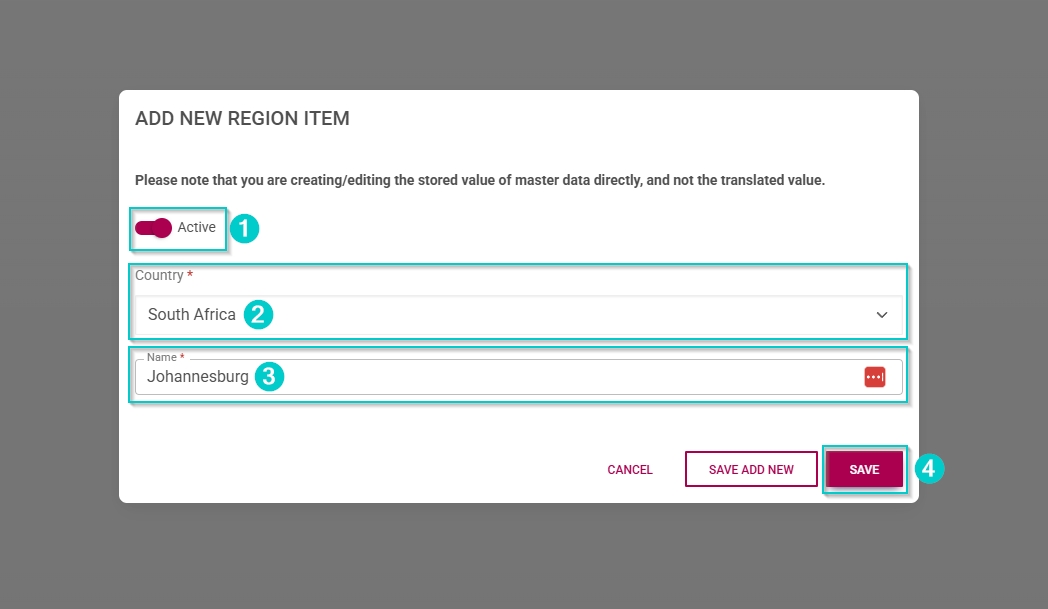
- Click the back arrow to navigate back to the Master Data Library once you are finished.
![]()
Venues
- Click on the Venues category to continue.

- To add a new master data item, click on +ITEM.
- Click the toggle button to set the venue’s status to Active.
- Enter a name for the venue.
- Click SAVE when you are finished, SAVE ADD NEW to add another master data item or click CANCEL to discard your edits.
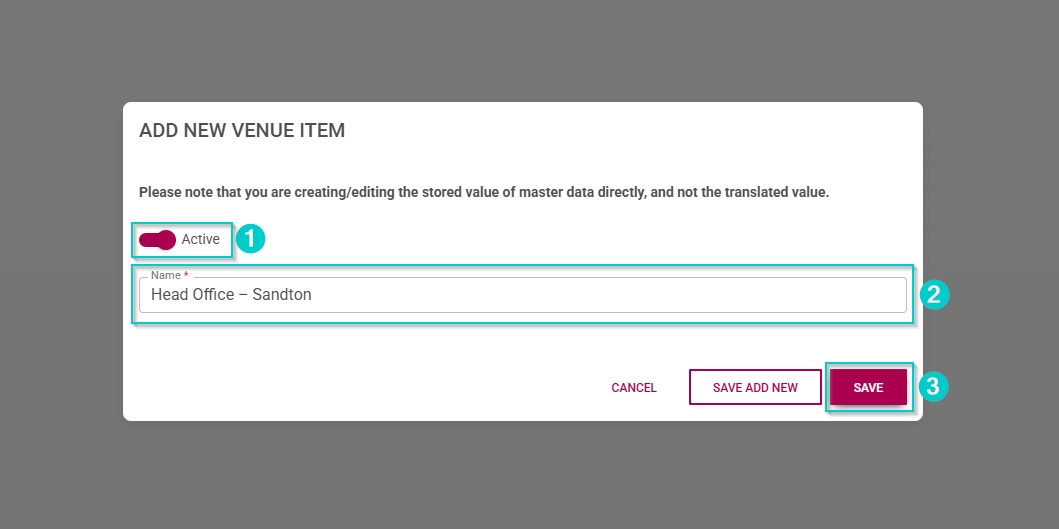
- Click the back arrow to navigate back to the Master Data Library once you are finished.
![]()
Rooms
Rooms are linked to venues; therefore, you should first compile the Venues master data items before you can add rooms.
- Click on the Rooms category to continue.
- To add a new master data item, click on +ITEM.
- Click the toggle button to set the room’s status to Active.
- Enter a name for the room.
- Select the venue from the dropdown menu.
- Click SAVE when you are finished, SAVE ADD NEW to add another master data item or click CANCEL to discard your edits.
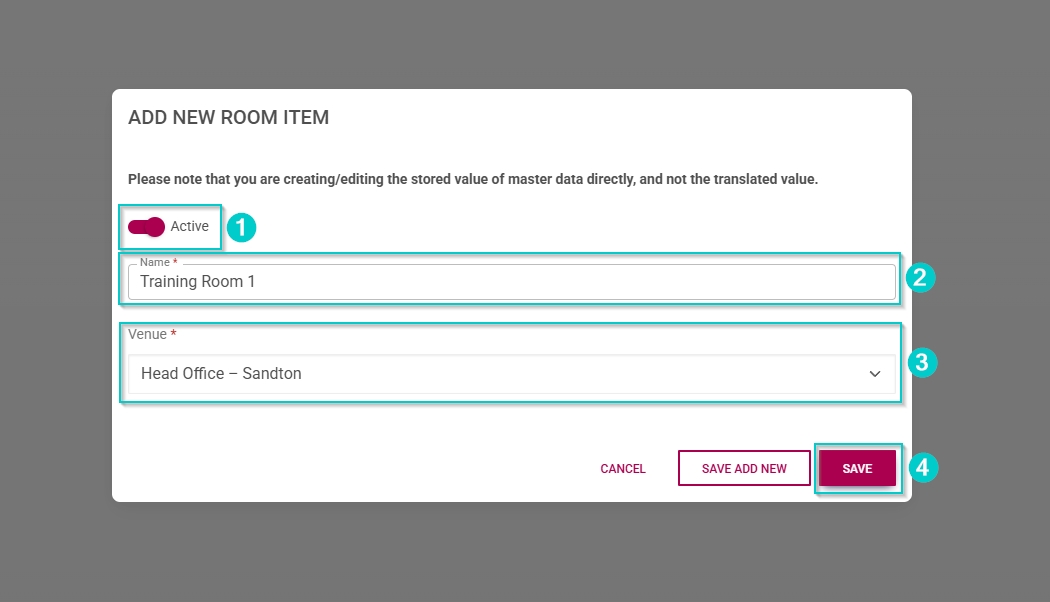
- Click the back arrow to navigate back to the Master Data Library once you are finished.
![]()
Motivations for Booking
- Click on the Motivations for Booking category to continue.
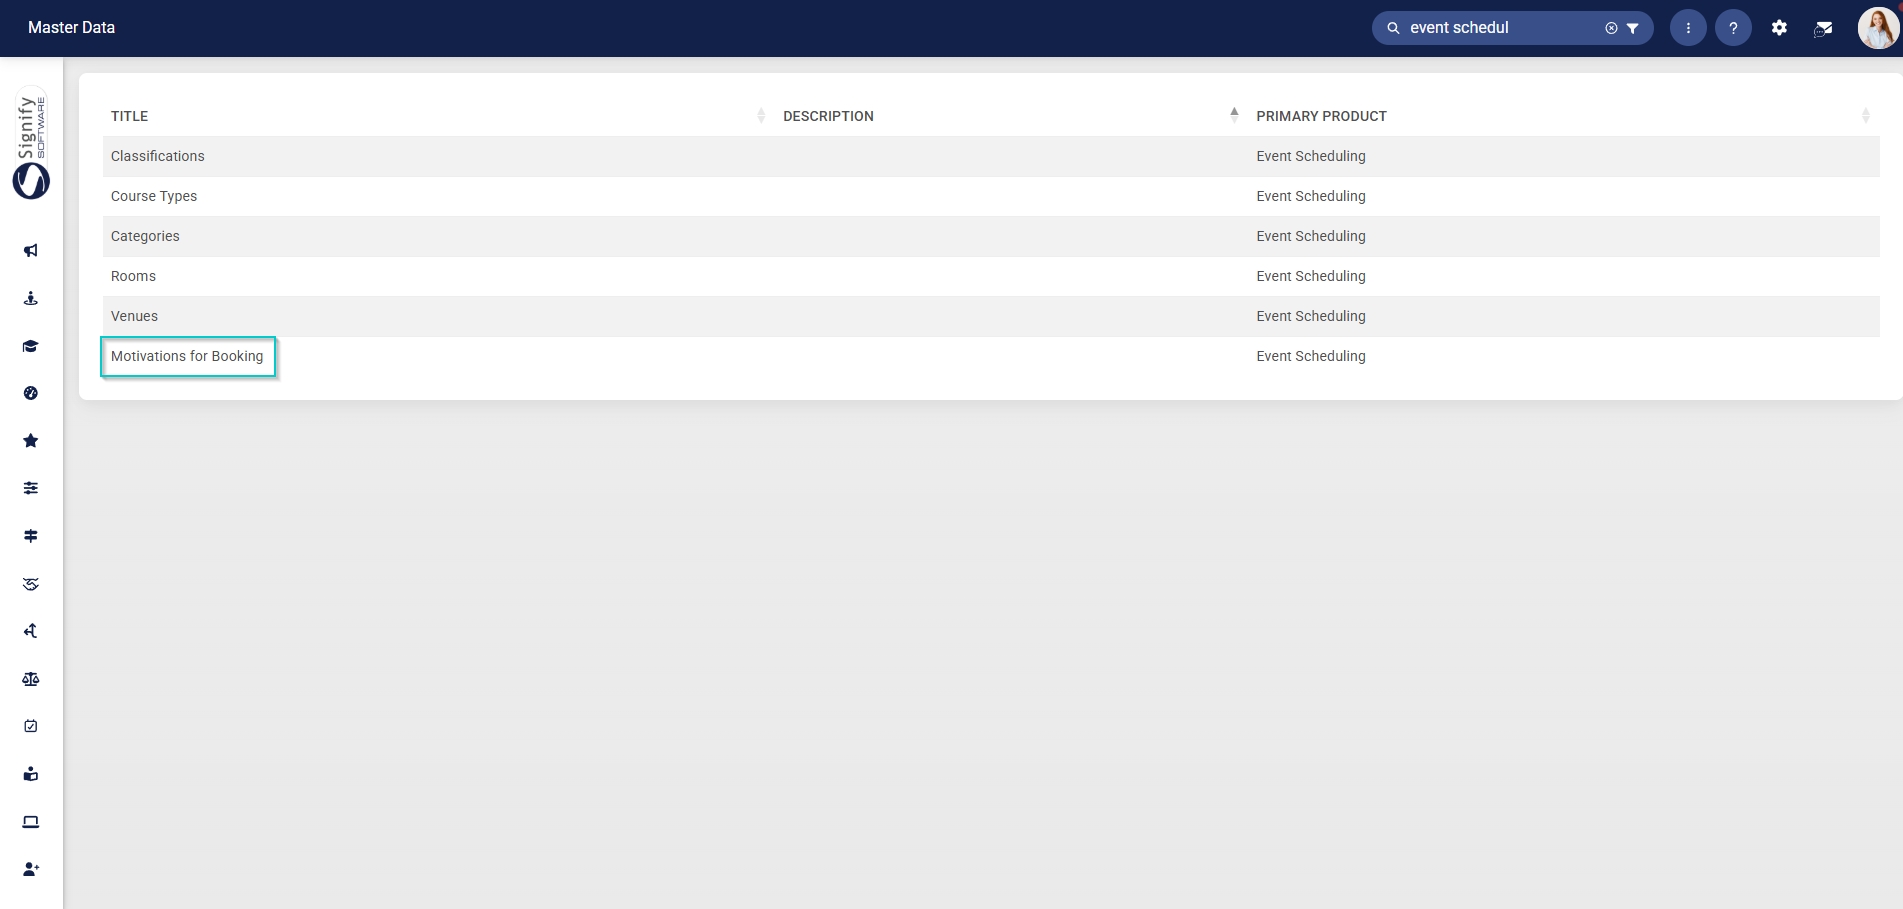
- To add a new master data item, click on +ITEM.
- Click the toggle button to set the item’s status to Active.
- Enter a name for the item.
- Click SAVE when you are finished, SAVE ADD NEW to add another master data item or click CANCEL to discard your edits.

- Click the back arrow to navigate back to the Master Data Library once you are finished.
![]()
Create people groups
A target audience, or a People Group, can be created to identify users based on specific criteria.
Create people groups for coordinators
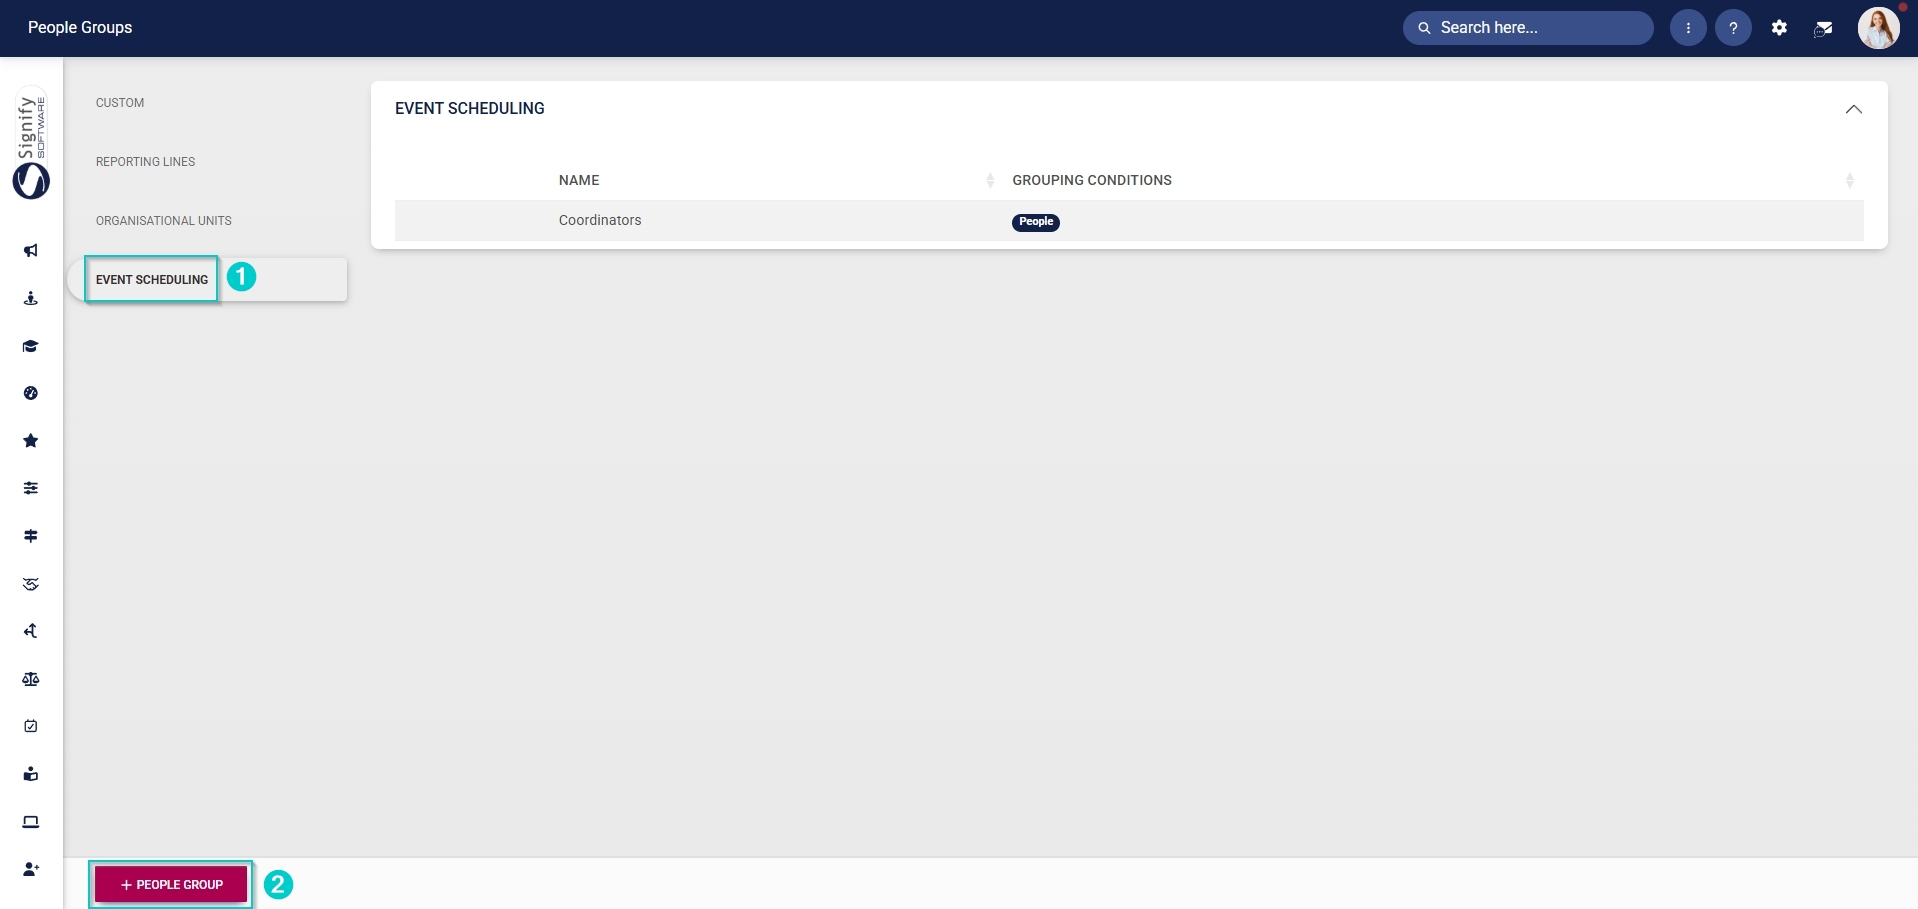
- Click the gear icon to access the Setup and Configuration menu.
- Click People Groups.
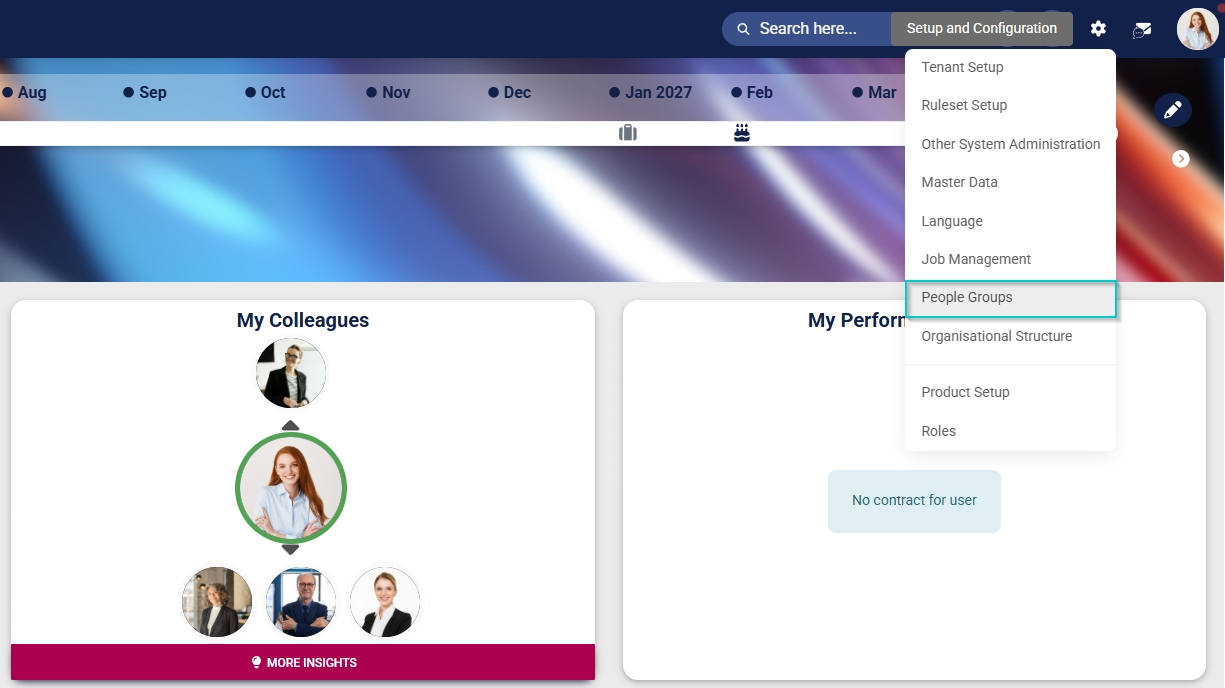
- In the left-hand menu, navigate to Event Scheduling, then click +PEOPLE GROUP.

- From the dropdown menu, select Coordinators.
- Click the toggle button to set the status to Active.
- Click SAVE when you are finished or click CANCEL to discard your edits.

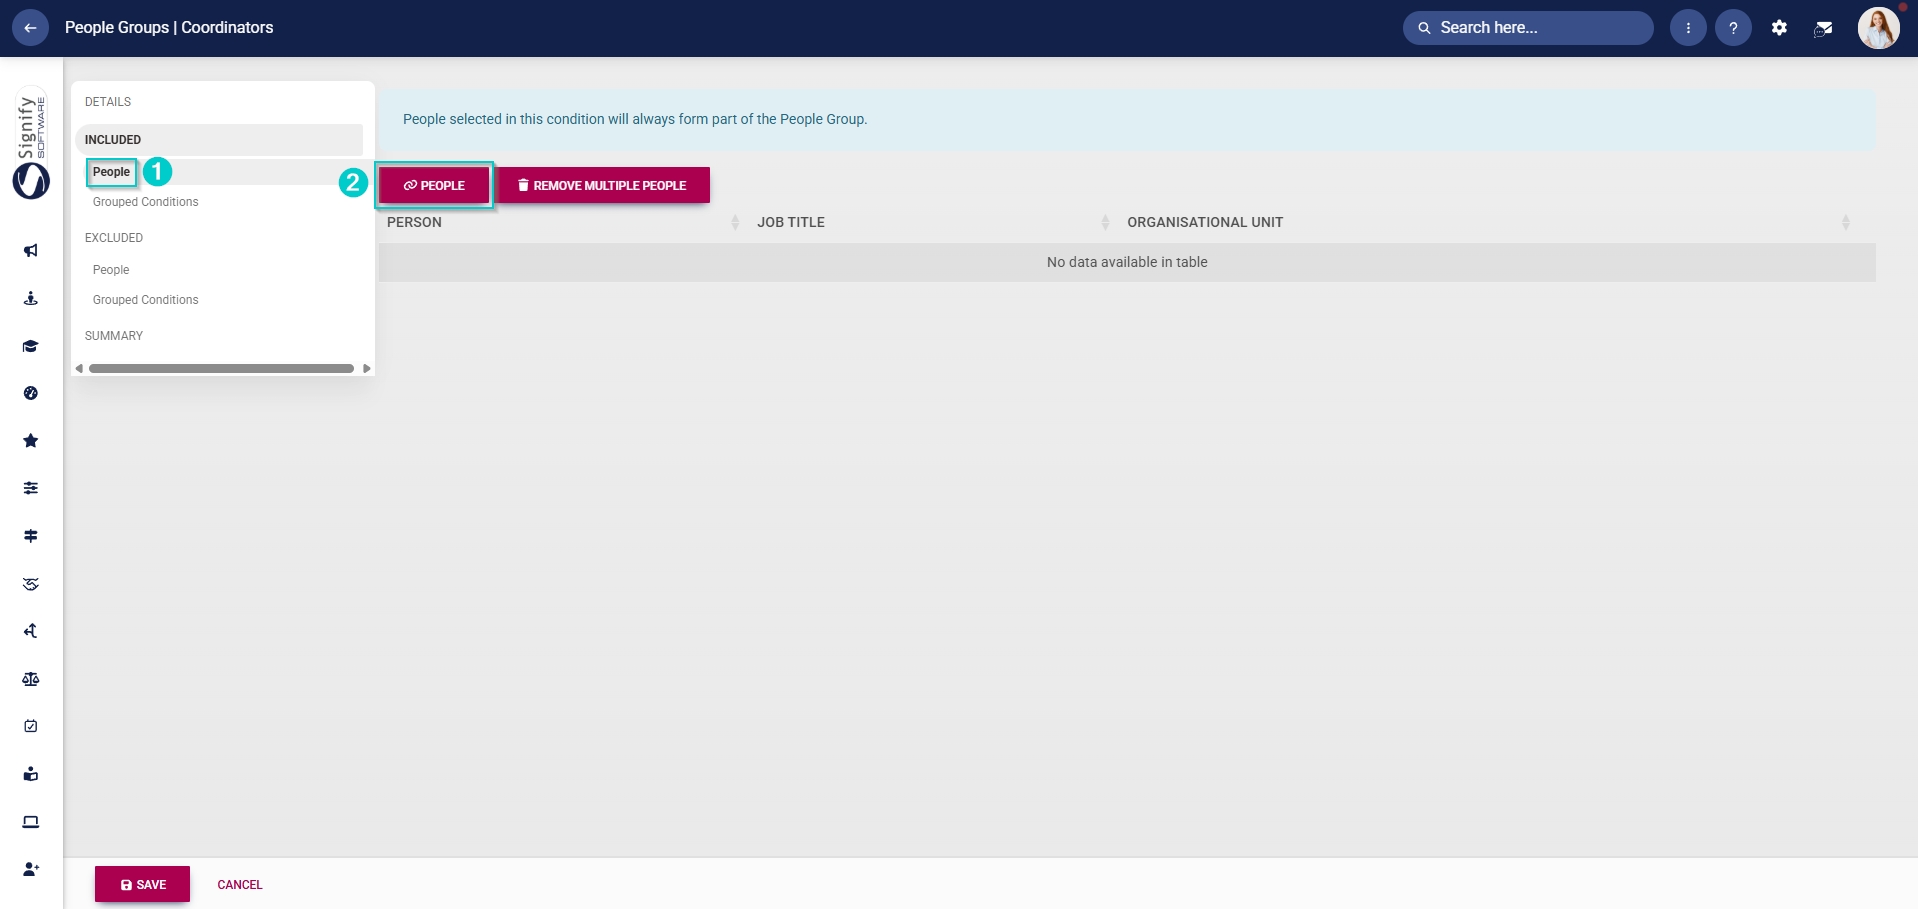
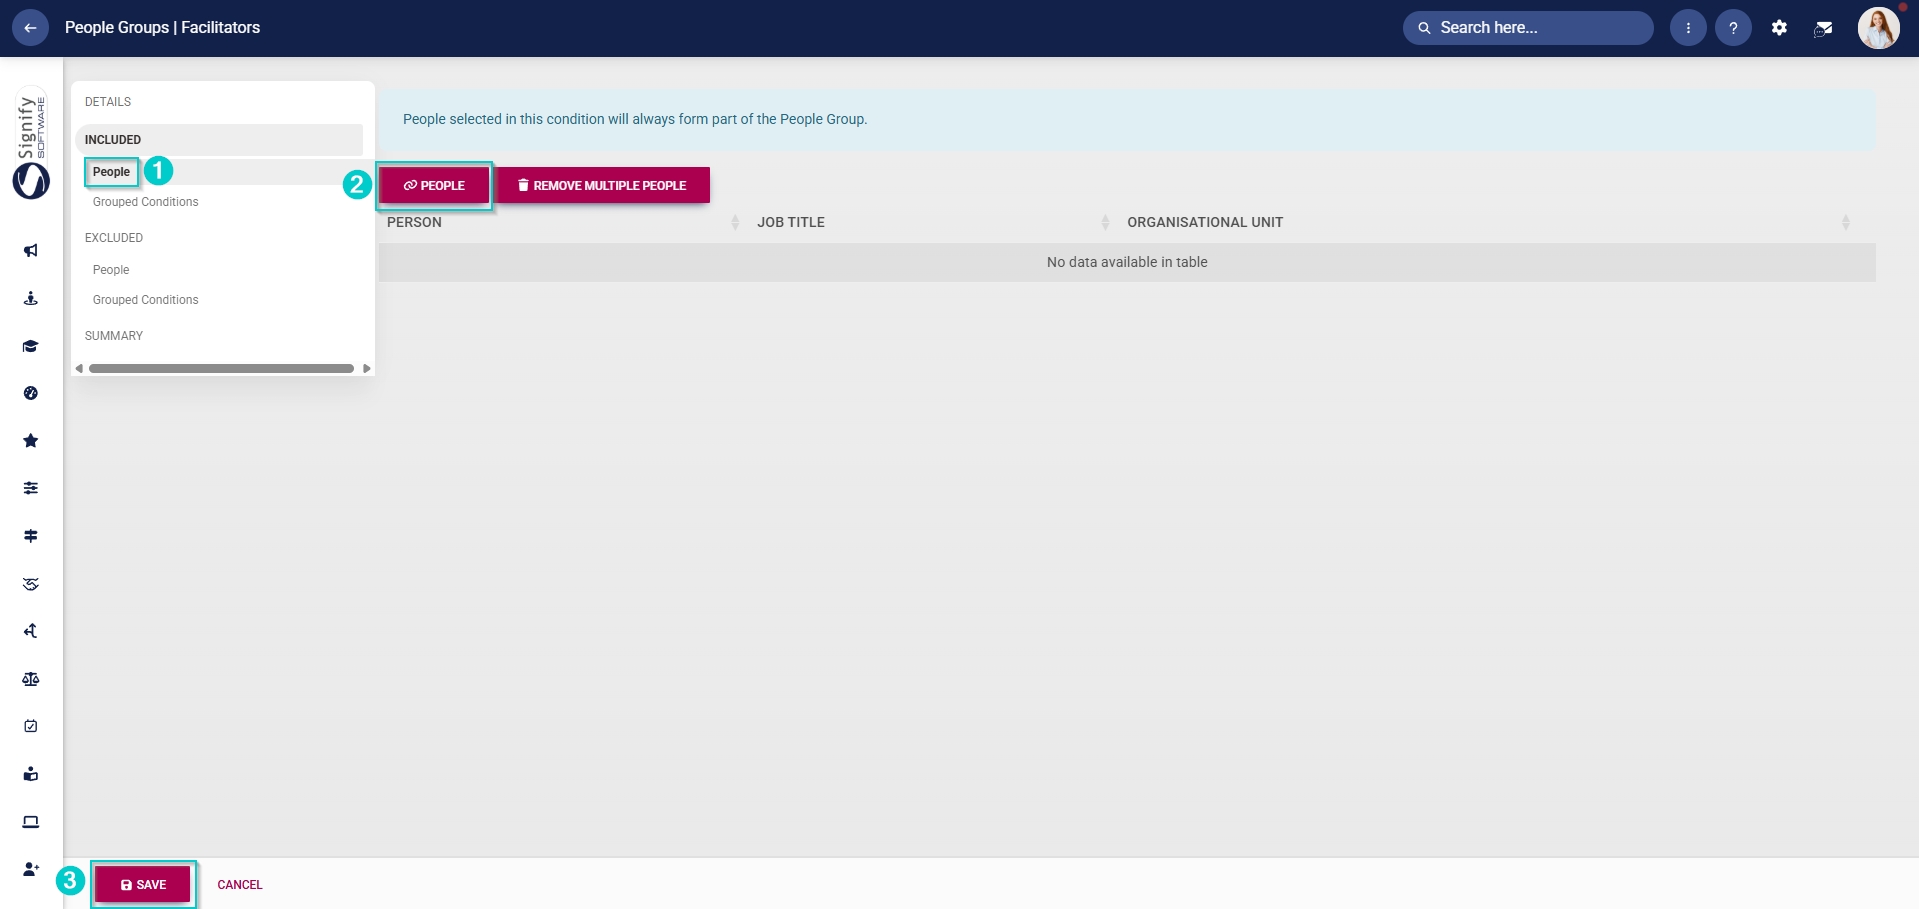
- Once the people group for coordinators has been created, you can select the people to add to it. In the left-hand menu, click to navigate to the Included section.
-
- Click People to add individuals, then click PEOPLE.
-
-
-
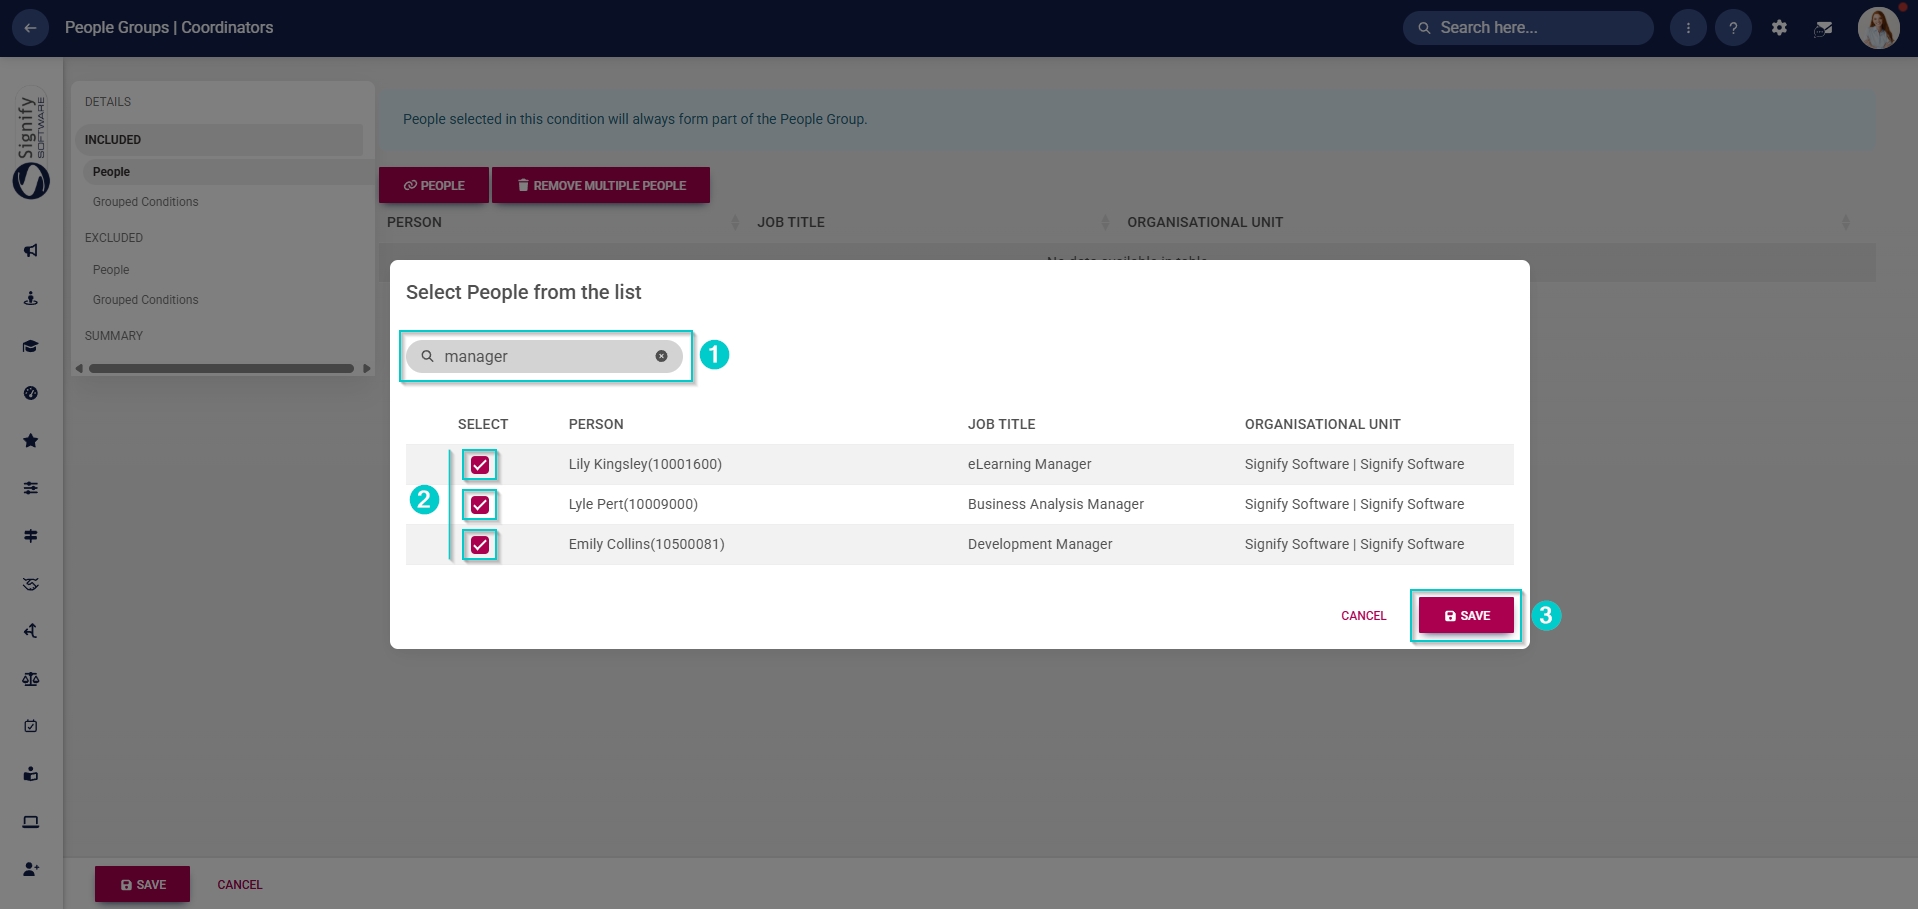
- Use the search bar to search for a specific person, job title, or organisational unit.
- Select the individuals from the list by ticking the checkbox next to a person’s name.
- Click SAVE when you are finished or click CANCEL to discard your edits.
-
-
-
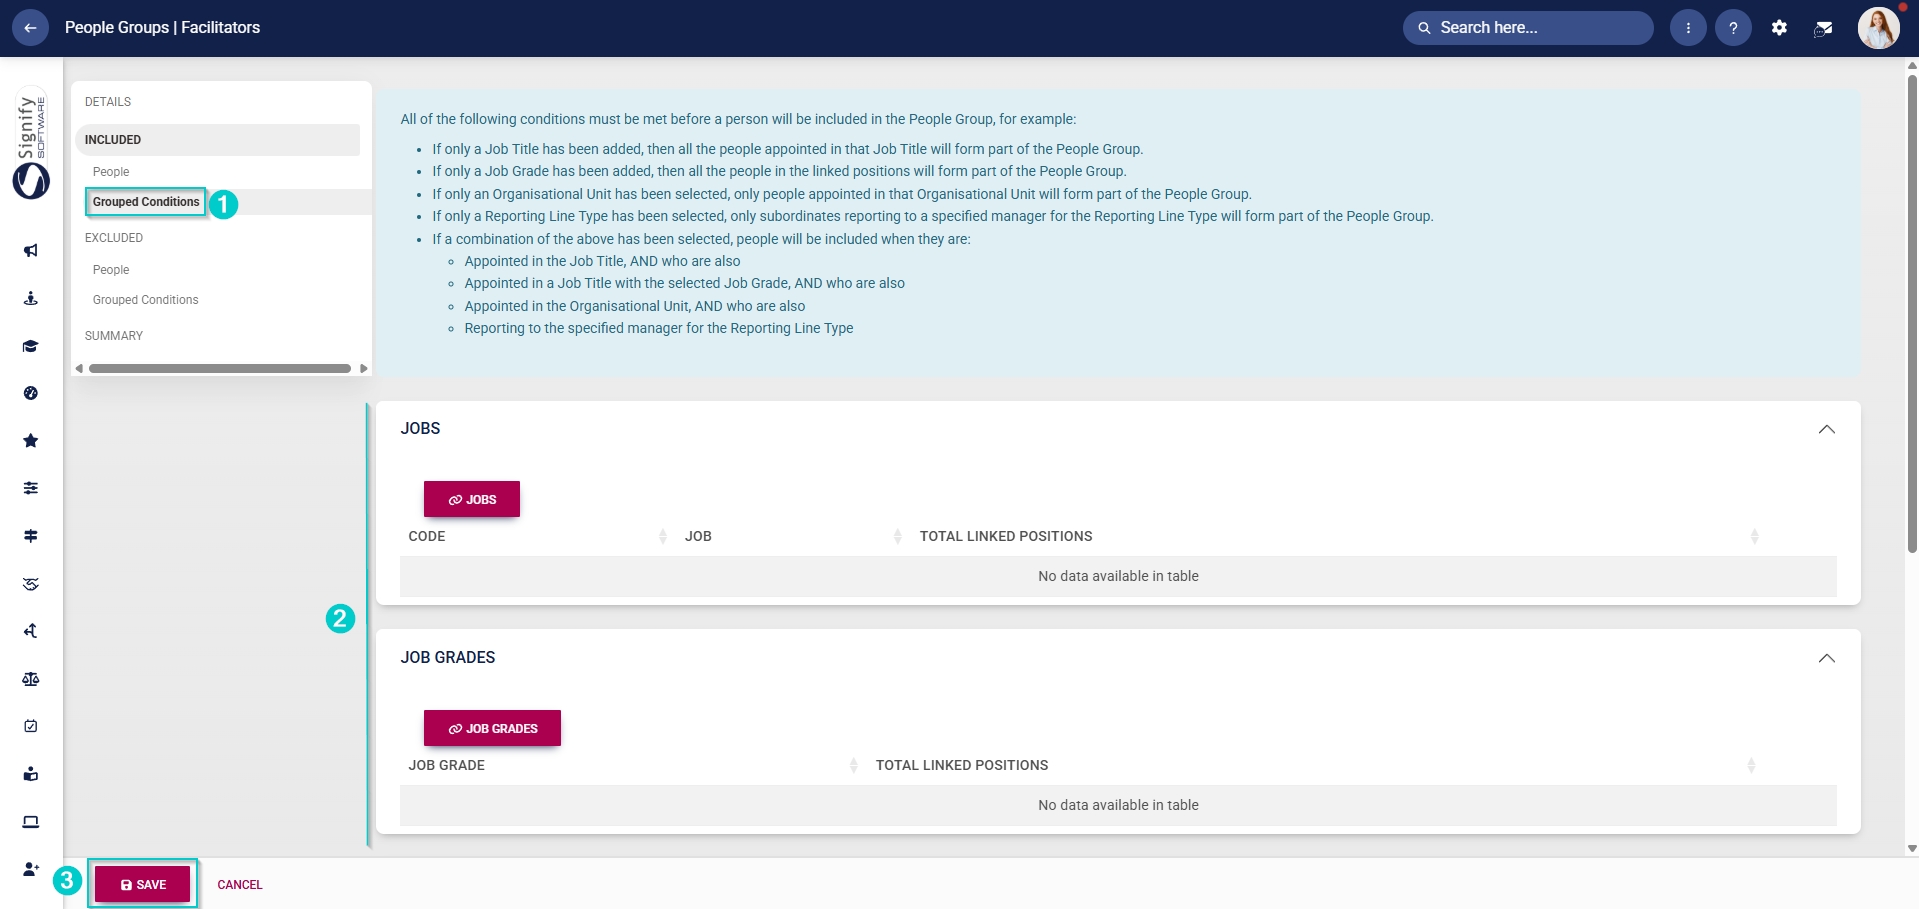
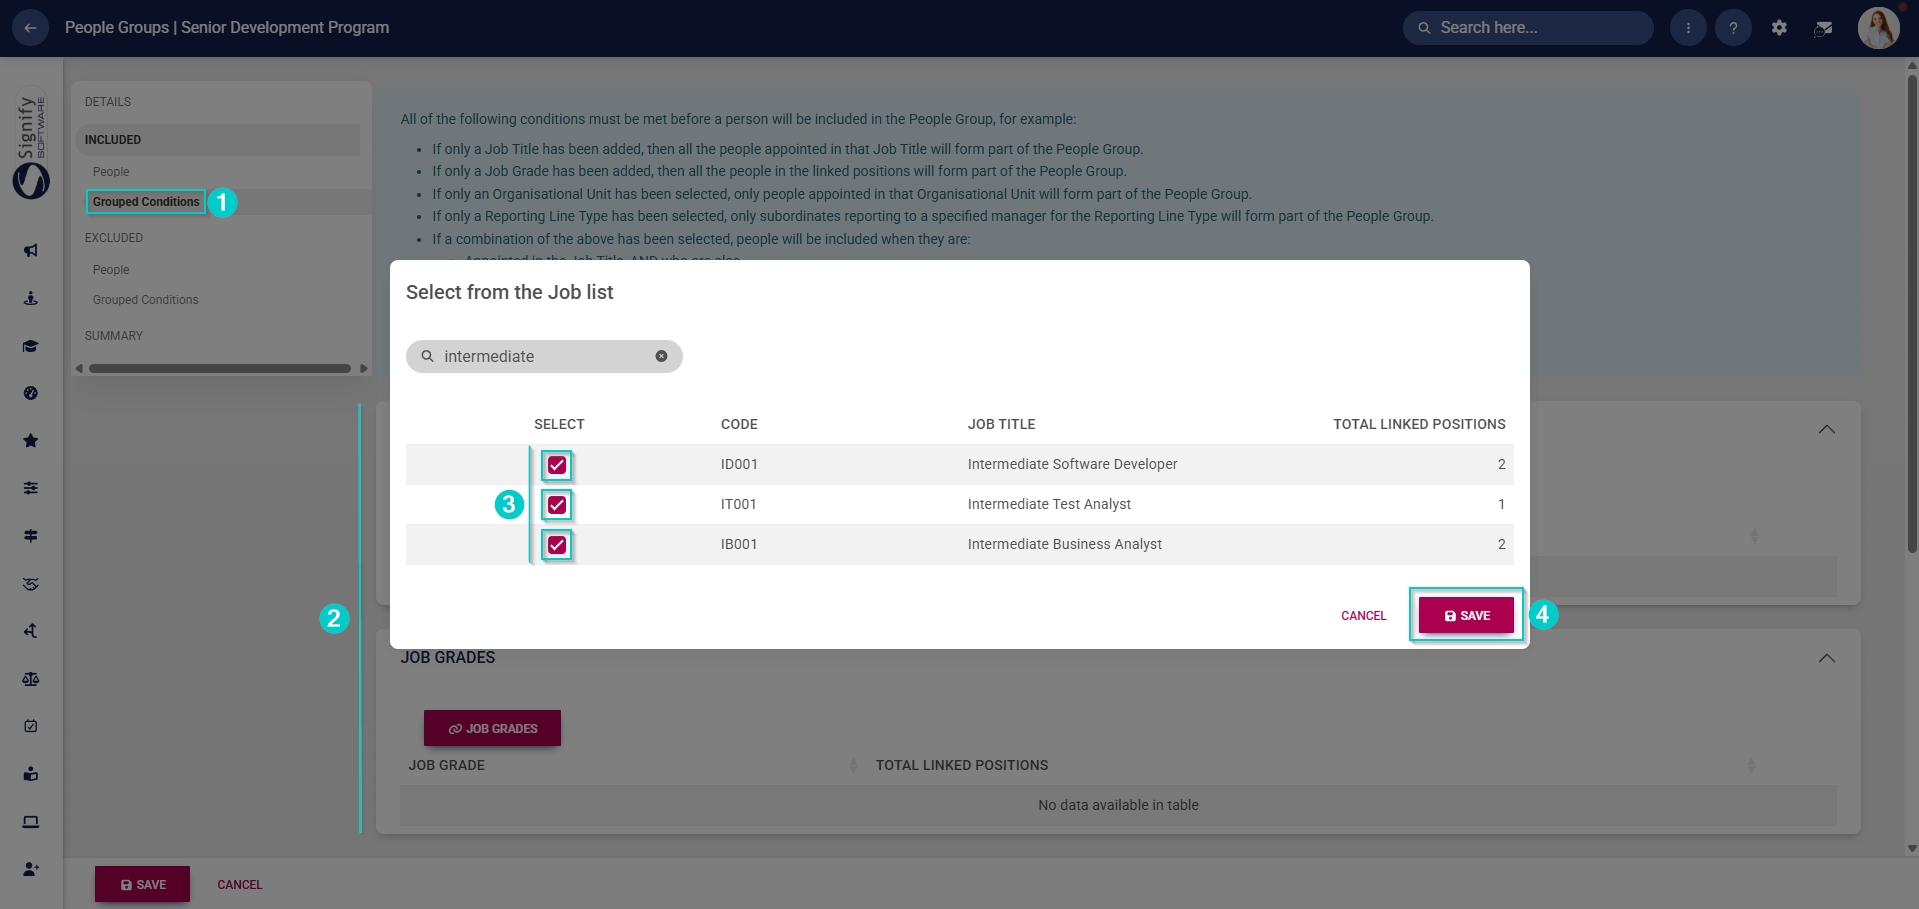
- Alternatively, click Grouped Conditions to add groups of people based on criteria such as job titles, organisational nodes, etc.
- Click SAVE when you are finished or click CANCEL to discard your edits.
-

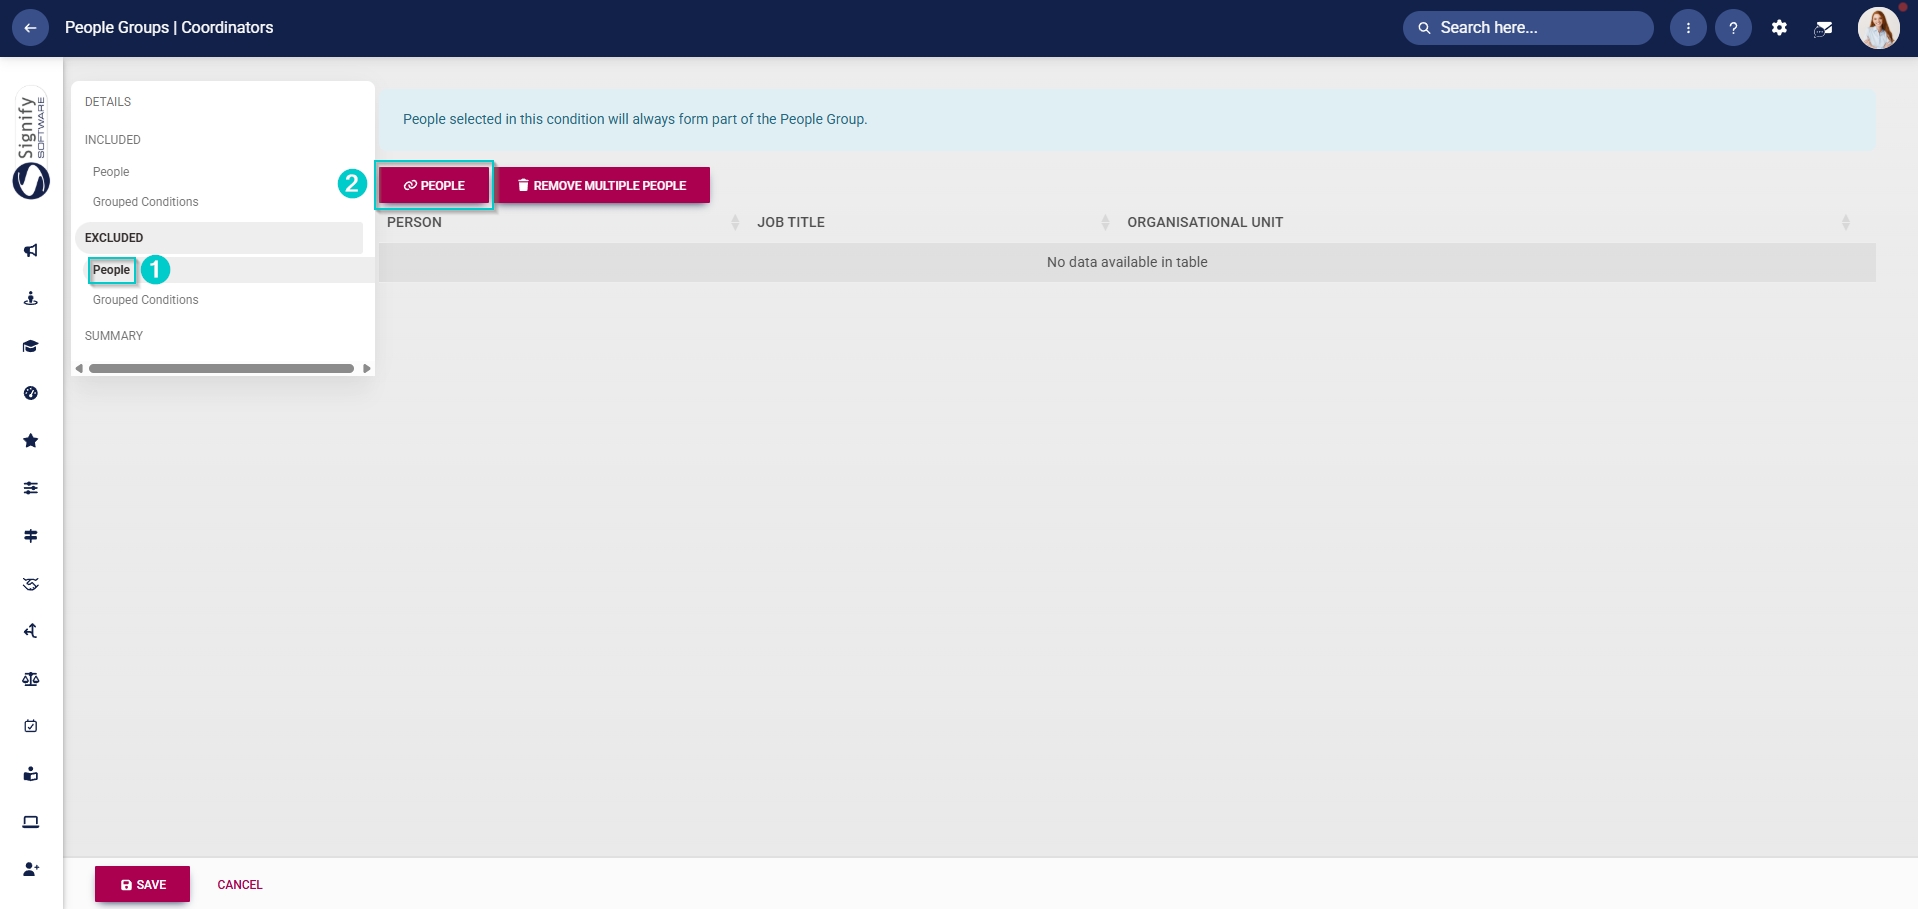
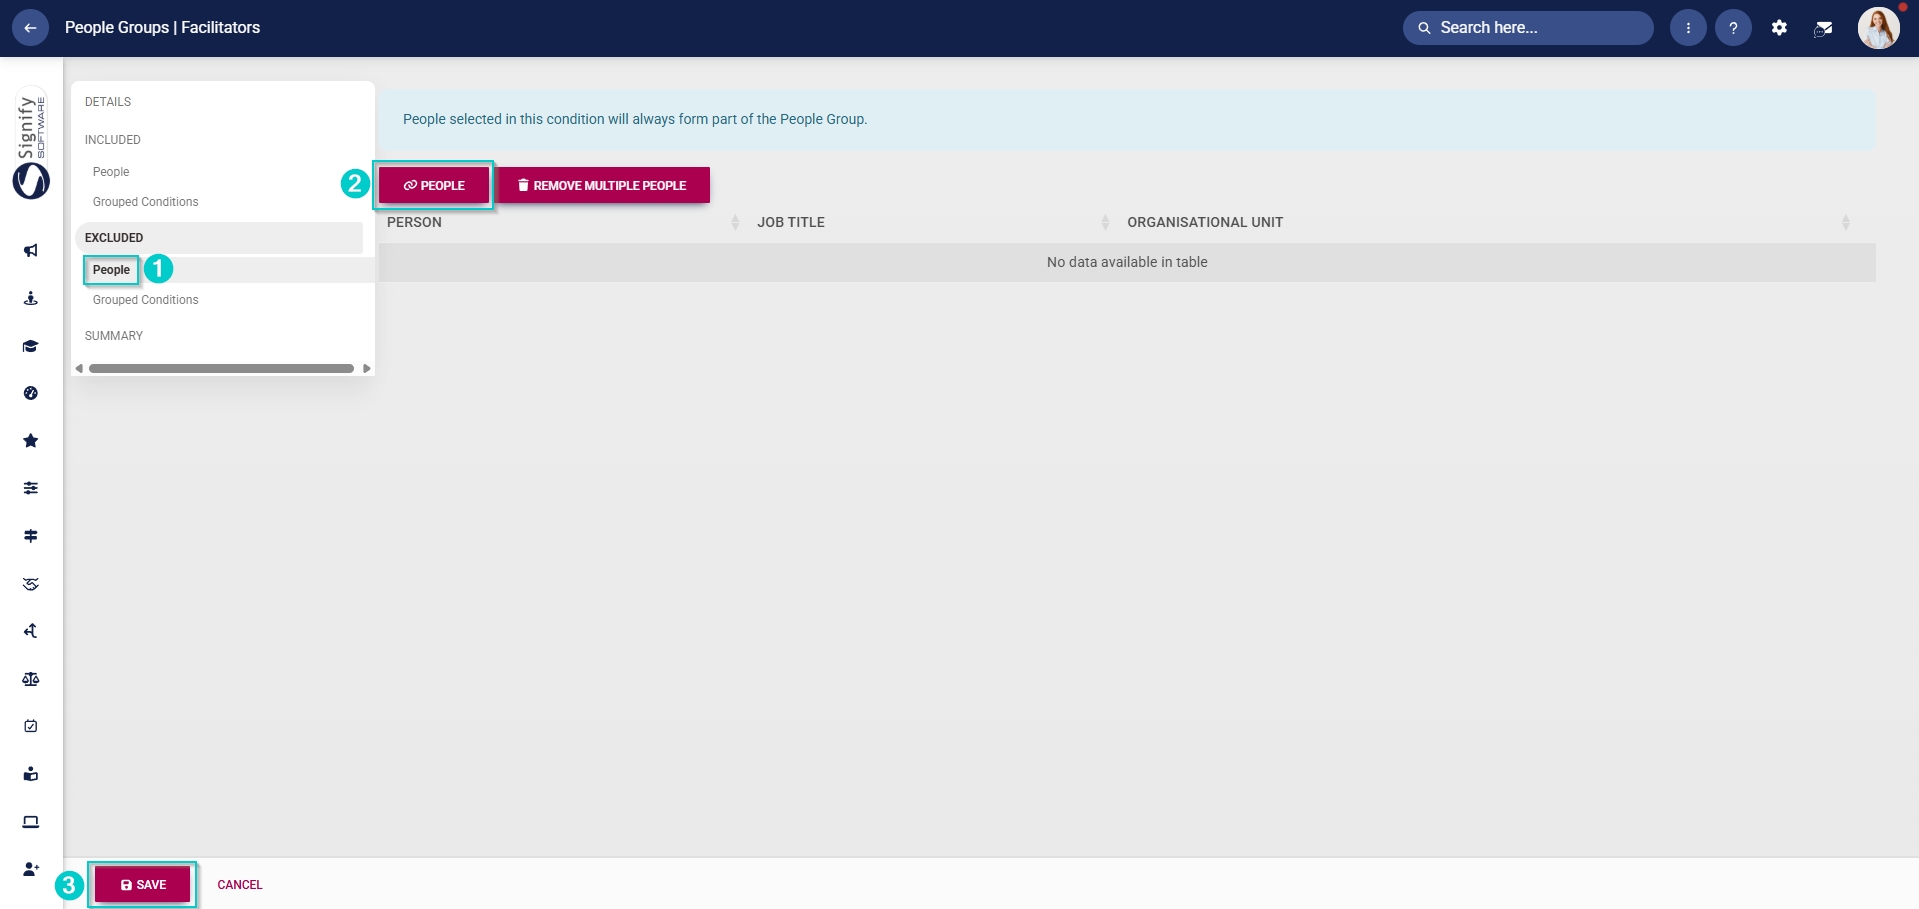
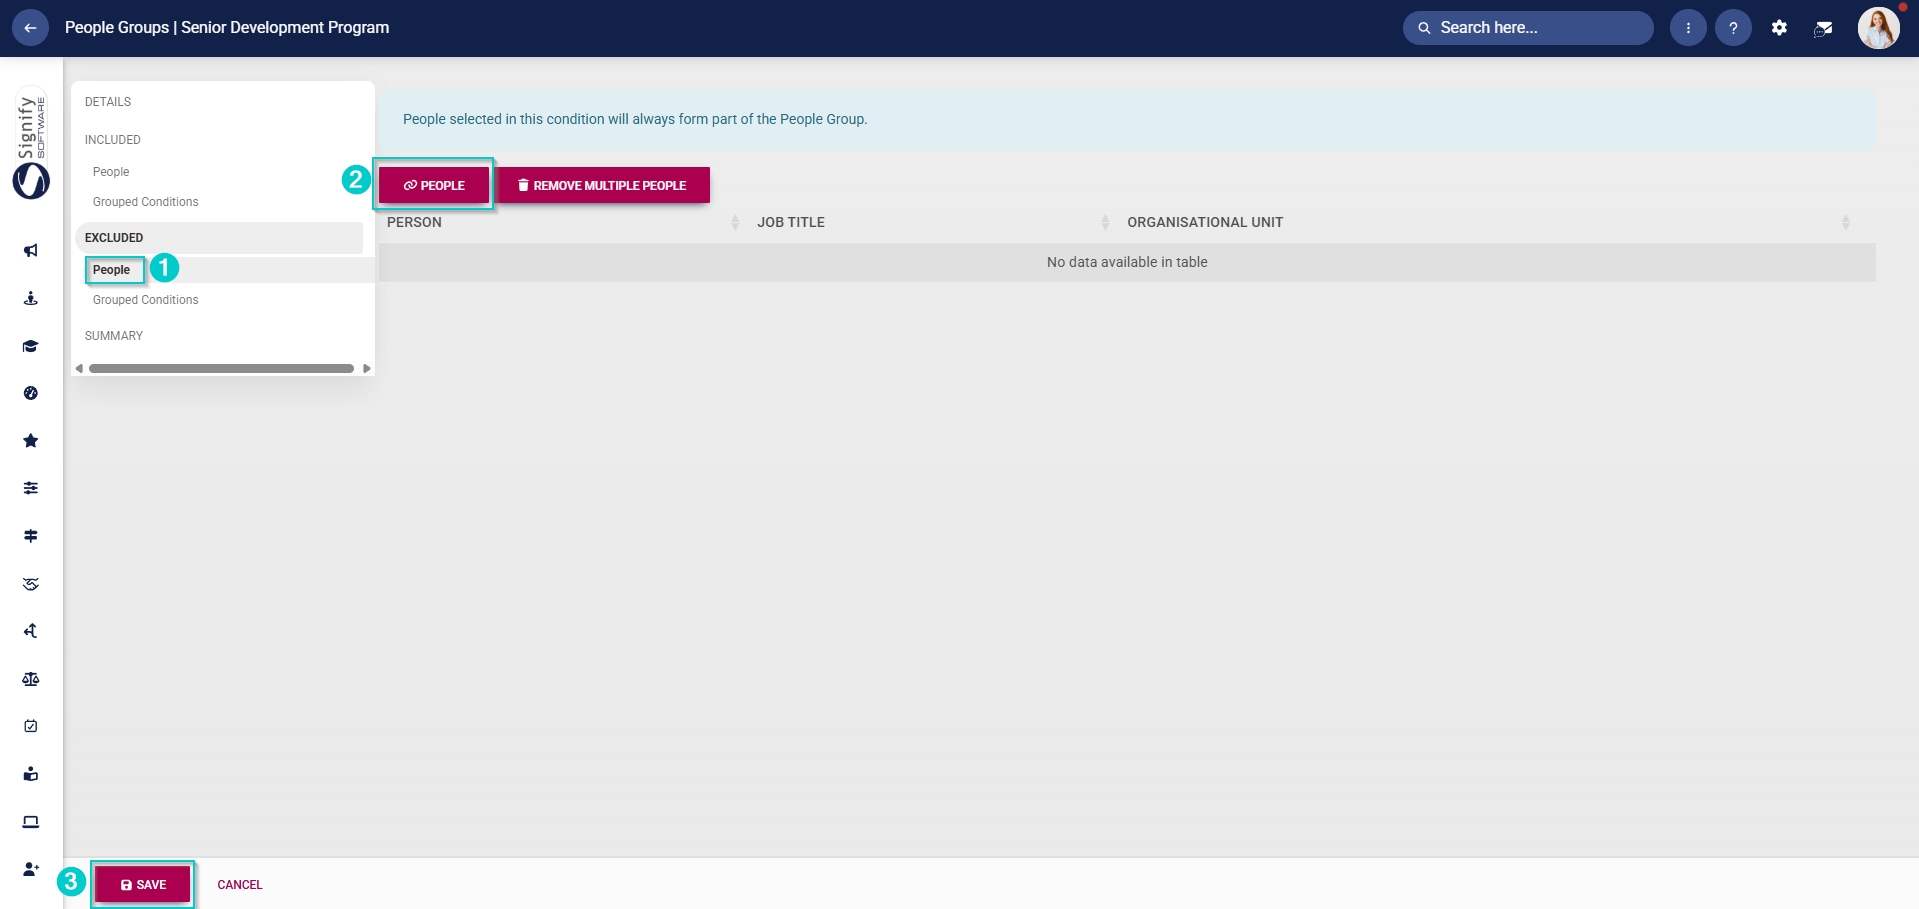
- Additionally, you can select the people to exclude from this group. In the left-hand menu, click to navigate to the Excluded section.
-
- Click People to exclude individuals, then click PEOPLE.
- Select the people you would like to exclude.
- Click SAVE when you are finished or click CANCEL to discard your edits.
-
-
-
- Click Grouped Conditions to exclude groups of people based on criteria such as job titles, organisational nodes, etc.
- Click SAVE when you are finished or click CANCEL to discard your edits.
-

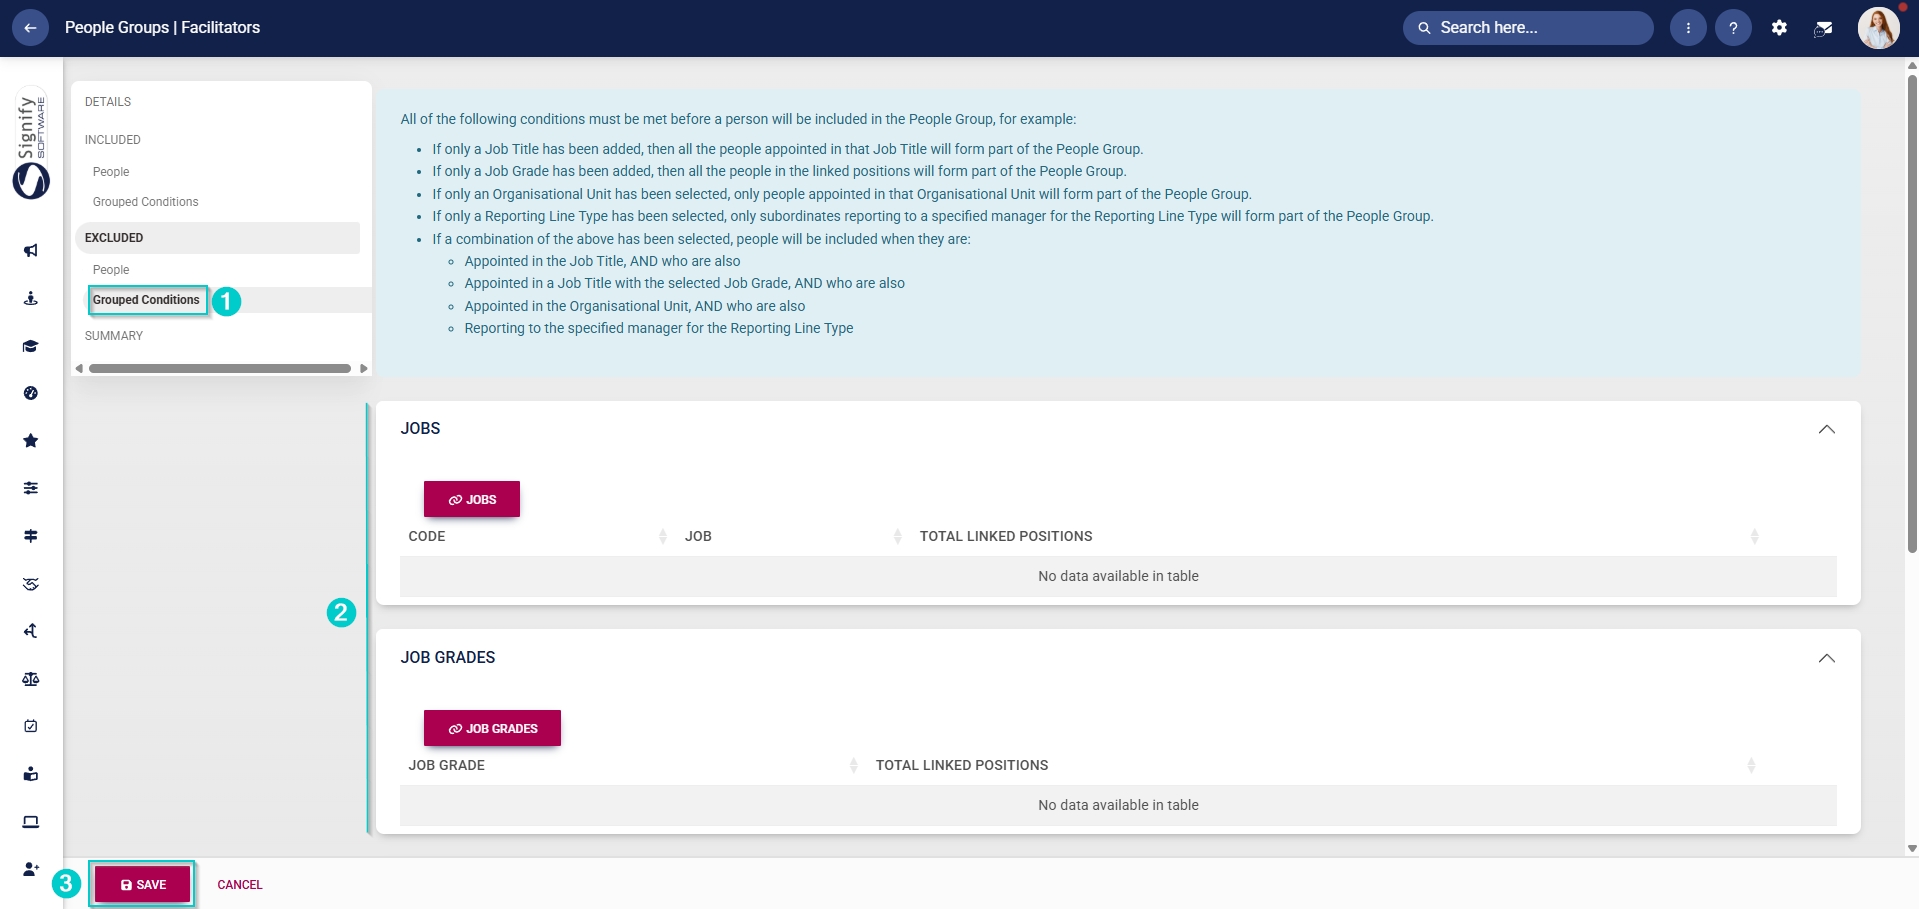
Create people groups for facilitators
- Click the gear icon to access the Setup and Configuration menu.
- Click People Groups.
- In the left-hand menu, navigate to Event Scheduling, then click +PEOPLE GROUP.
- From the dropdown menu, select Facilitators.
- Click the toggle button to set the status to Active.
- Click SAVE when you are finished or click CANCEL to discard your edits.

- Once the people group for facilitators has been created, you can select the people to add to it. In the left-hand menu, click to navigate to the Included section.
-
- Click People to include individuals, then click PEOPLE.
- Select the people you would like to include.
- Click SAVE when you are finished or click CANCEL to discard your edits.
-
-
-
- Alternatively, click Grouped Conditions to add groups of people based on criteria such as job titles, organisational nodes, etc.
- Click SAVE when you are finished or click CANCEL to discard your edits.
-
- Alternatively, you can select the people to exclude from this group. In the left-hand menu, click to navigate to the Excluded section.
-
- Click People to exclude individuals, then click PEOPLE.
- Select the people you would like to exclude.
- Click SAVE when you are finished or click CANCEL to discard your edits.
-
-
-
- Click Grouped Conditions to exclude groups of people based on criteria such as job titles, organisational nodes, etc.
- Click SAVE when you are finished or click CANCEL to discard your edits.
-
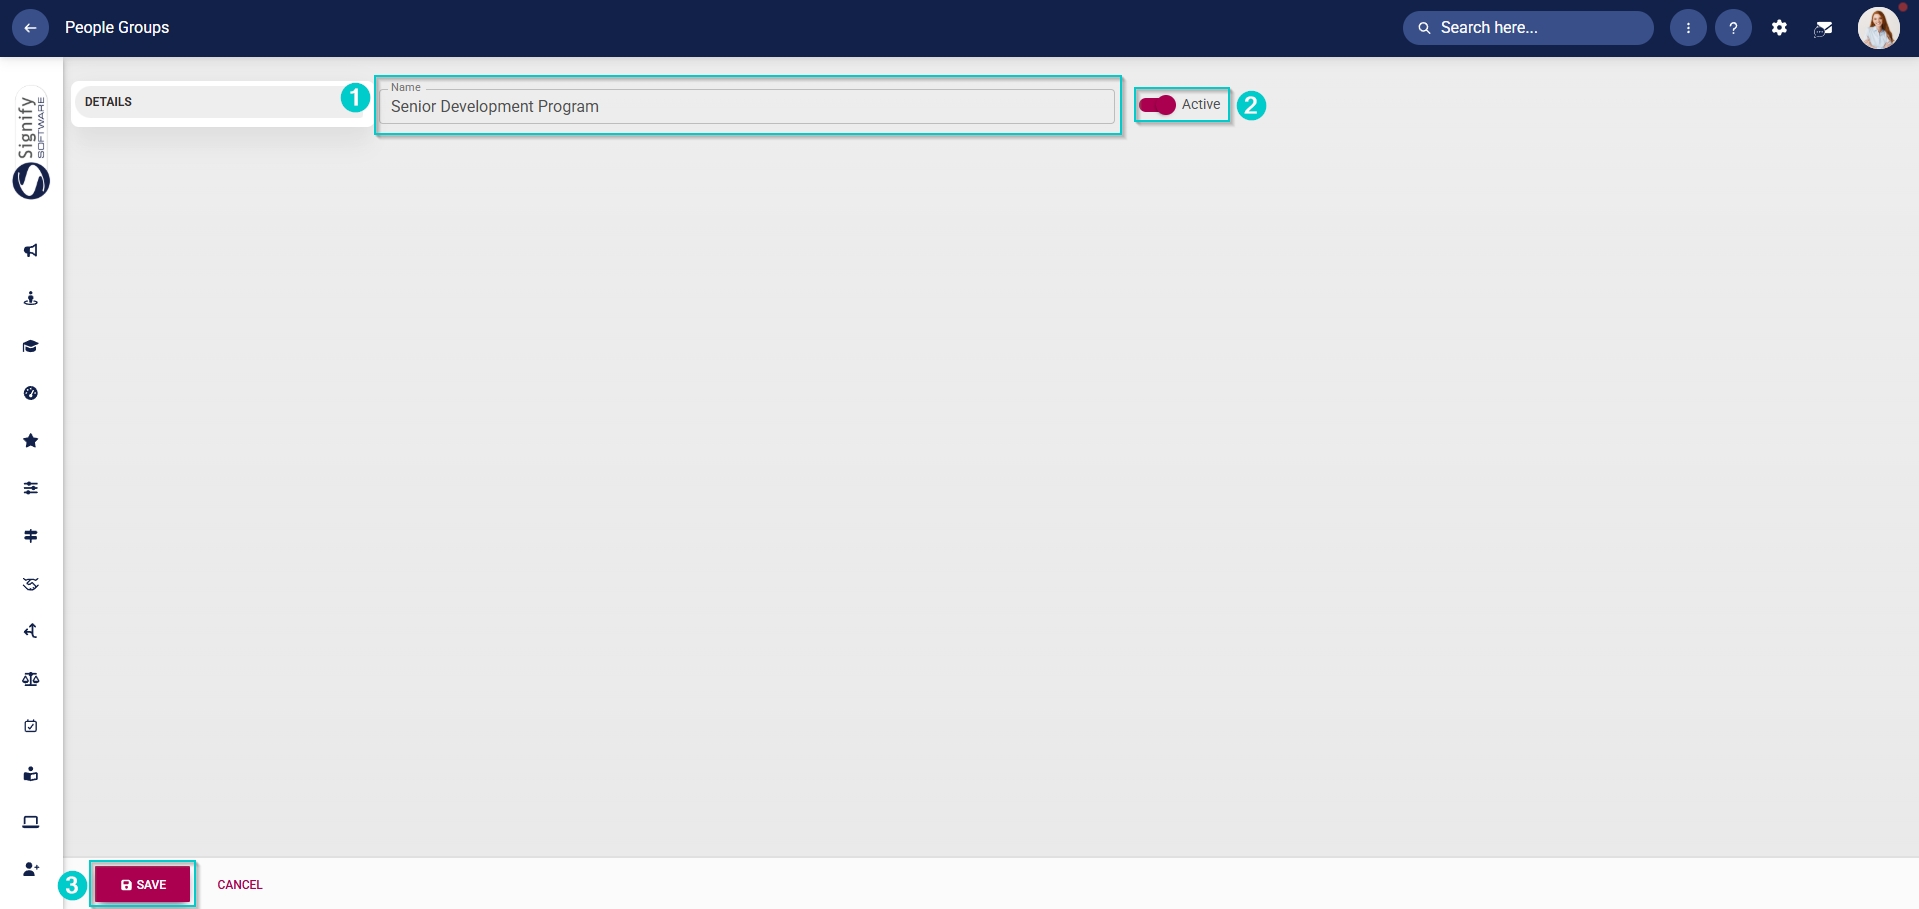
Create custom people groups for attendees
- Click the gear icon to access the Setup and Configuration menu.
- Click People Groups.
- In the left-hand menu, navigate to Custom, then click +PEOPLE GROUP.
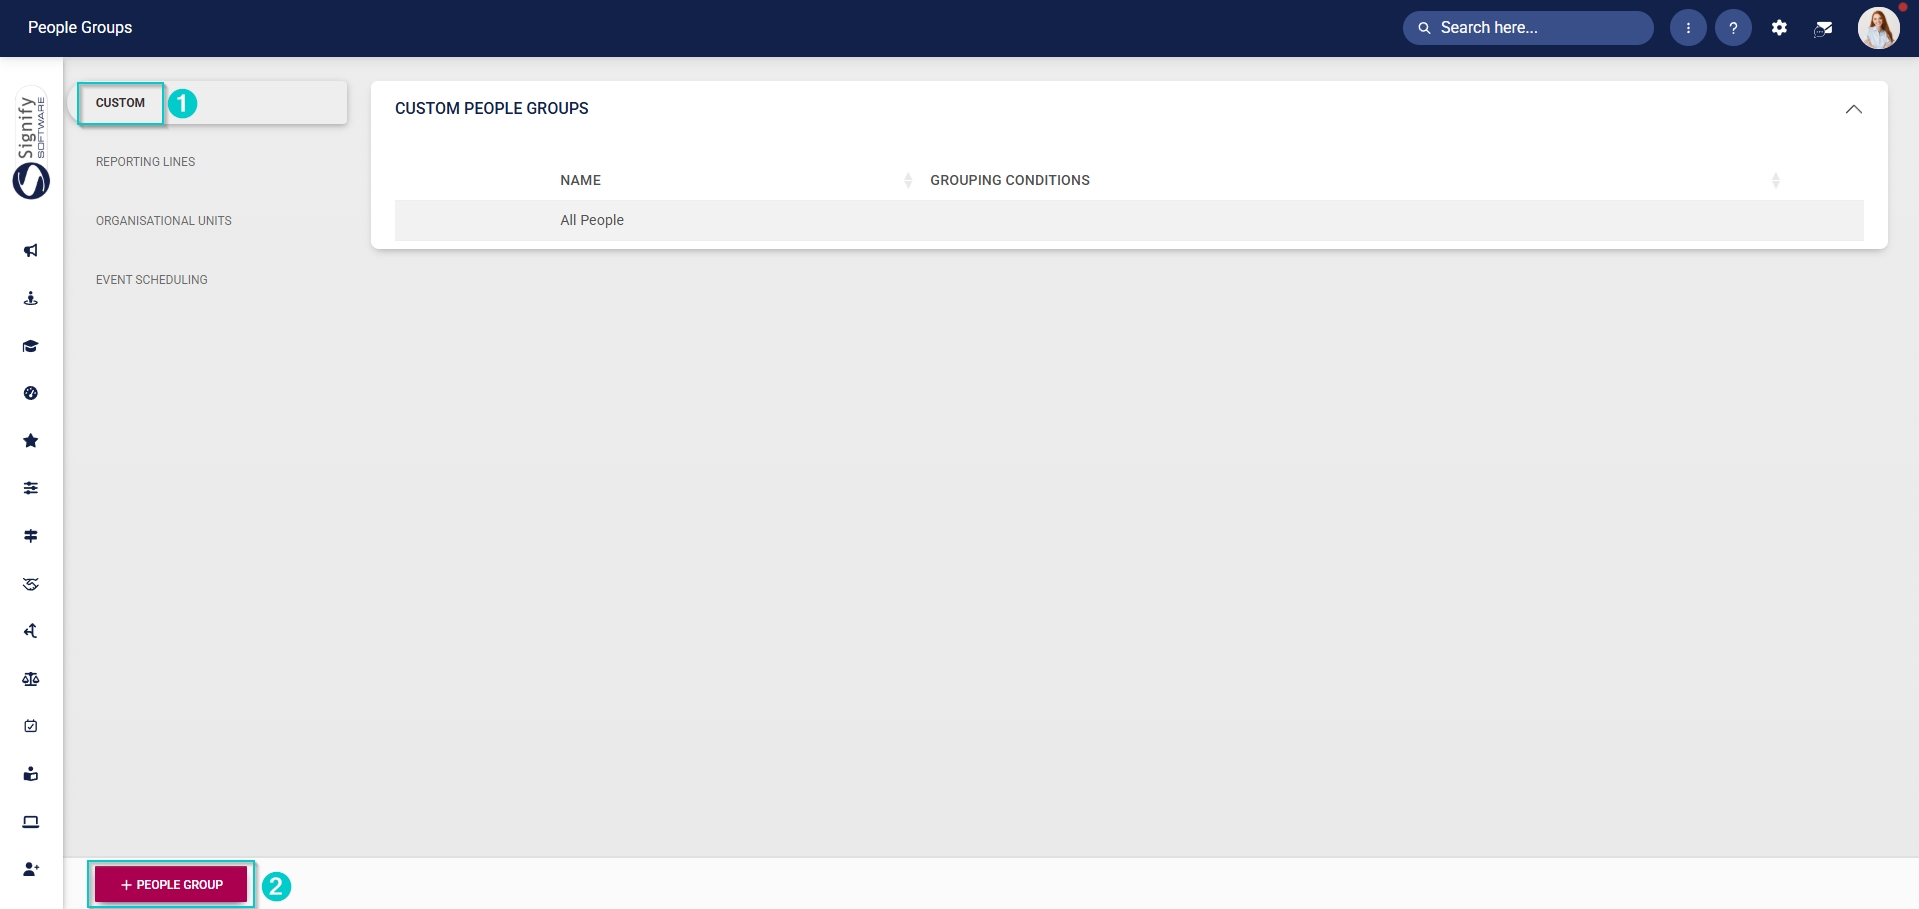
- Enter a descriptive name for the group of attendees.
- Click the toggle button to set the status to Active.
- Click SAVE when you are finished or click CANCEL to discard your edits.
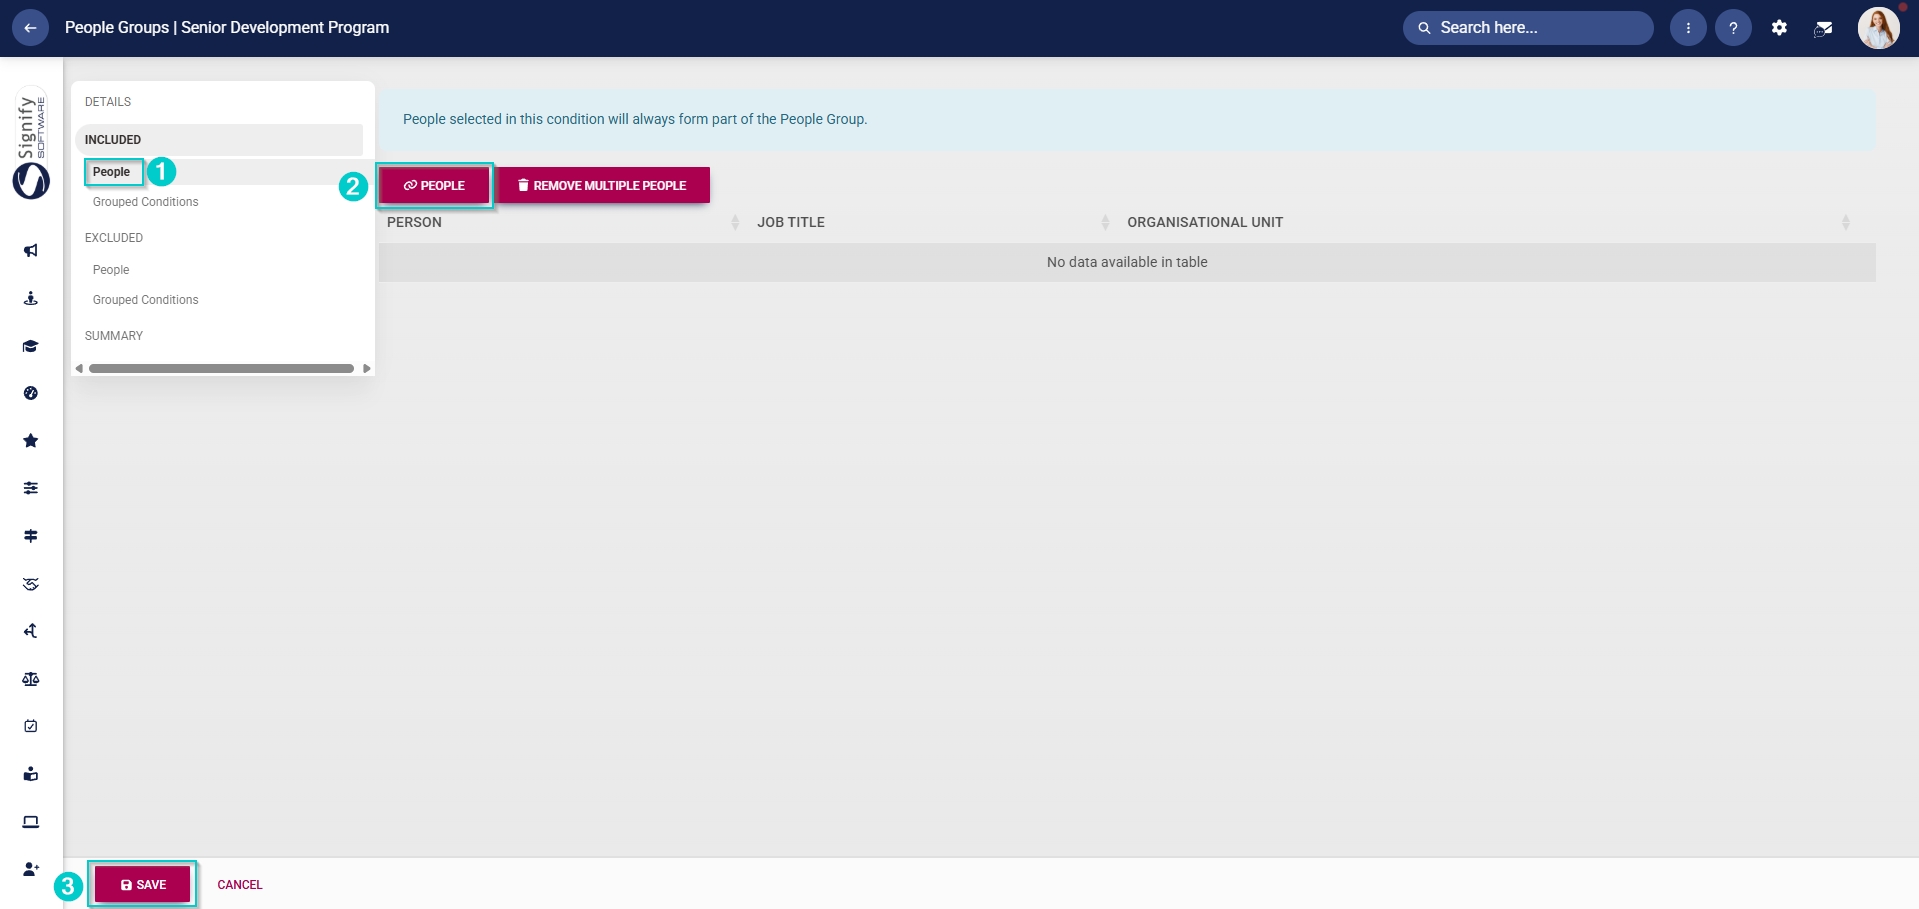
- Once the people group for attendees has been created, you can select the people to add to it. In the left-hand menu, click to navigate to the Included section.
-
- Click People to add individuals, then click PEOPLE.
- Select the people you would like to add.
- Click SAVE when you are finished or click CANCEL to discard your edits.
-
-
-
- Click Grouped Conditions to add groups of people based on criteria such as job titles, organisational nodes, etc.
- Click SAVE when you are finished or click CANCEL to discard your edits.
-
- Alternatively, you can select the people to exclude from this group. In the left-hand menu, click to navigate to the Excluded section.
-
- Click People to exclude individuals, then click PEOPLE.
- Select the people you would like to exclude.
- Click SAVE when you are finished or click CANCEL to discard your edits.
-
-
-
- Click Grouped Conditions to exclude groups of people based on criteria such as job titles, organisational nodes, etc.
- Click SAVE when you are finished or click CANCEL to discard your edits.
-

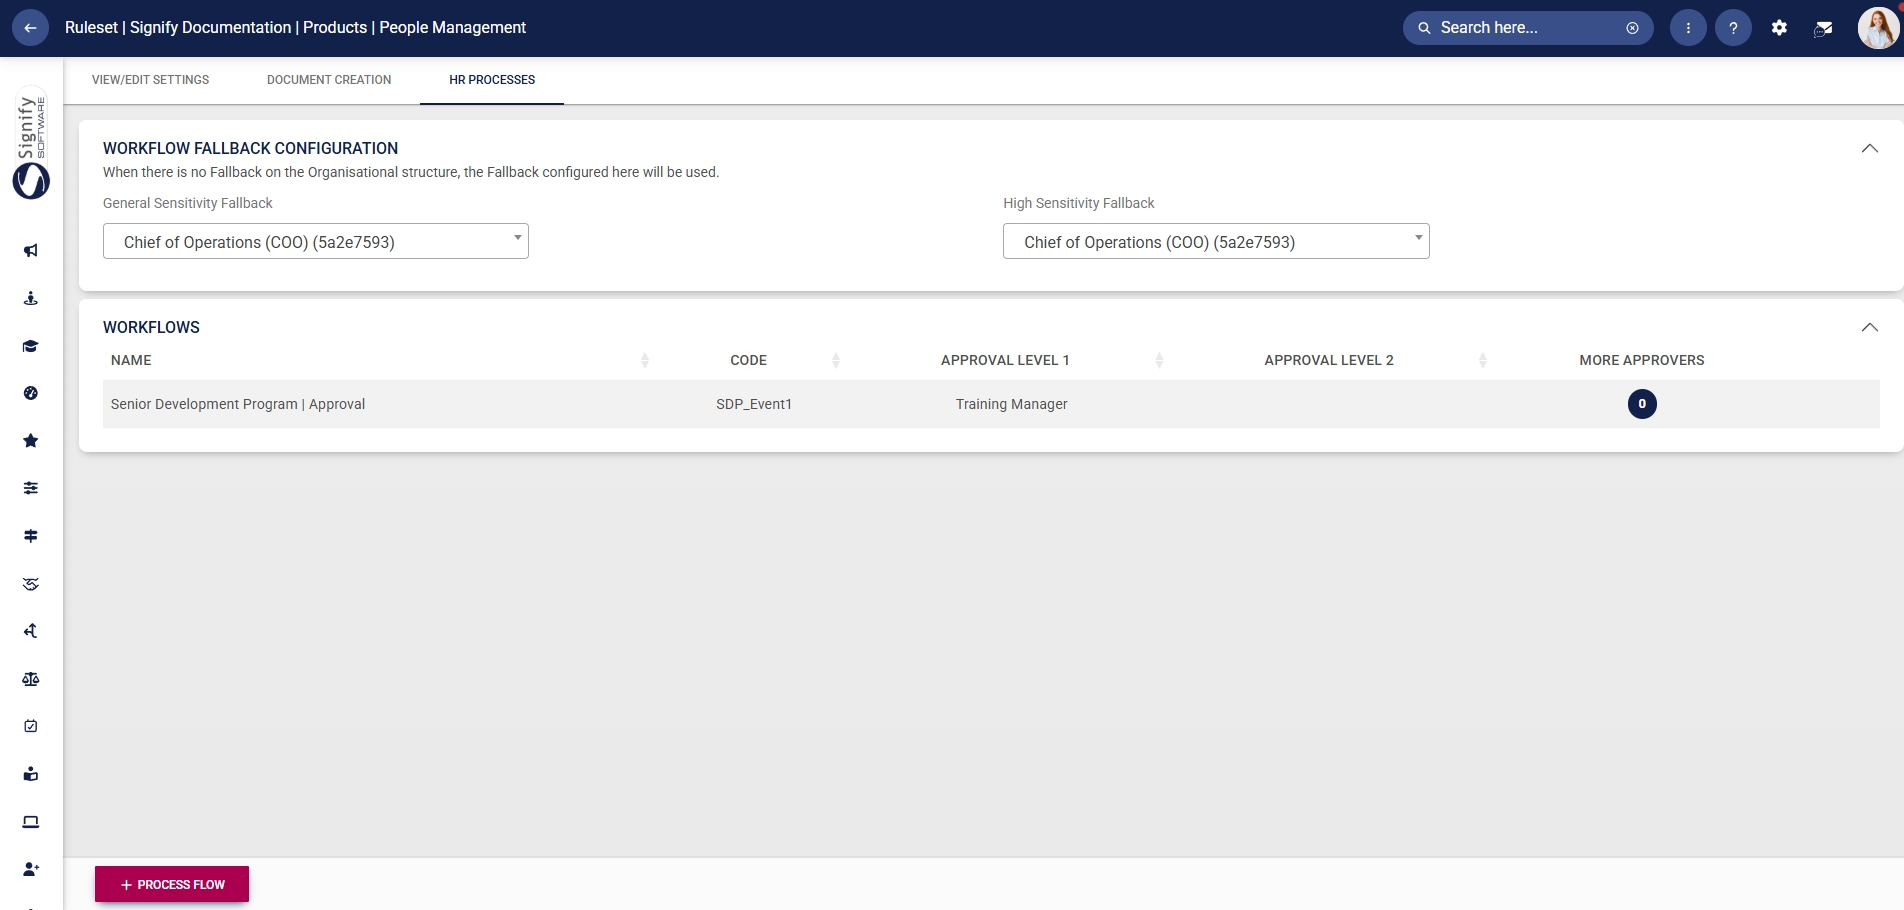
Set up approval workflows
Should an event require a manager’s approval, an administrator can configure an approval workflow.
- Click the gear icon to access the Setup and Configuration menu.
- Click Ruleset Setup.
- Select the ruleset you would like to update.
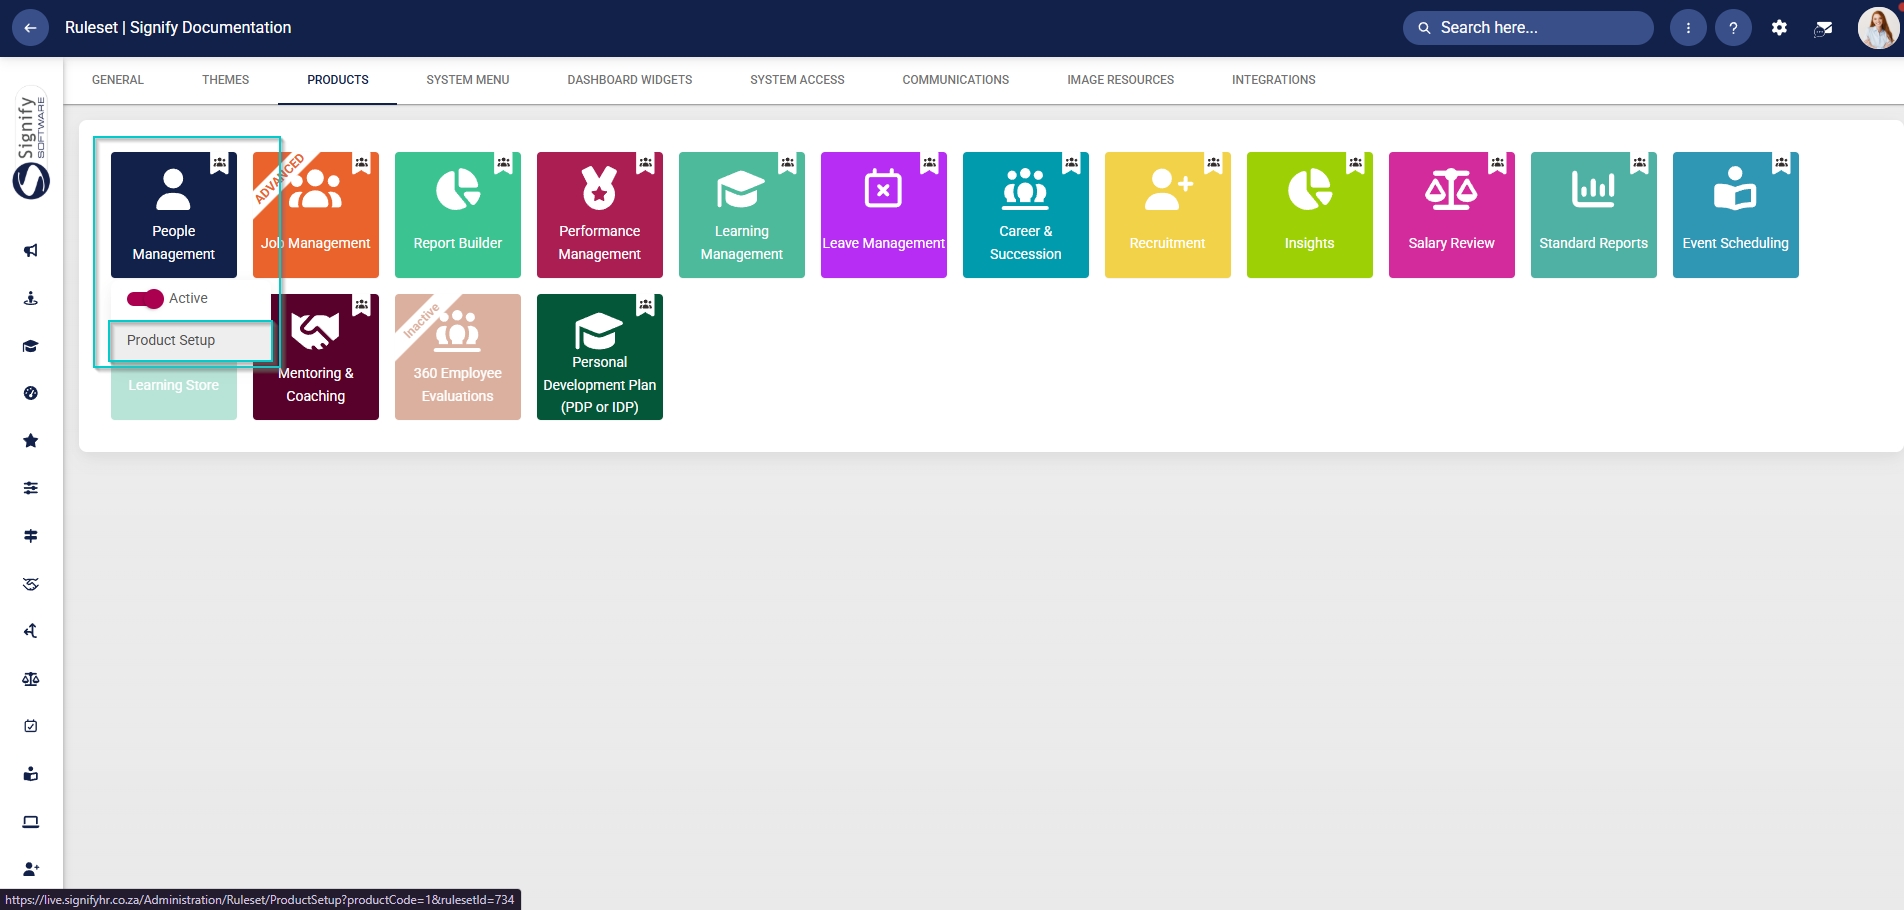
- Click on the People Management product card, then click Product Setup.
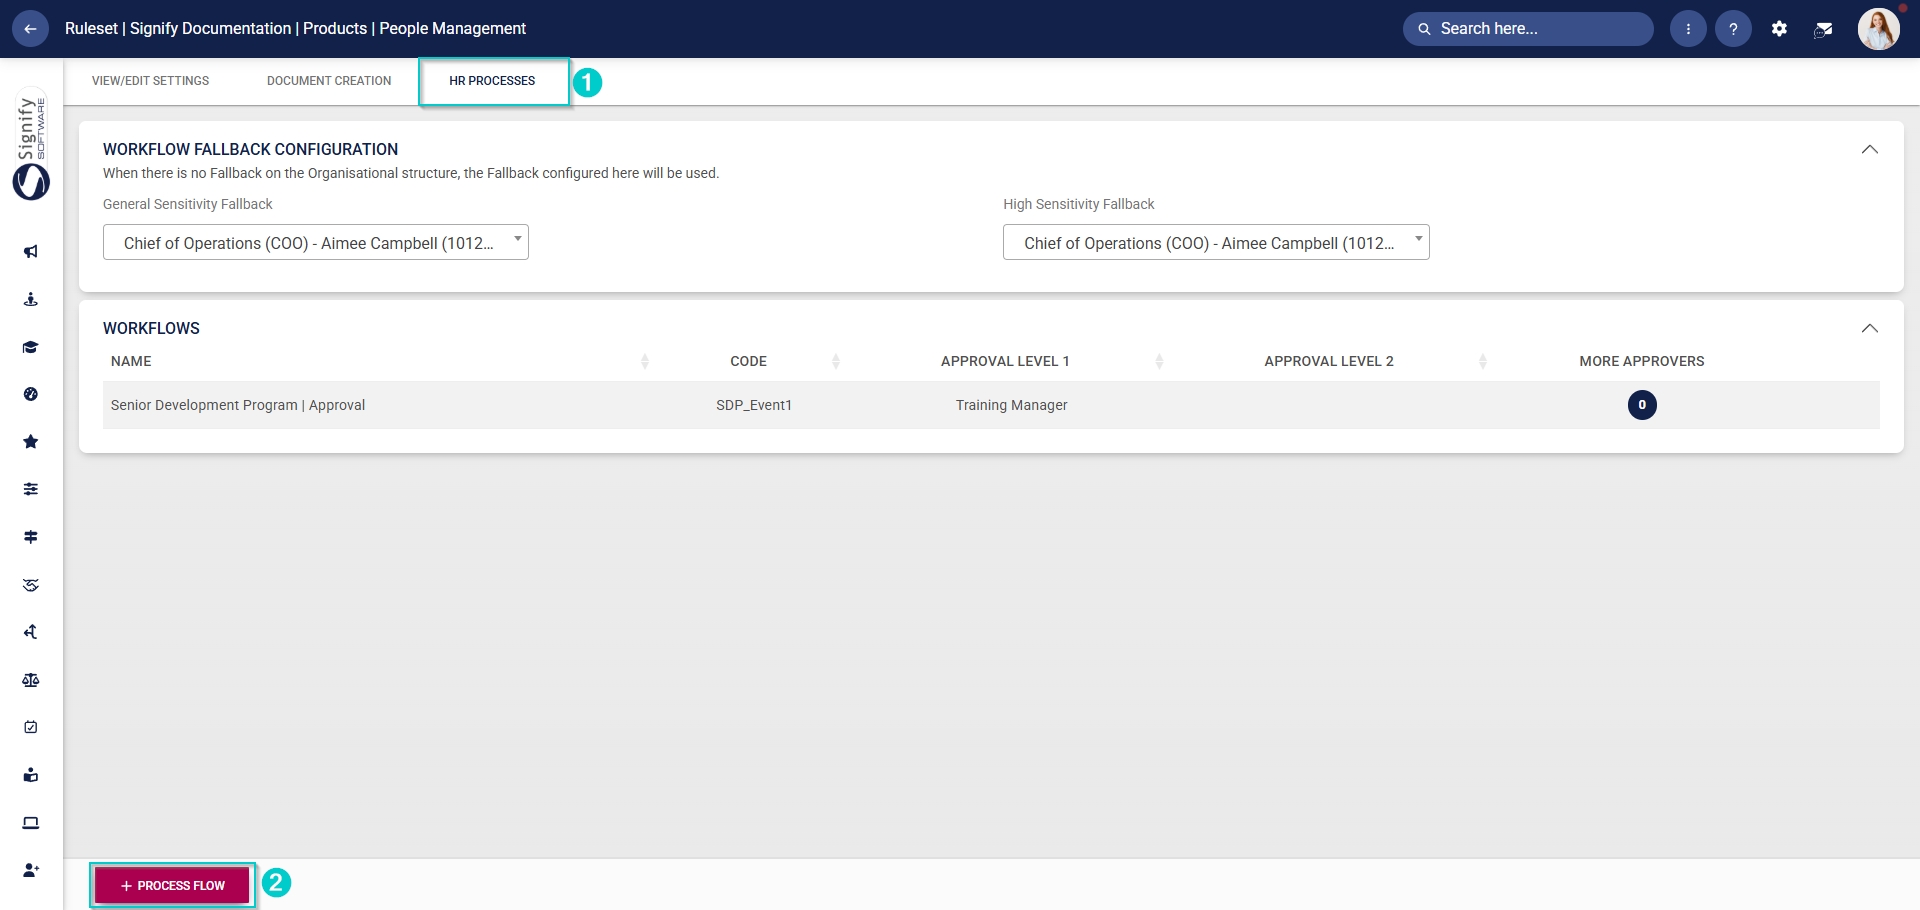
- Enter the name and the code for the process flow.
- Select the workflow sensitivity fallback from the dropdown menu.
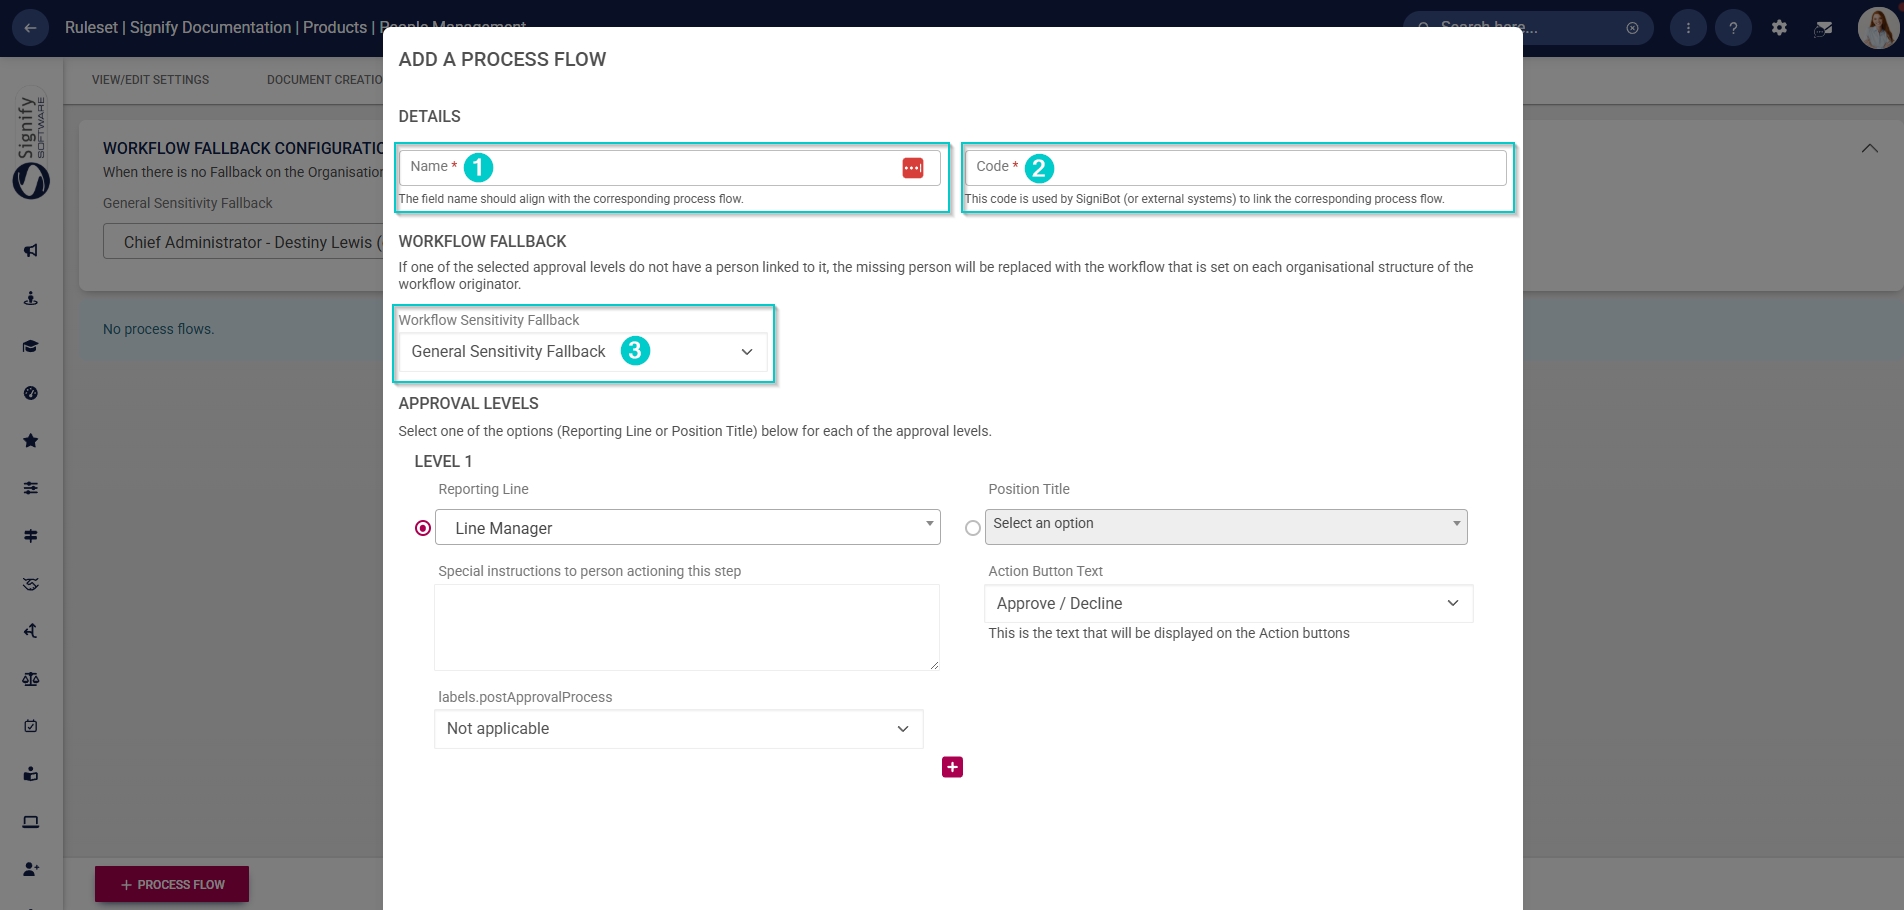
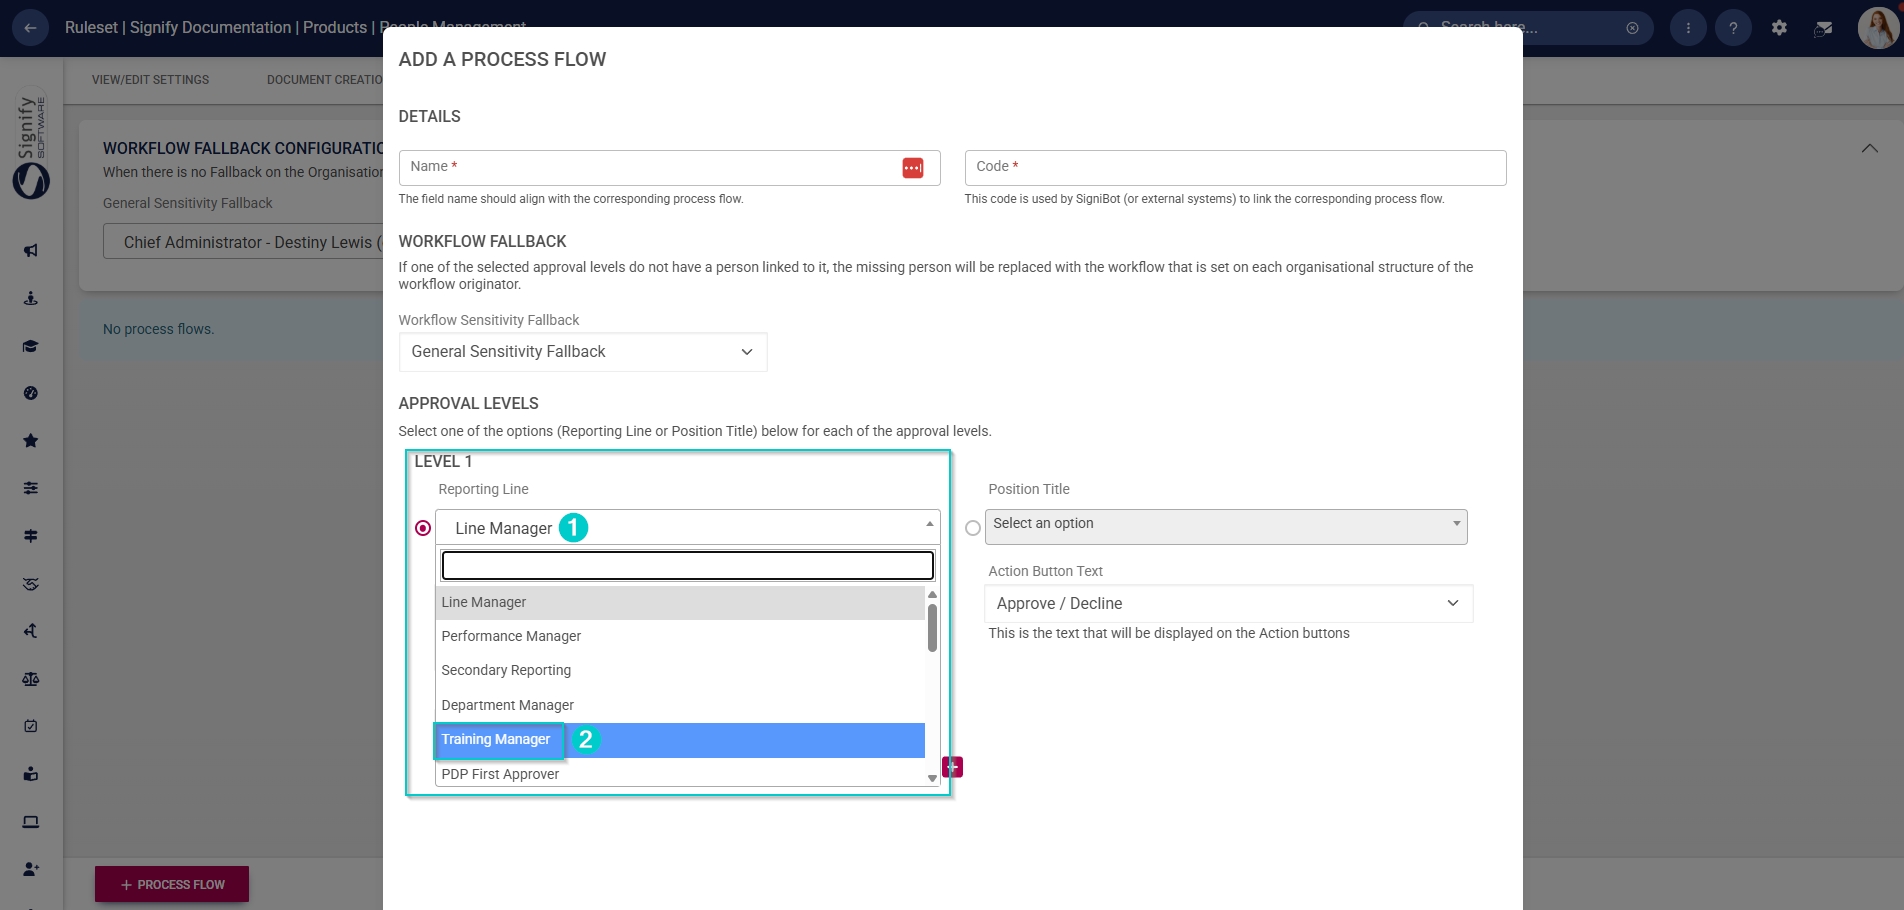
- From the dropdown menu, select the reporting line associated with the manager responsible for this approval workflow.
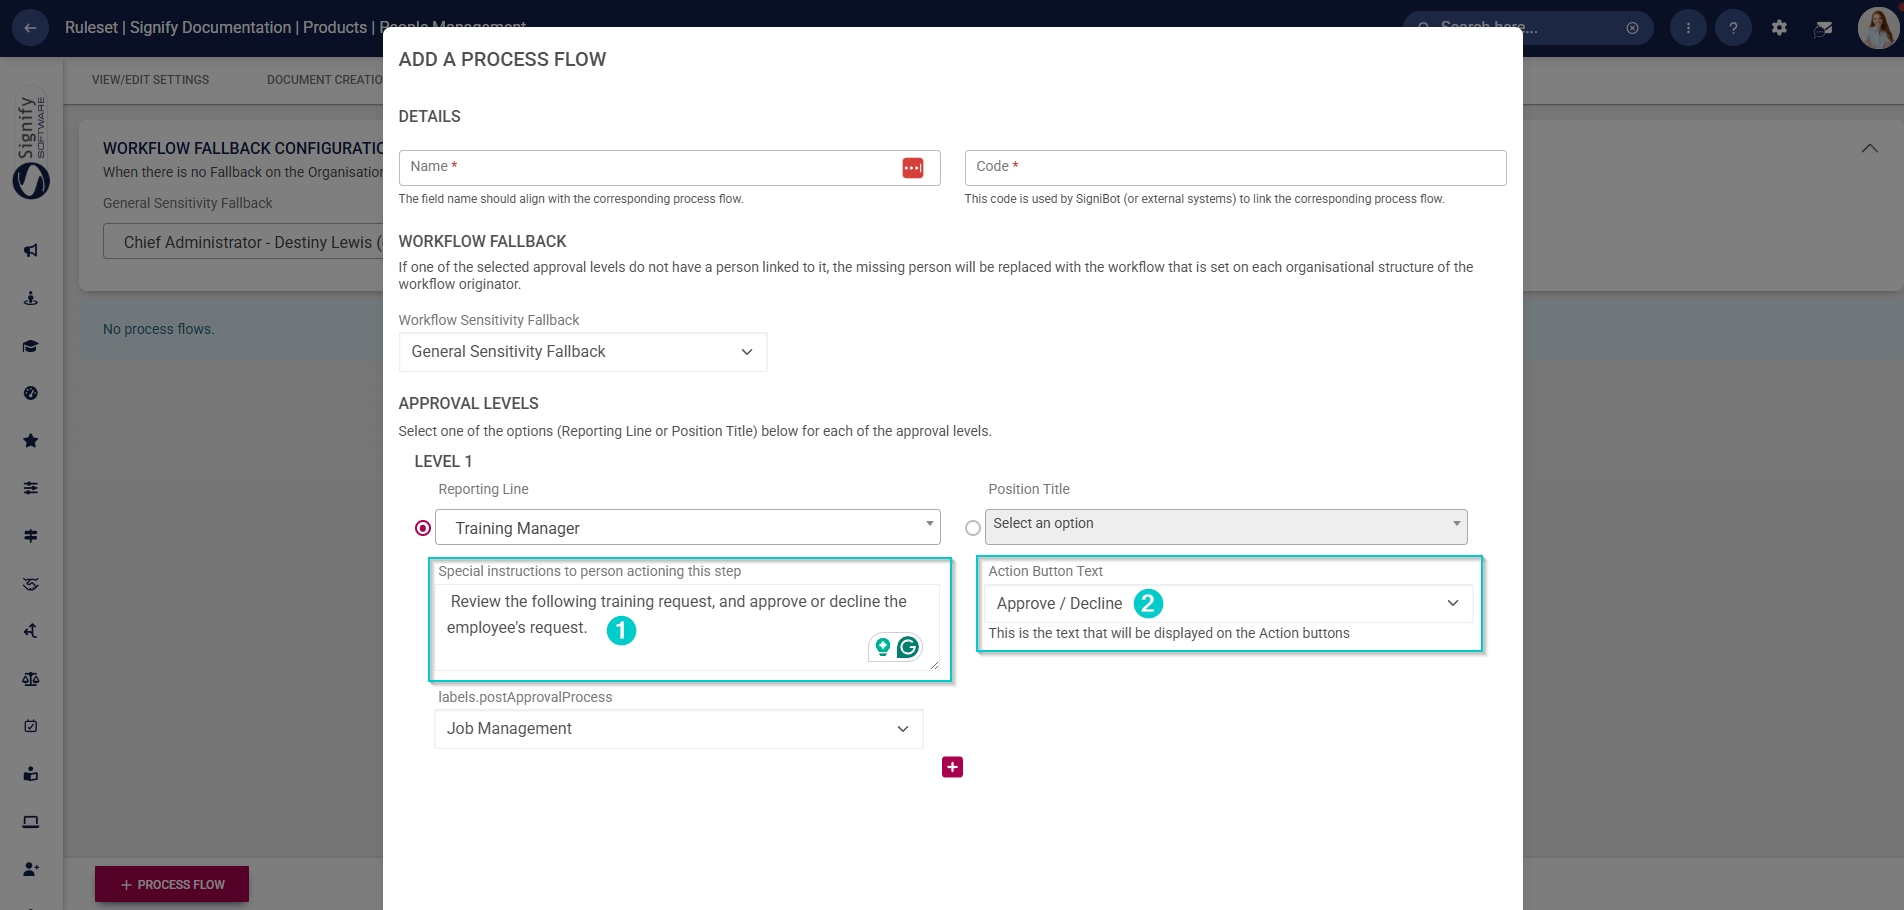
- If required, add special instructions which will be displayed once the manager receives training requests for this event.
- Using the dropdown menu, select the text to display on the action buttons on the training request.
- Click SAVE when you are finished or click CANCEL to discard your edits.
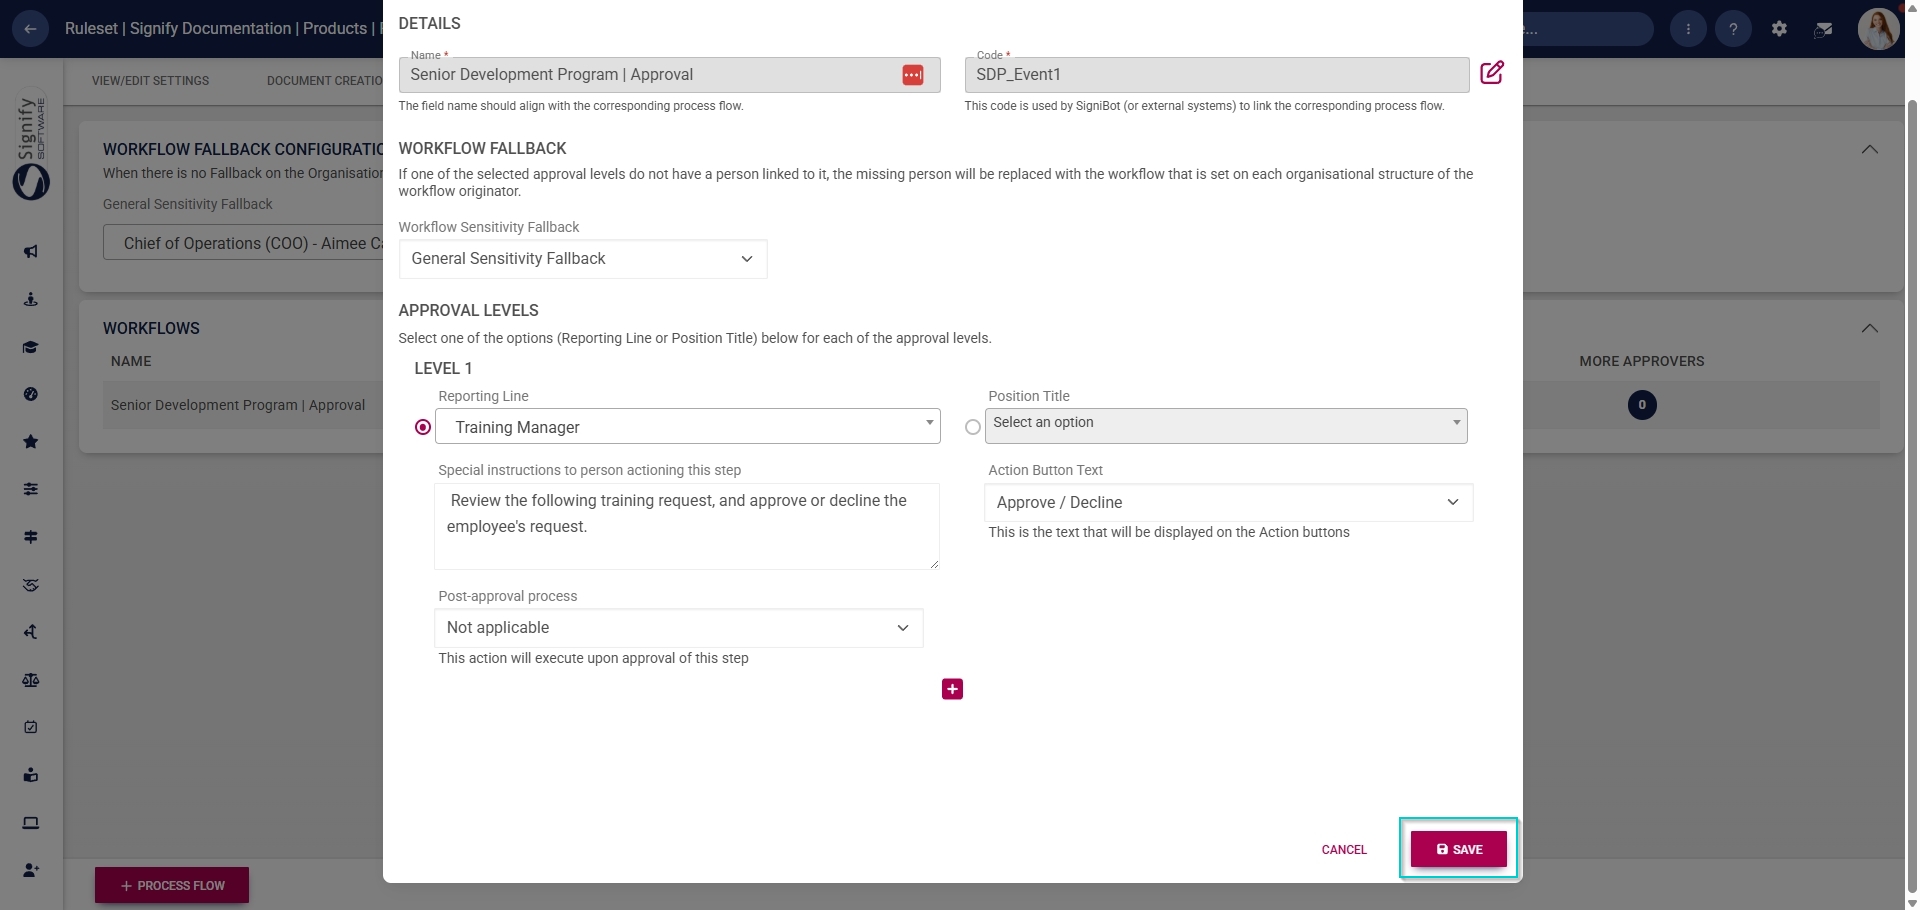
- The new workflow will be displayed in the Workflows table.
Create training interventions
If an event should be logged to the attendee’s training history, a training intervention should be linked to it. However, before creating the event, the training intervention needs to be added to the Training Intervention Library.
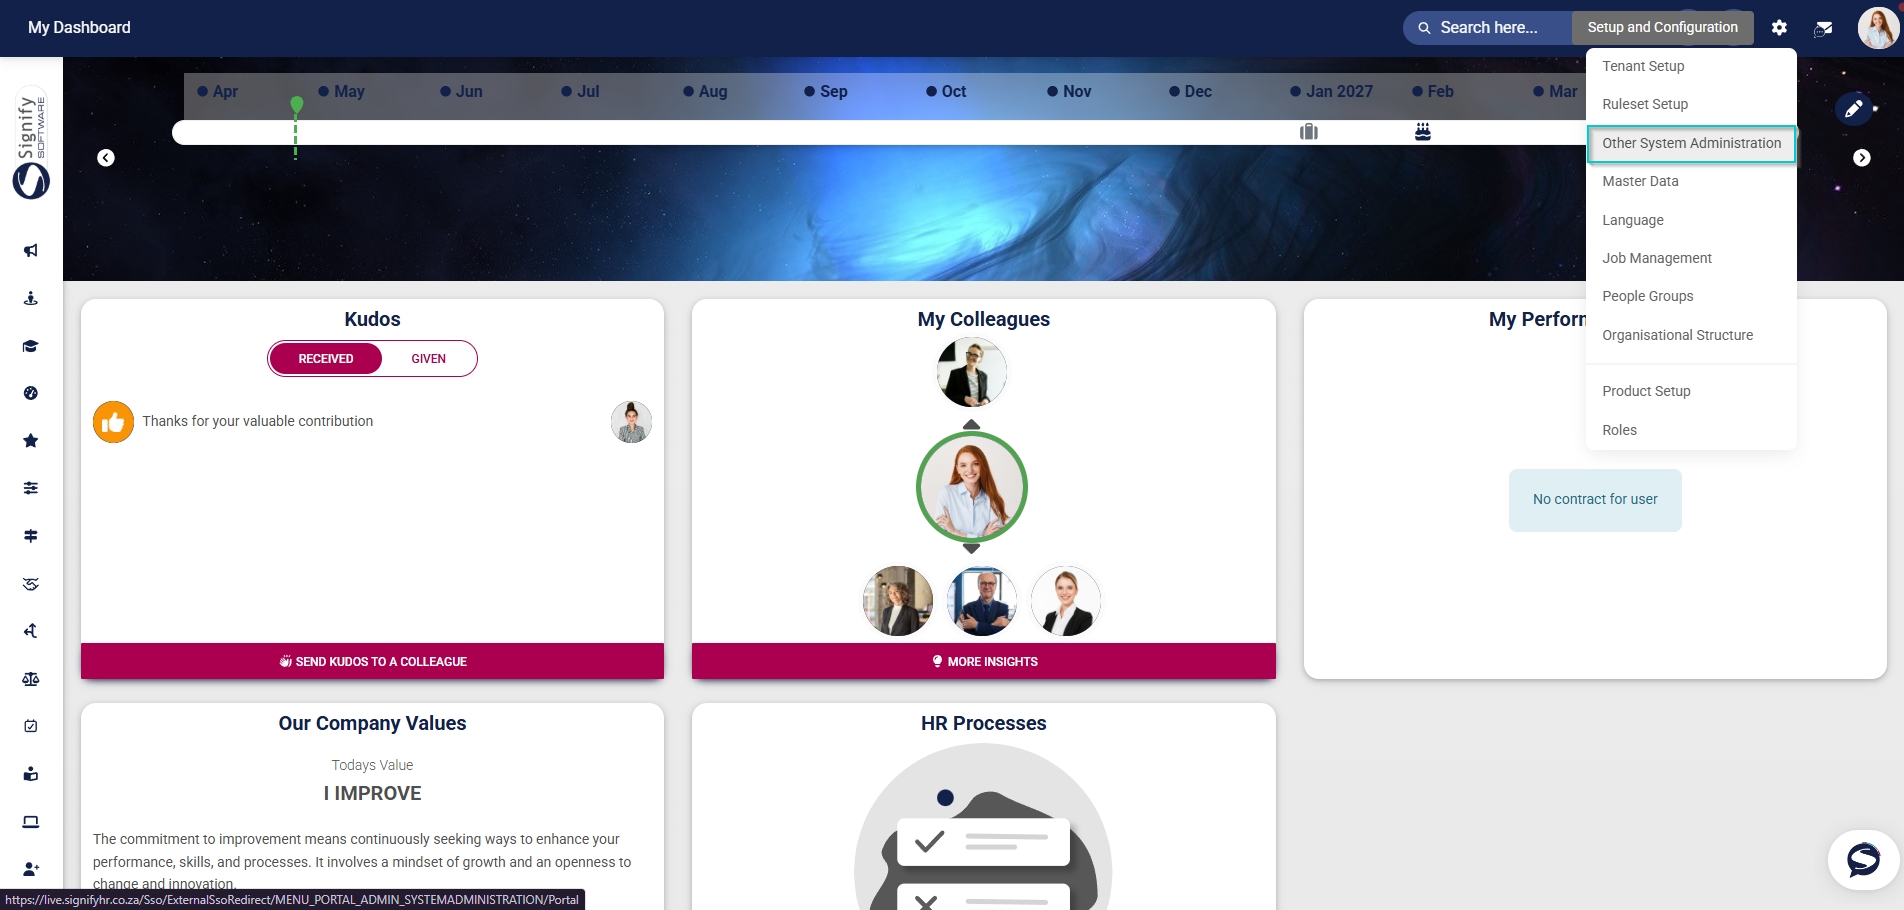
- Click the gear icon to access the Setup and Configuration menu.
- Click Other System Administration.
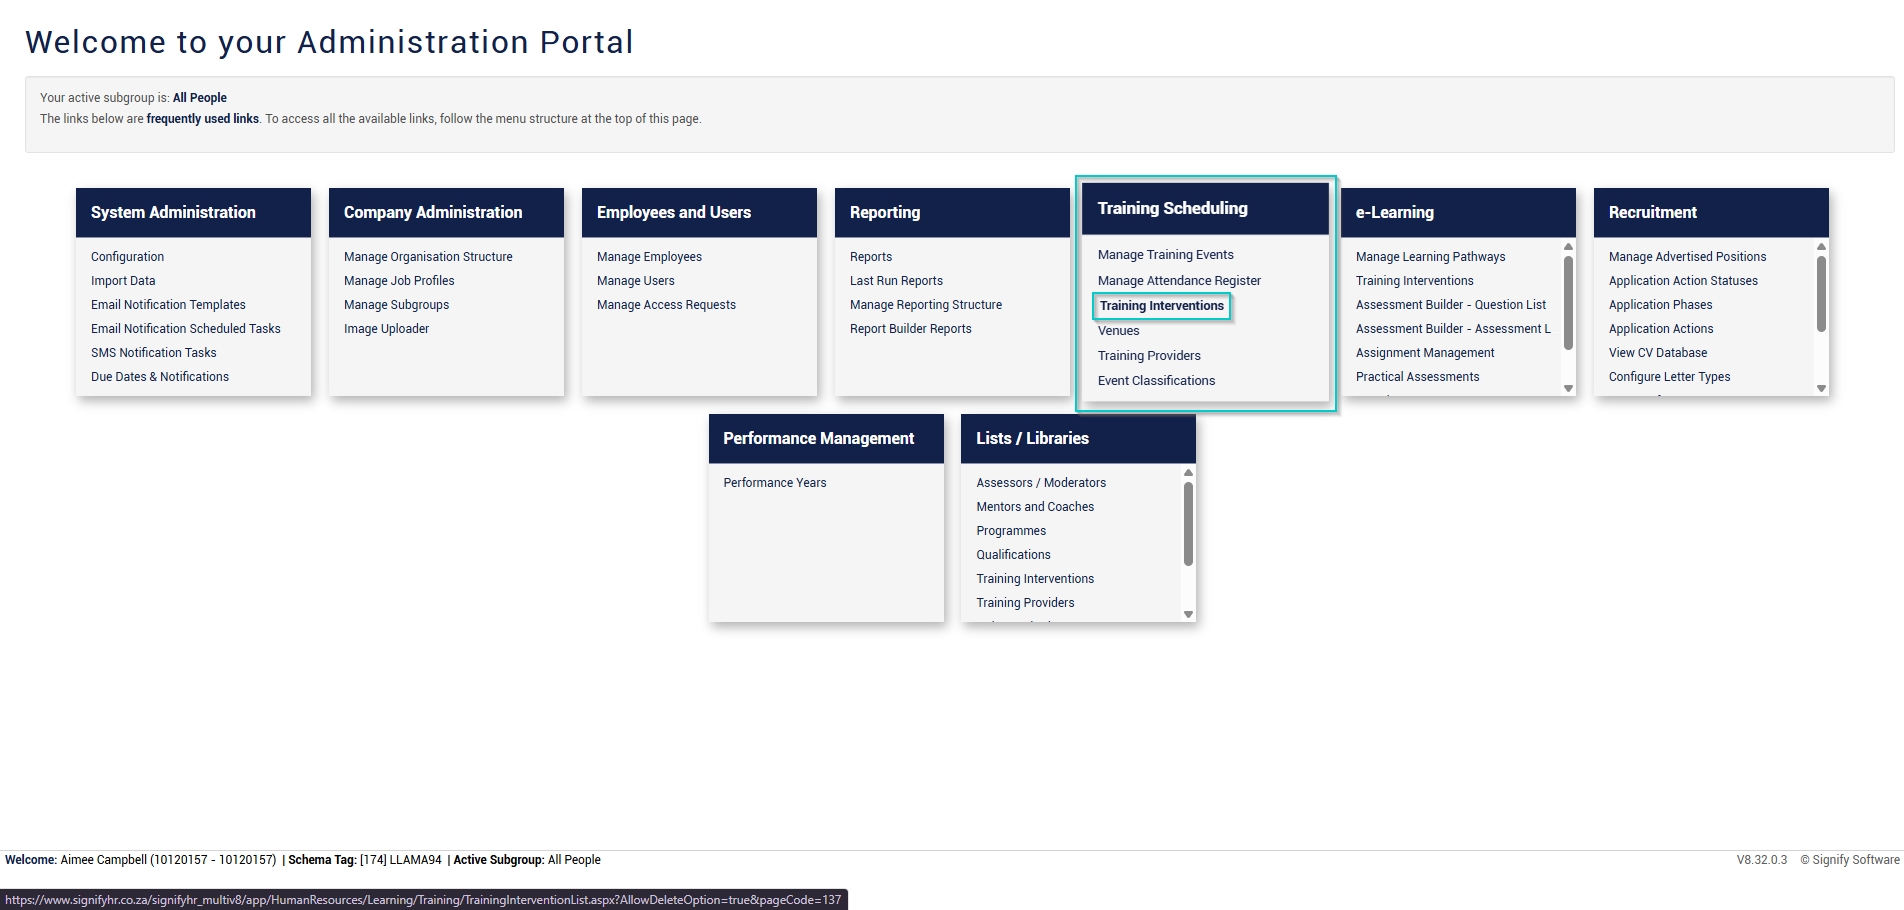
- In the new tab that opens, click Training Interventions in the Training Scheduling block.
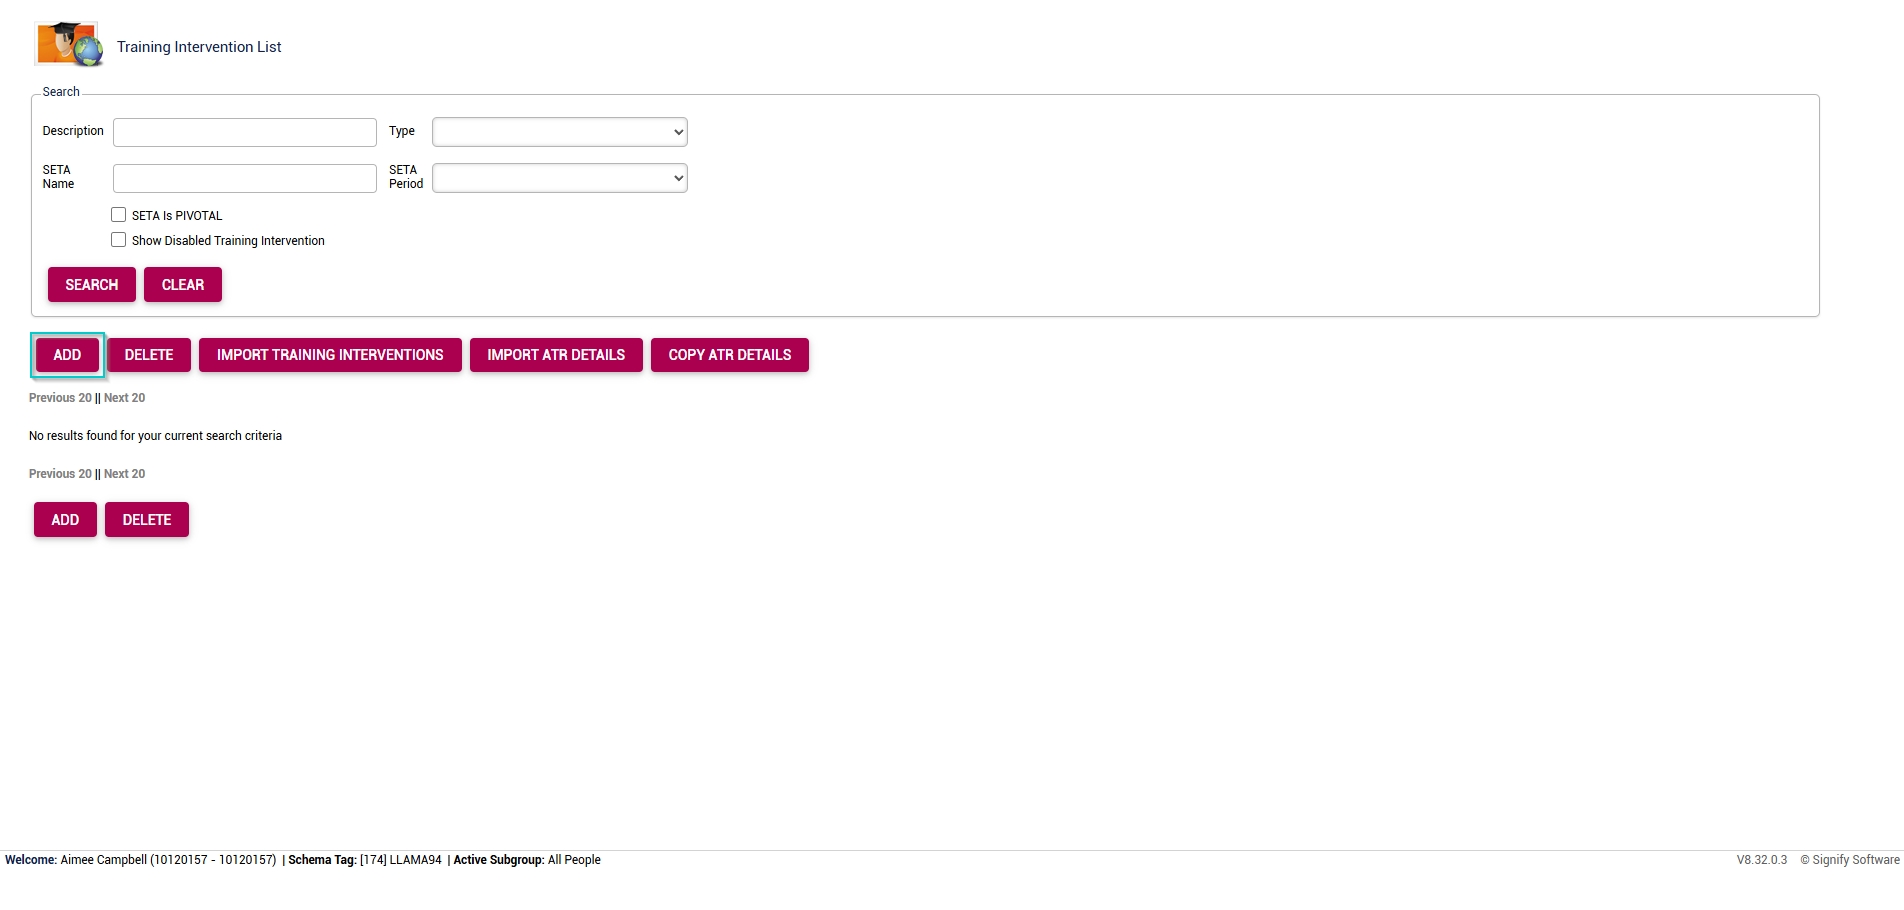
- The Training Intervention Library will open in a new tab. To add a new training intervention, click ADD.
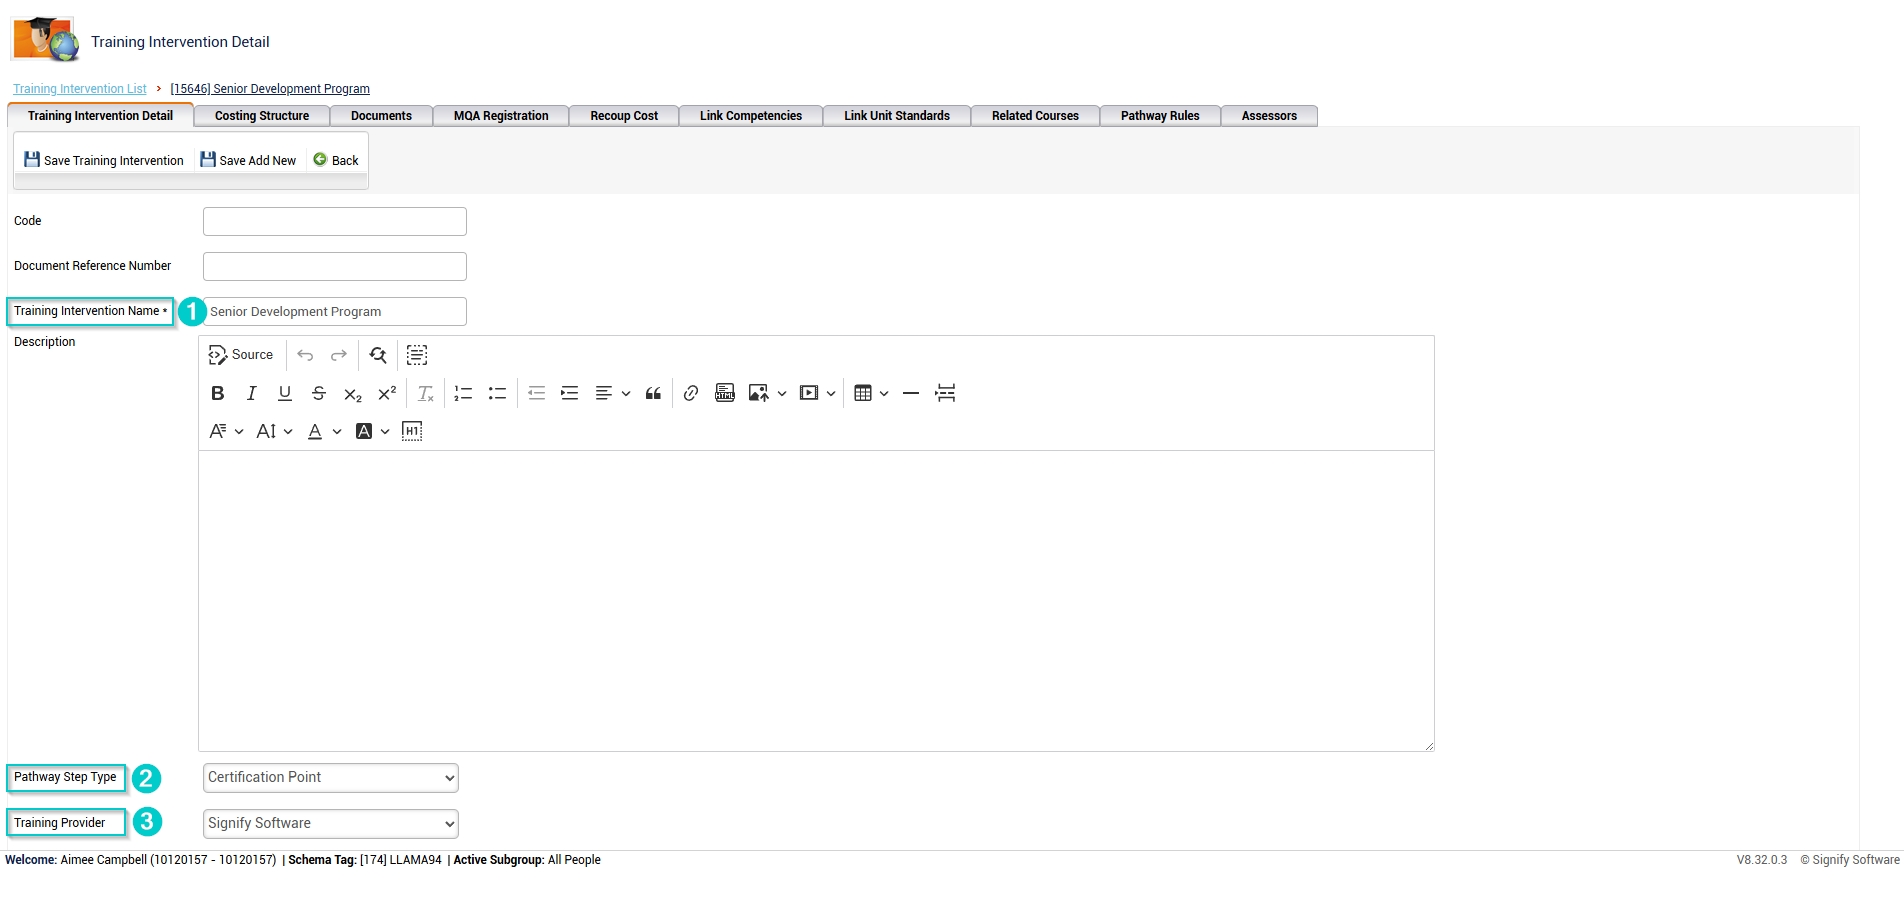
- Complete the details for the course’s training intervention. Please note that all the fields marked with an asterisk (*) are compulsory.
-
- Fill in the name, then select the pathway step type and training provider (if applicable) from the dropdown menus.
-
-
-
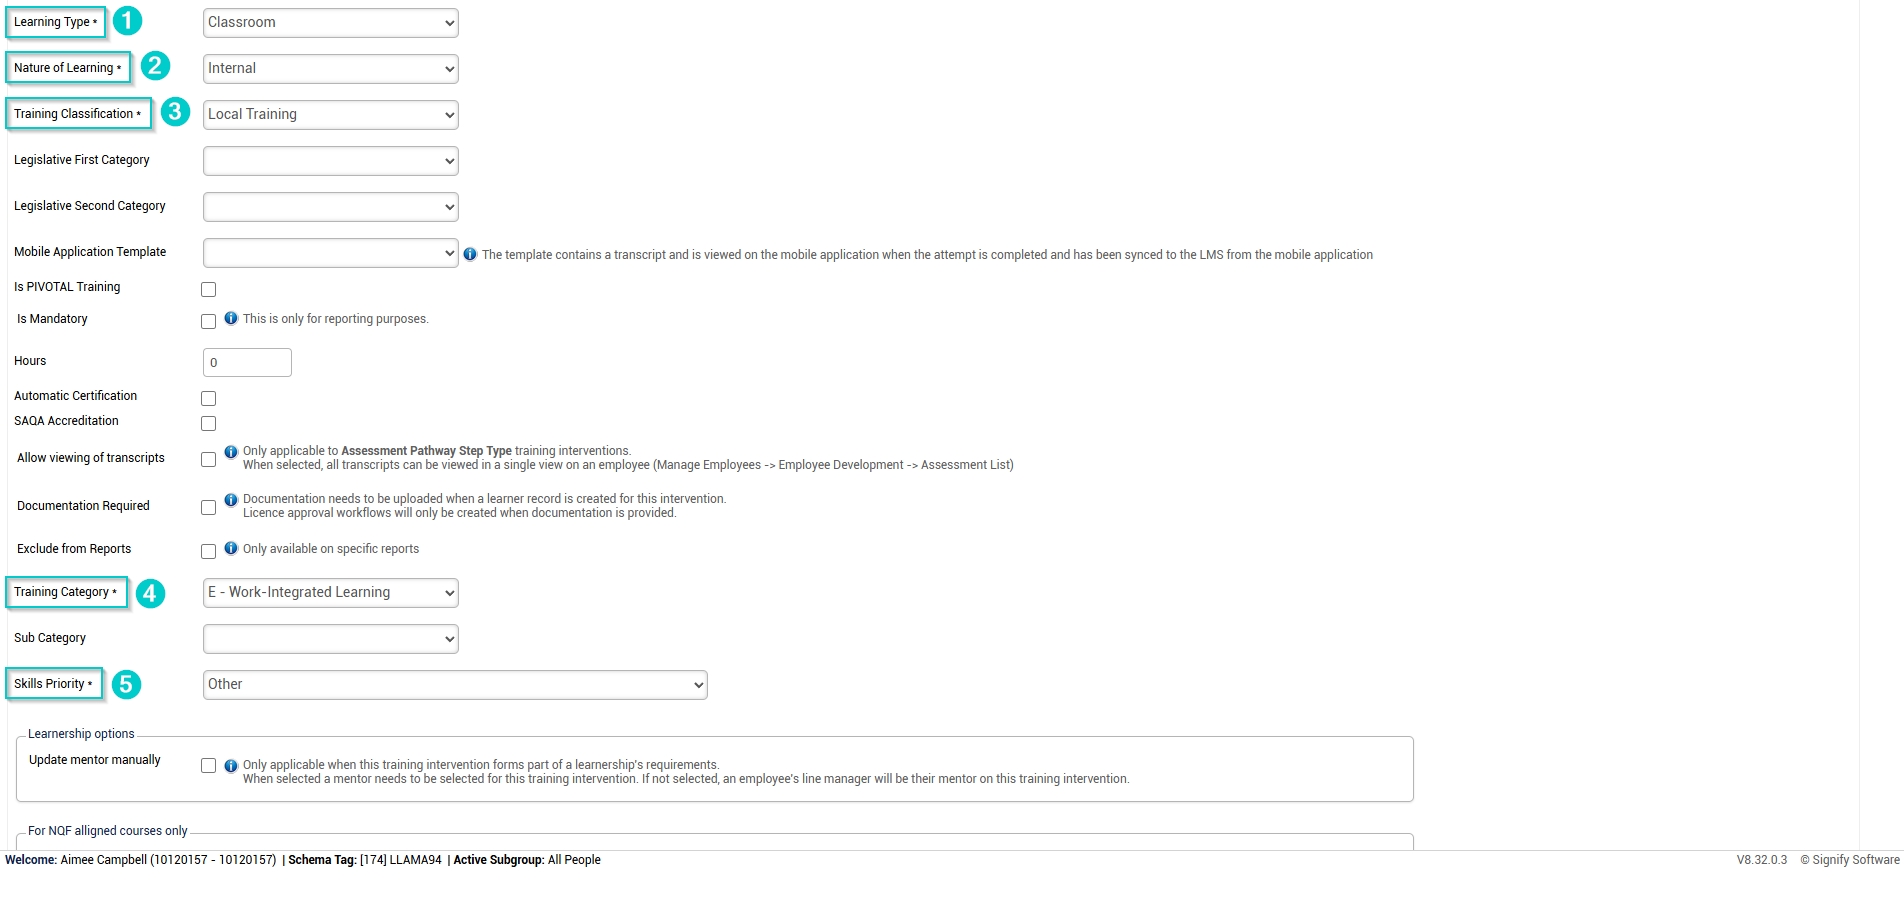
- Select the learning type, nature of learning, training classification, training category, and skills priority from the dropdown menus.
-
-
-
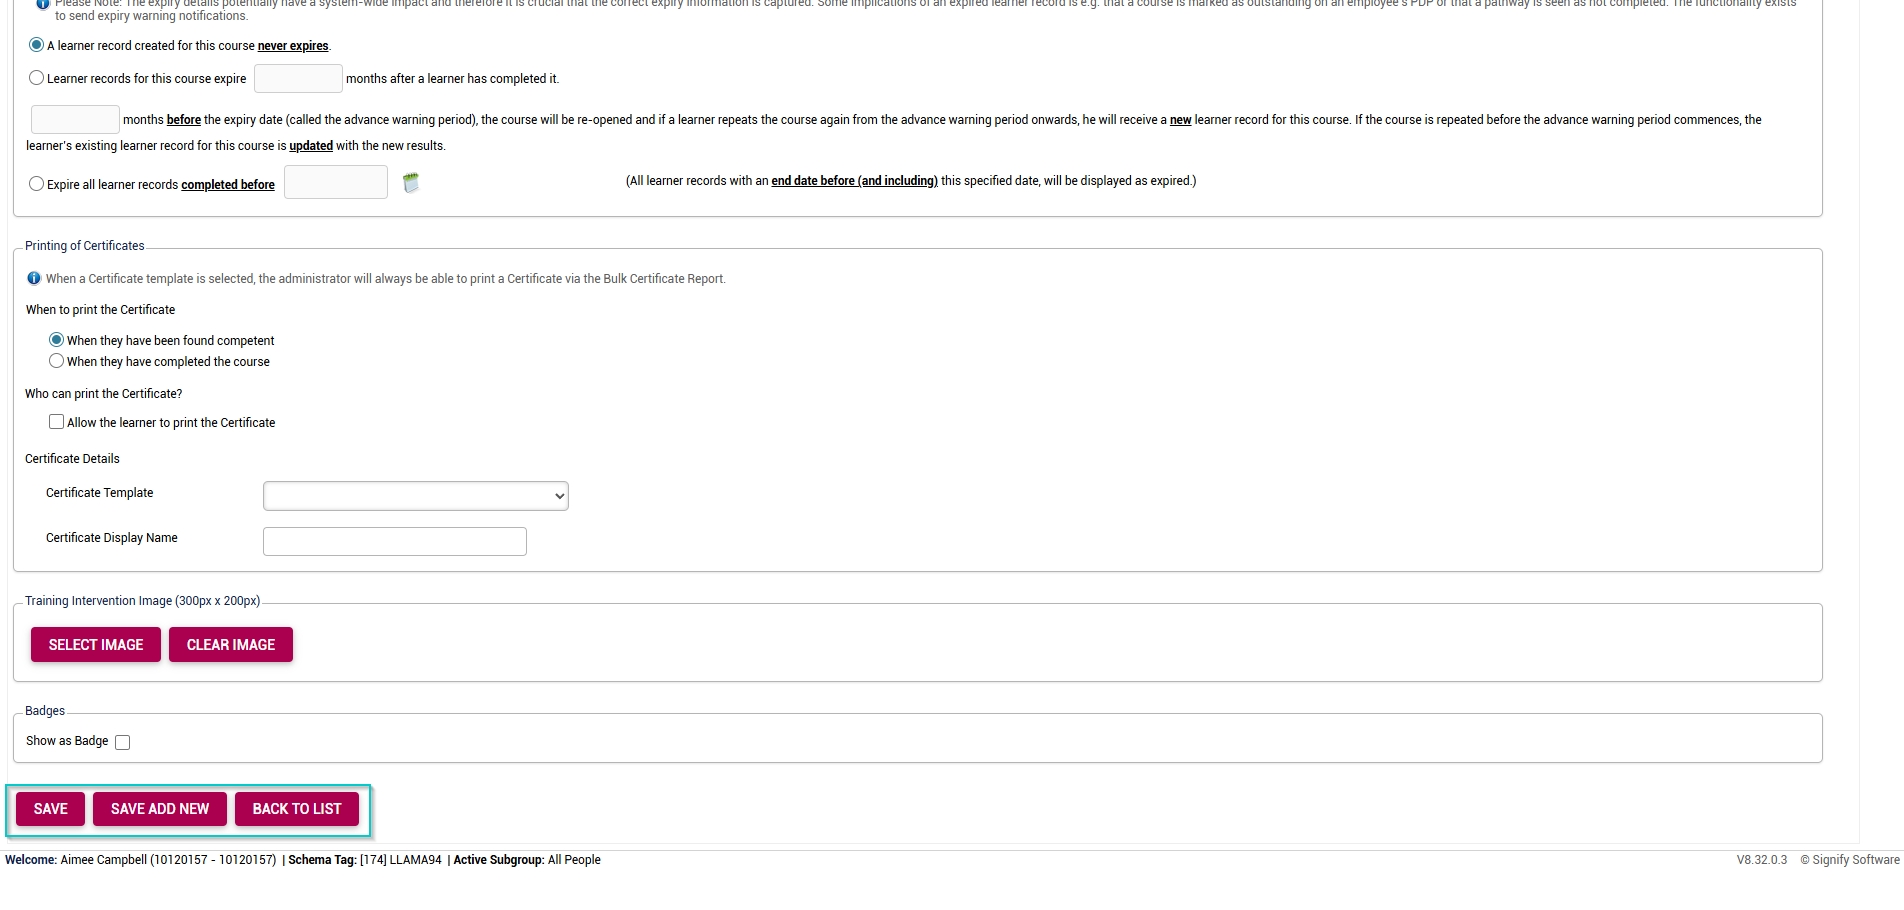
- If required for compliance purposes, select when the learner record will expire.
-
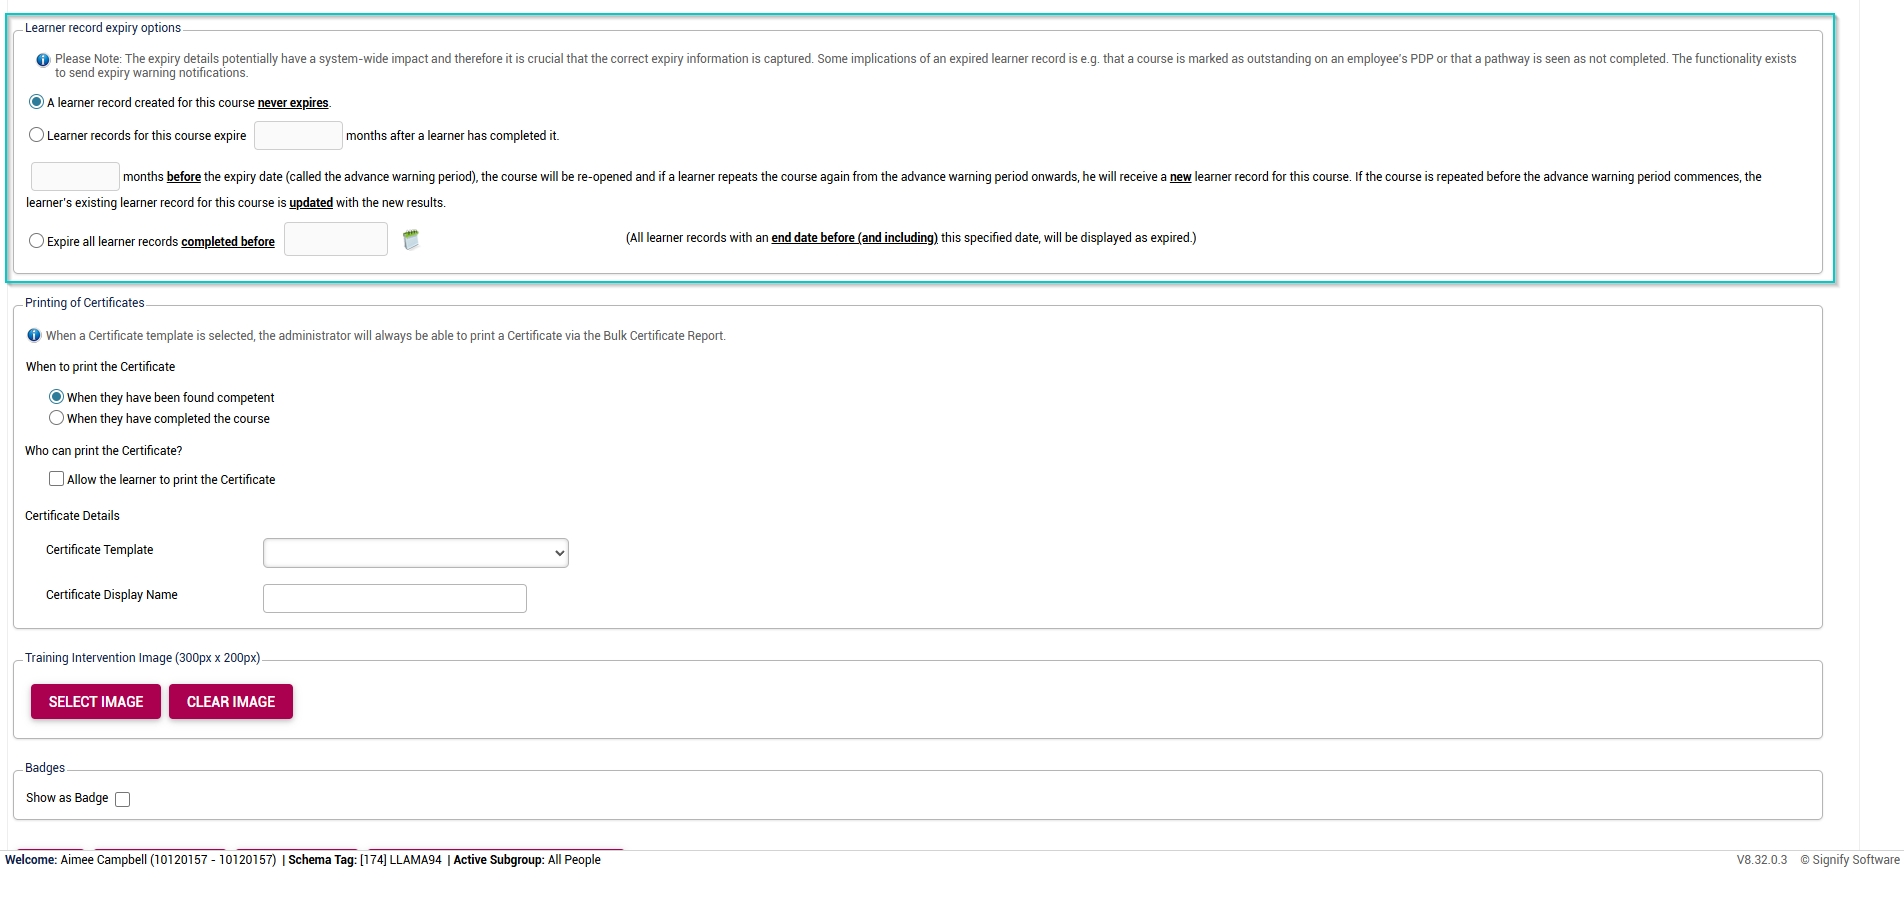
-
-
- Configure certificate printing for the course (if required).
-
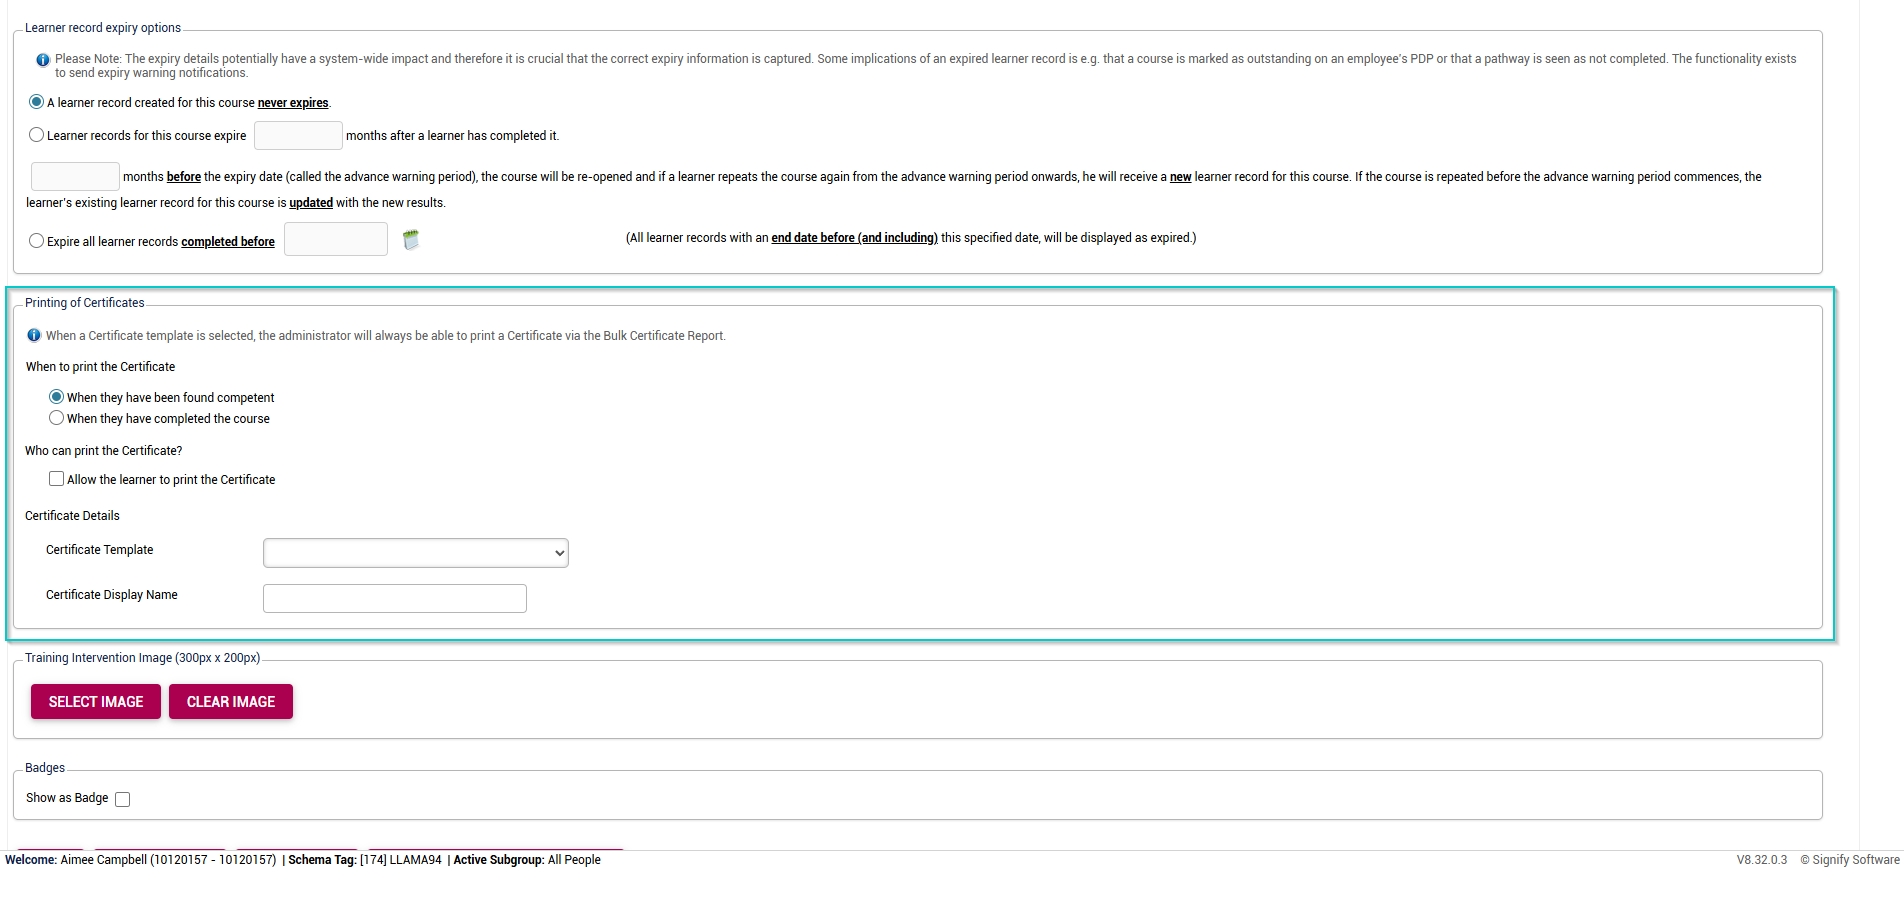
-
-
- At the bottom of the screen, click SAVE when you are finished, SAVE ADD NEW to add another training intervention, or BACK TO LIST to return to the Training Intervention Library.
-
Success!
Congratulations! You have successfully implemented the Event Scheduling module. For more details on how to use the module, view the next chapter: Chapter 4: Using the Event Scheduling module.
