Learning Management: eLearning Implementation Guide

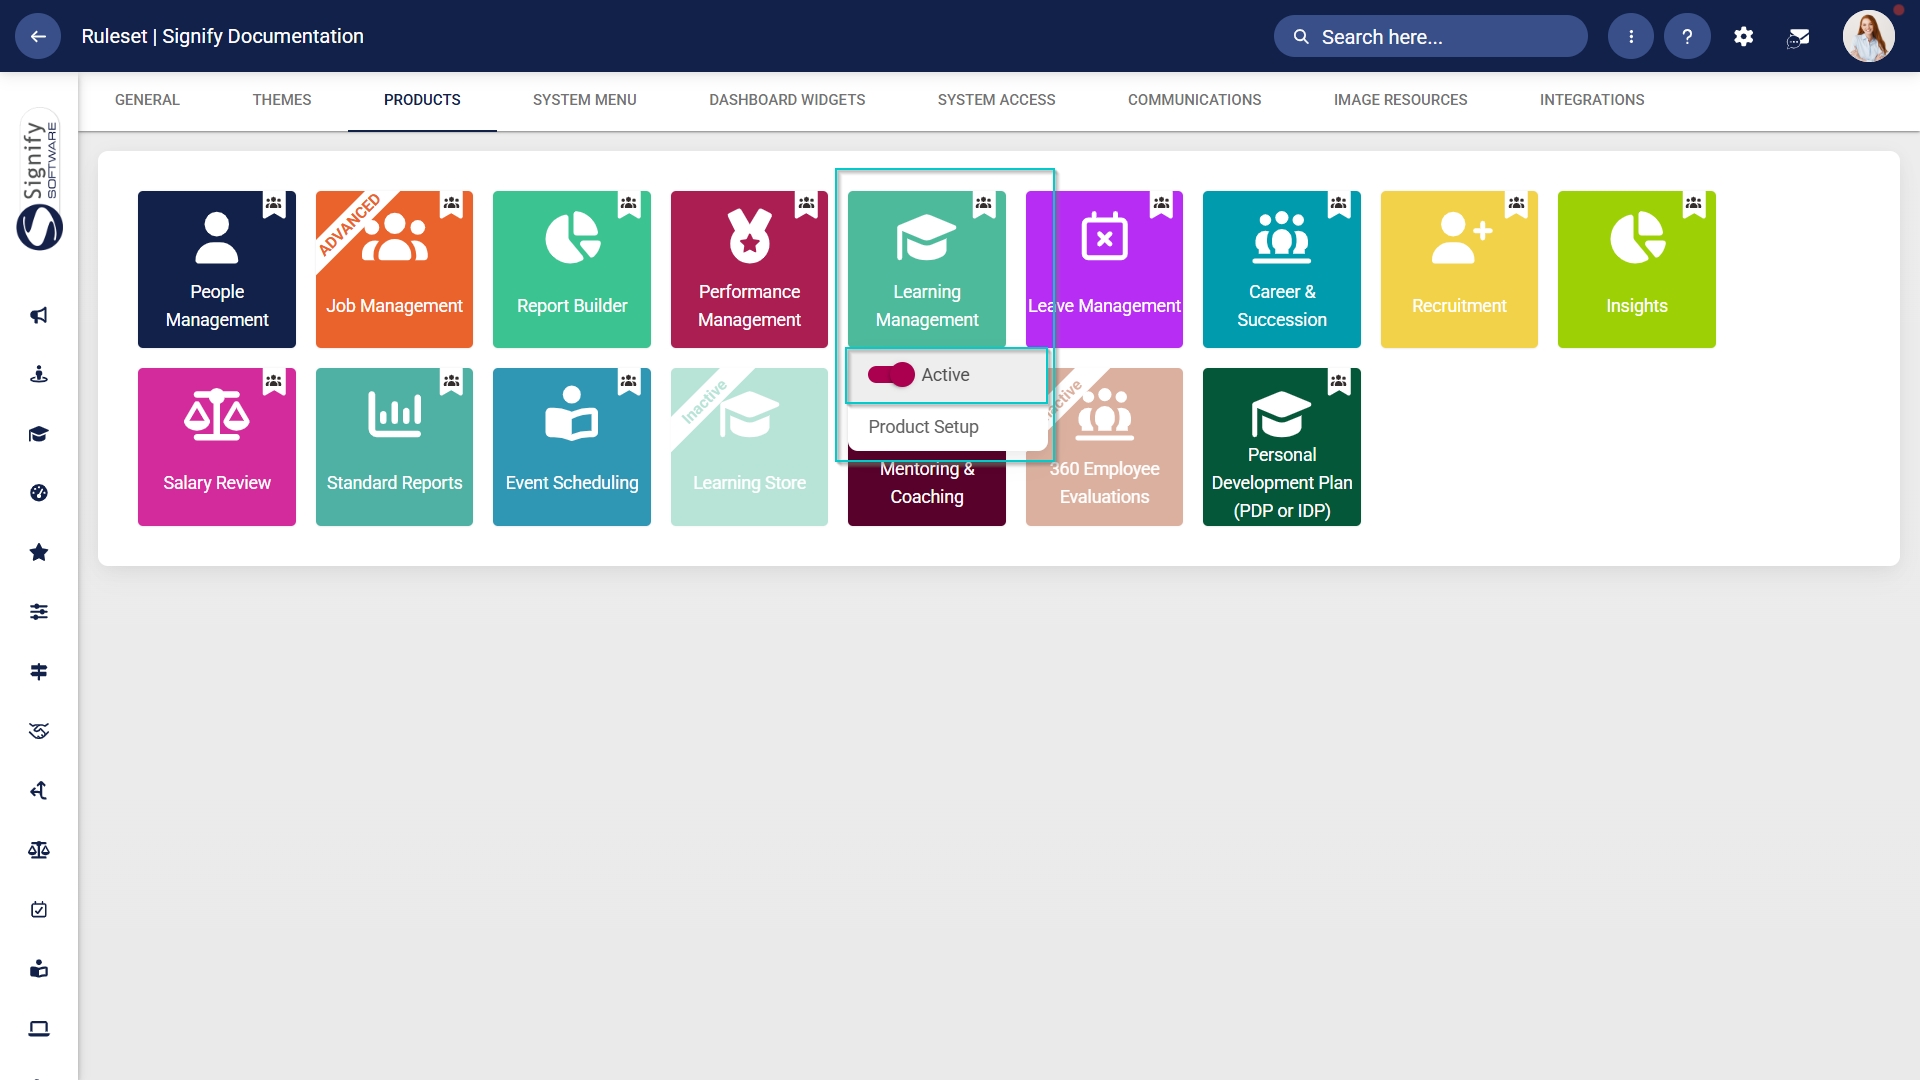
Activate the Learning Management module
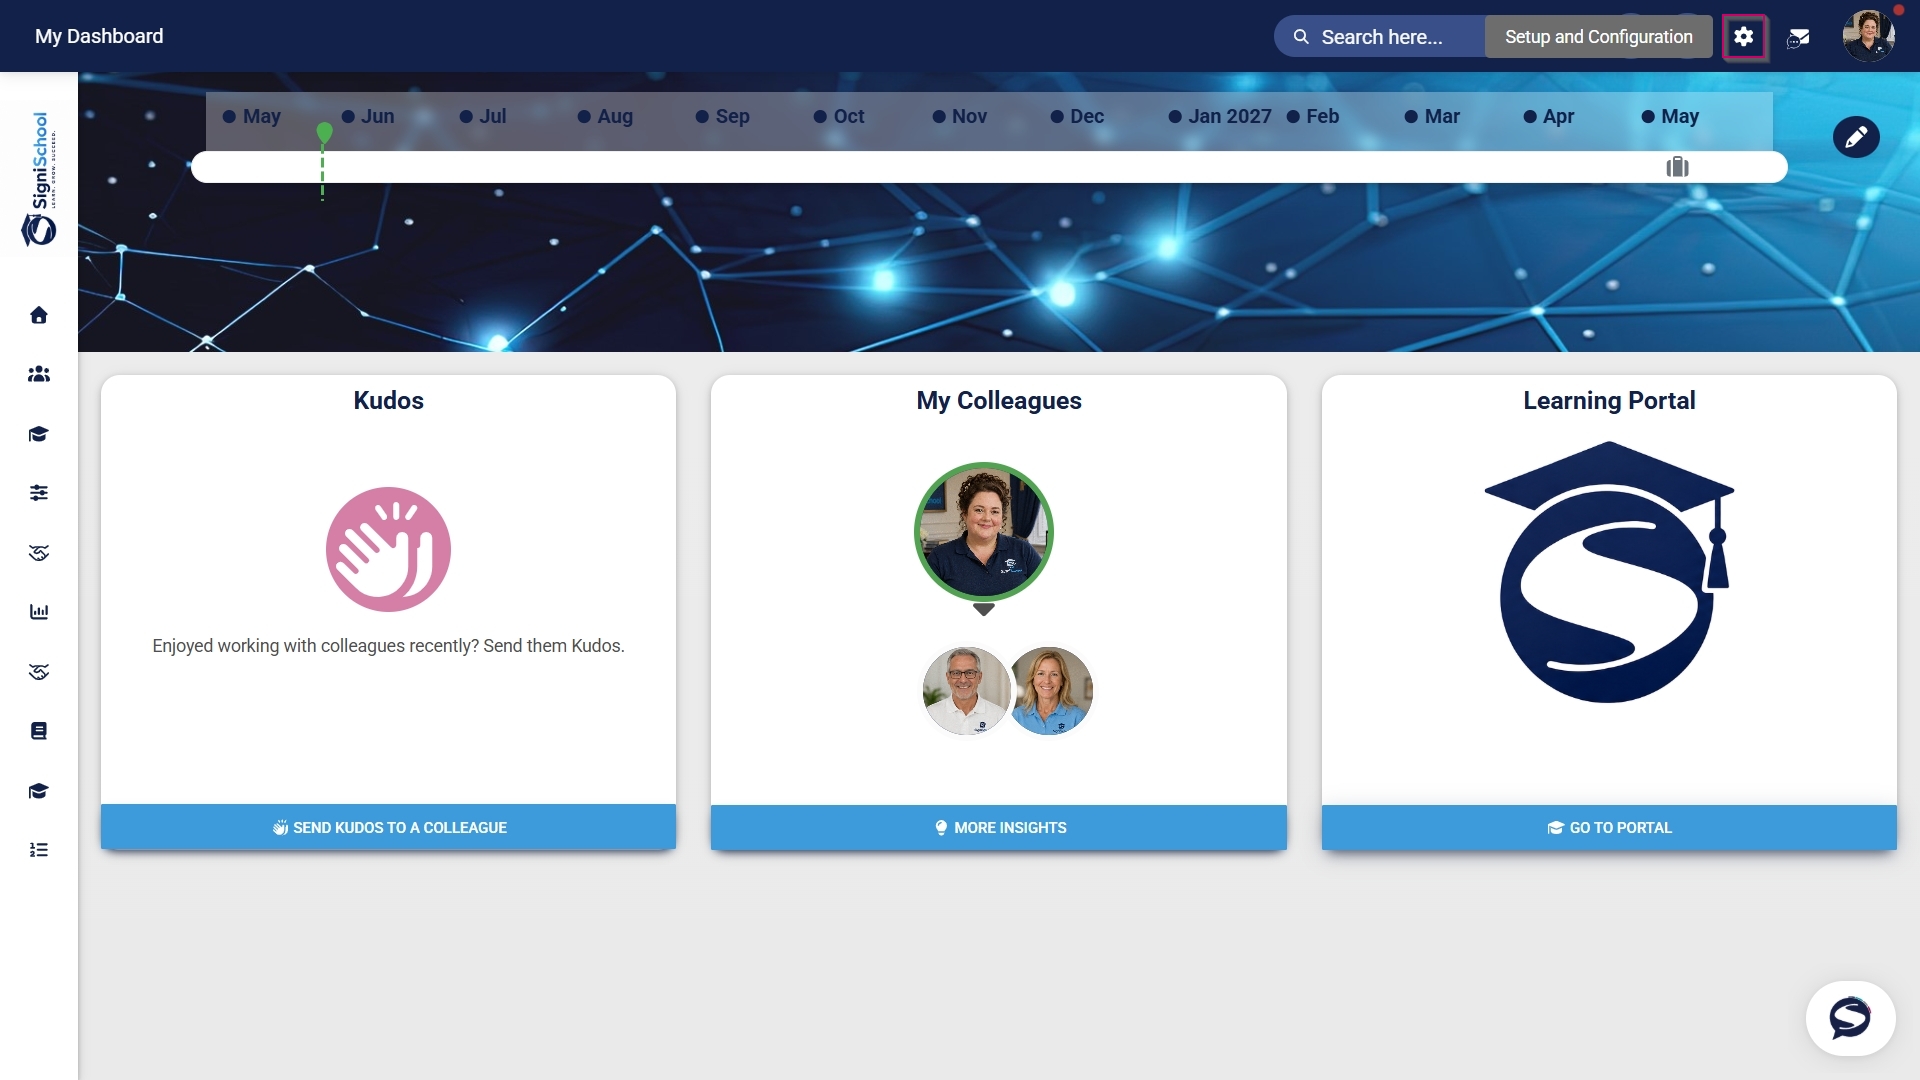
- Click the gear icon to access the Setup and Configuration menu.
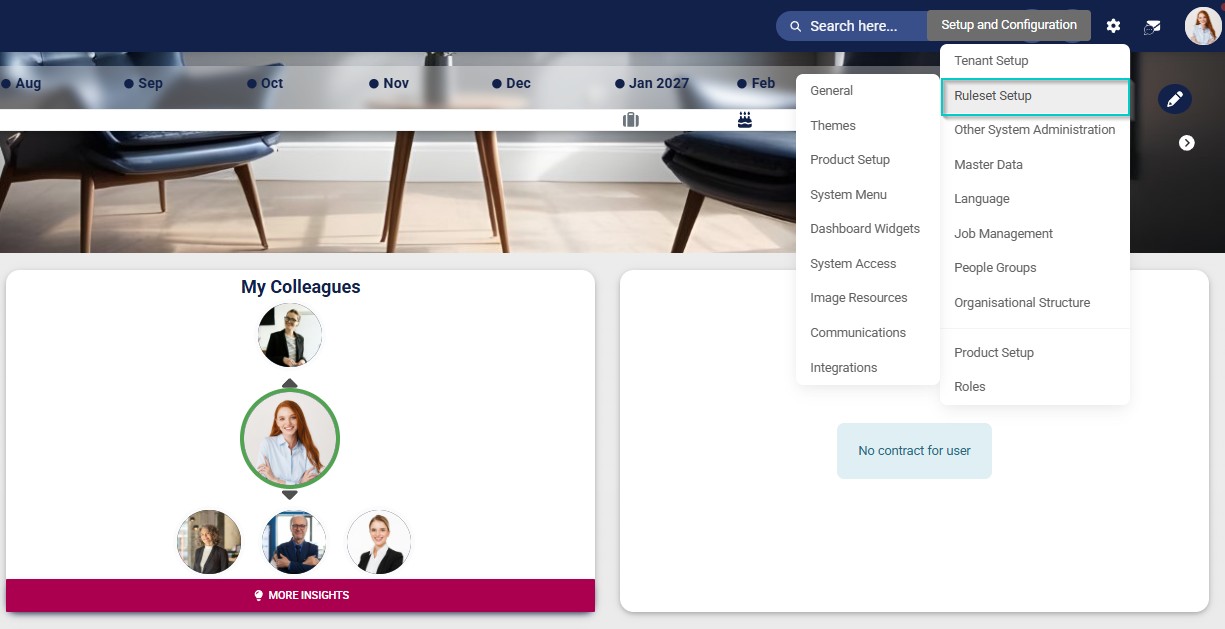
- Click Ruleset Setup.
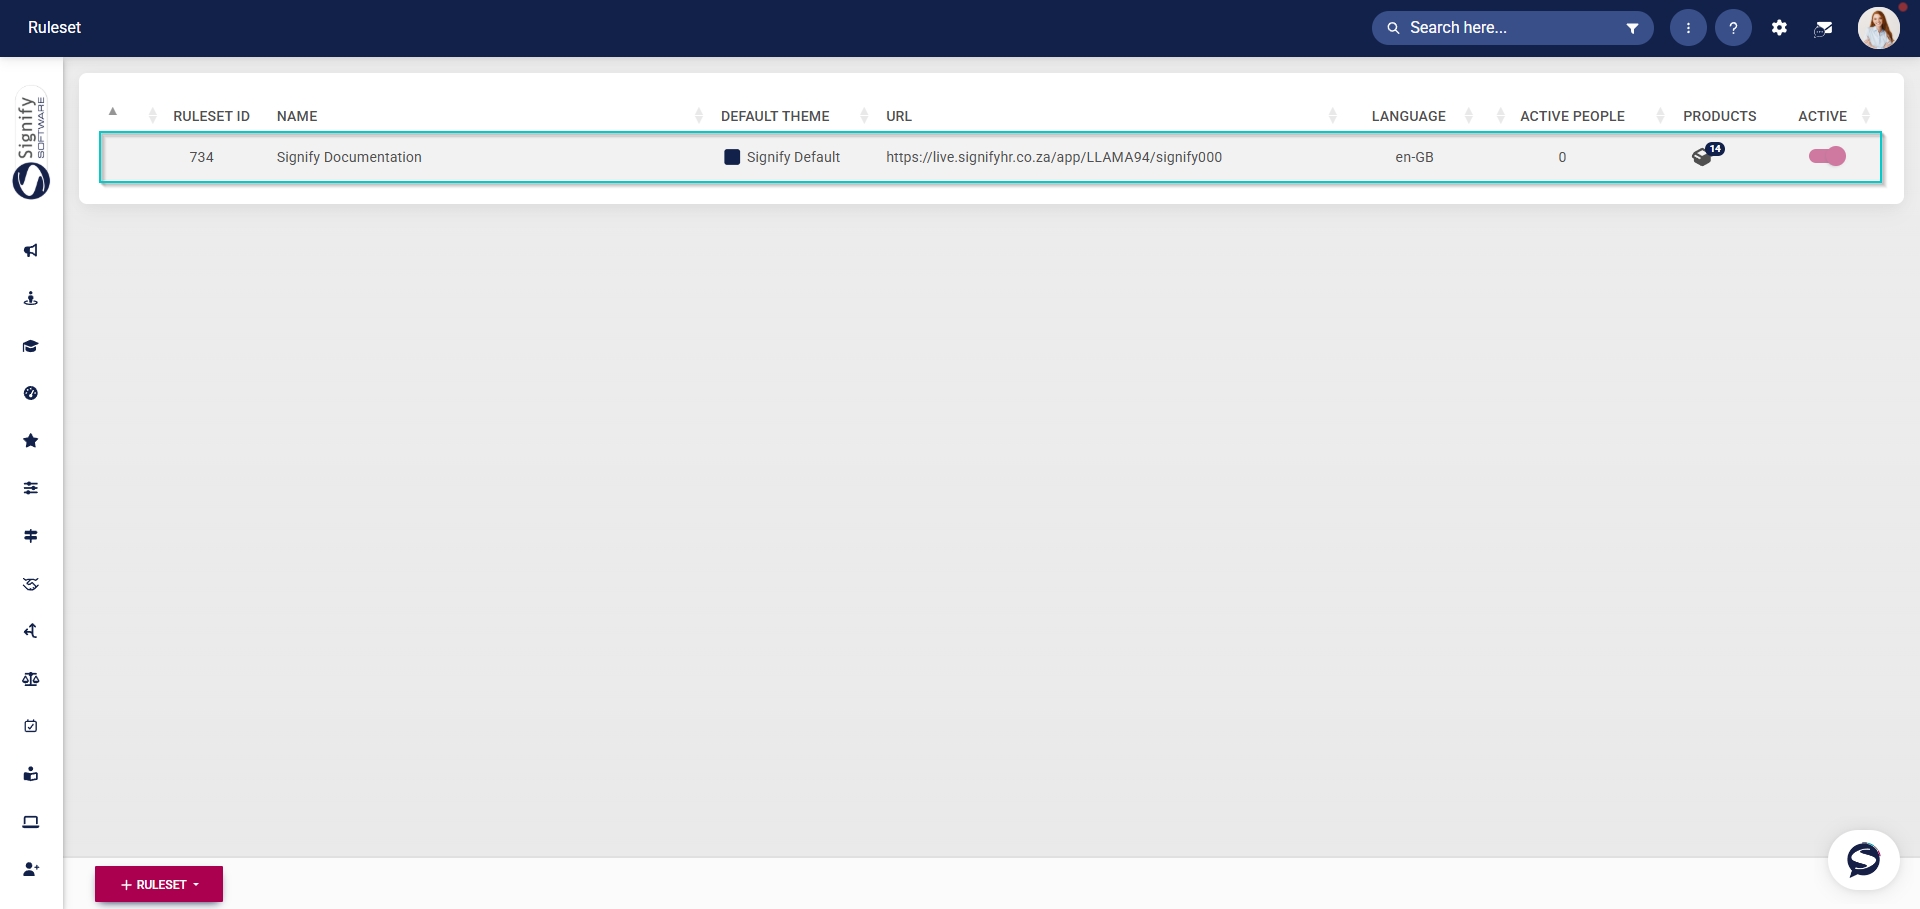
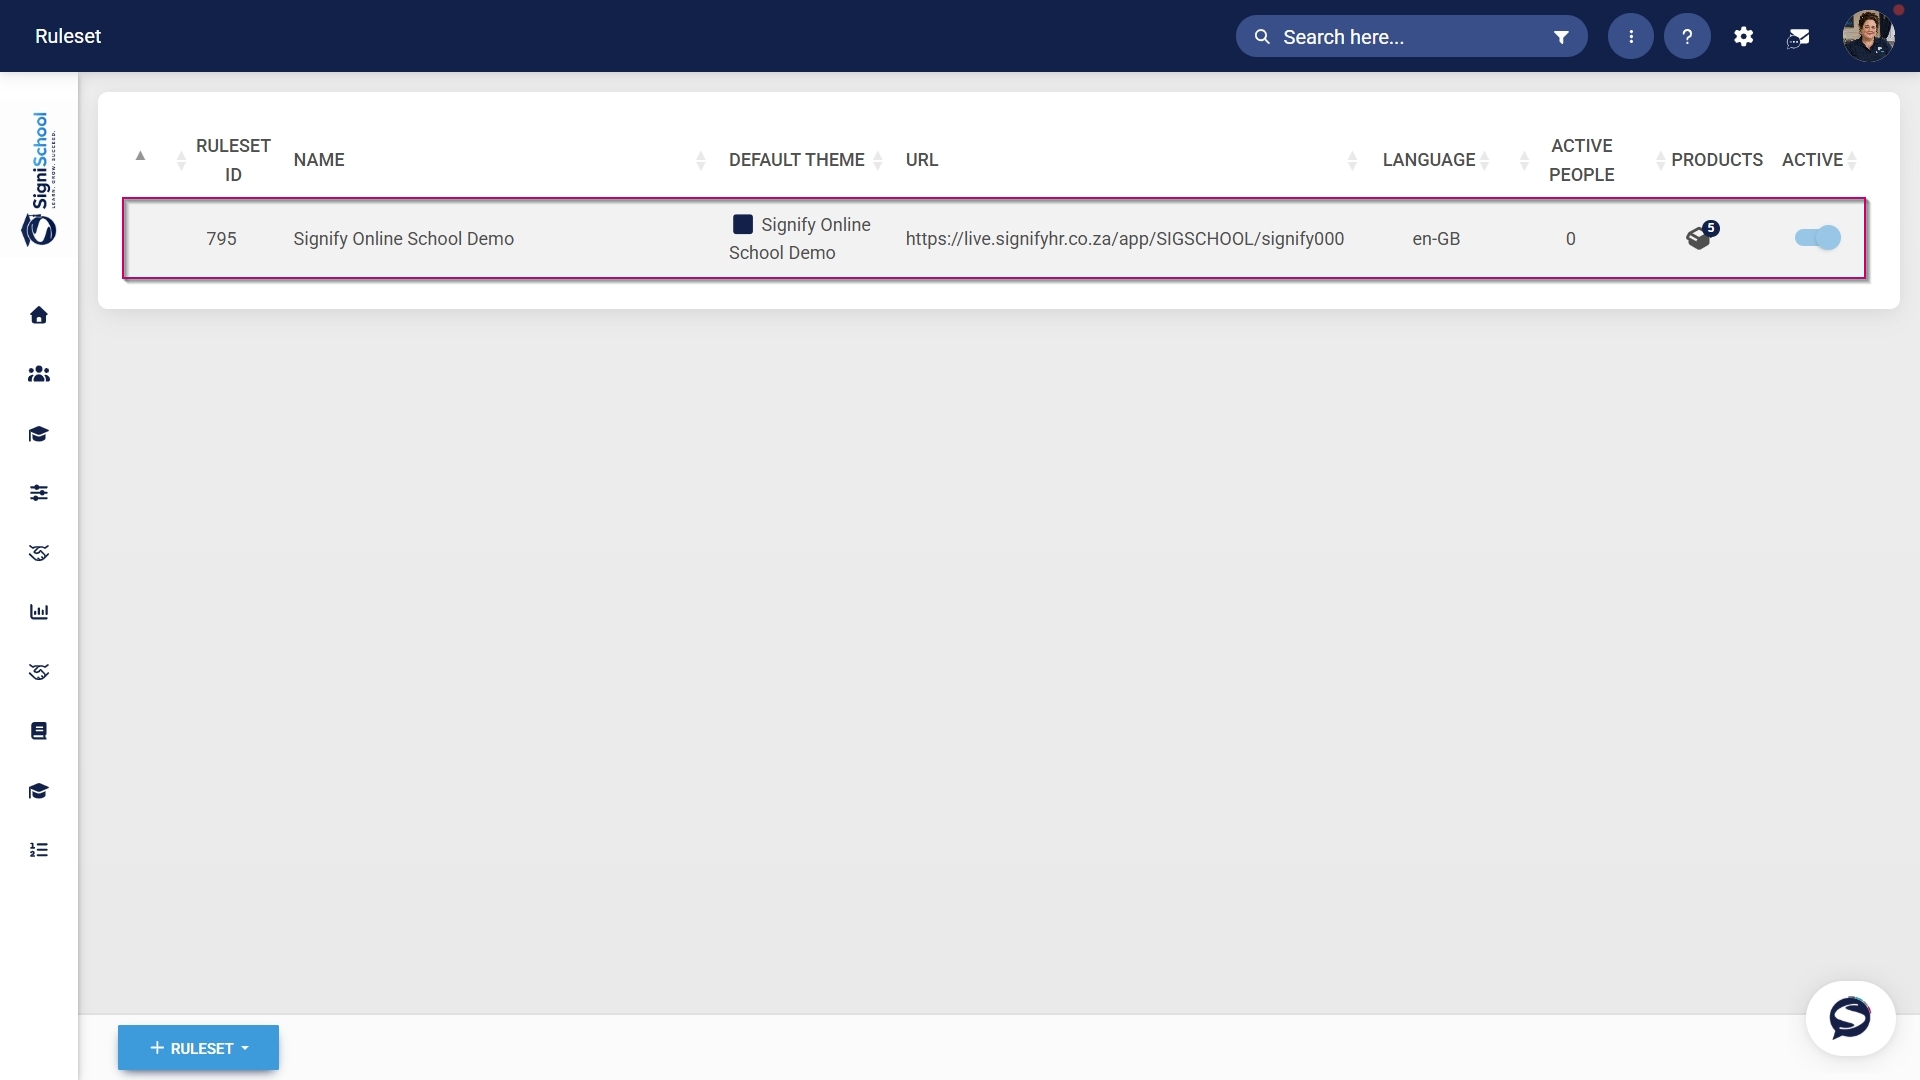
- Select the ruleset you would like to update.
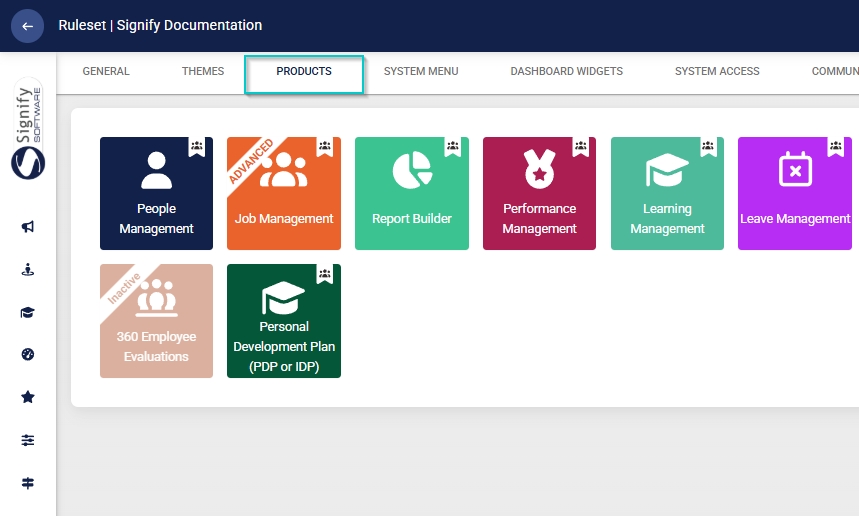
- Click on the Learning Management product card, then click the toggle button to set the product’s status to Active.
Add Learning Management to the system menu
- Click the gear icon to access the Setup and Configuration menu.
- Click Ruleset Setup.
- Select the ruleset you would like to update.
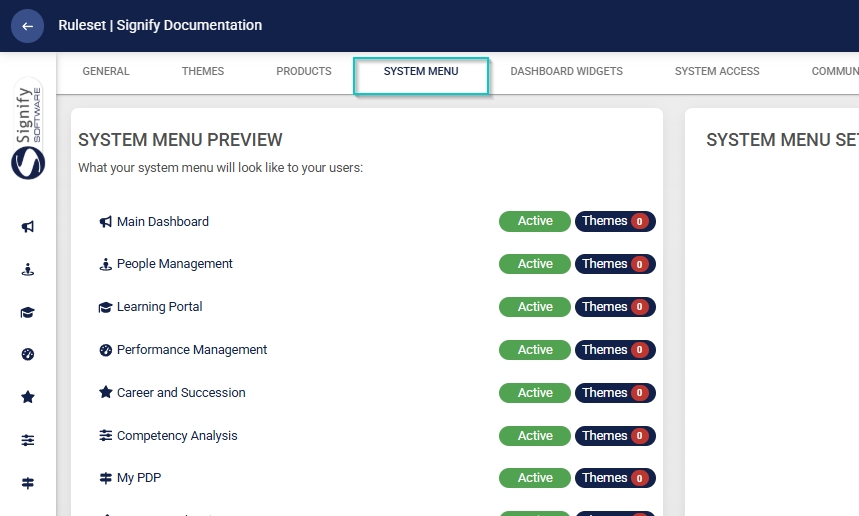
- Click the Learning Portal menu item in the system menu preview.
- Click the toggle button to set the system menu item’s status to Active.

- You can select an icon for the Learning Management module by clicking CHANGE ICON.
![]()
- Click SAVE to continue or CANCEL to discard your changes.

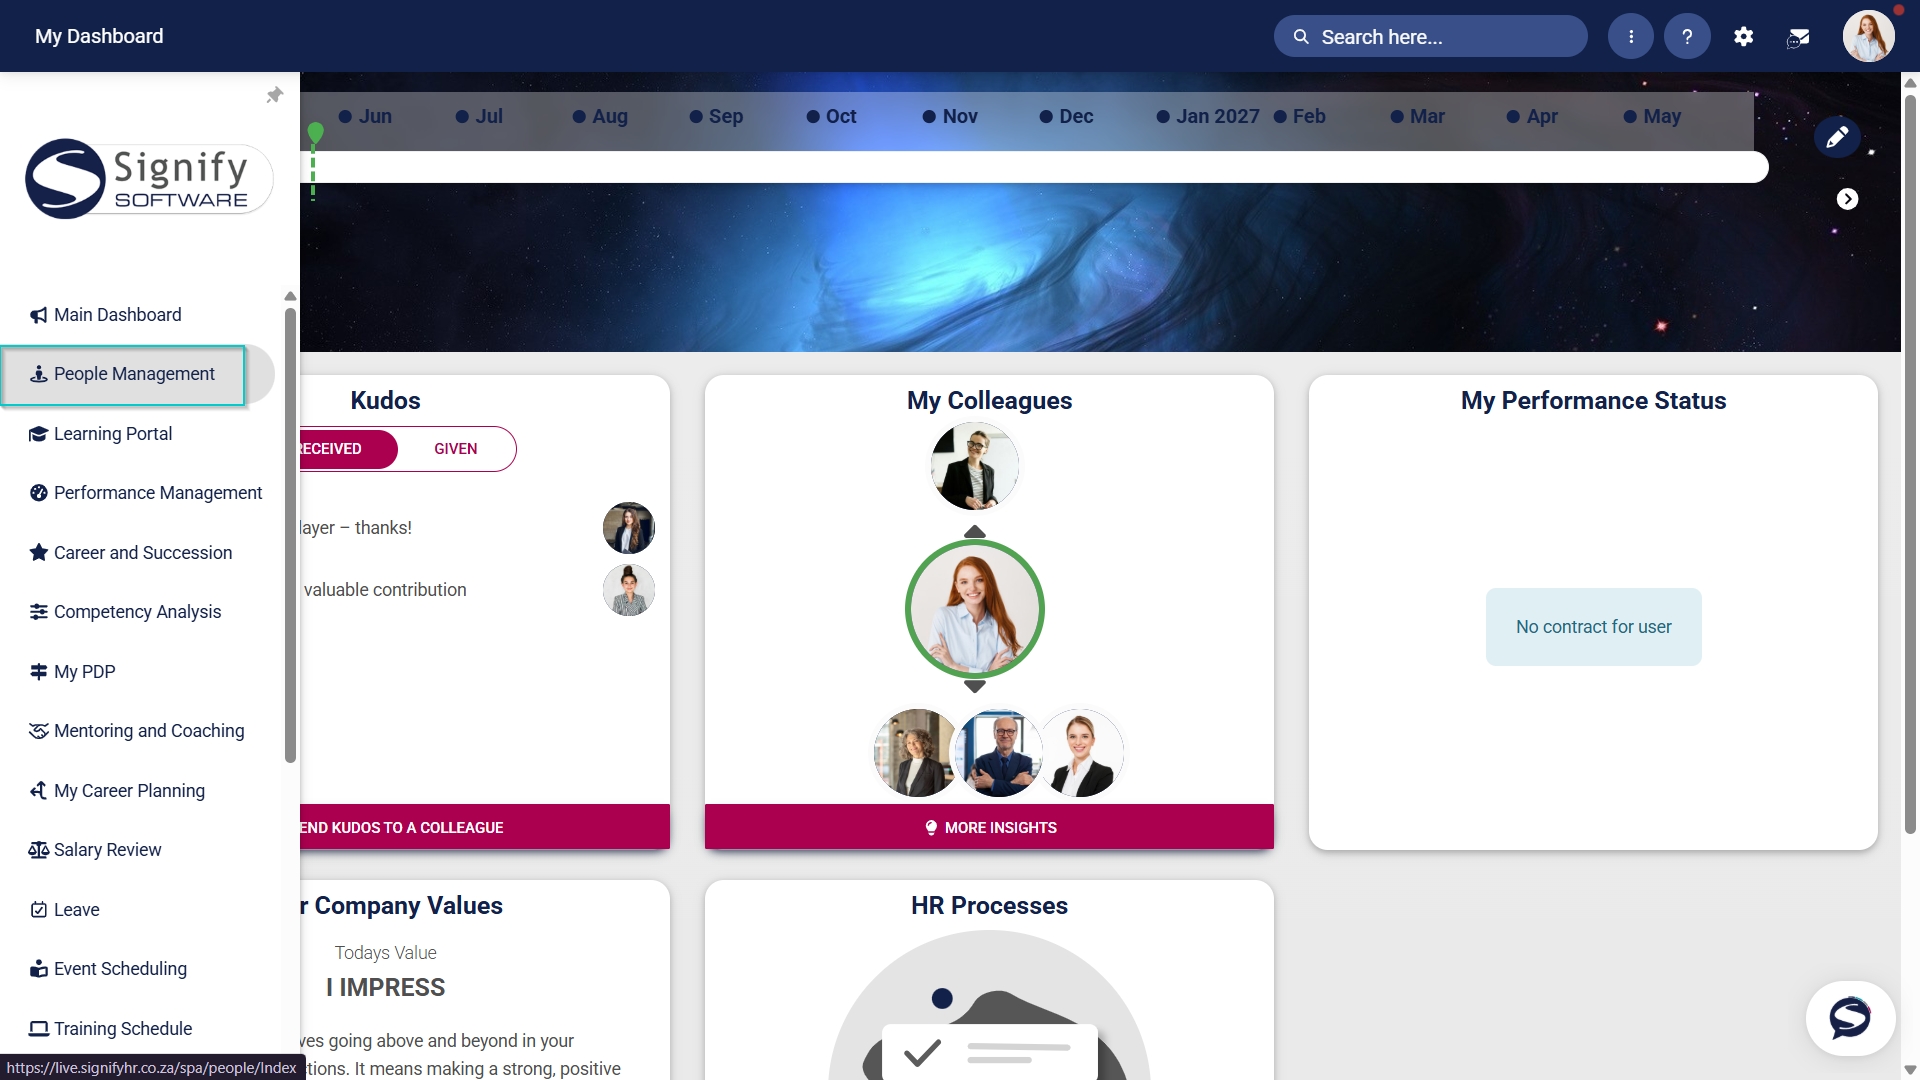
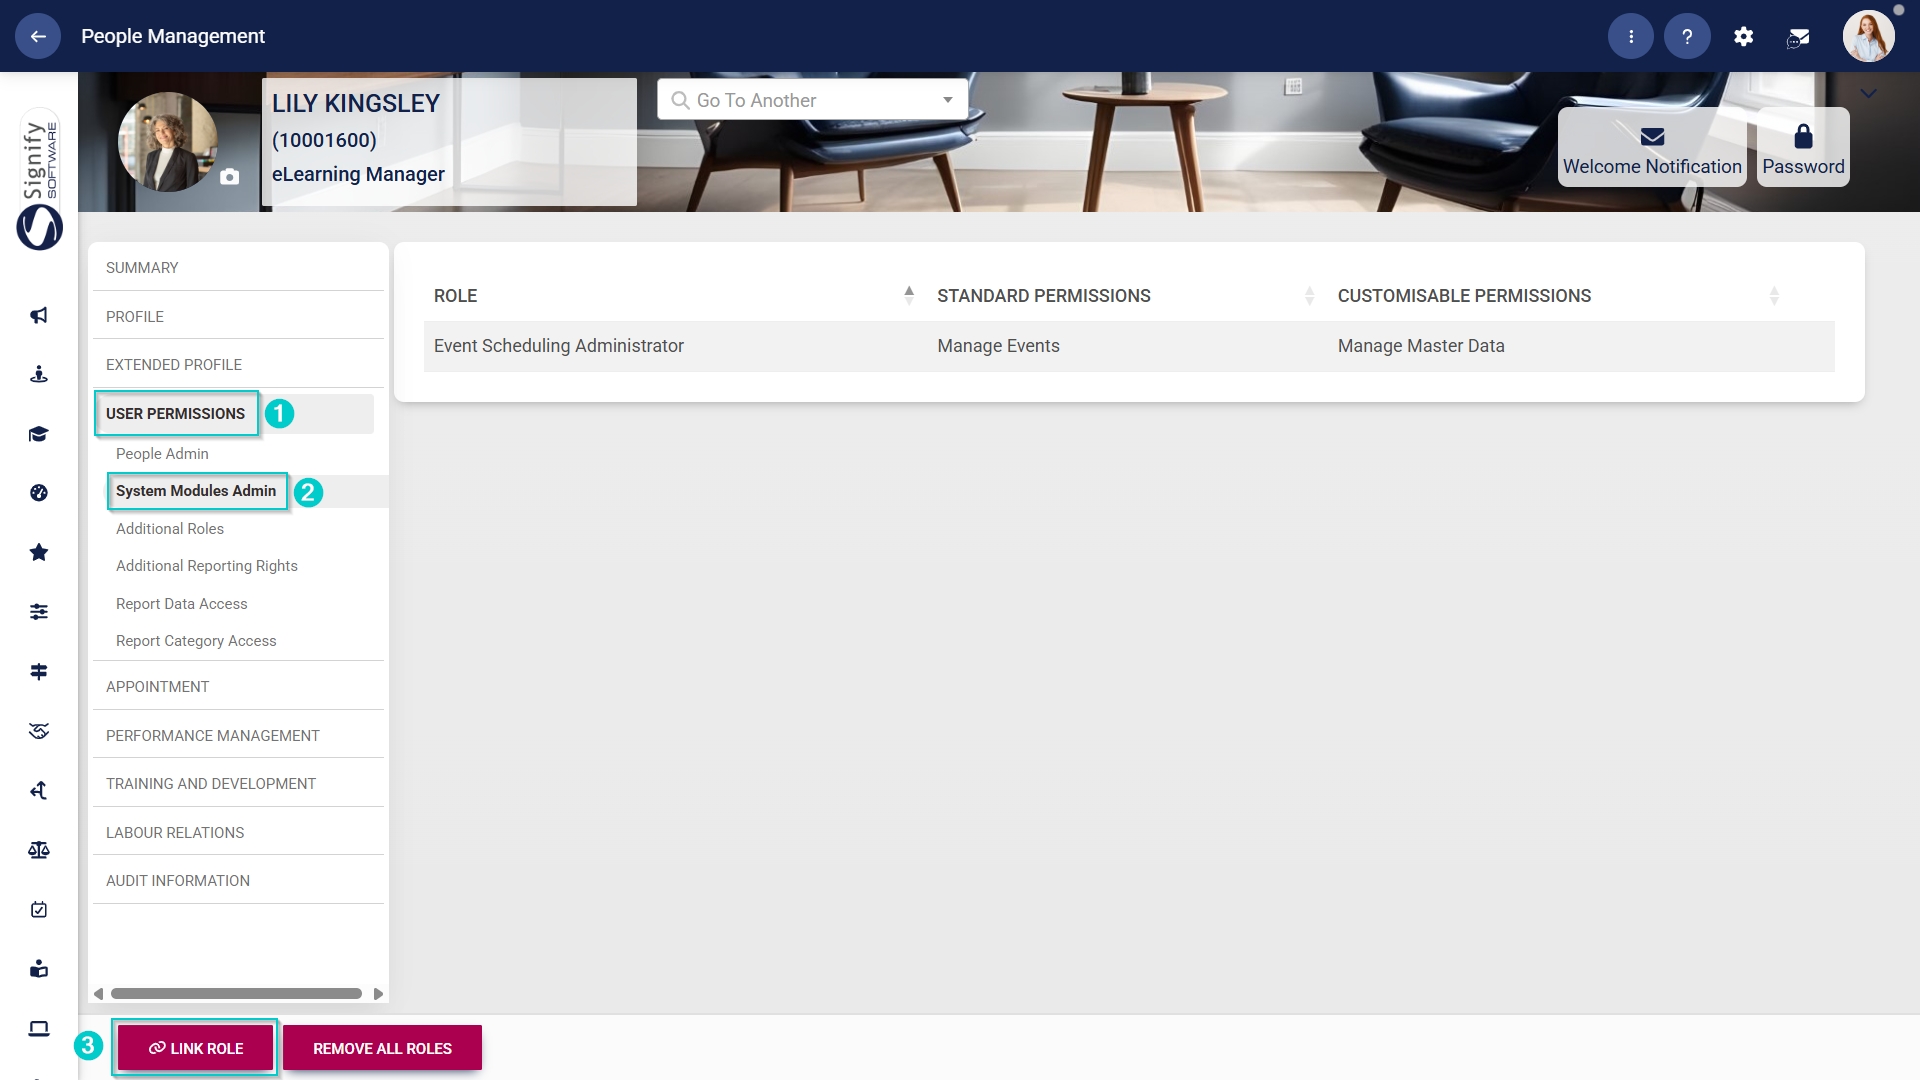
Assign the Learning Management administrator permission
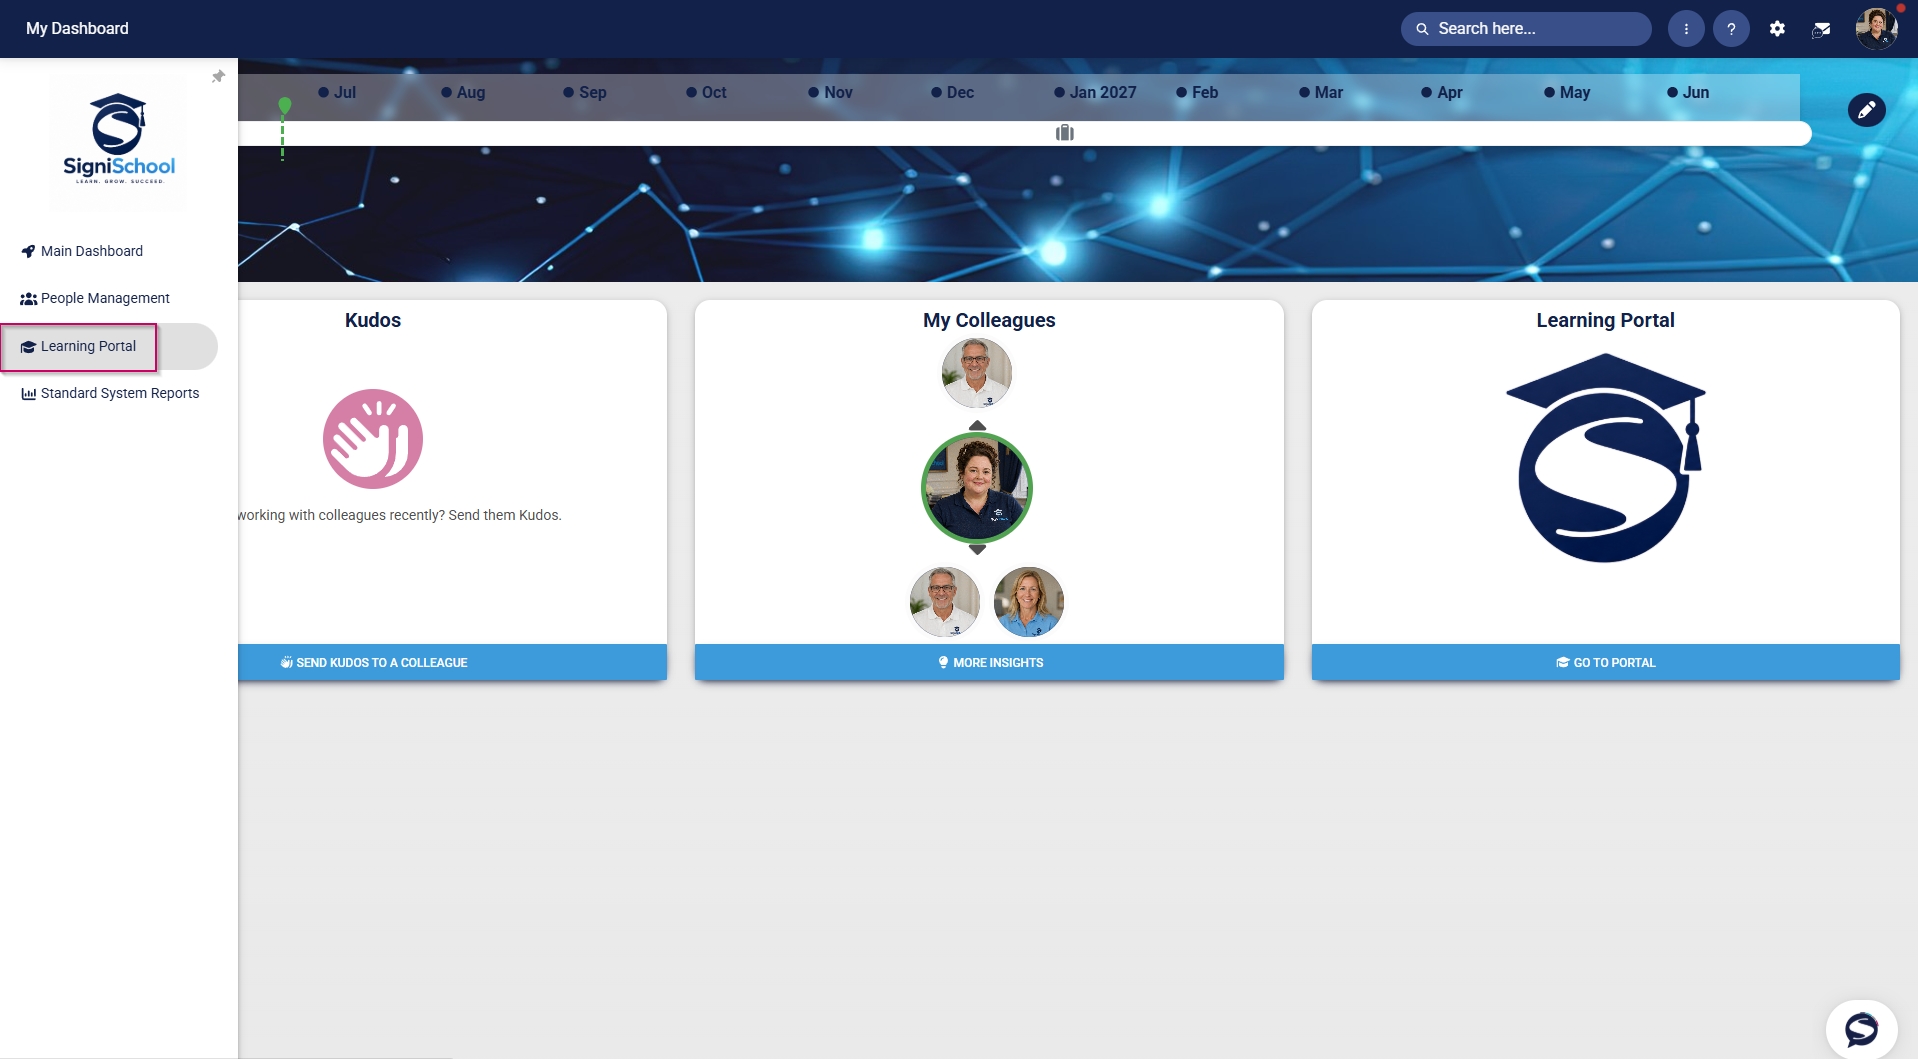
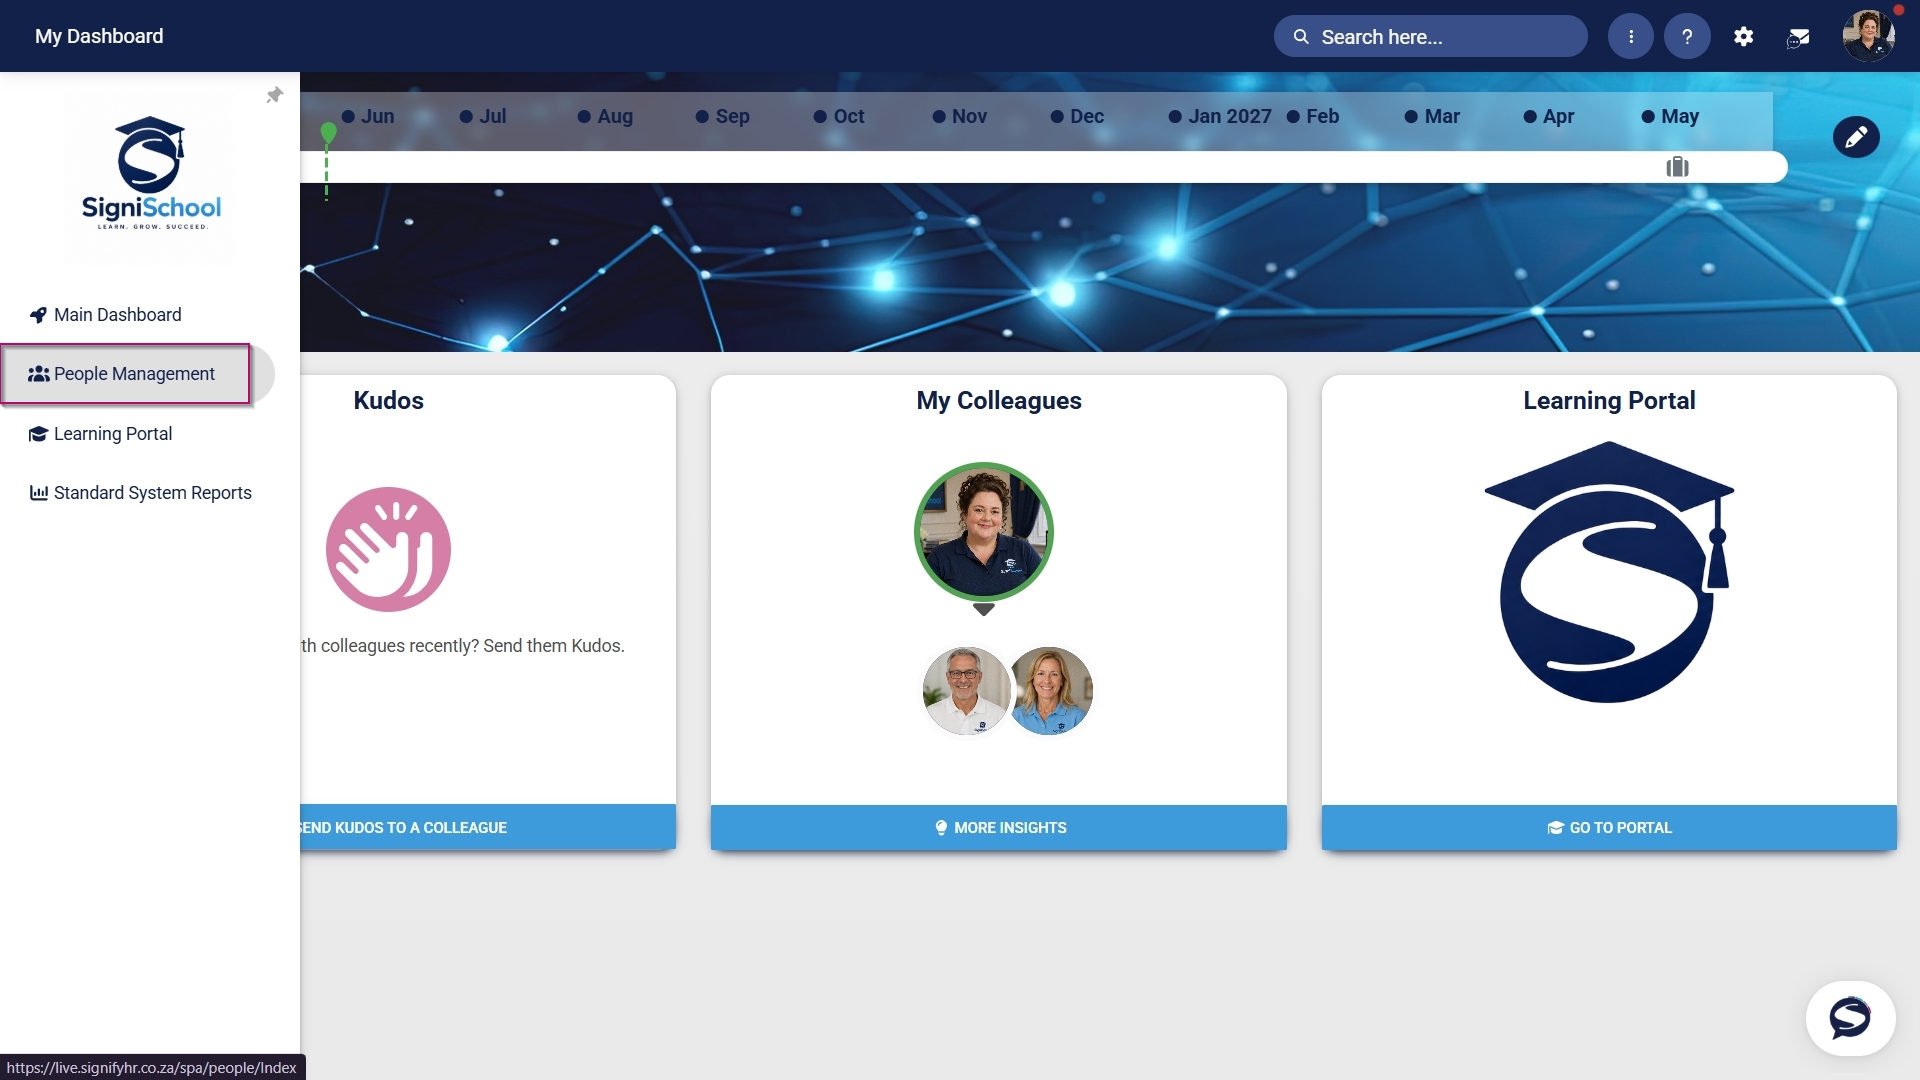
- Hover over the sidebar menu, then click People Management.

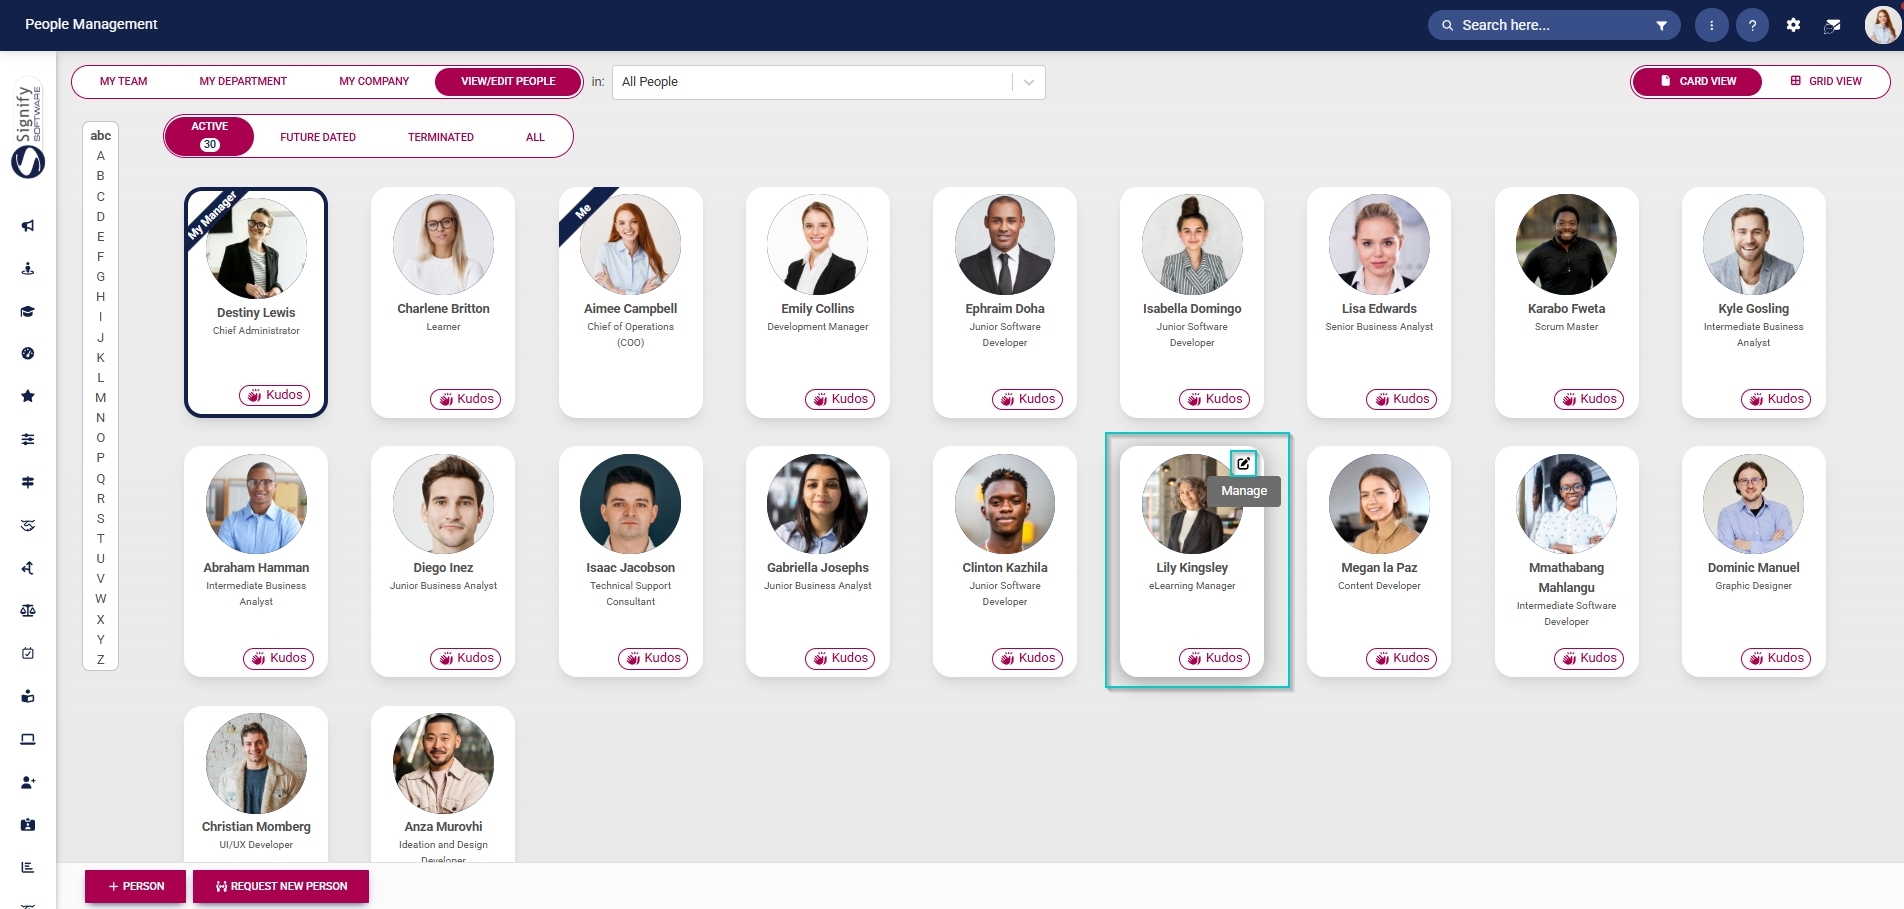
- Click the pencil icon to manage the profile of the person you want to edit.
- In the left-hand menu, navigate to User Permissions, then click System Modules Admin.
- Click the LINK ROLE button.
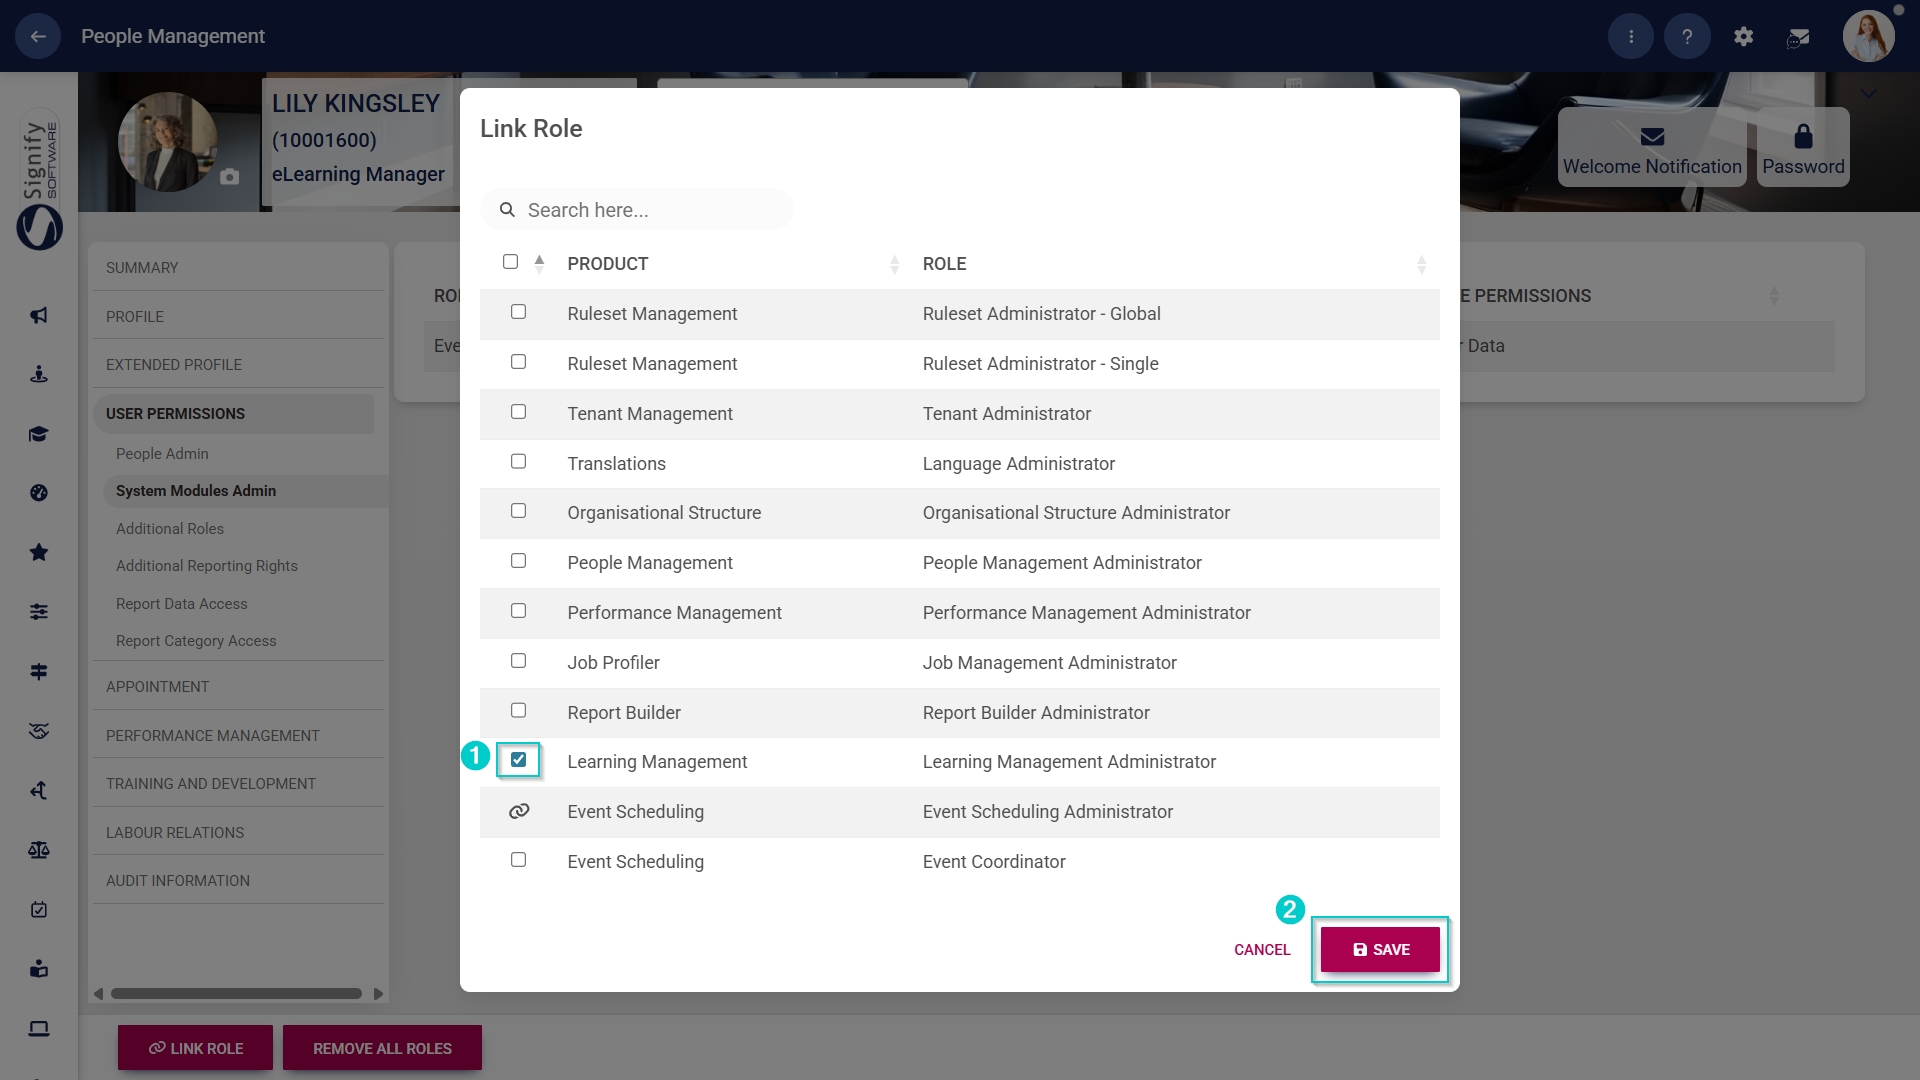
- Tick the checkbox next to Learning Management in the table to assign the Learning Management administrator role to the user.
- Click SAVE to continue or CANCEL to discard your changes.
Create people groups
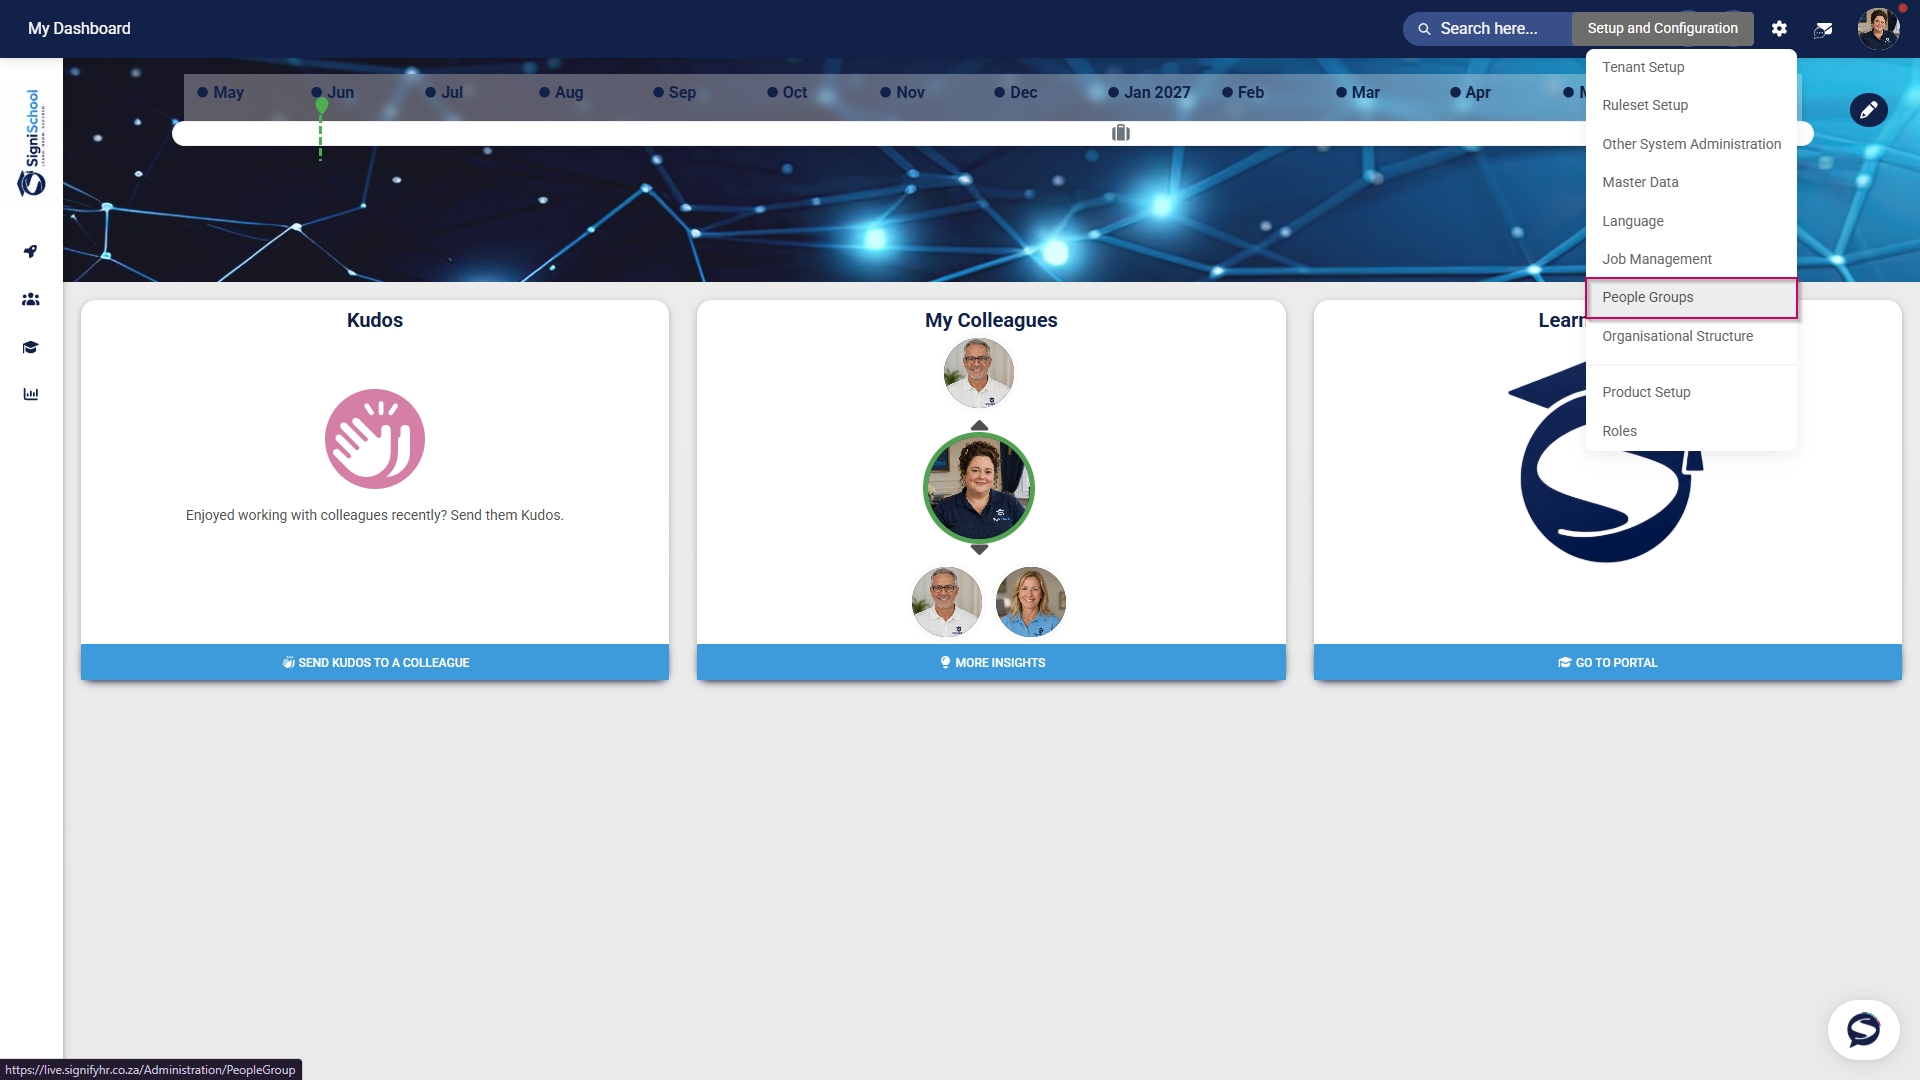
- Click the gear icon to access the Setup and Configuration menu.
- Click People Groups.
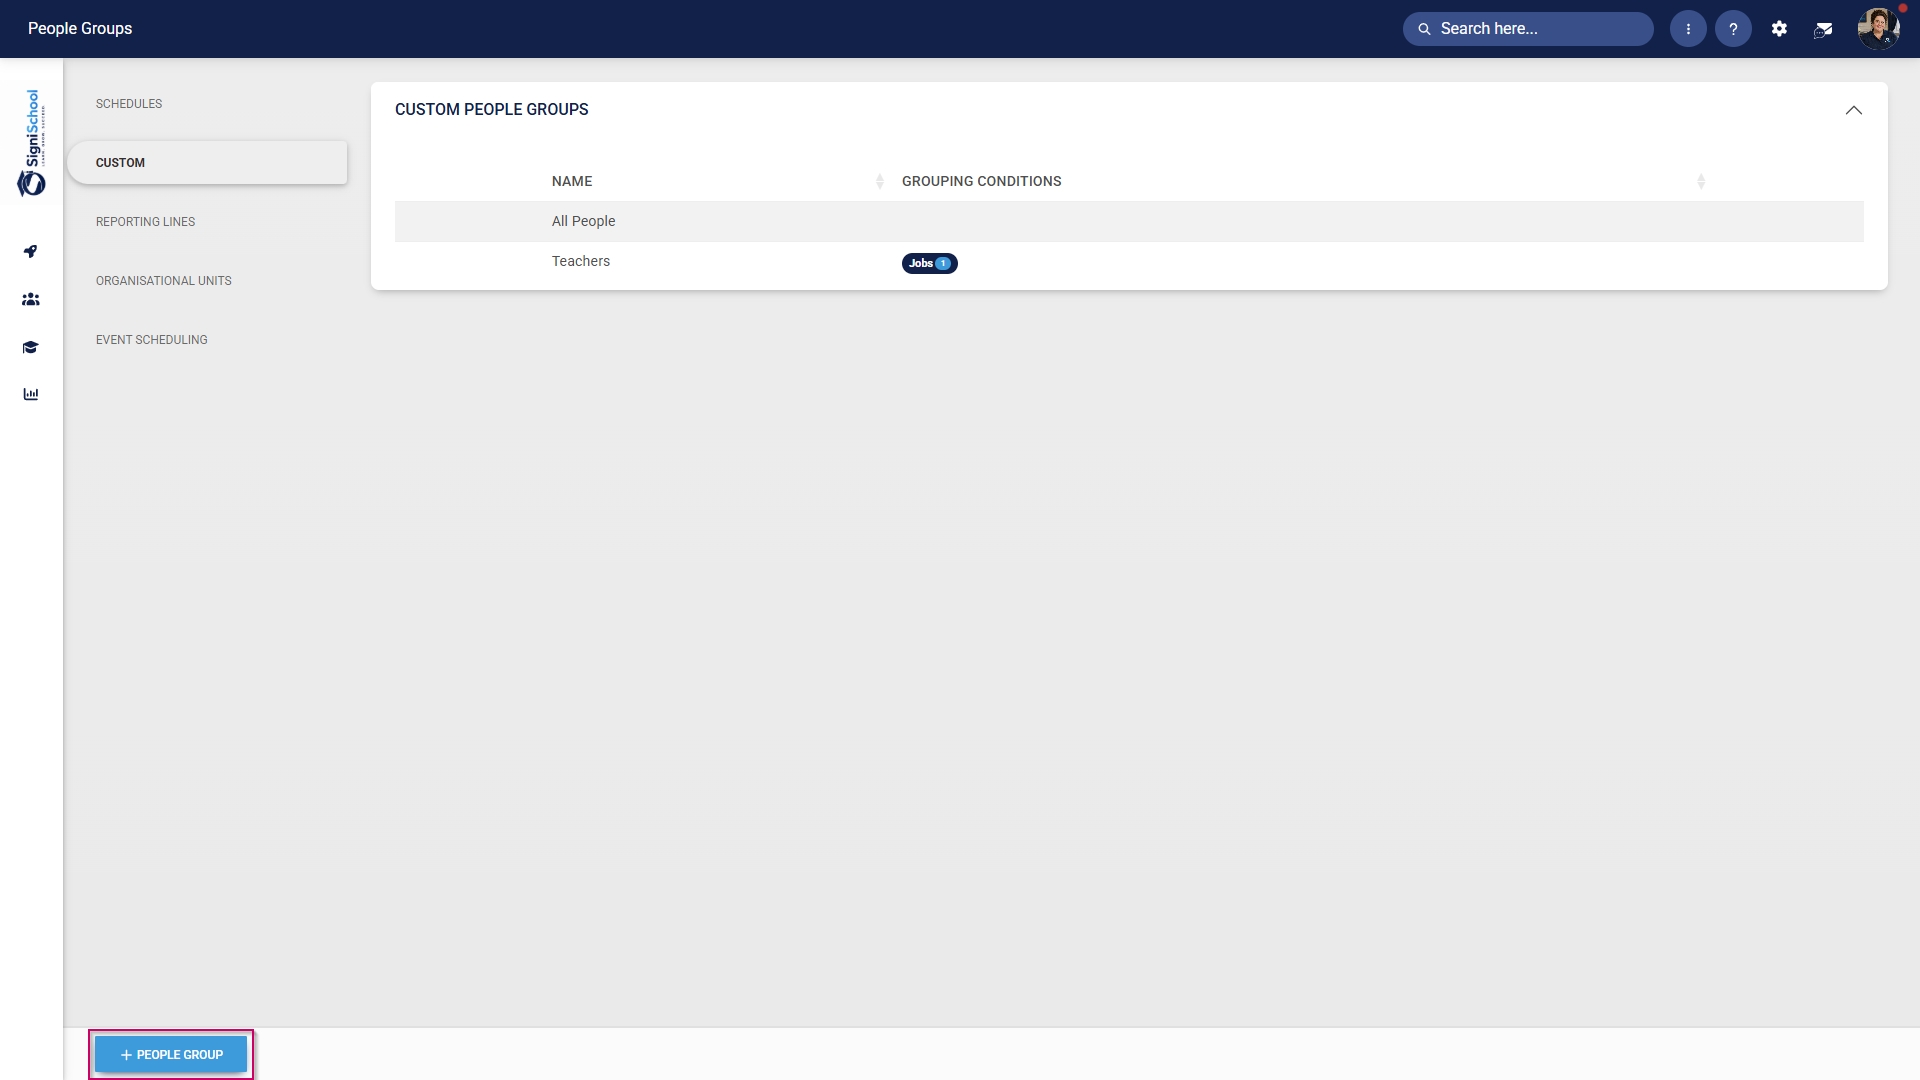
- In the left-hand menu, navigate to Custom, then click +PEOPLE GROUP.
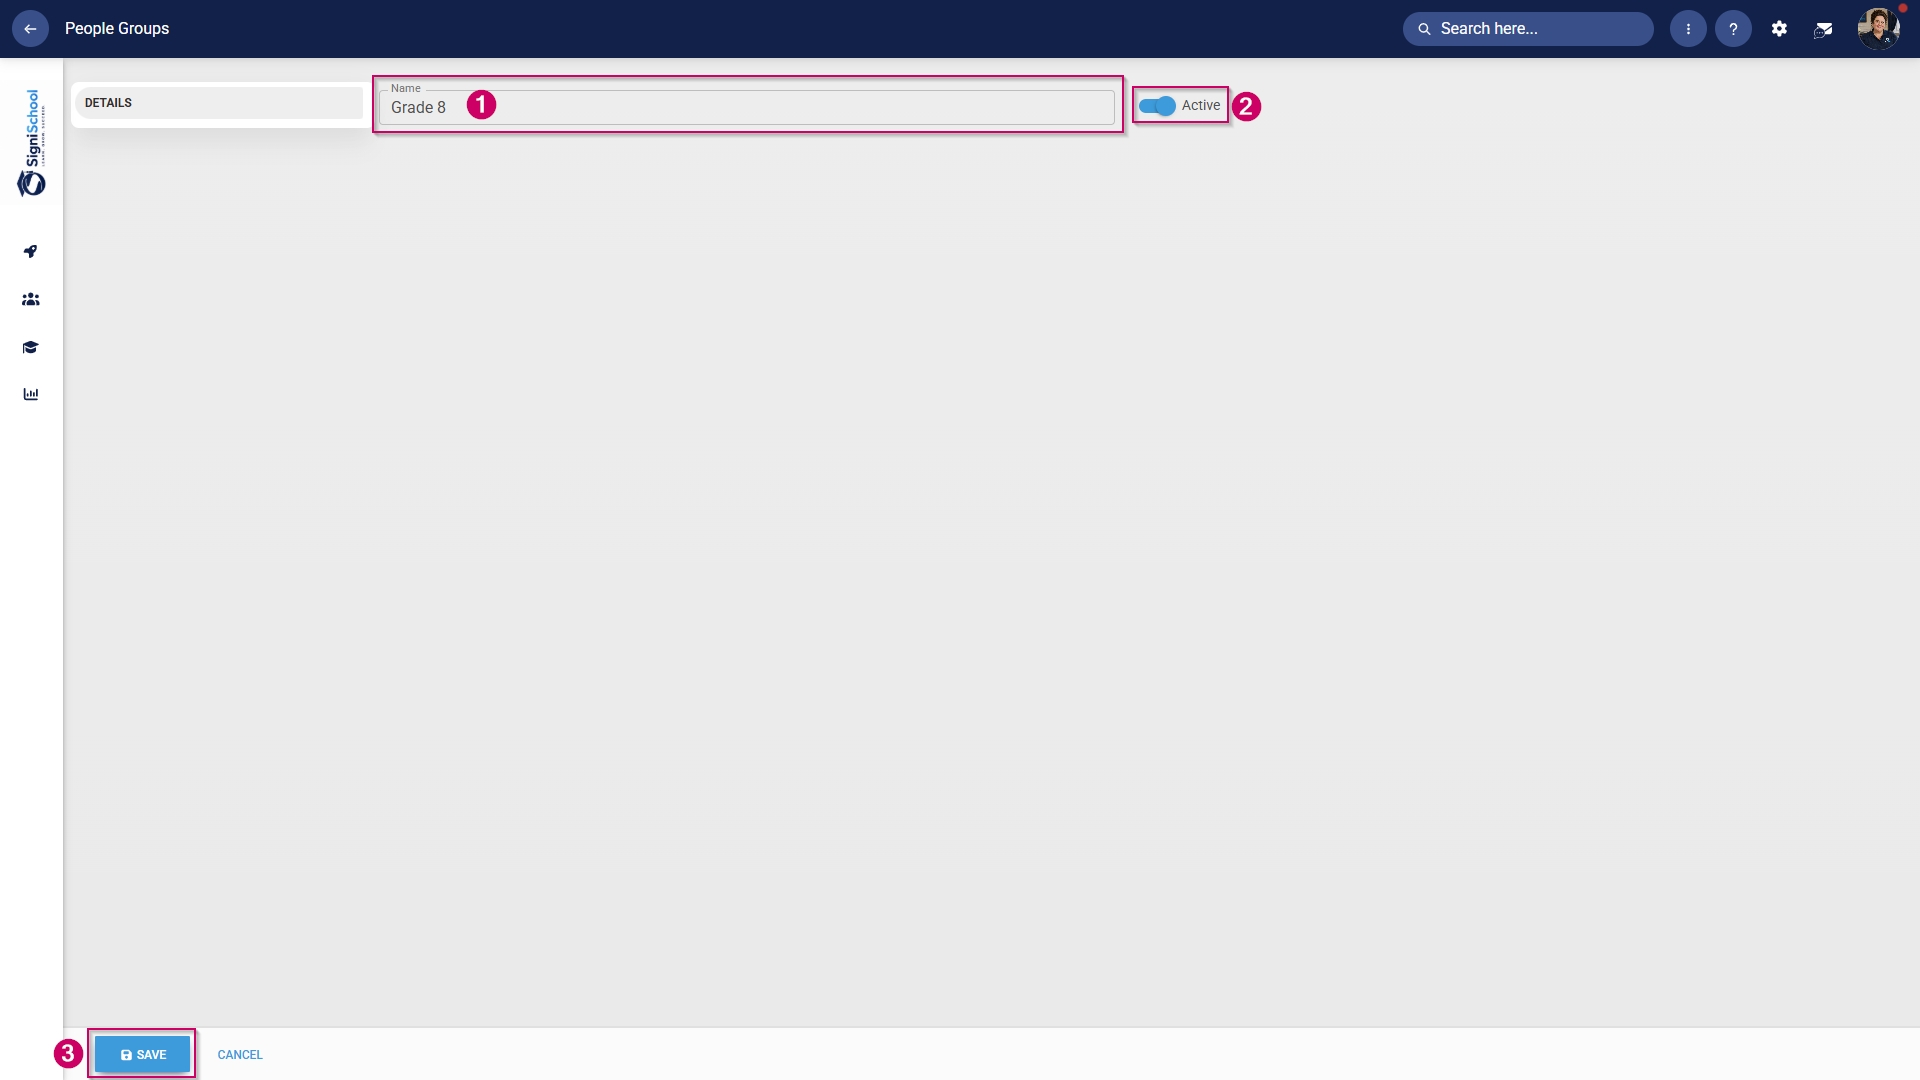
- Enter a descriptive name for the people group.
- Click the toggle button to set the status to Active.
- Click SAVE when you are finished or click CANCEL to discard your edits.
- Once the people group has been created, you can select the people to add to it.
Included: Individuals
- In the left-hand menu, click to navigate to the Included section, then click People to add individuals.
- Click the PEOPLE button.

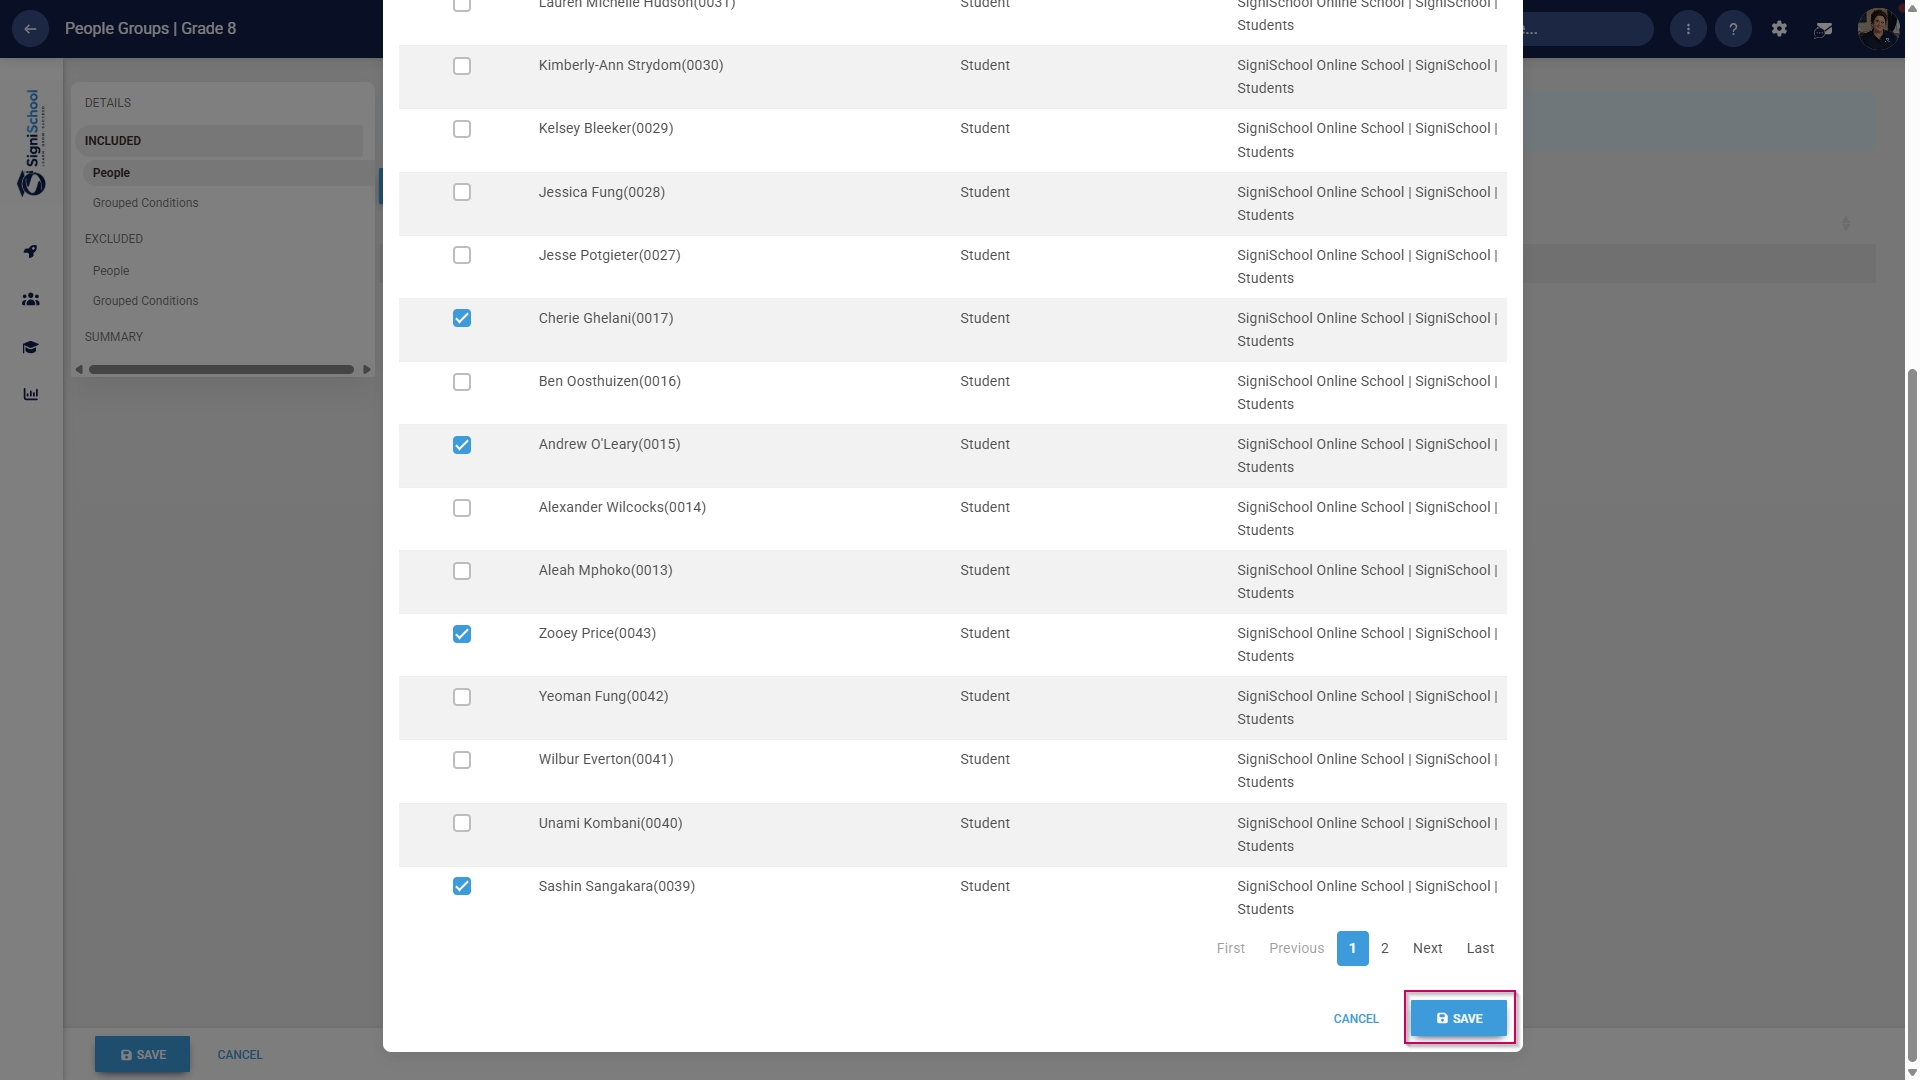
- Use the search bar to find a person based on their name, surname, username, or job title.
- Tick the checkbox to select a person.

- Click SAVE when you are finished or click CANCEL to discard your edits.
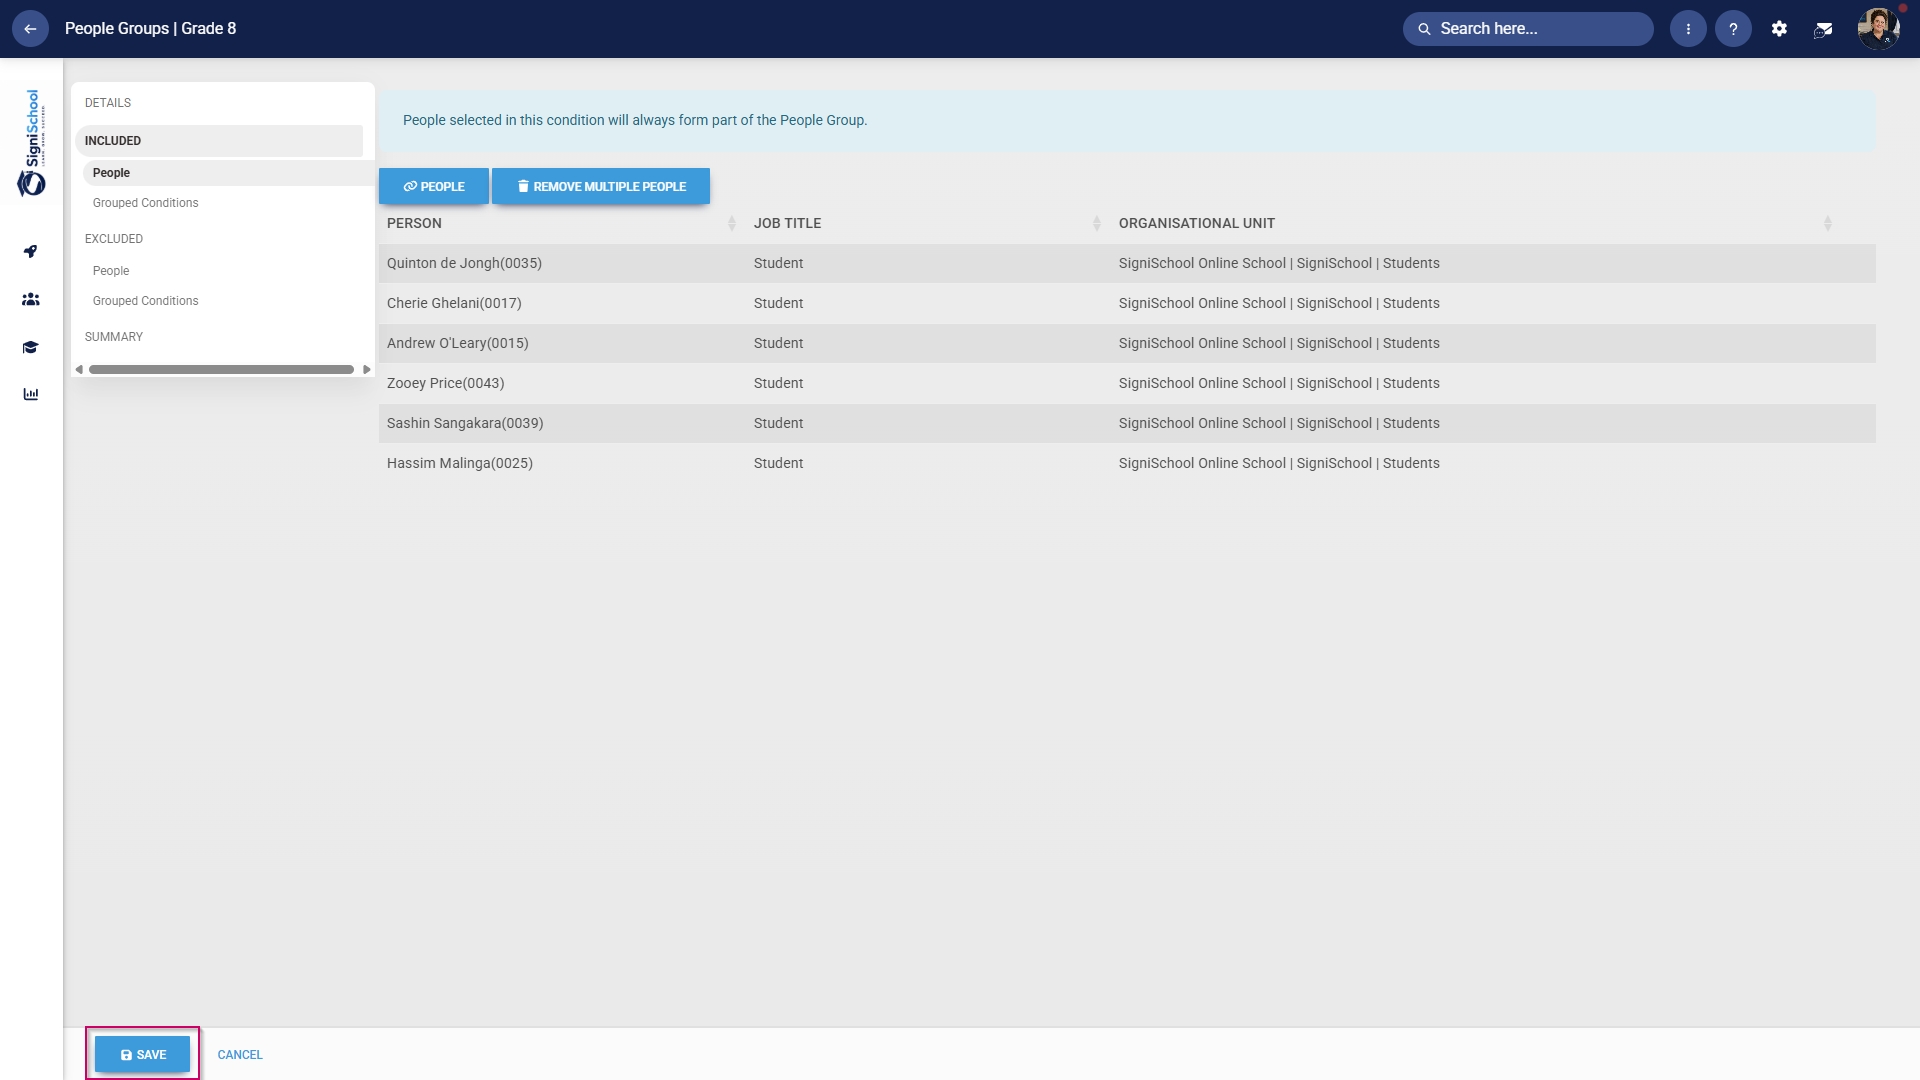
- Review the users added to your people group, then click SAVE when you are finished or click CANCEL to discard your edits.
Included: Grouped conditions
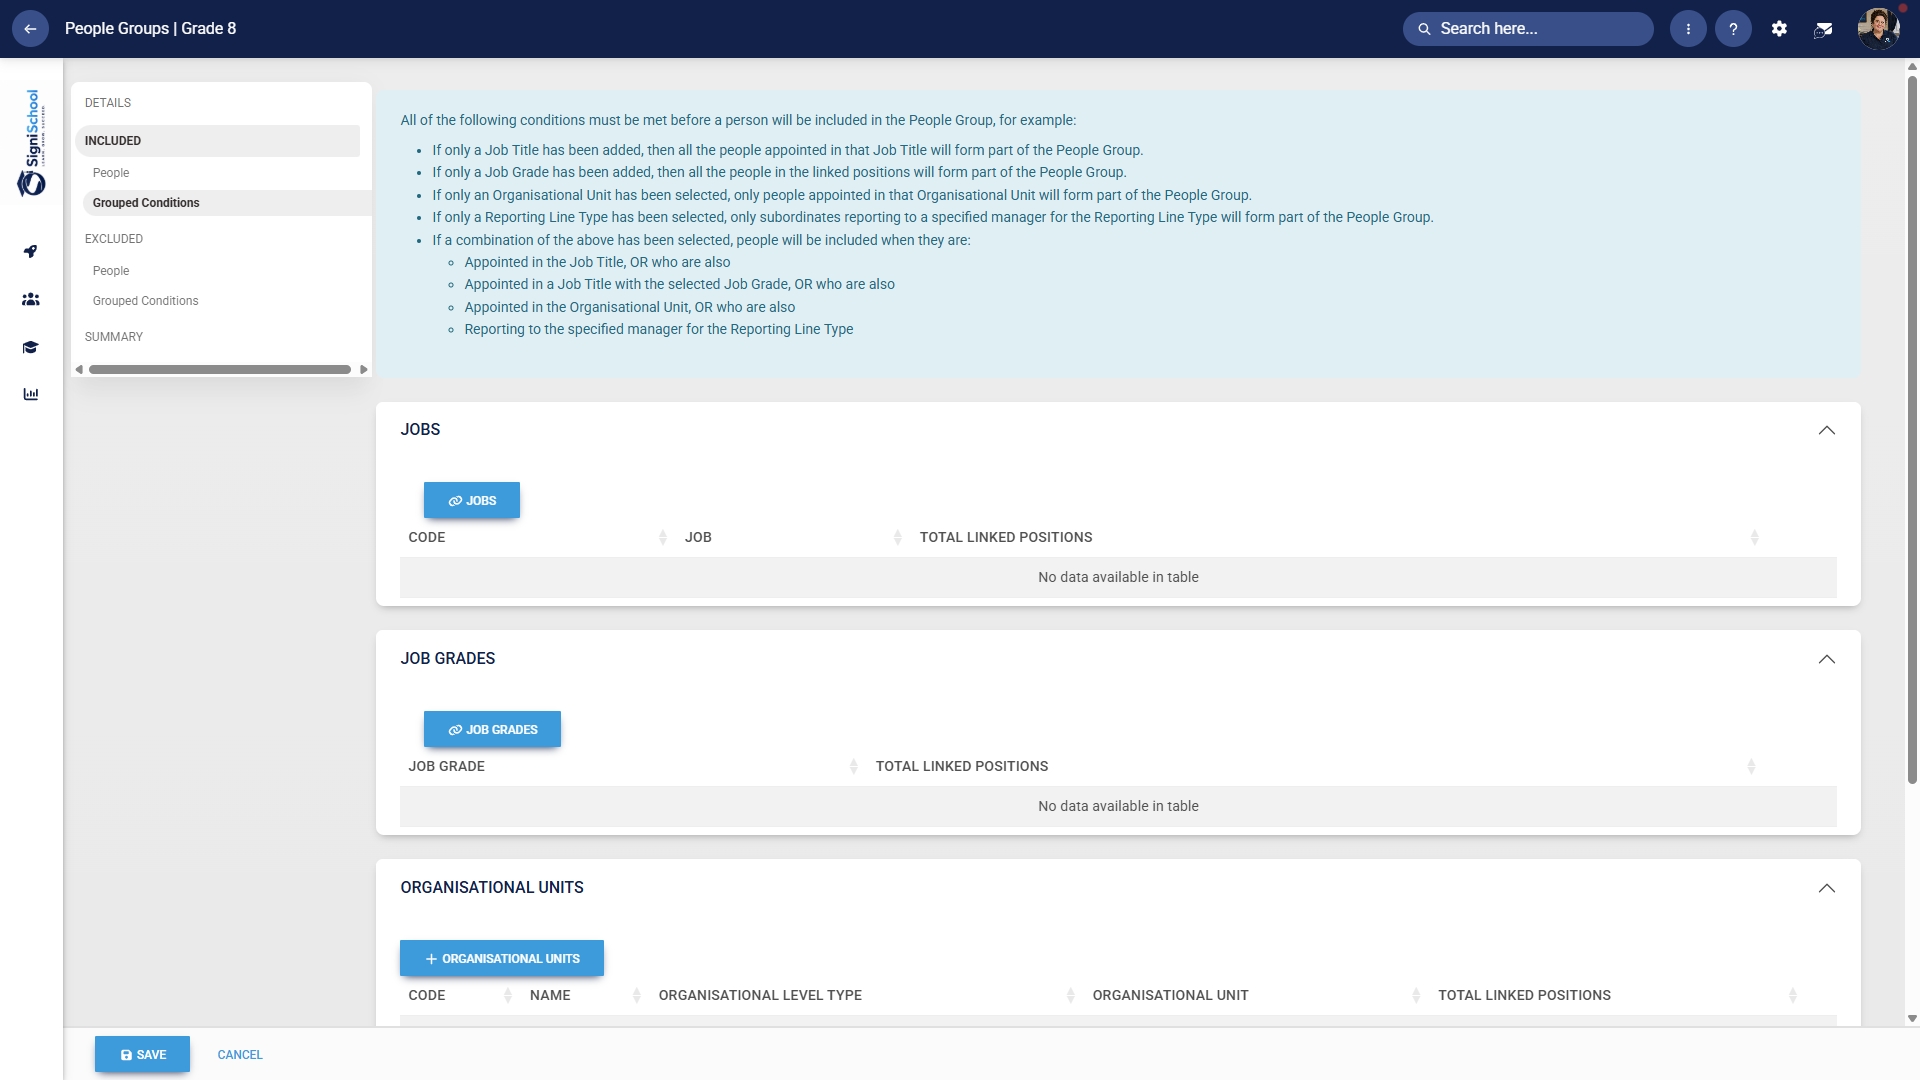
- Click Grouped Conditions to add groups of people based on criteria such as job titles, organisational nodes, etc.
- Click SAVE when you are finished or click CANCEL to discard your edits.
Included: Individuals
- In the left-hand menu, click to navigate to People in the Excluded section.
-
- Click the PEOPLE button.
- Select the people you would like to exclude.
- Click SAVE when you are finished or click CANCEL to discard your edits.
-

Excluded: Grouped conditions
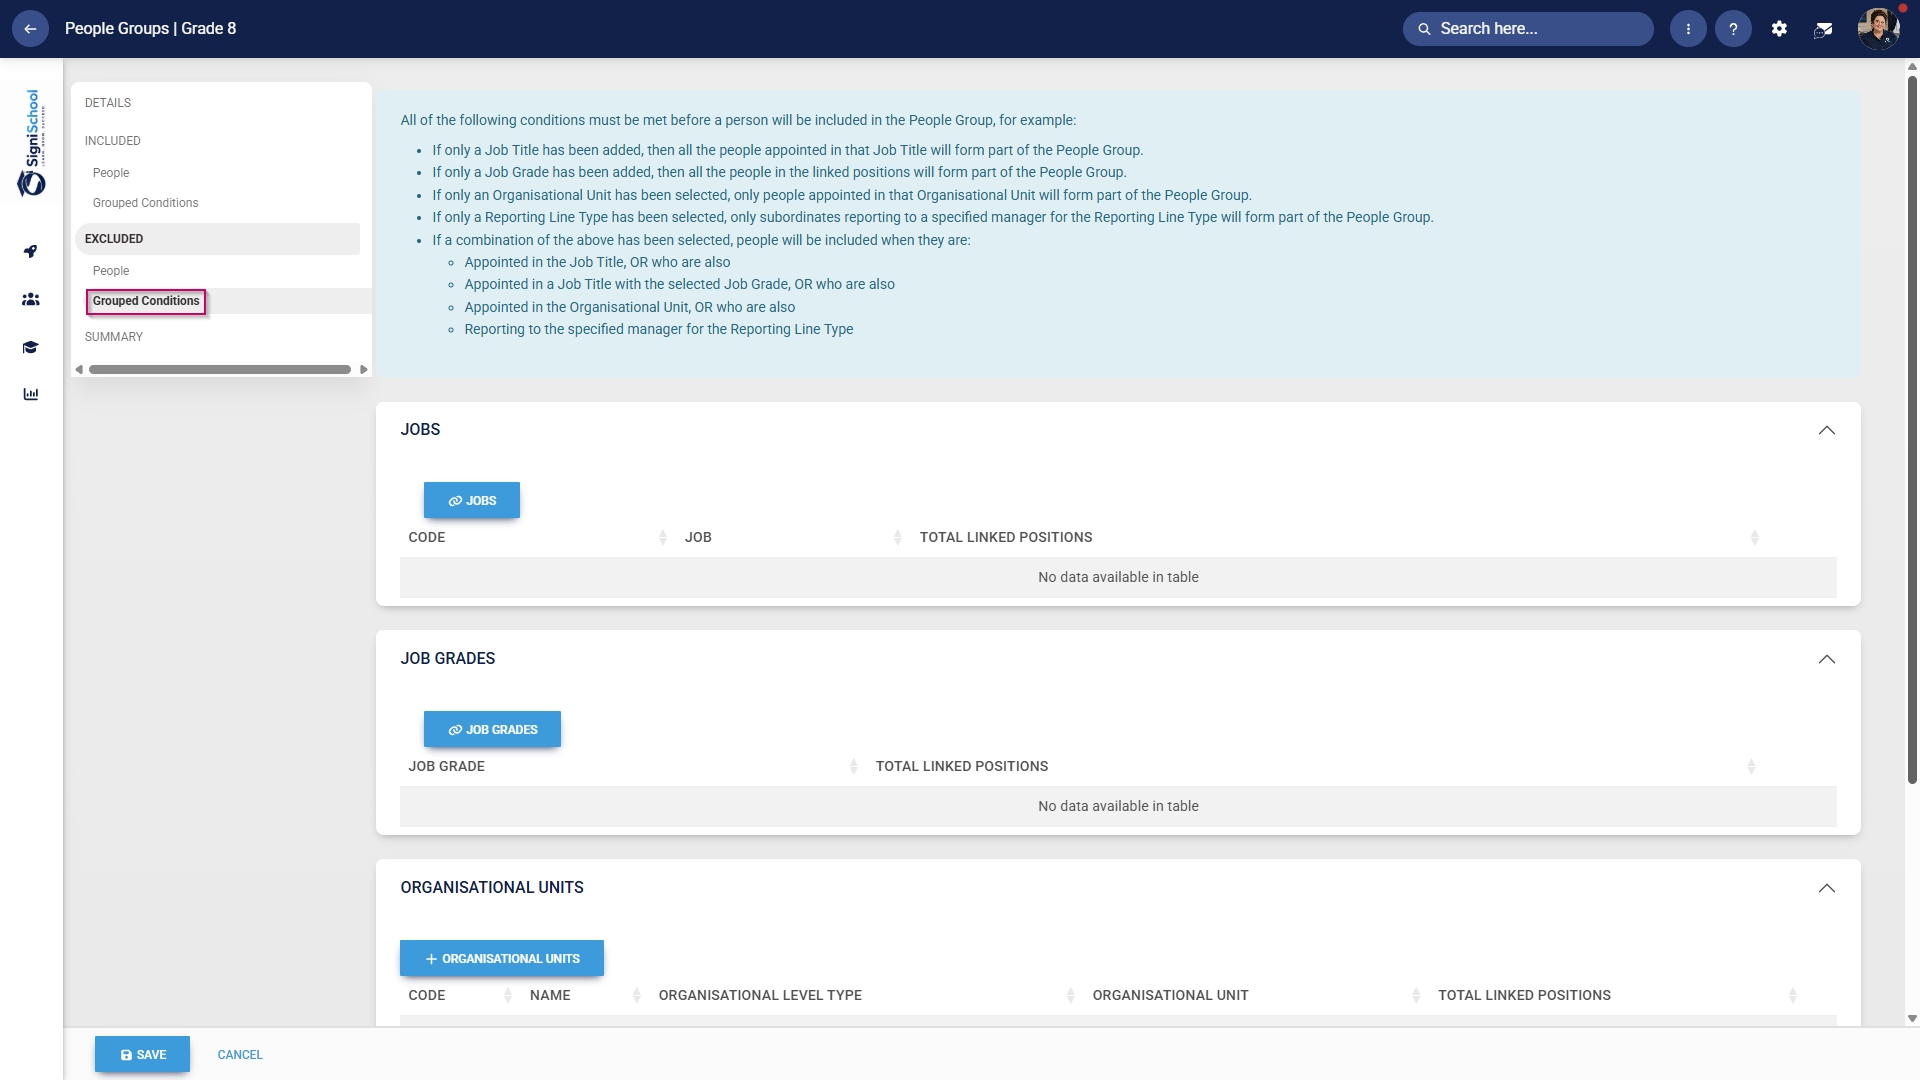
- Click Grouped Conditions to exclude groups of people based on criteria such as job titles, organisational nodes, etc.
- Click SAVE when you are finished or click CANCEL to discard your edits.
Summary
- In the left-hand menu, click Summary to view all the users included in your people group.
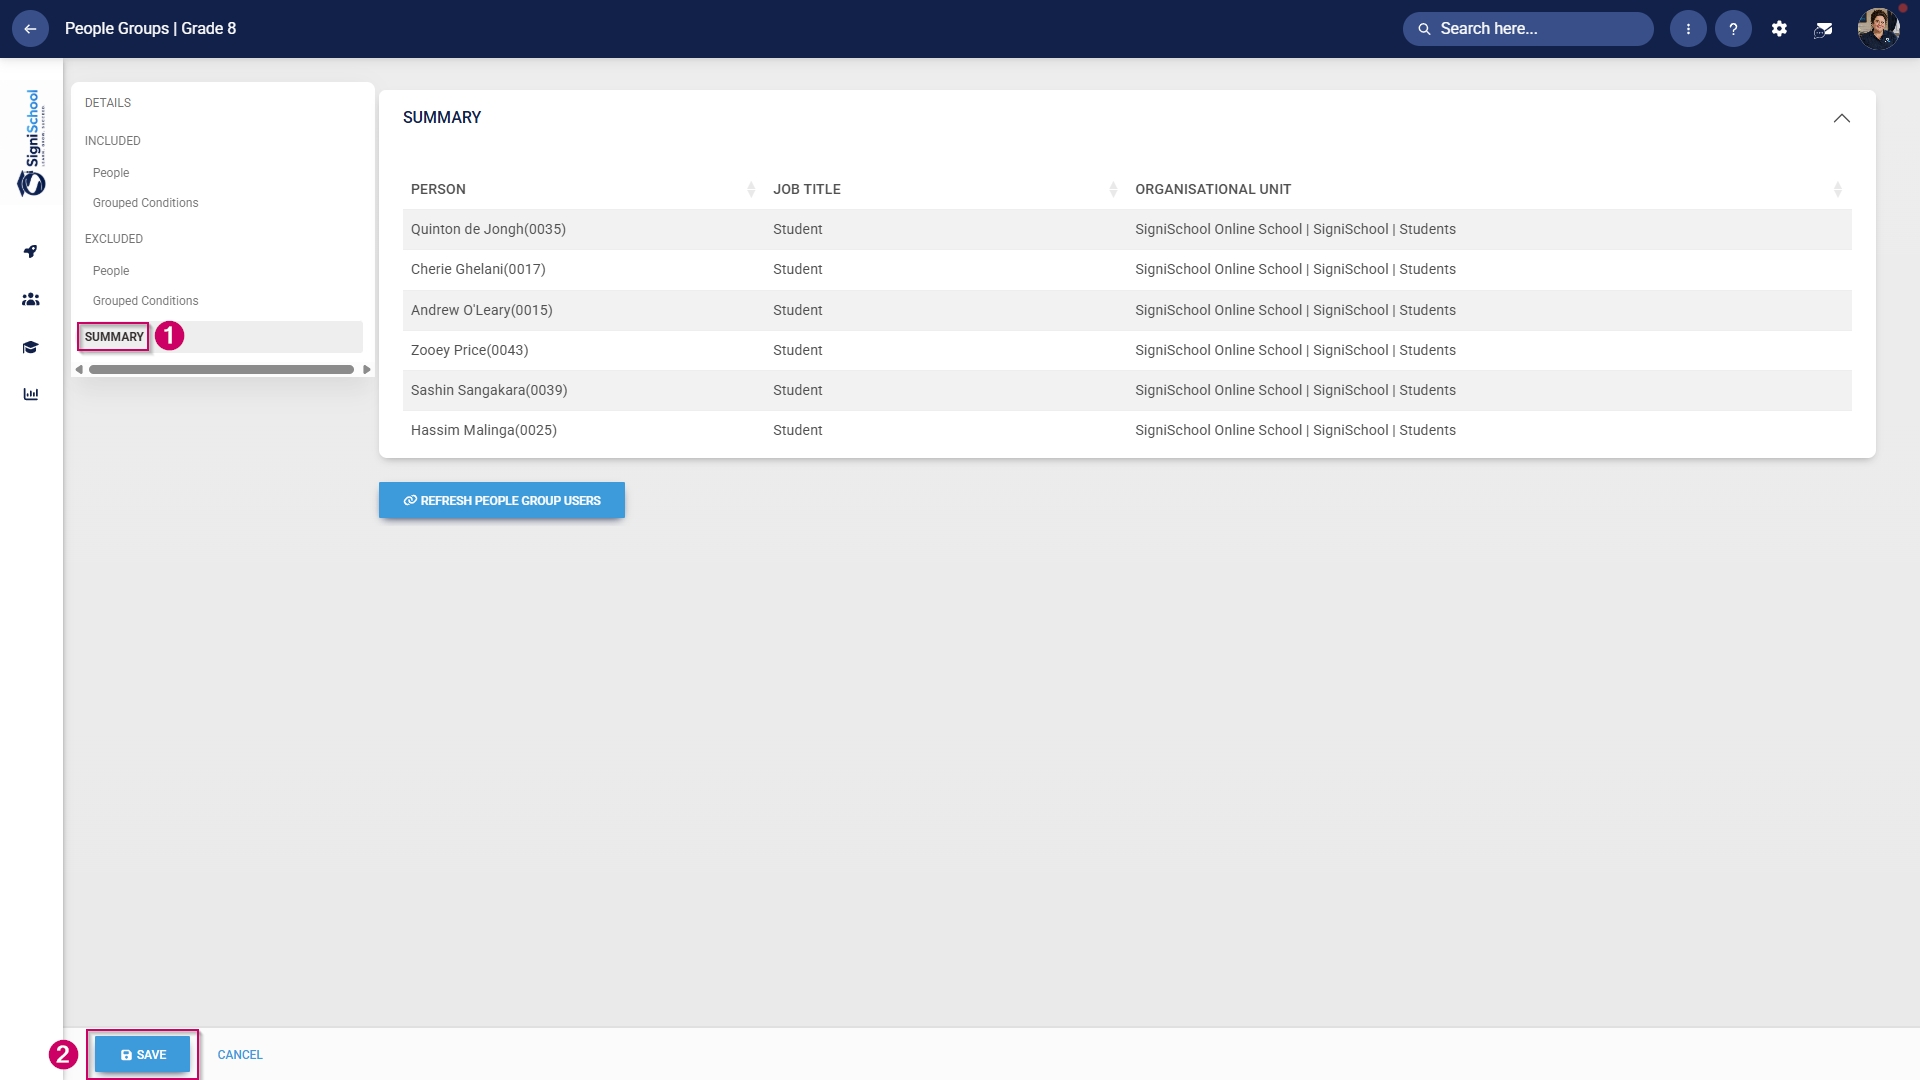
The people groups take some time to synchronise on the system once they're created. This can take anywhere from 10 minutes to 12 hours, depending on the number of changes.
- To synchronise the newly-created or updated people groups manually, follow the steps in the next section.
Manually syncing people groups
- Click the gear icon to access the Setup and Configuration menu.
- Click Ruleset Setup.

- Select the ruleset you would like to update.
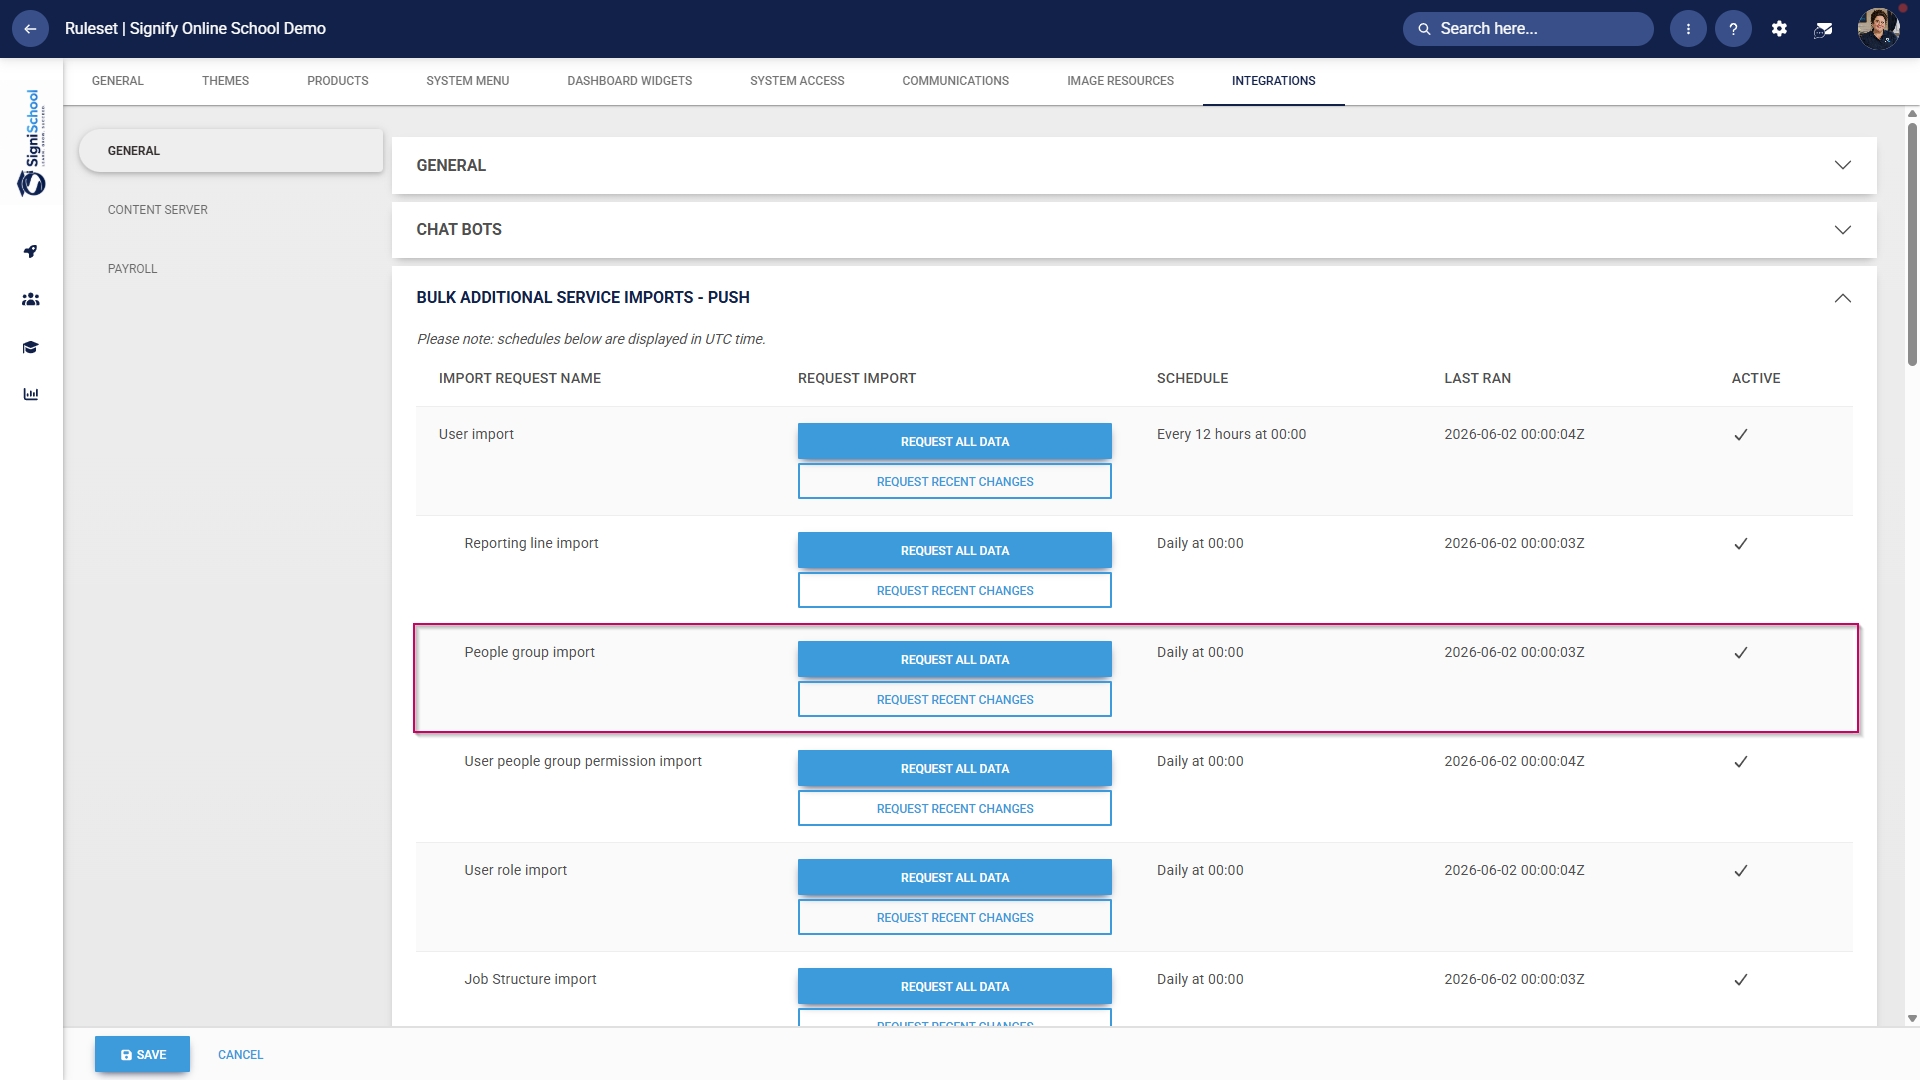
- Scroll down to the Bulk Additional Service Imports – Push section.
- For the People group import function, you have two options when synchronising manually:
-
- Click REQUEST ALL DATA to synchronise all the people groups.
-
- This is a time-consuming operation because all the people groups' data is overwritten and synchronised from scratch.
-
- Click REQUEST ALL DATA to synchronise all the people groups.
-
Please be very careful when selecting this option, as it can affect system performance and speed, particularly during business hours.
-
-
- Click REQUEST RECENT CHANGES to synchronise only recent changes to your people groups.
-
- This is a time-efficient option because only the changes are synchronised, and the previous data remains unchanged.
-
- Click REQUEST RECENT CHANGES to synchronise only recent changes to your people groups.
-
- Once you have selected a synchronisation method, a message will appear stating that the import has been requested. You can monitor the synchronisation progress by navigating to your System Inbox.
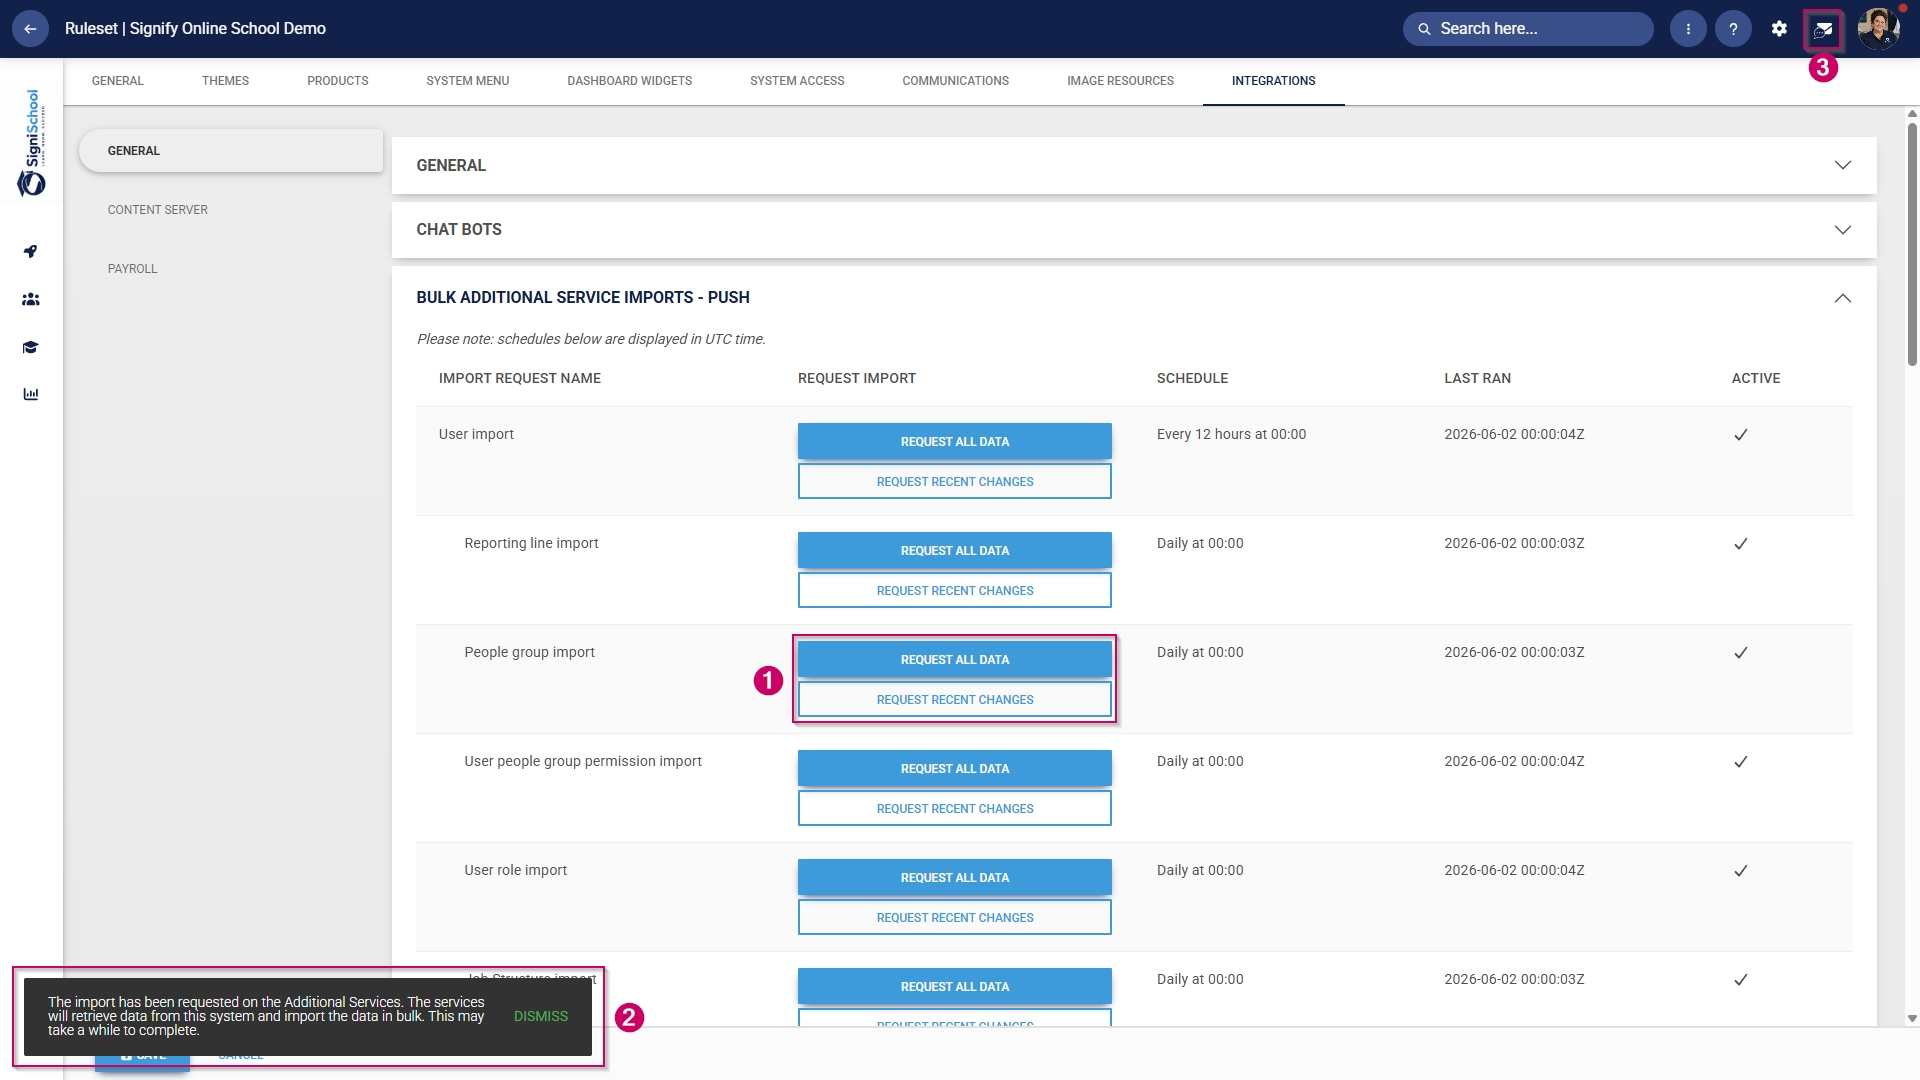
- Click the envelope icon at the top of your screen to navigate to your System Inbox, then click Imports.
- You can monitor the status of your imports and system processes here:
-
- Staged means the task has been added to the queue and will begin once the current tasks have been completed.
- Started means the task is currently running.
- Completed with Errors means the task has been completed, although only partially, due to detected errors.
- Completed means the task has been successfully executed.
- Failed means the task could not be completed.
-
- For a Completed with Errors or Failed task, you can download an Excel document with a breakdown of the errors.
-
- Click on the kebab icon next to the task.
- Click Export Errors.
- Review the errors, then re-attempt the task using the steps above.
-
Add training interventions
Training interventions are used to track a learner's academic progress. Each learning activity or assessment will have its own training intervention. Training interventions can be created in two ways:
- Manually through the training intervention builder
- Automatically through the training intervention import functionality
Both methods will be shown below.
Method 1: Add training interventions manually
- Hover over the sidebar menu, then click Learning Portal.
- Click the spanner icon to access the system's Administration menu.
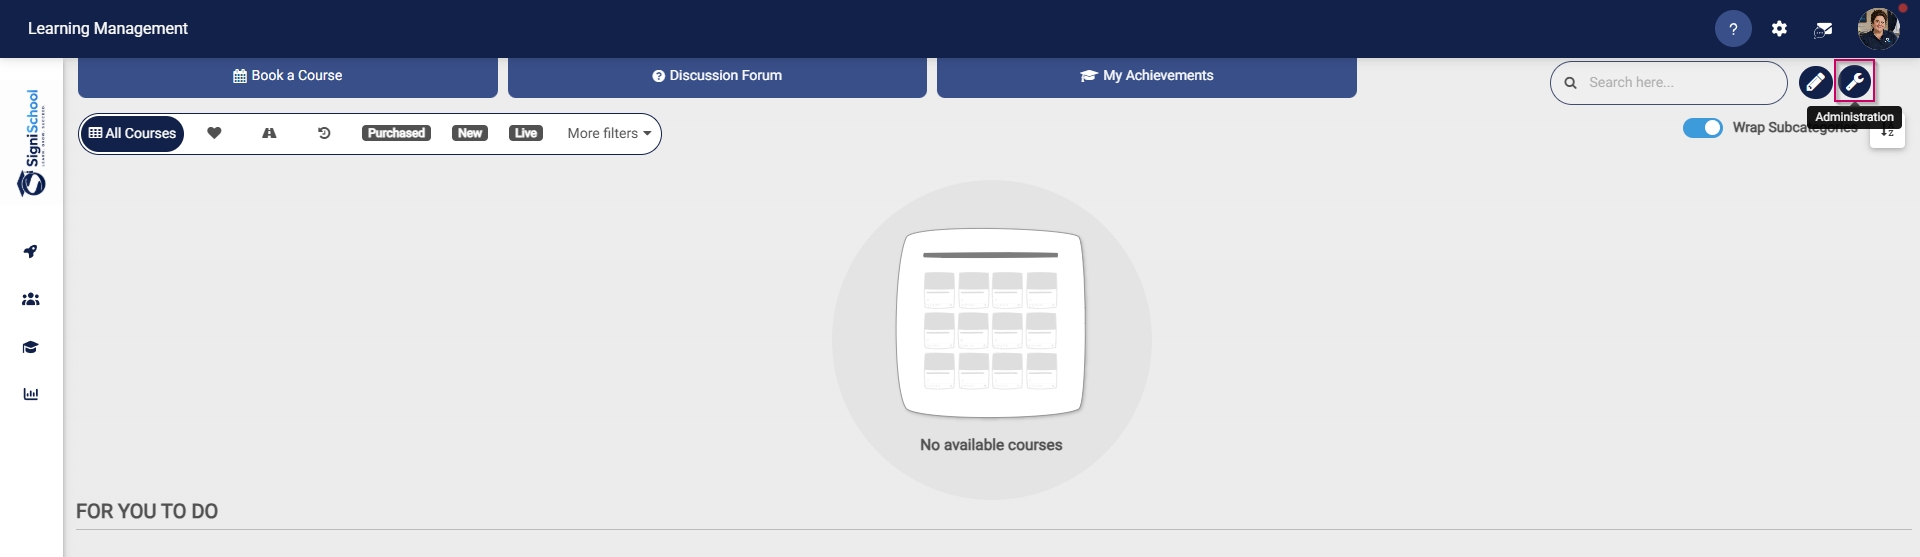
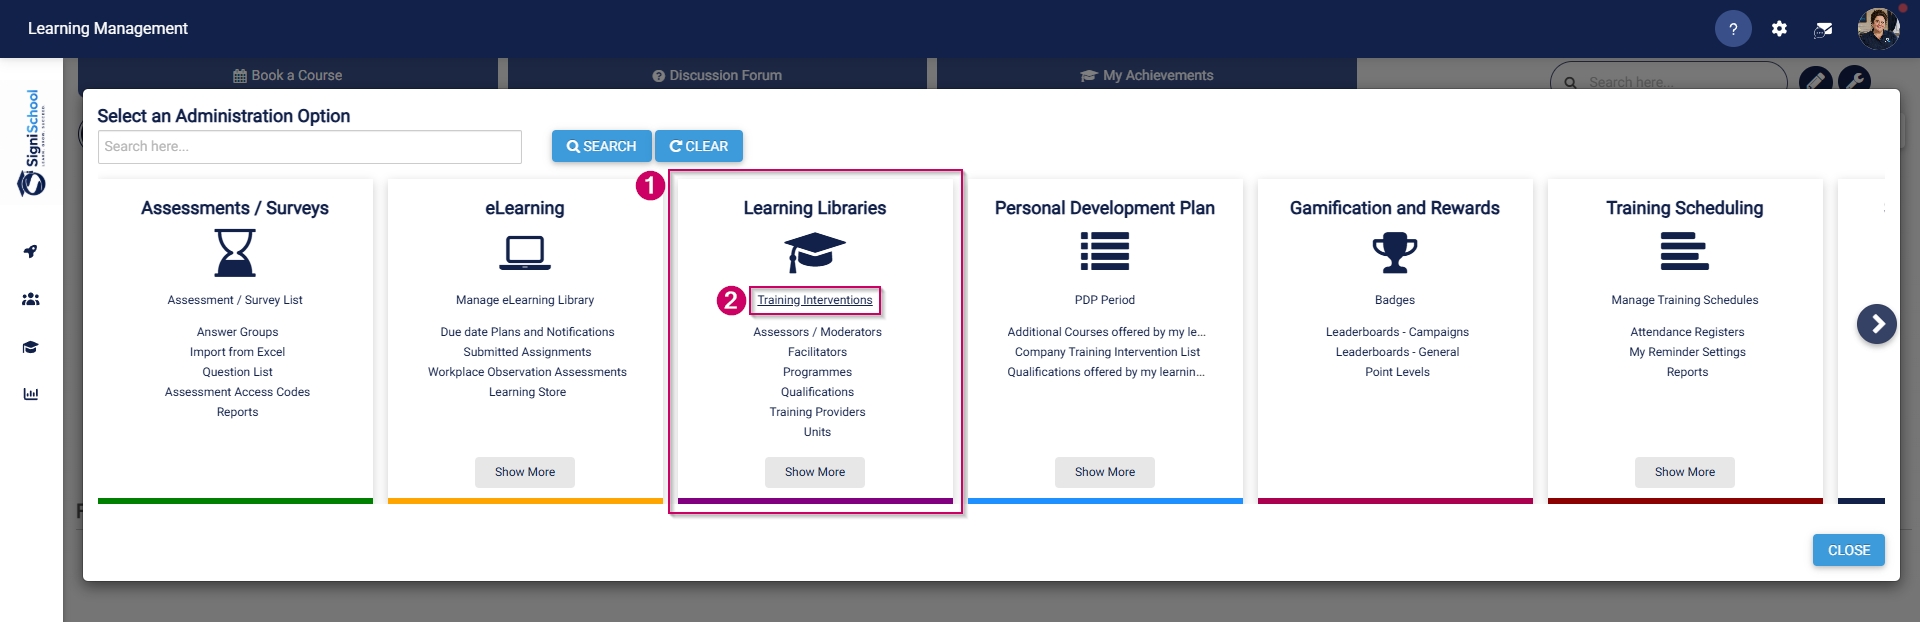
- On the Learning Libraries card, click Training Interventions.
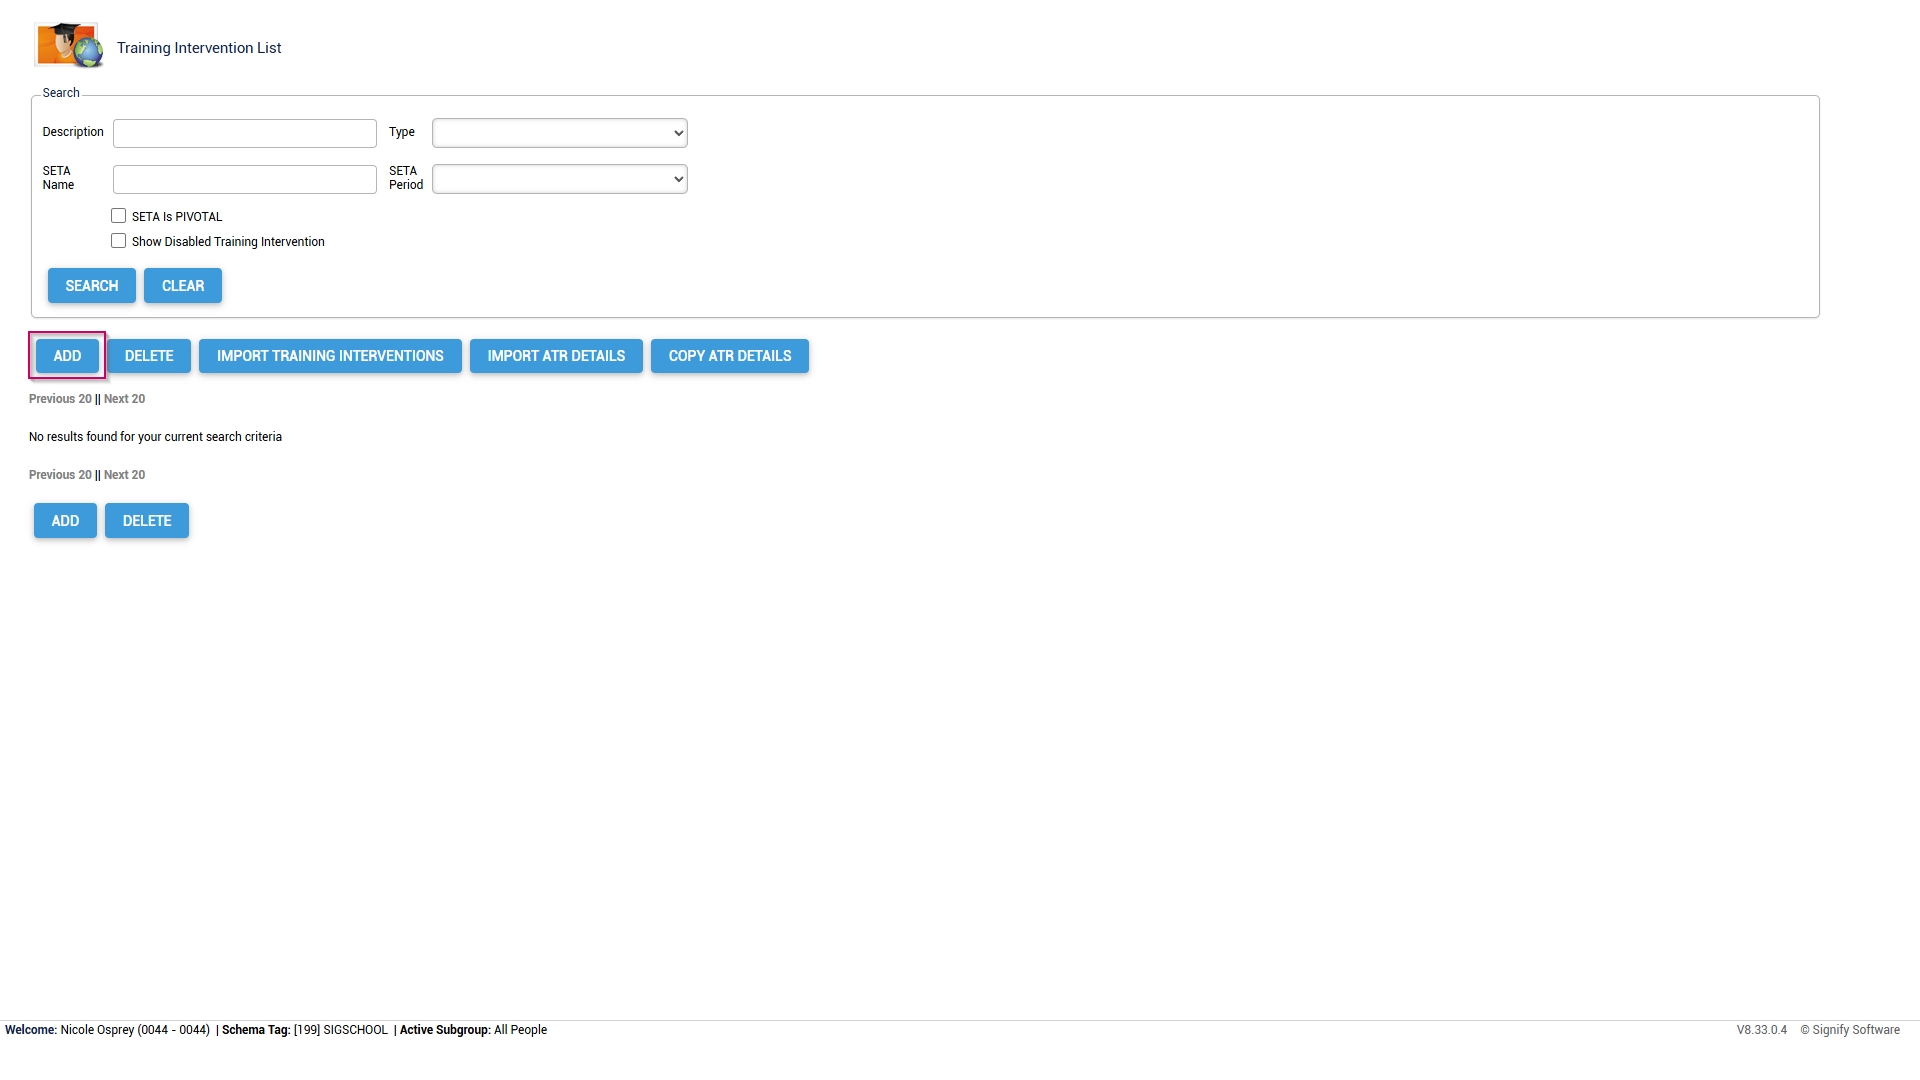
- The Training Intervention Library will open. This is where training interventions can be created, edited, or deleted. To add a new training intervention, click ADD.
- The training intervention editing screen will open.
-
- Please note that all the fields marked with an asterisk (*) are required.
- For our example, we will only fill out the necessary fields, but you can add more details if desired.
-
It is recommended to use a naming convention to standardise the training interventions. This ensures it is easy to maintain the data integrity of the Training Intervention Library while also improving the quality of system report outputs.
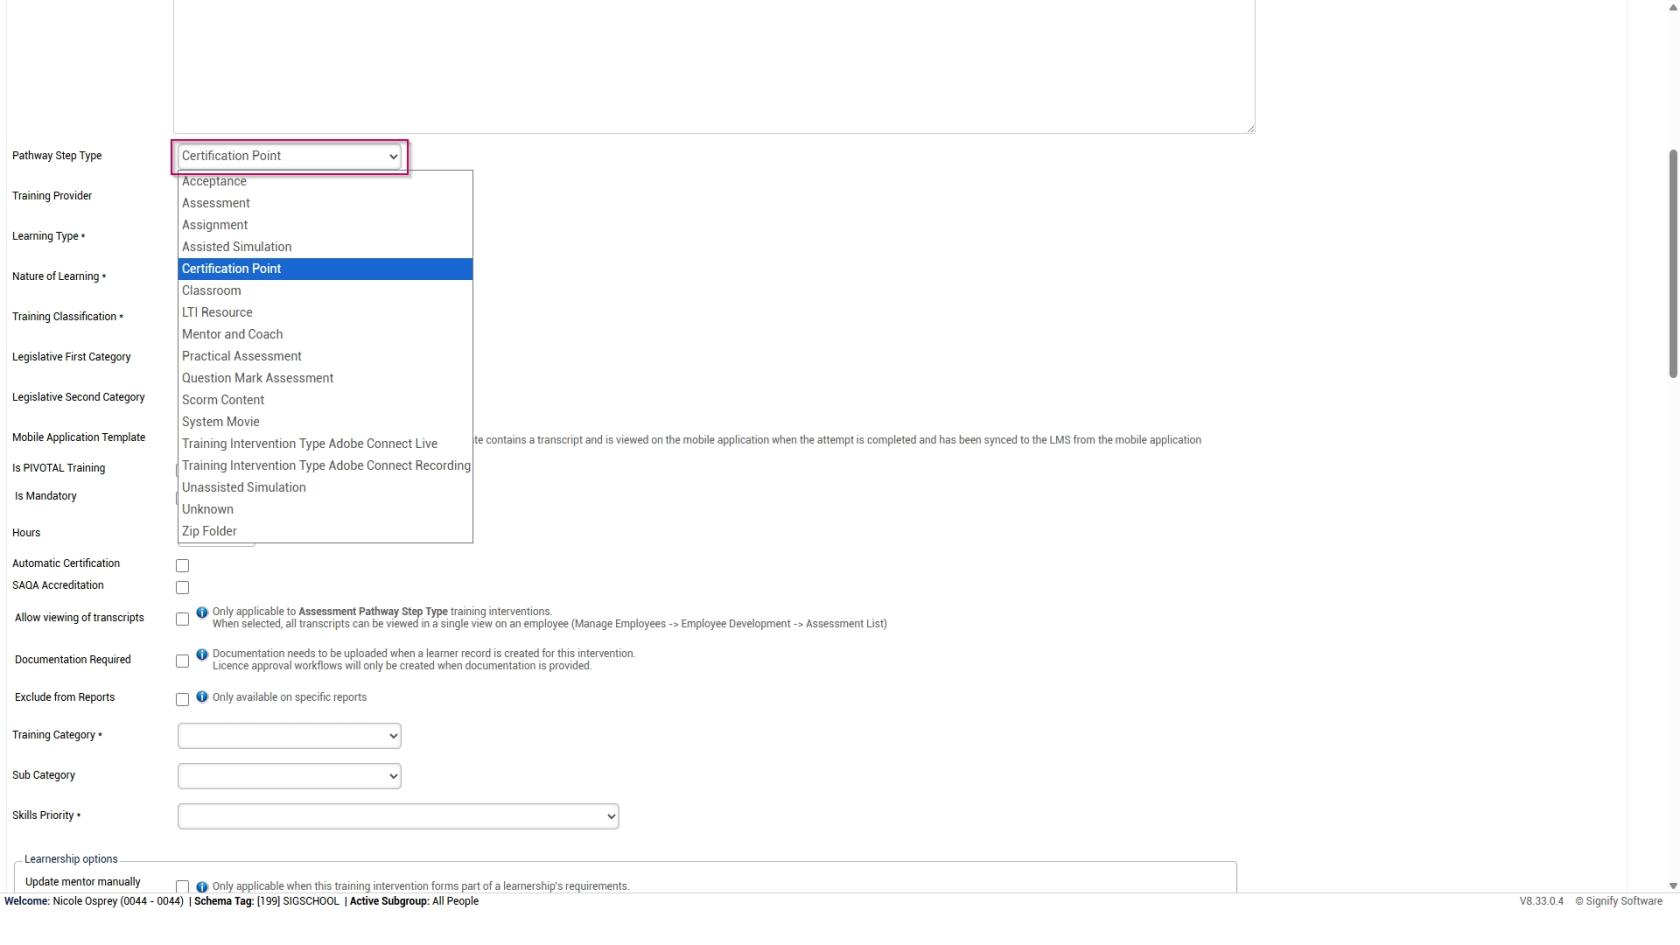
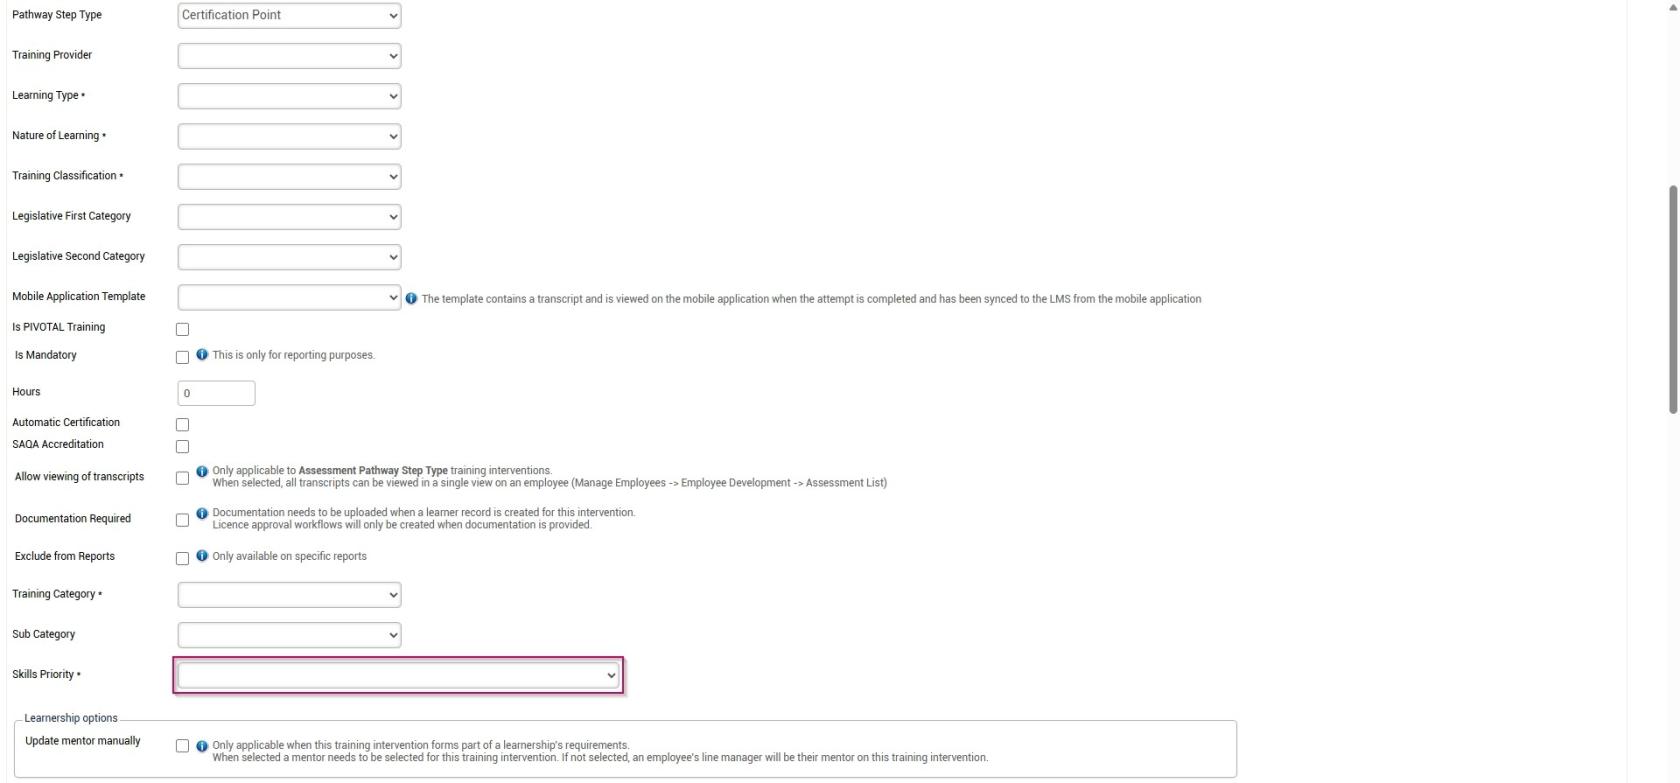
- Add an appropriate name for the training intervention.

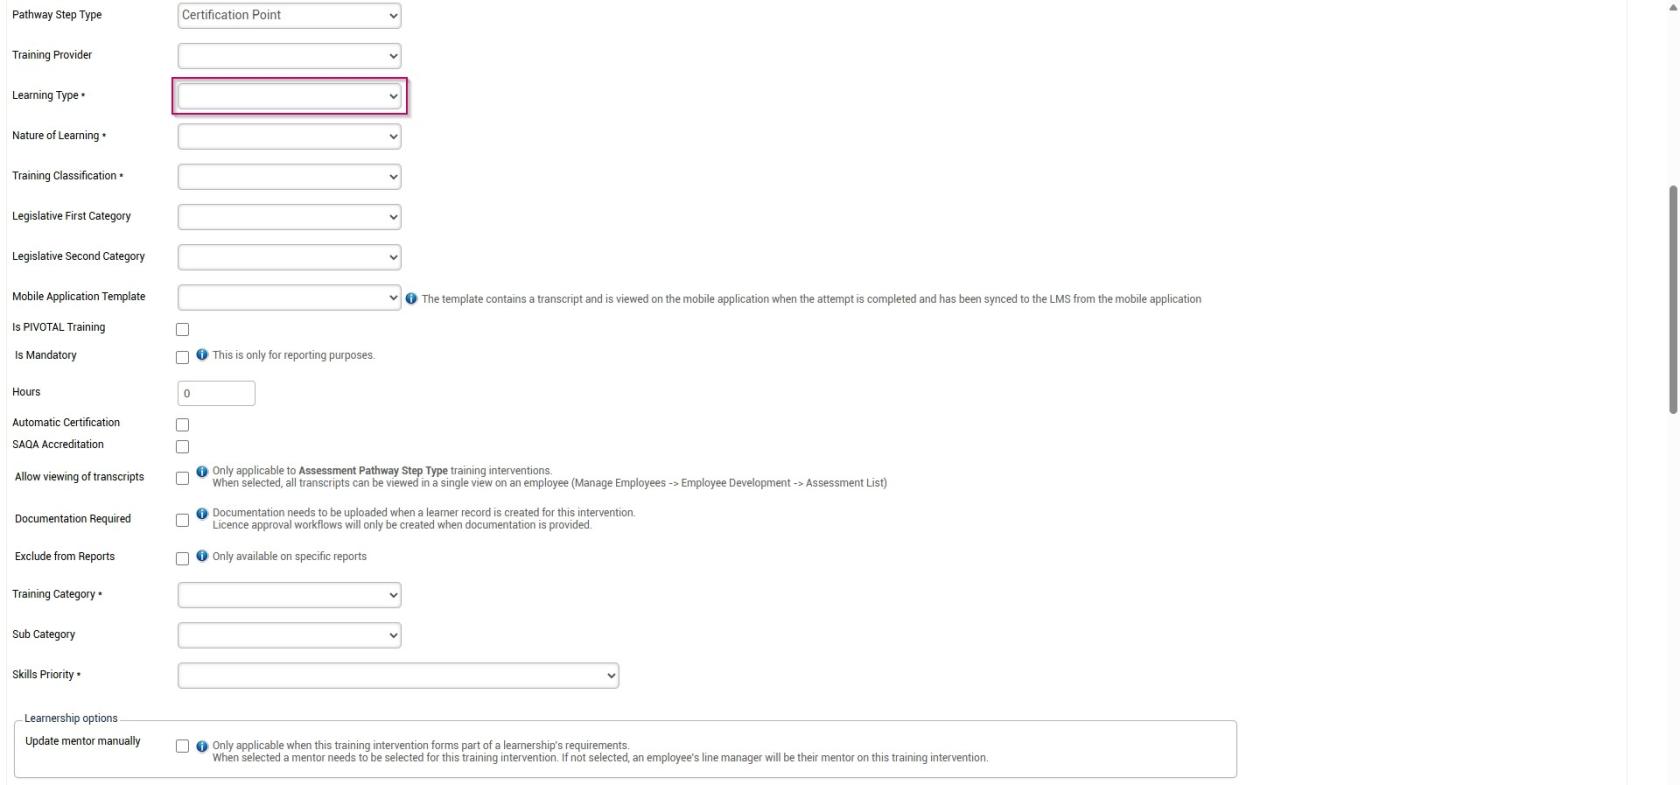
- Select the type of training intervention from the Pathway Step Type drop-down menu.
- Select the Learning Type from the drop-down menu.
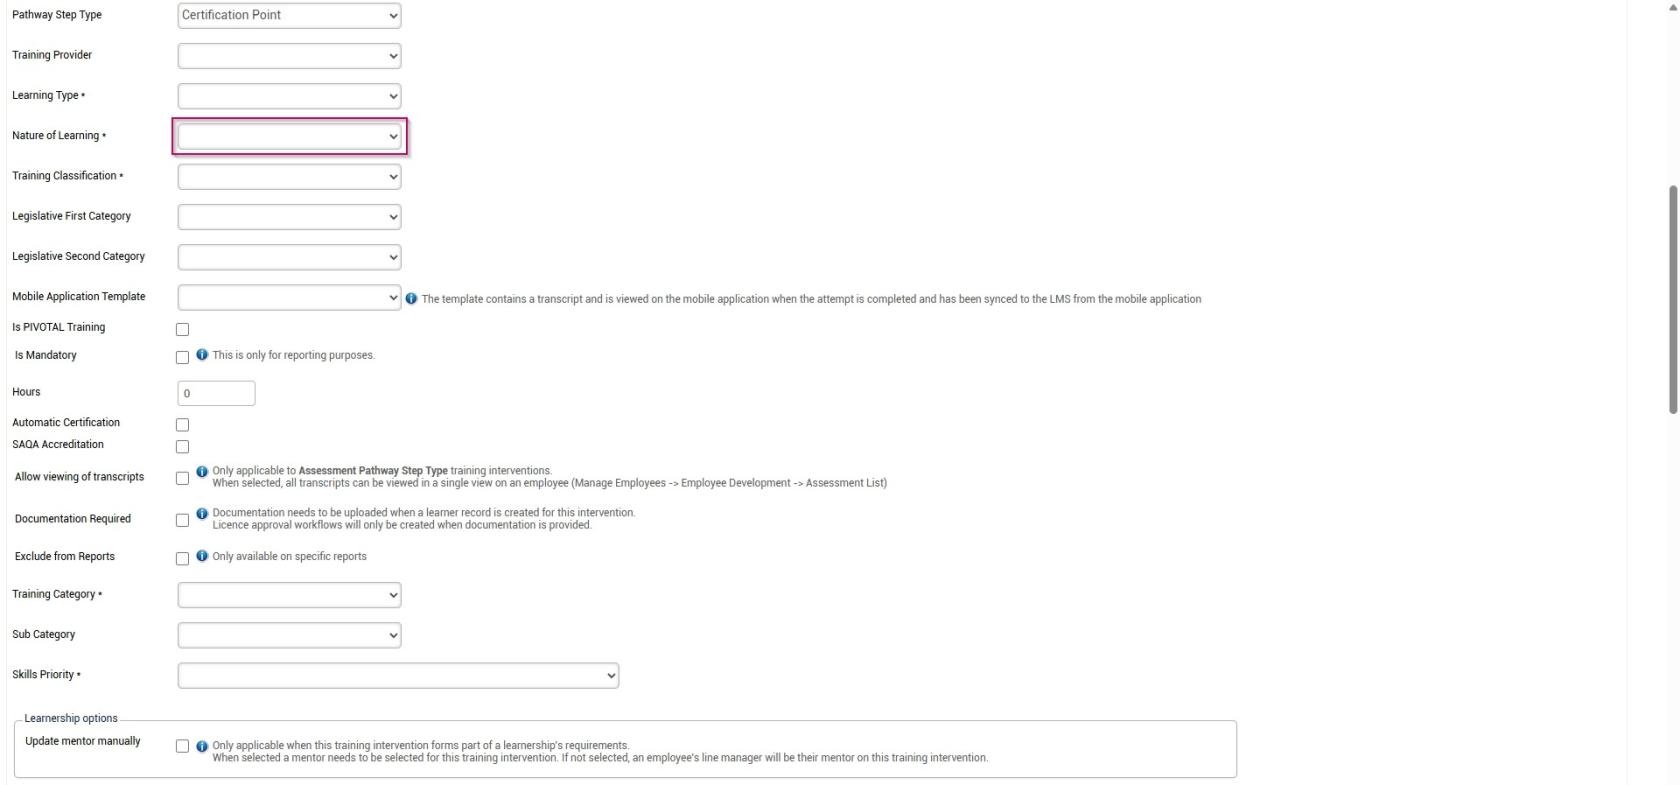
- Select the Nature of Learning from the drop-down menu.
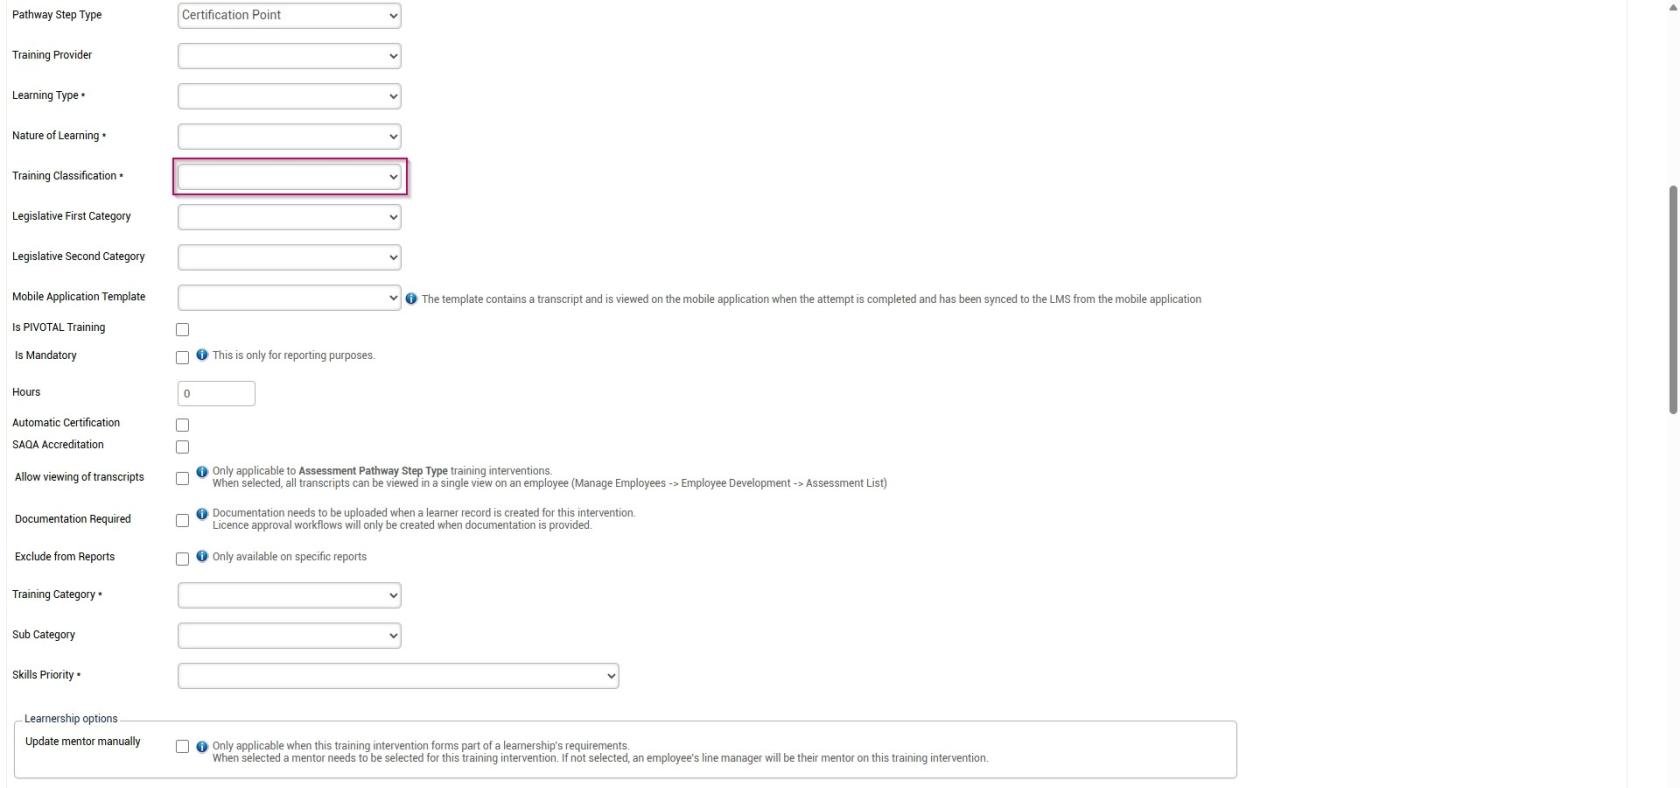
- Select the Training Classification from the drop-down menu.
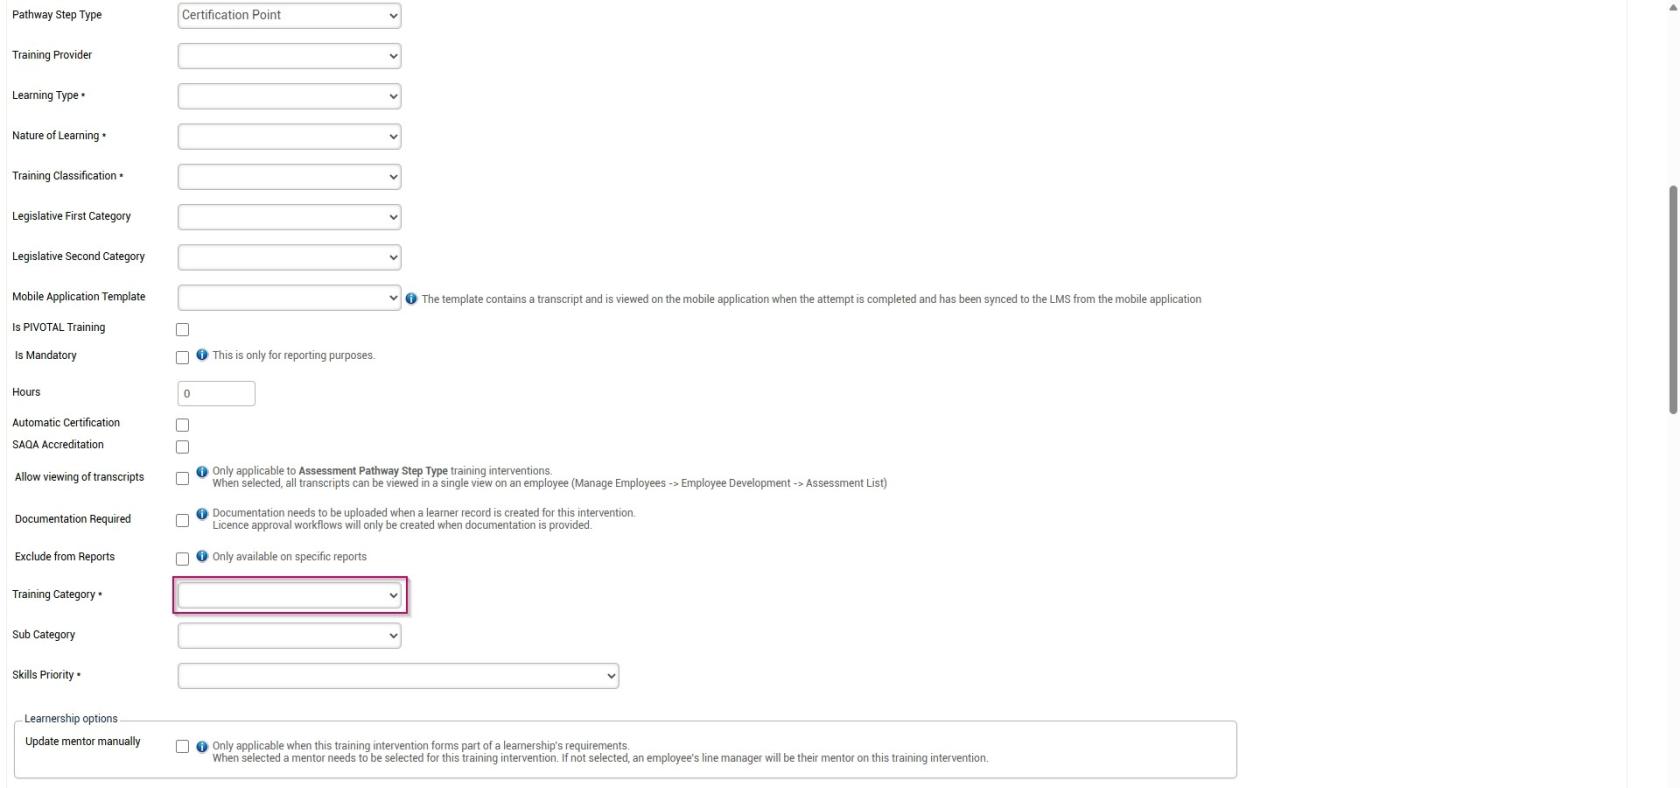
- Select the Training Category from the drop-down menu.
- Select the Skills Priority from the drop-down menu.
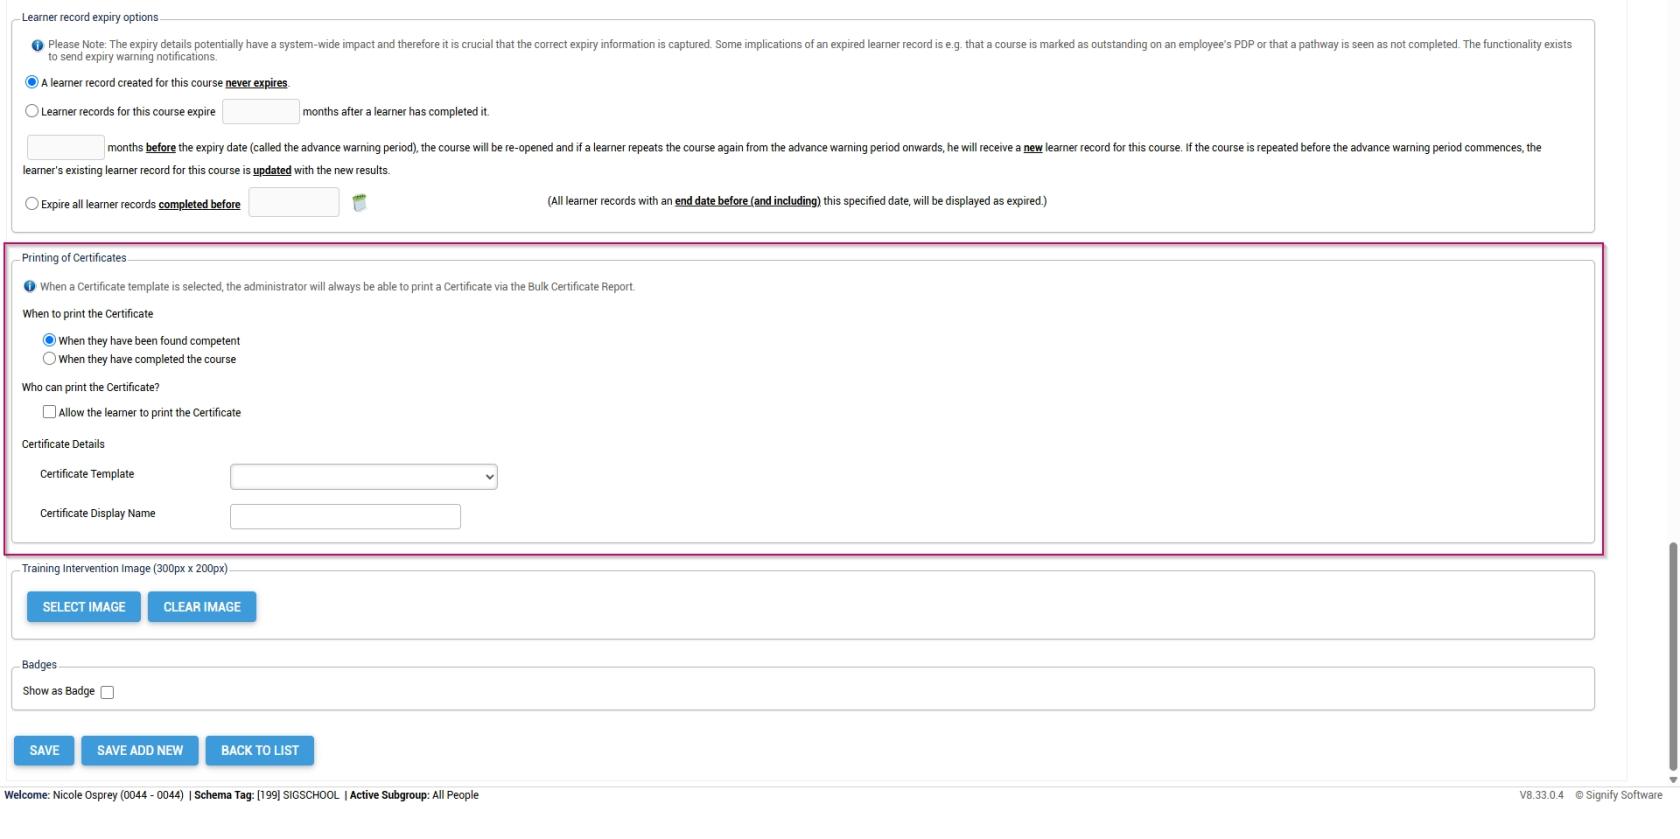
- Configure the settings for the expiry of learner records.

- Configure the settings for the printing of certificates.
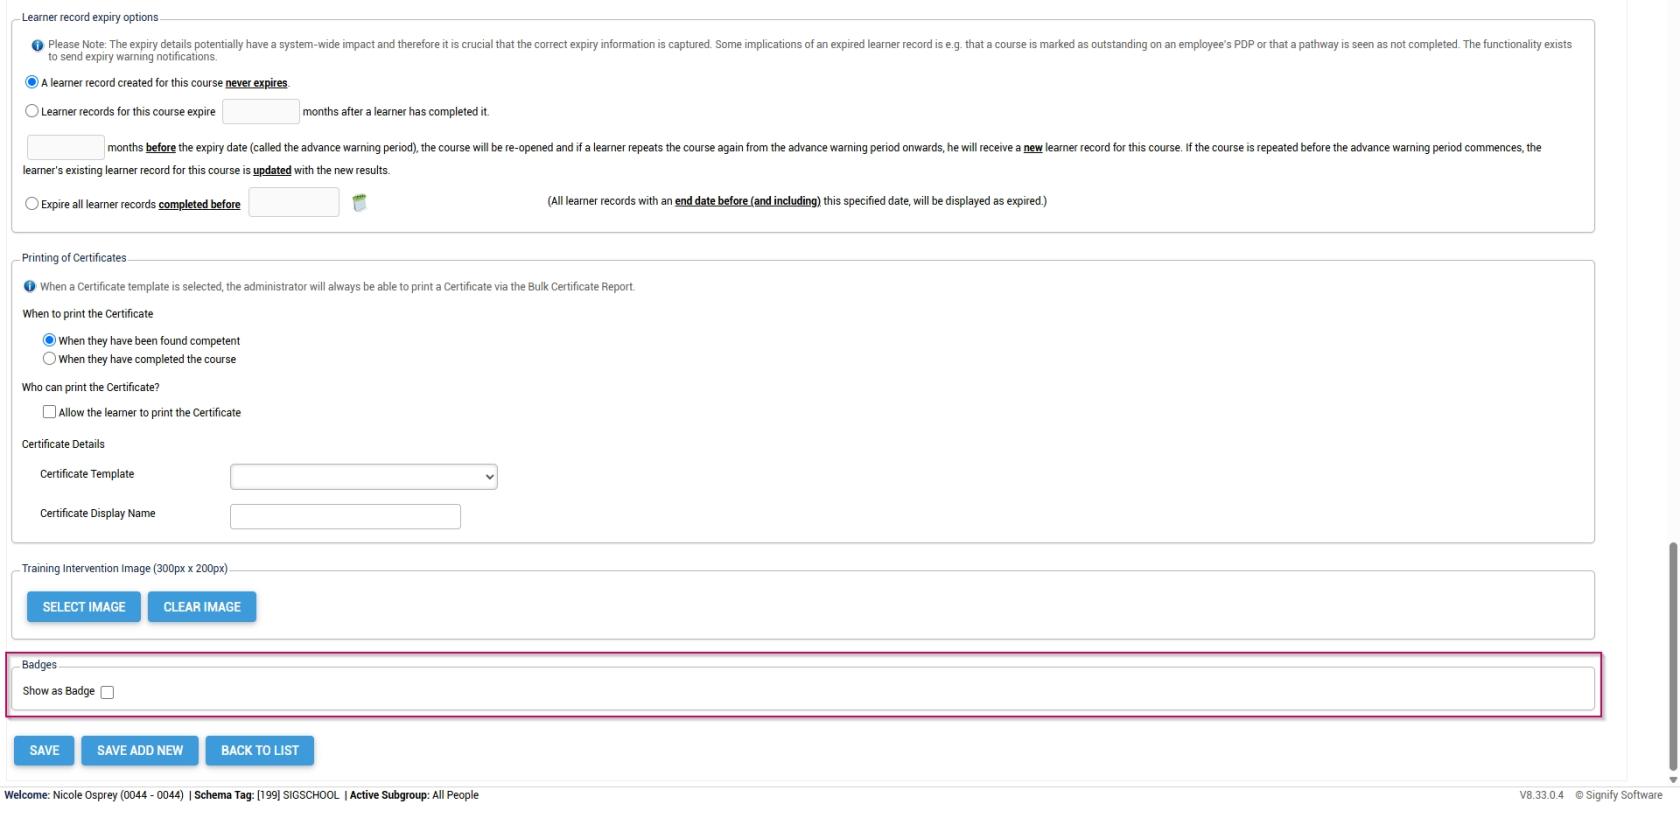
- If you employ a gamification strategy in your learning environment, you can display a completed course as a badge and assign points for leaderboard tracking.
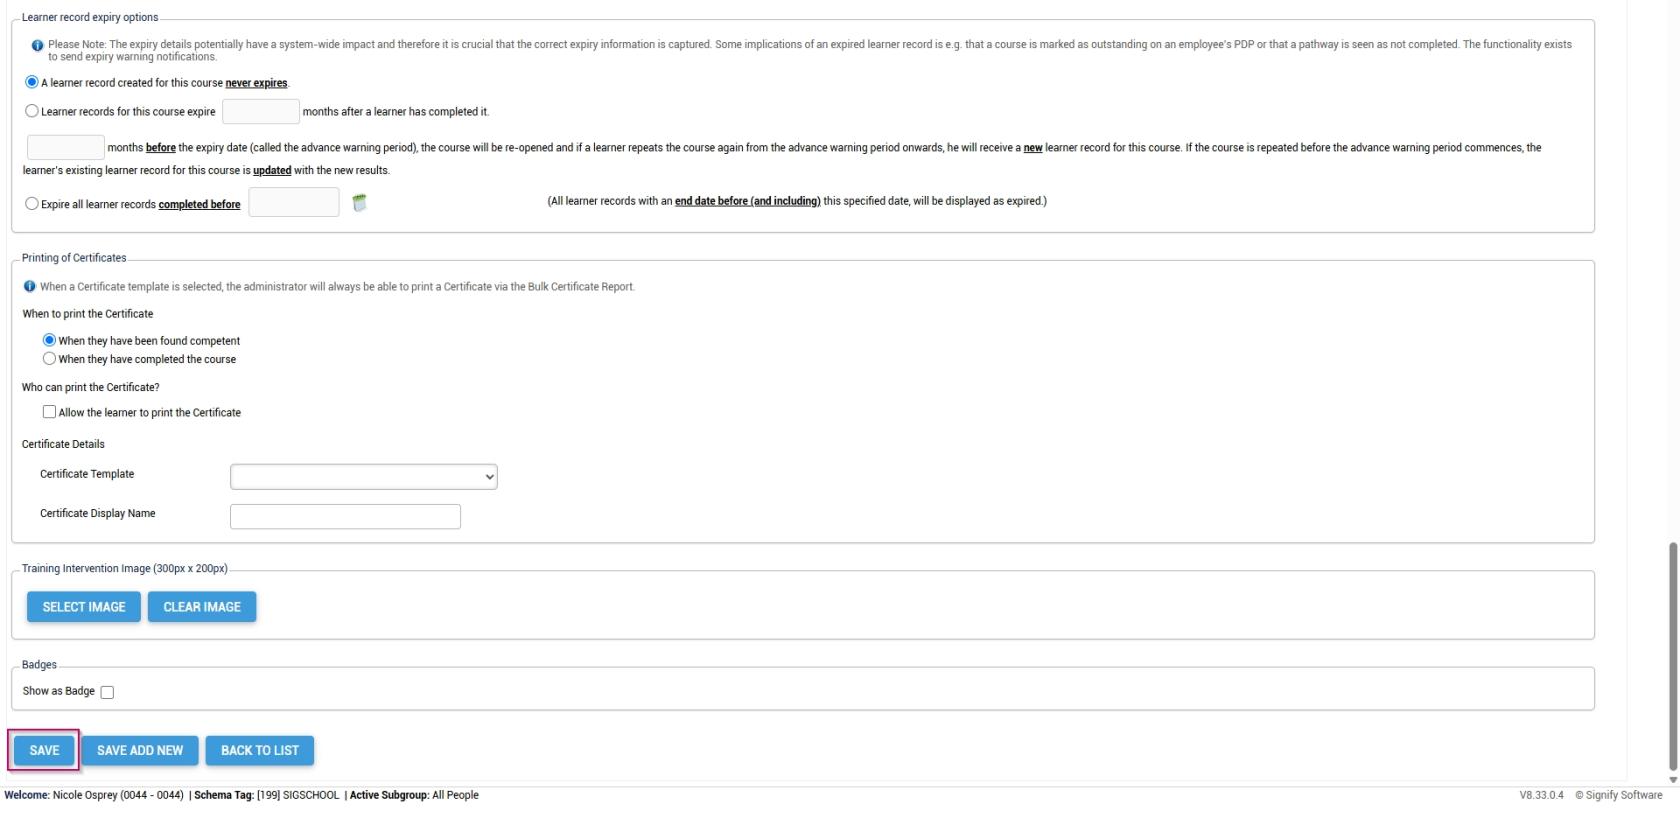
- Click SAVE when you are finished, SAVE ADD NEW to add another training intervention or click BACK TO LIST to discard your edits.
Method 2: Add training interventions using the import
- Hover over the sidebar menu, then click Learning Portal.
- Click the spanner icon to access the system's Administration menu.
- On the Learning Libraries card, click Training Interventions.
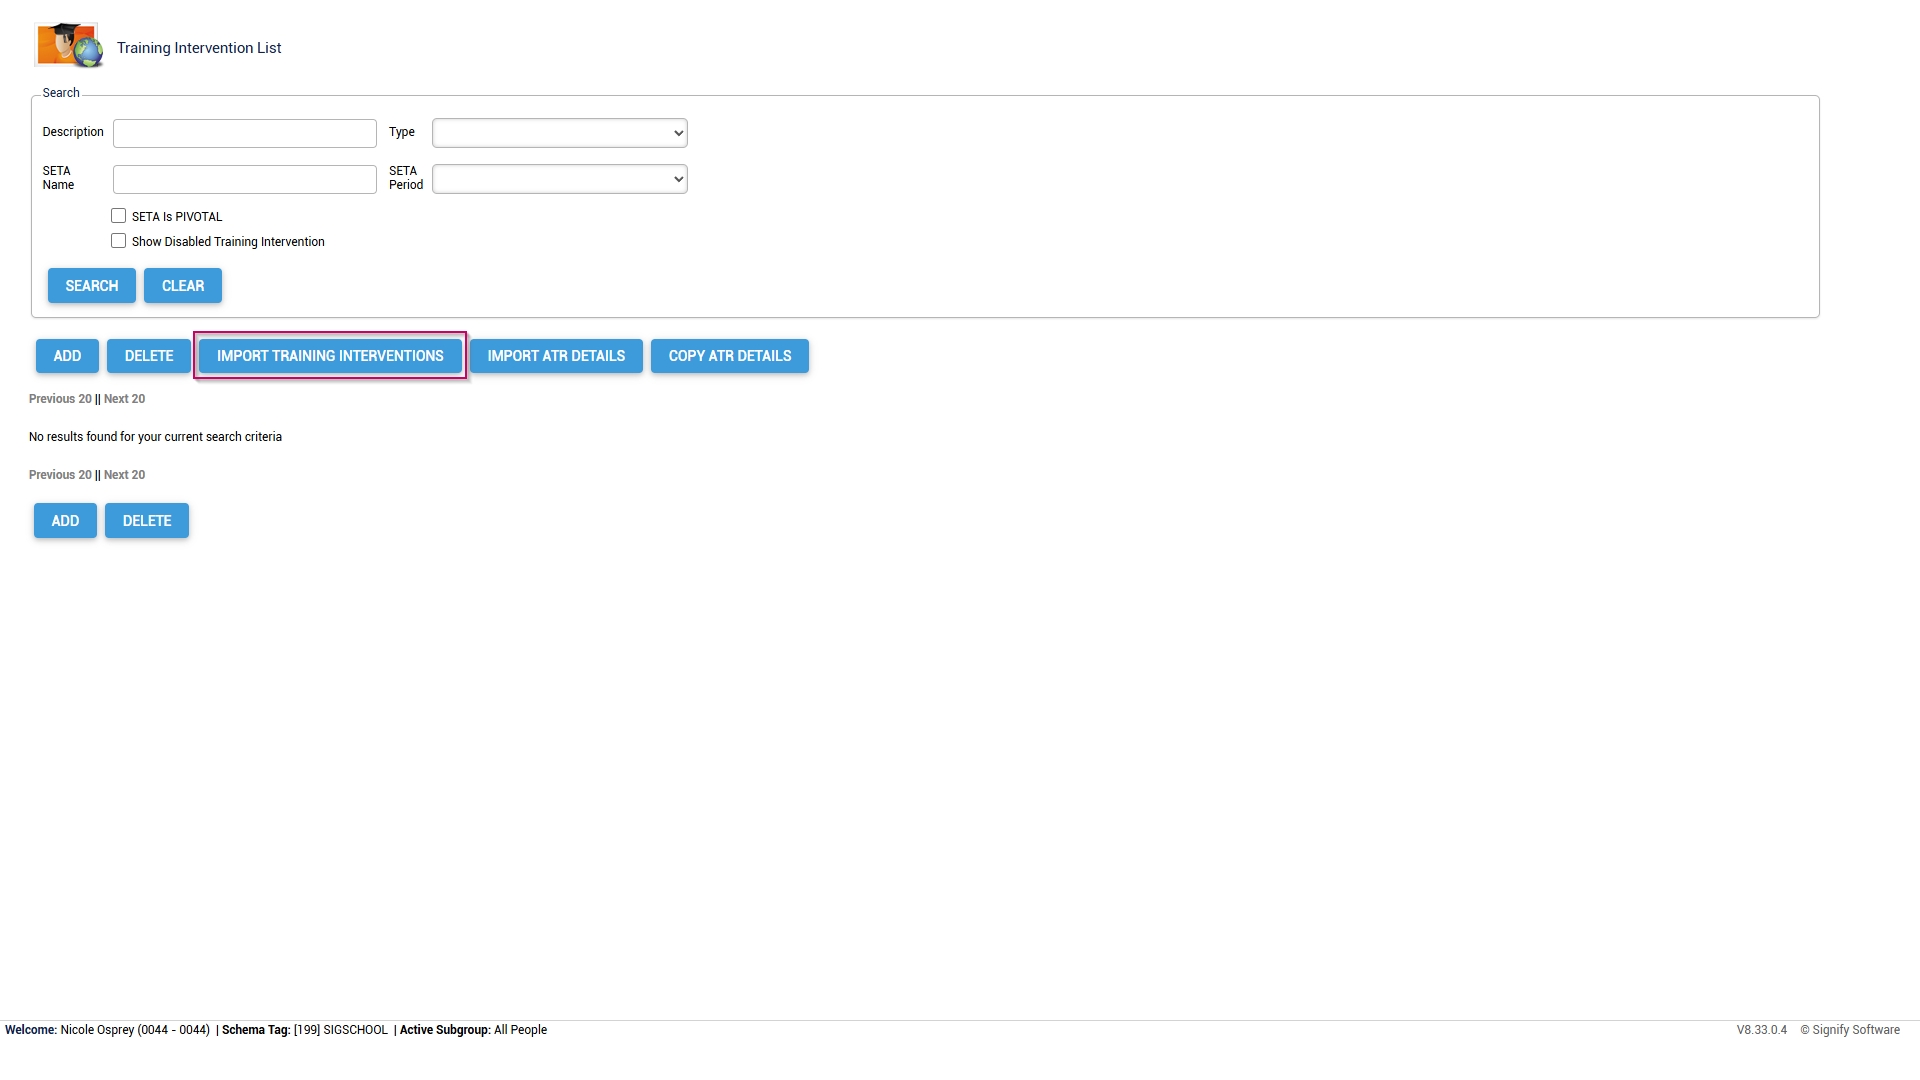
- The Training Intervention Library will open. This is where training interventions can be created, edited, or deleted. Click IMPORT TRAINING INTERVENTIONS to begin.
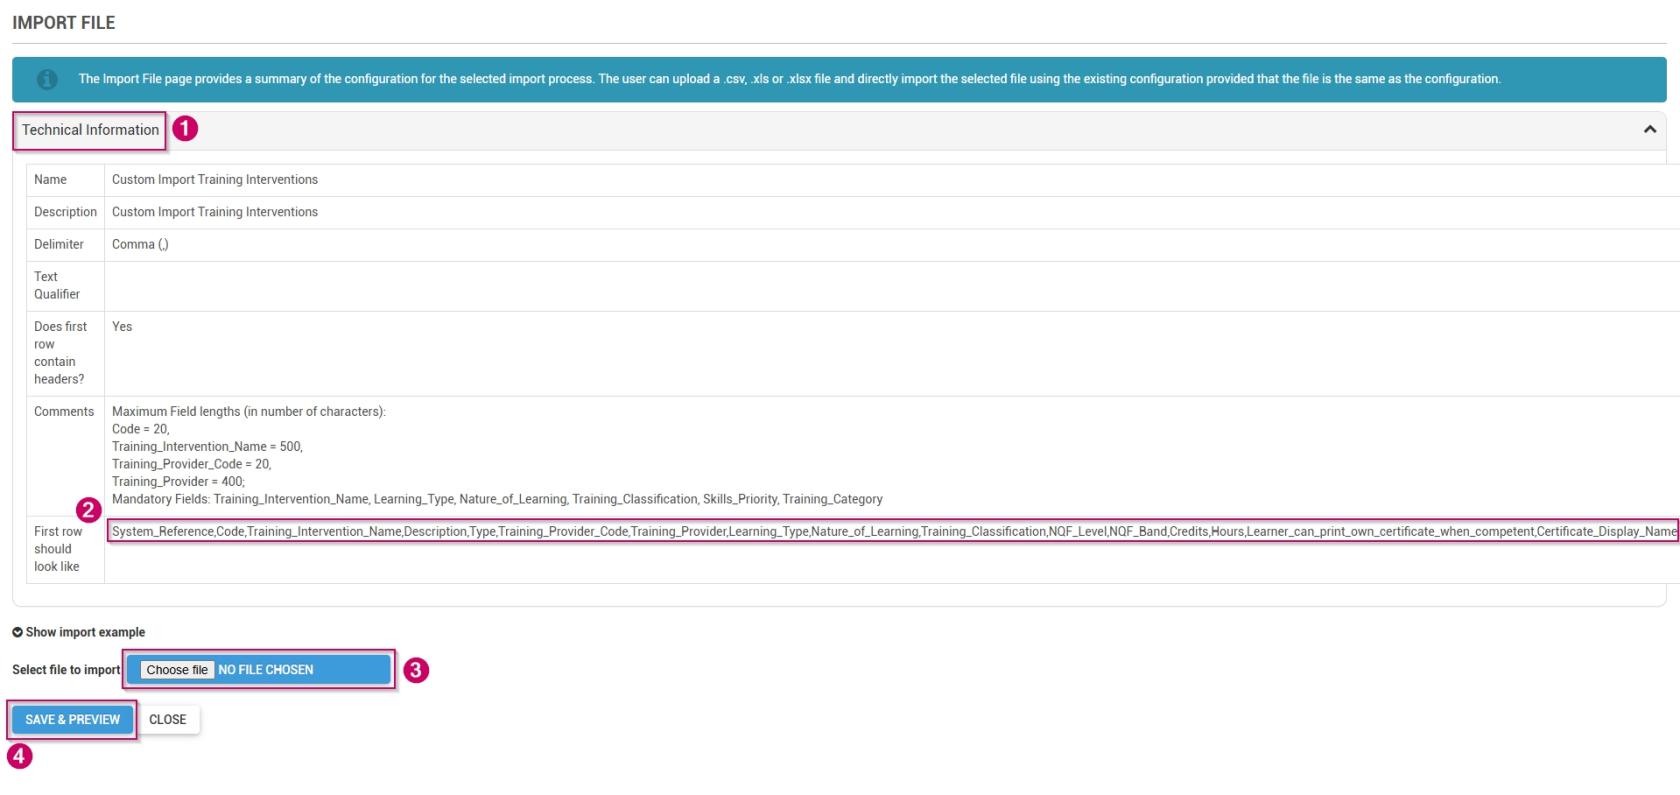
- Click on the Technical Information section.
-
- Take note of the maximum field lengths for each category.
-
- Copy the data in the section titled First row should look like.
-
- Use this data to construct a training intervention import file.
- For more information and a step-by-step guide on how to do this, go to the next section: Create a custom Training Intervention file in Excel.
-
- Once you have populated your training intervention document, click CHOOSE FILE to upload your import file as a .csv, .xls, or .xlsx.
- Click SAVE & PREVIEW.
- Review the preview of your data import. If the data appears correct, tick the checkbox to confirm it.
- You are now ready to kick off the import.
-
- You can execute a mock import to ensure all the data displays correctly. This is recommended for very large import files. To do this, click EXECUTE MOCK IMPORT.
- If the data is ready to be imported, click EXECUTE IMPORT.
-

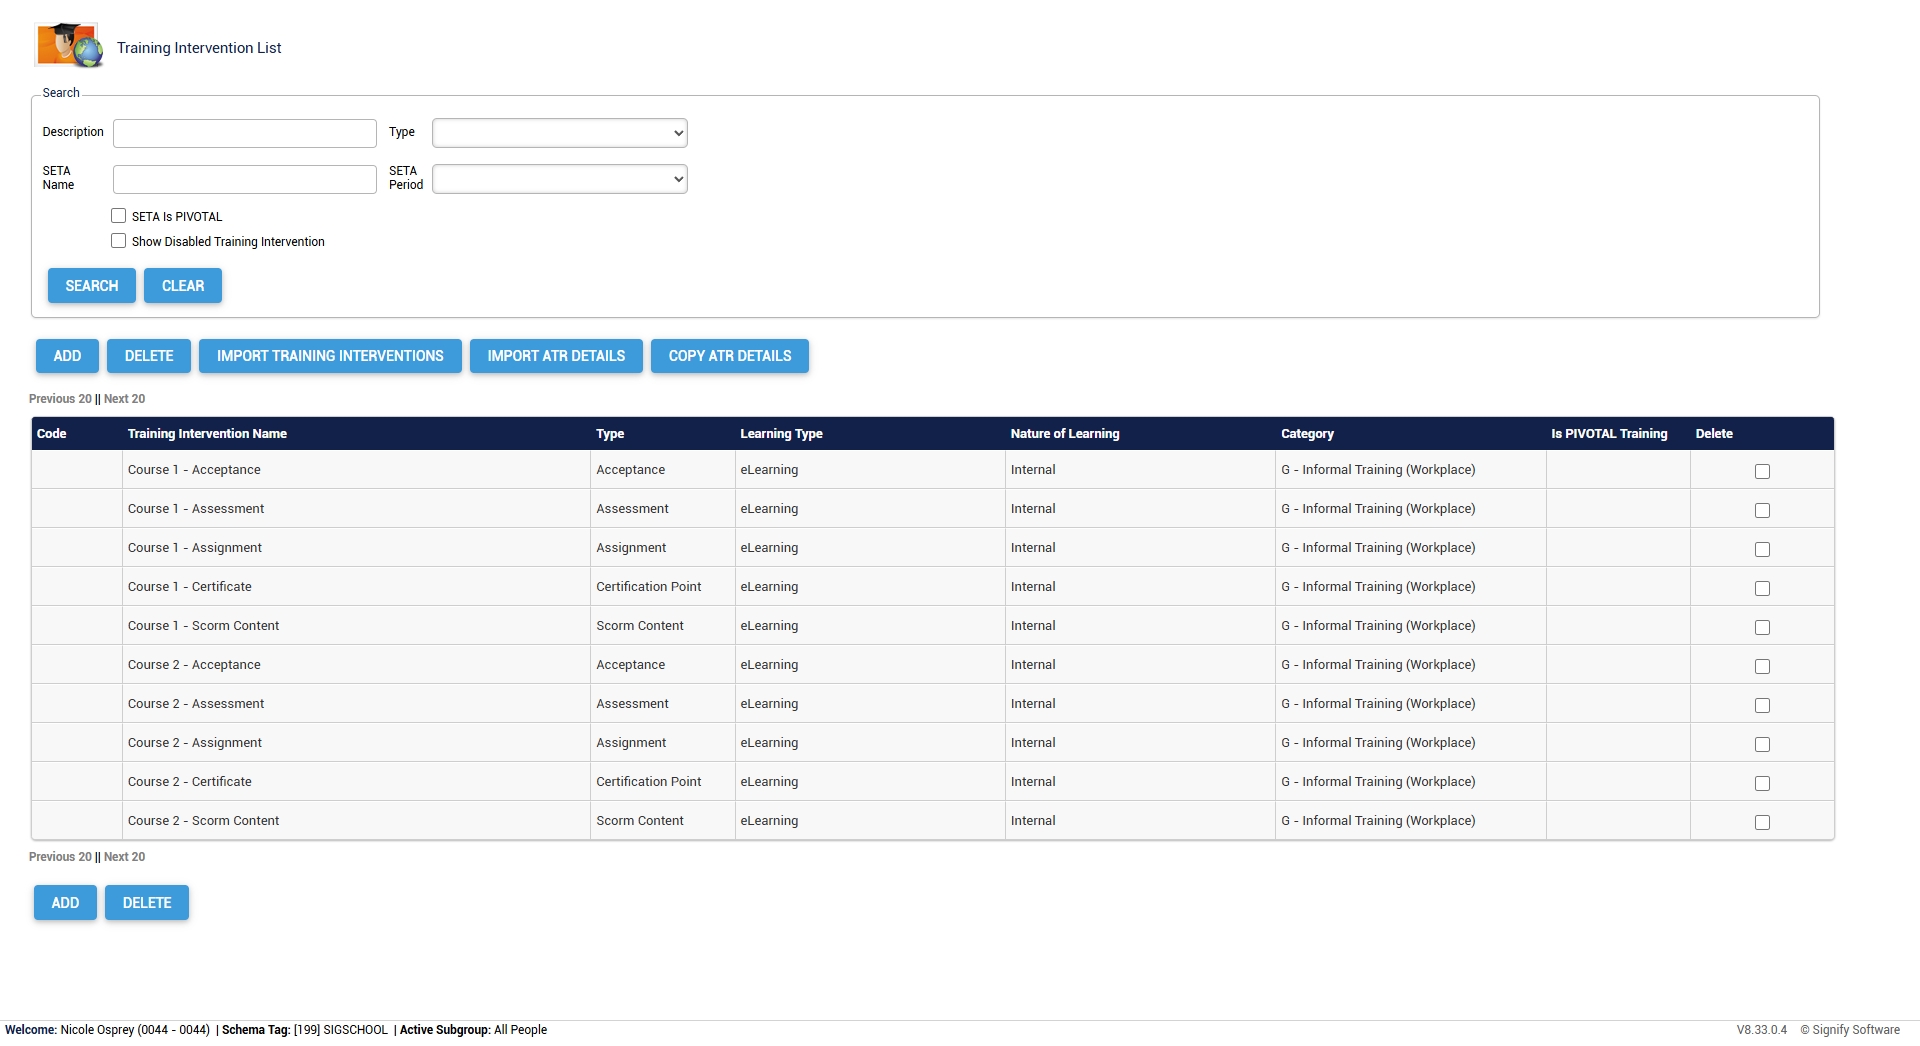
- Your Training Intervention Library is now populated with your new training interventions. If you do not see your training interventions, please refresh your browser window.
Create a custom Training Intervention file in Excel
- Copy the following information to your clipboard:
System_Reference,Code,Training_Intervention_Name,Description,Type,Training_Provider_Code,Training_Provider,Learning_Type,Nature_of_Learning,Training_Classification,NQF_Level,NQF_Band,Credits,Hours,Learner_can_print_own_certificate_when_competent,Certificate_Display_Name,Training_Scheduling_Category,Participants_Min,Participants_Max,Outcomes,Skills_Priority,Prerequisite,Training_Category,Log_to_Learner_Record,Learner_Record_Never_Expires,Advanced_Warning_Period,Expire_All_Learner_Records_Completed_Before,Learner_Records_Expiry,Exclude_From_Reports,WSP_ATR_Category,PTP_PTR_Category,DocumentationRequired,AllowViewingTranscripts,IsPivotalTraining,IsMandatory,Mobile_Application_Template,Automatic_Certification,SAQA_Accredited,Update_Mentor_Manually,ImageUrl,BadgeUrl,ShowBadgeWhen,MinPoints,MaxPoints,MinScore,MaxScore,BadgeExpiryMonths,BadgeShowScoreDistributionGraph,BadgeShowLeaderboard
- Open the Excel application and create a new workbook.
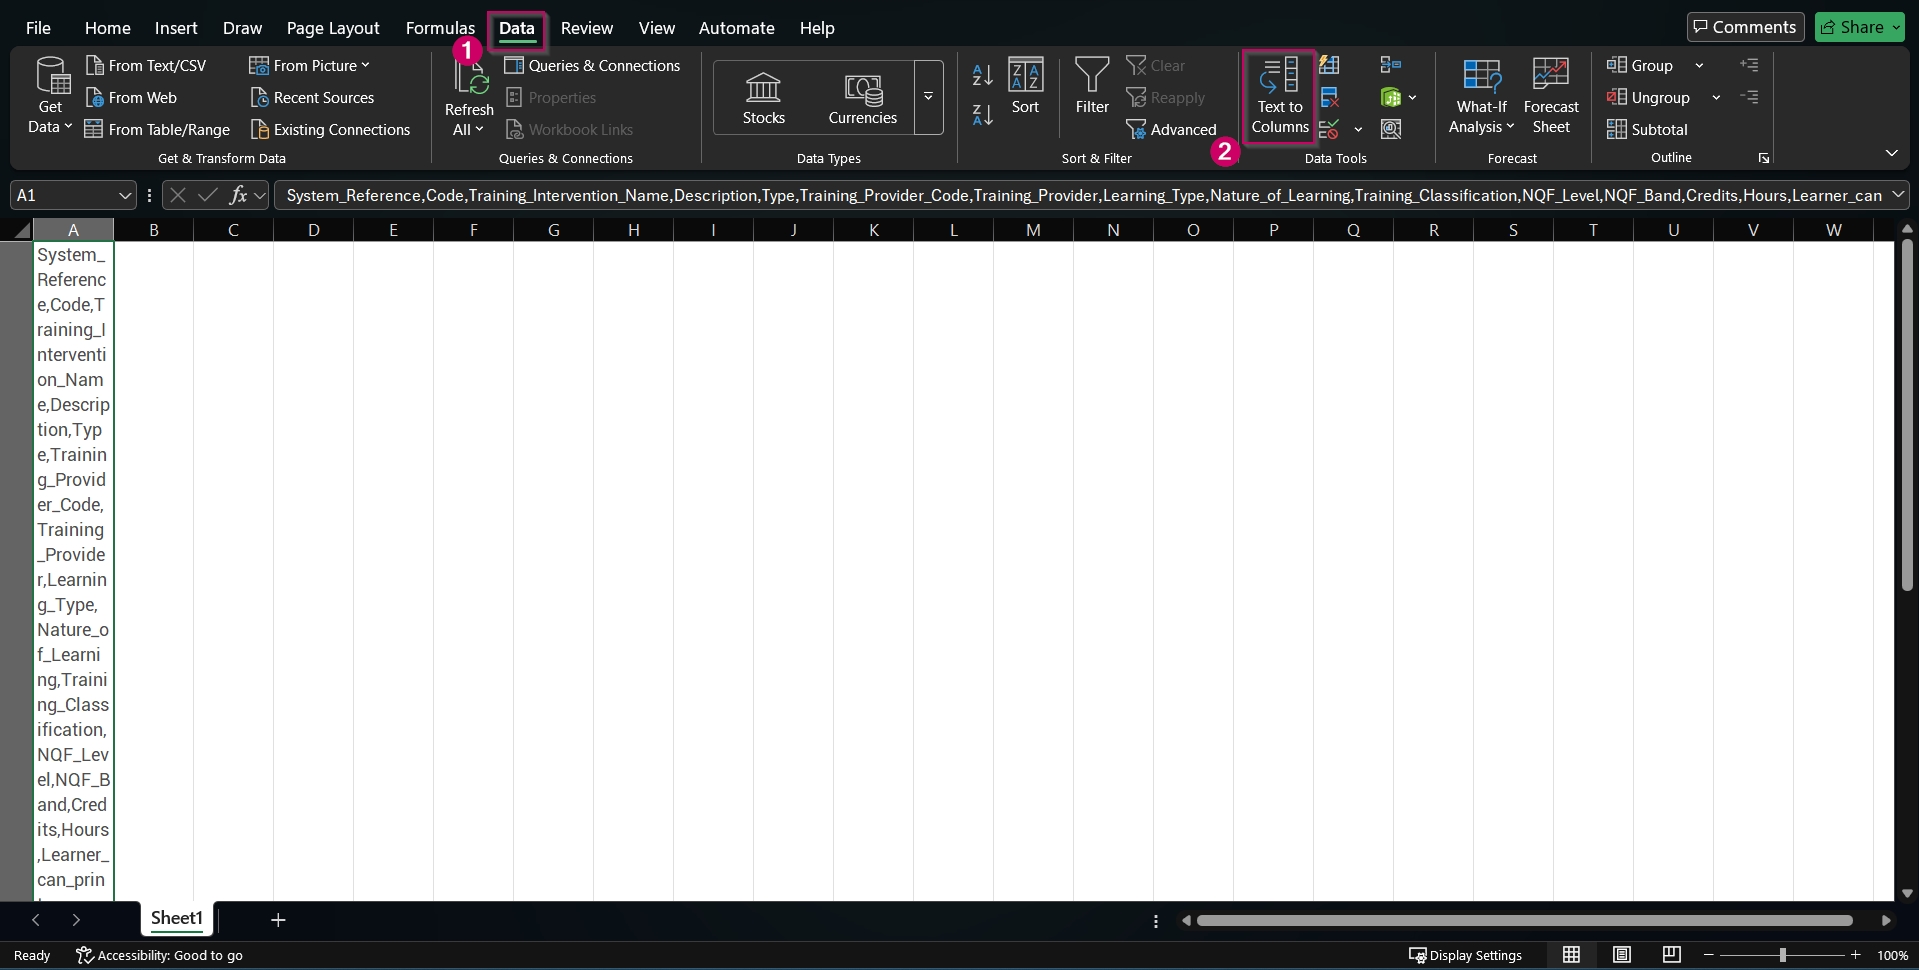
- Paste the information into the first cell of the new workbook.
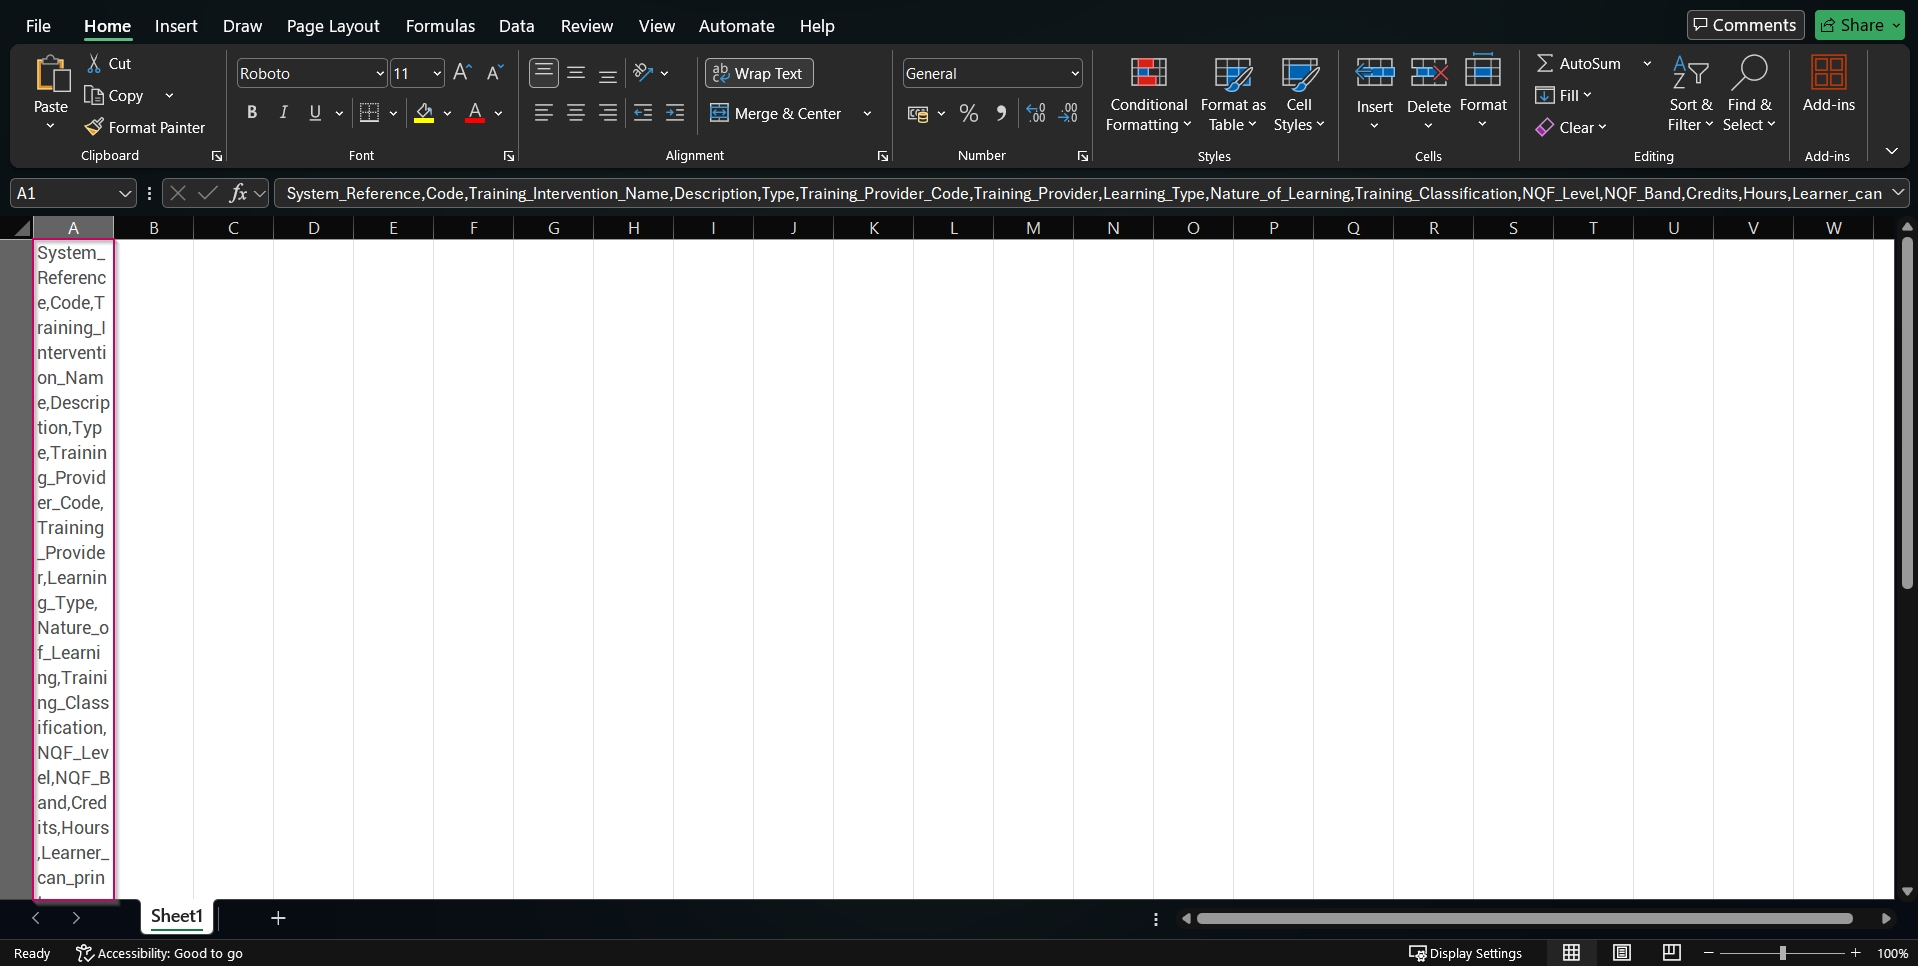
- Ensuring the first cell is selected, navigate to the Data tab. Click the Text to Columns option in the Data Tools section.
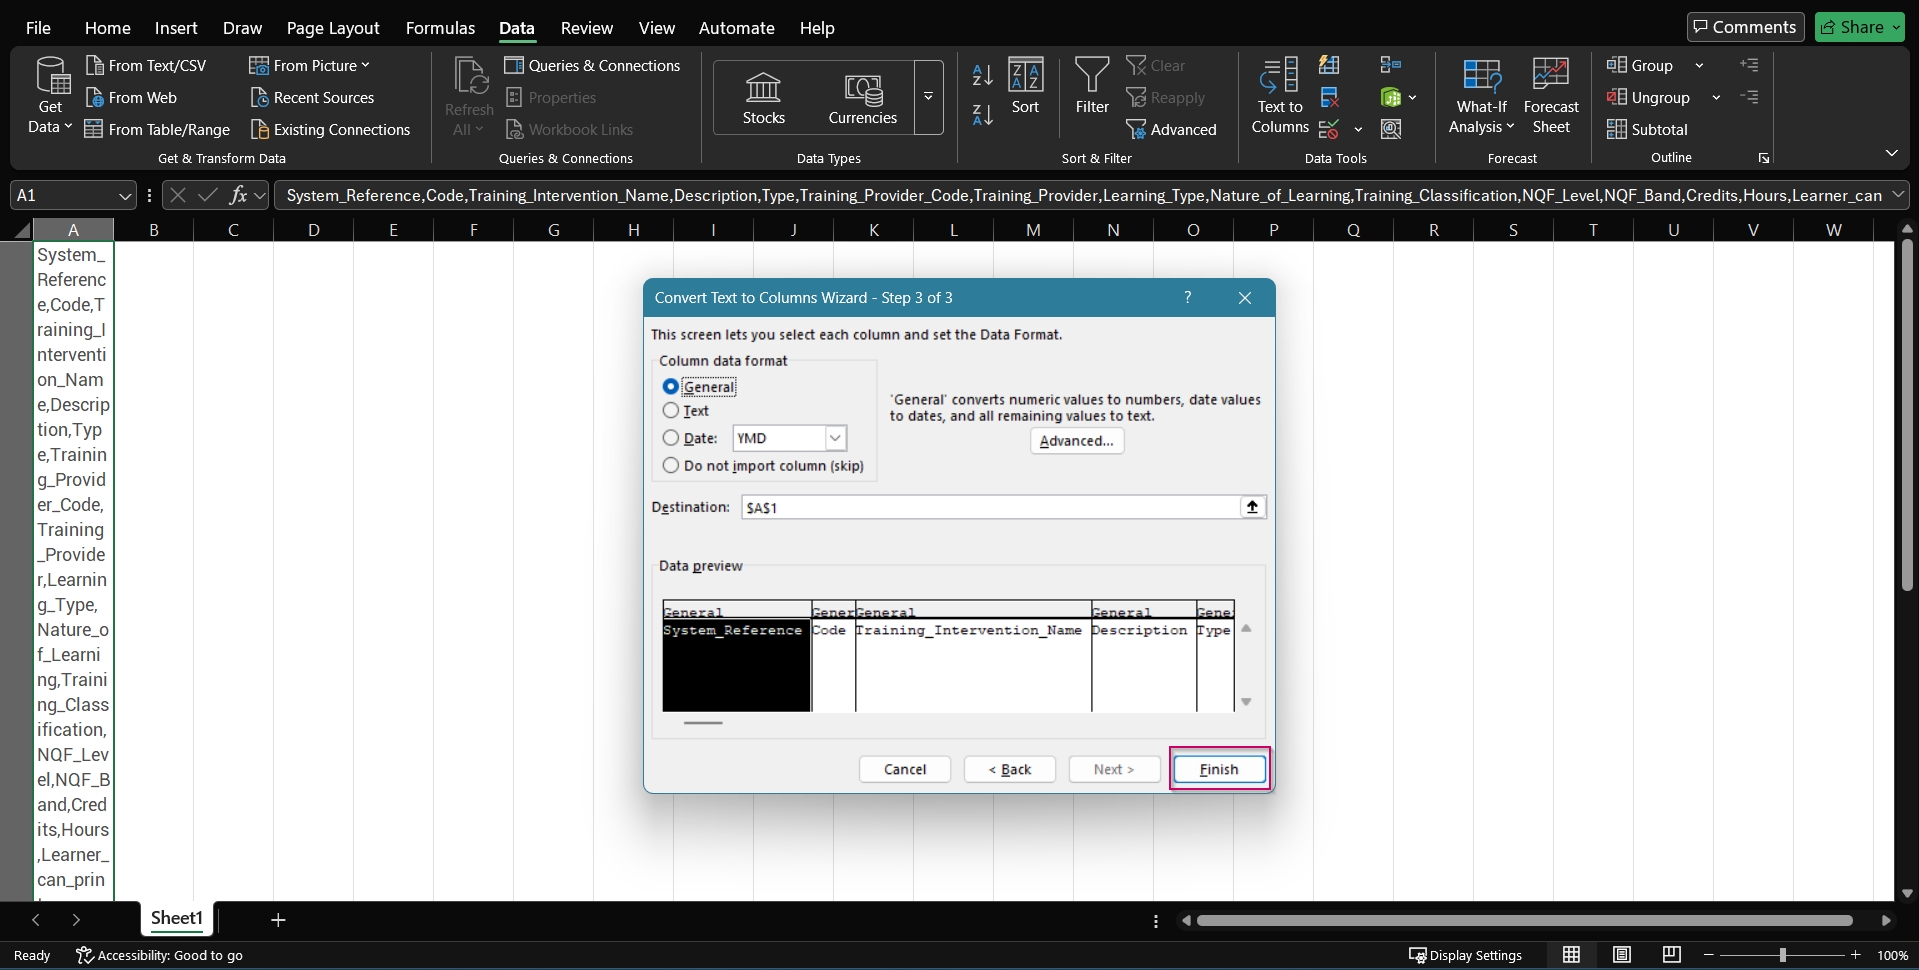
- The Convert Text to Columns Wizard will pop up. Click the Delimited radio button, then click Next.
- In the Delimiters section, ensure ONLY the Comma checkbox is ticked, then click Next.
- Click Finish.
- Your file is now ready to be populated.
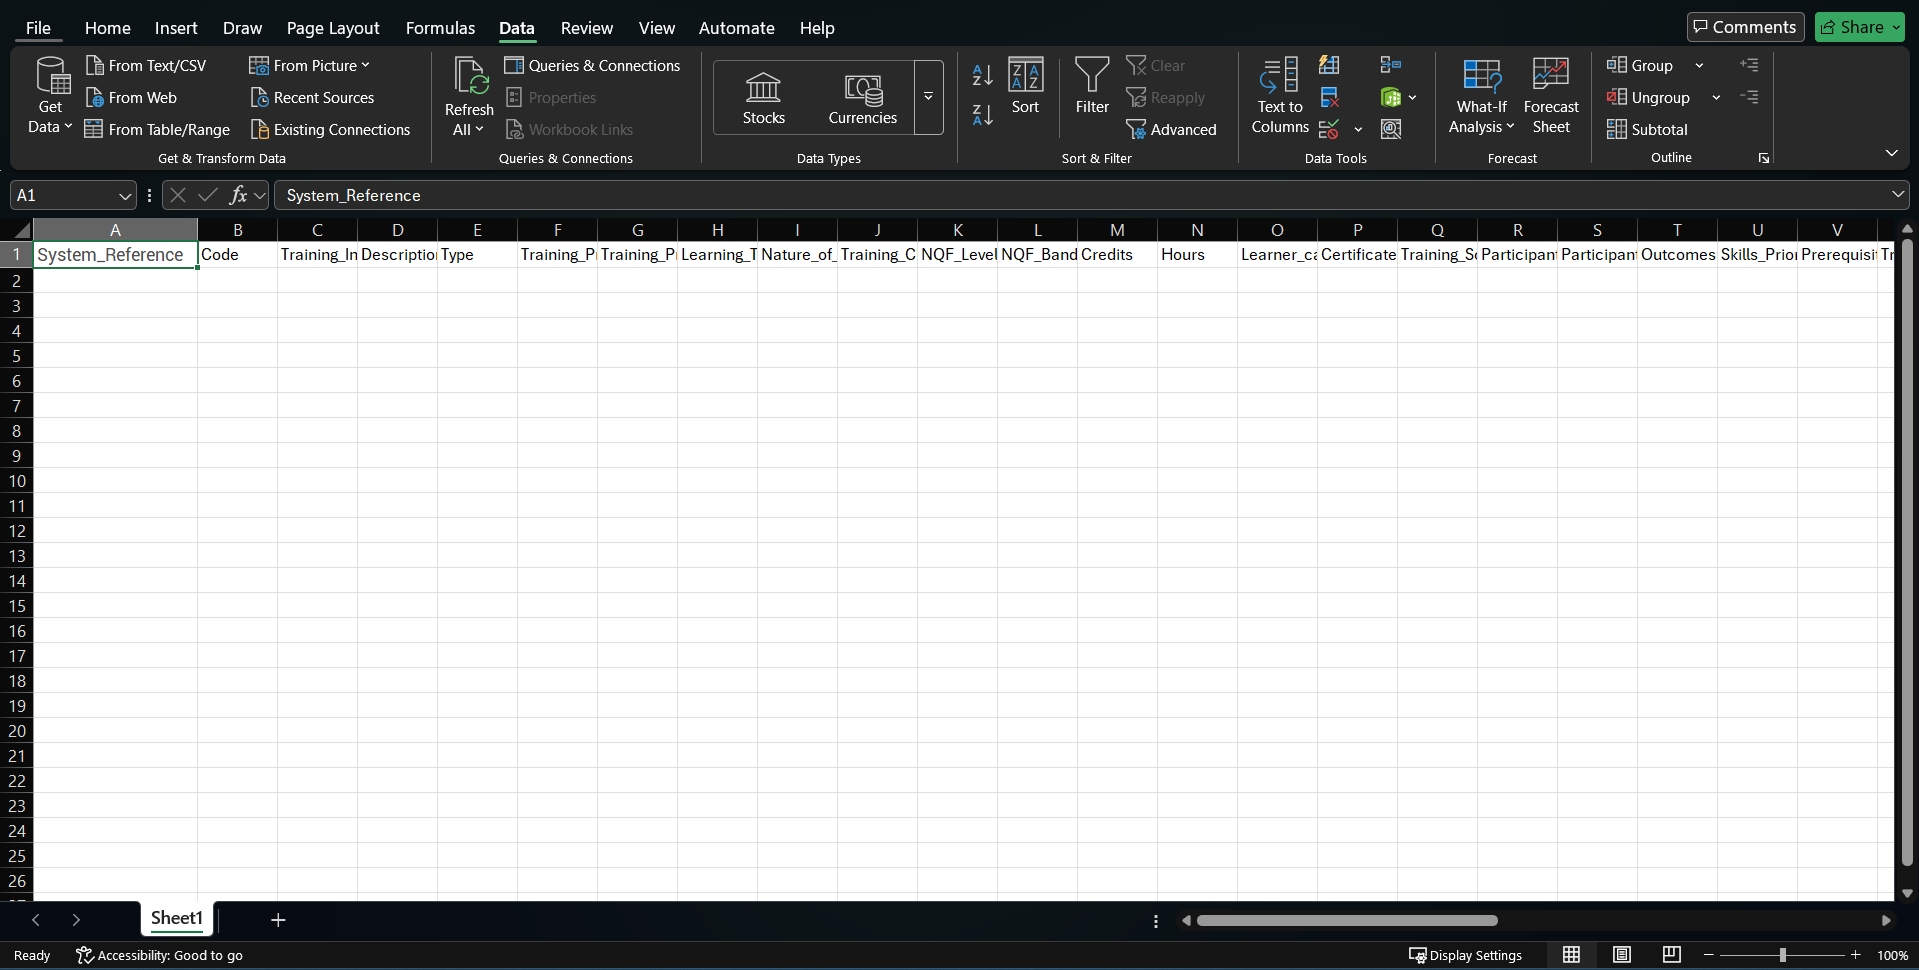
- Please do not enter any data into the System_Reference or Code columns, as these will be updated automatically.
- Save the Excel workbook as a .csv, .xls, or .xlsx file, then use it to import training interventions.
Create learning pathways
Starting with pathways
- Hover over the sidebar menu, then click Learning Portal.
- Click the spanner icon to access the system's Administration menu.
- On the eLearning card, click Manage eLearning Library.
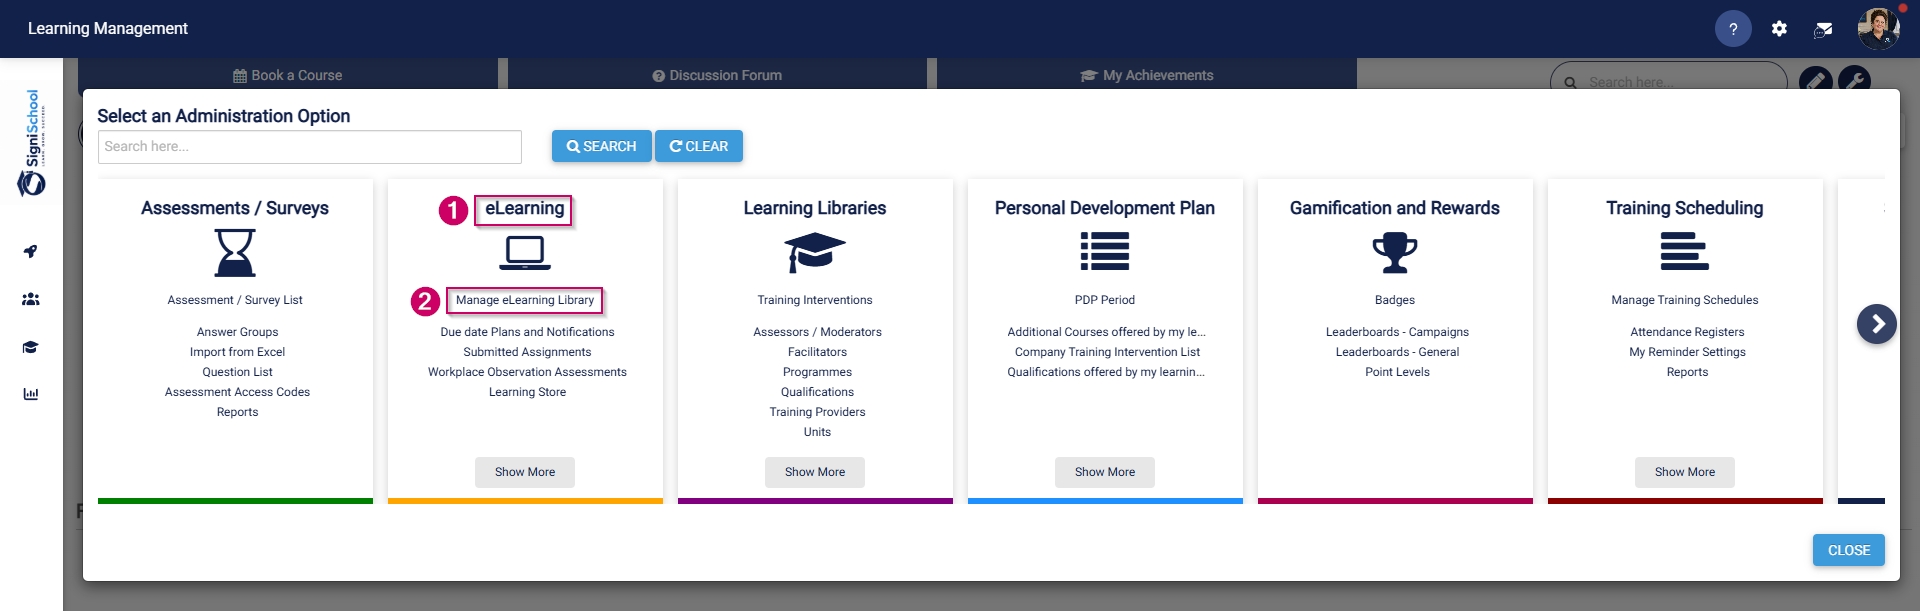
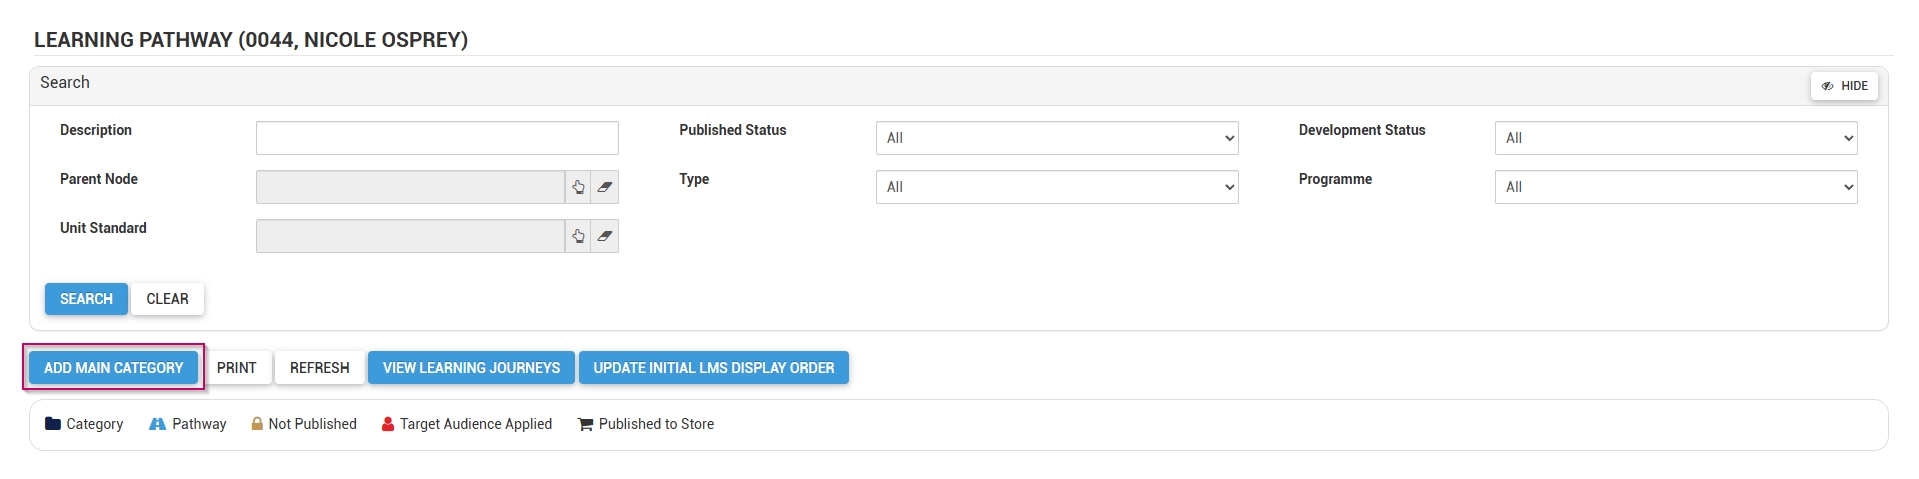
- The Pathways Tree View screen will open in a new tab.
- Click ADD MAIN CATEGORY.
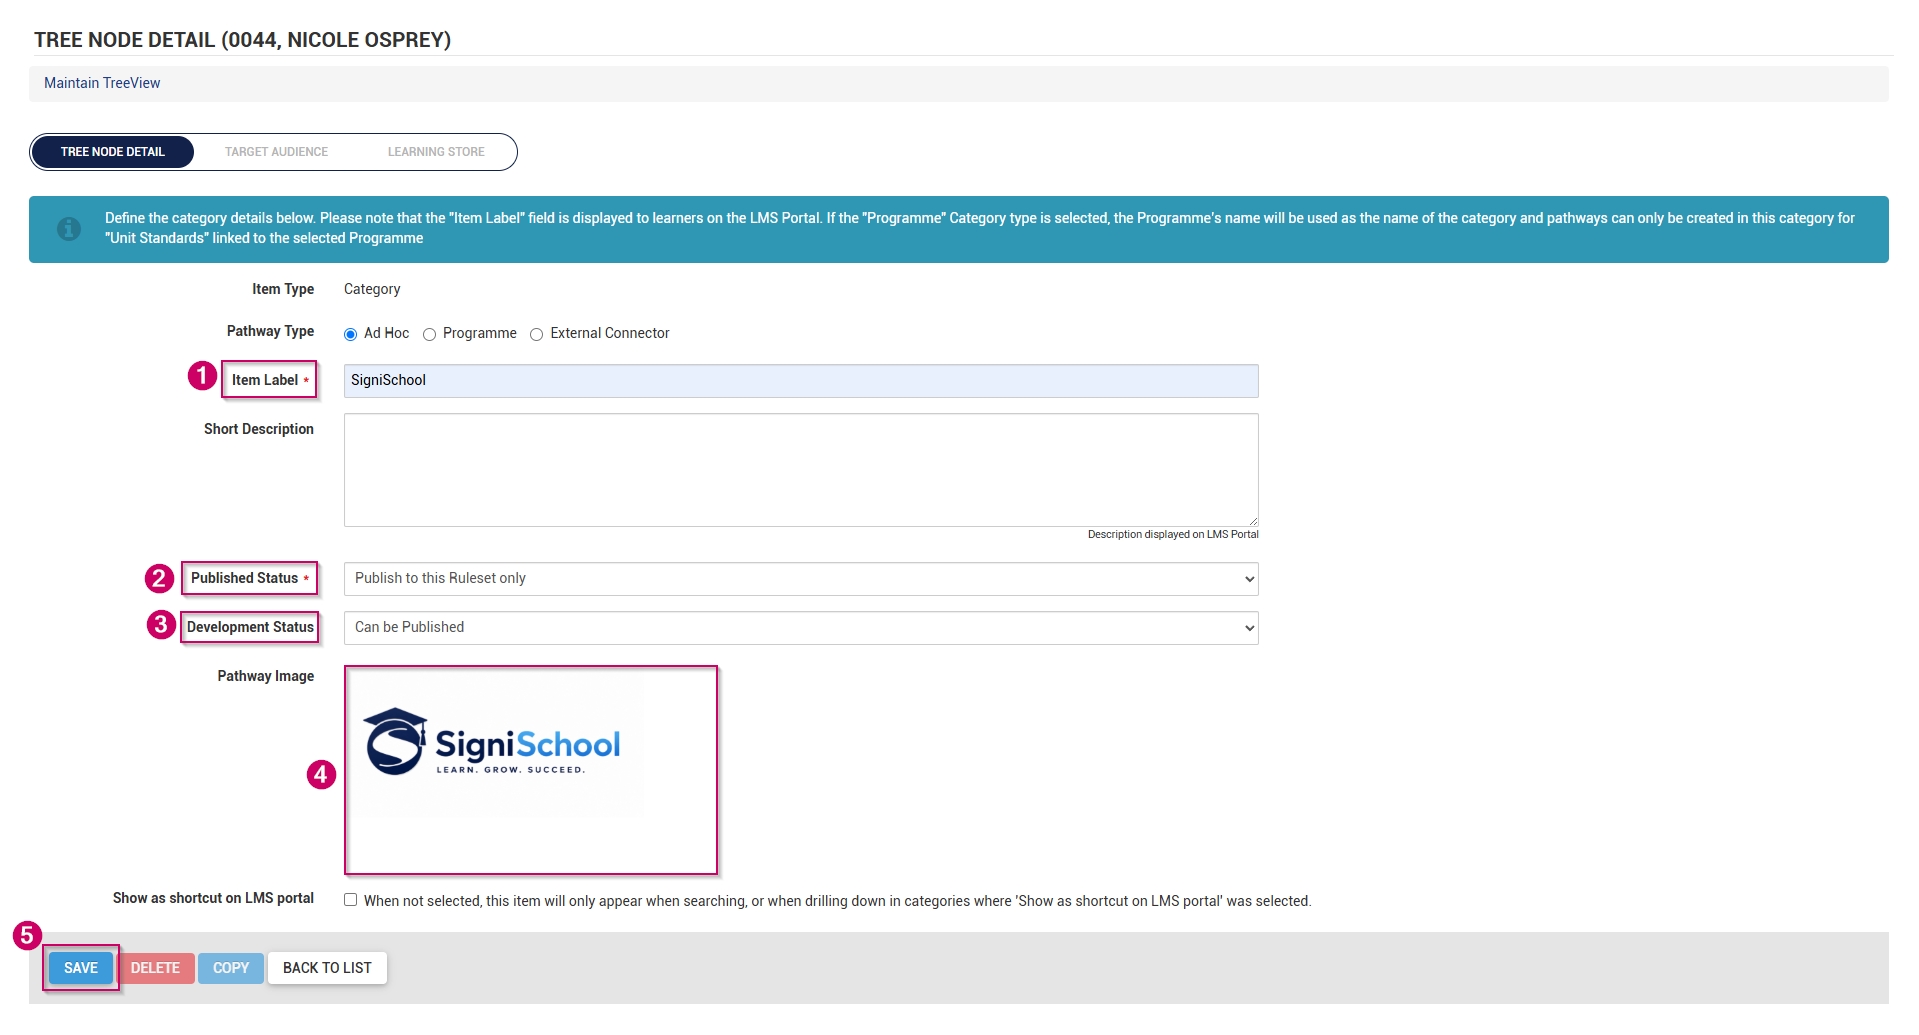
- Add a name for the category.
- Optionally, add a short description for the category.
- From the drop-down menu, select the published status as Publish to this Ruleset only.
- From the drop-down menu, select Can be Published to set the development status.
- Choose an image for the category. When adding your own image, ensure the aspect ratio is 300 by 200 px and that it is in .png, .jpg, or .gif format.
- If the main category should display on the Learning Portal, tick the Show as shortcut on LMS portal checkbox.
-
- Please be aware that selecting a main category on the Learning Portal and checking this box for related pathways in that category may lead to duplicate entries appearing on the Learning Portal screen.
- If the main category appears on the Learning Portal, its pathways are accessible through the drill-down feature, so there's no need to tick this checkbox for those pathways.
- It is recommended to try out this feature to determine the most effective way for you.
-
- Click SAVE when you are finished or click BACK TO LIST to discard your edits.
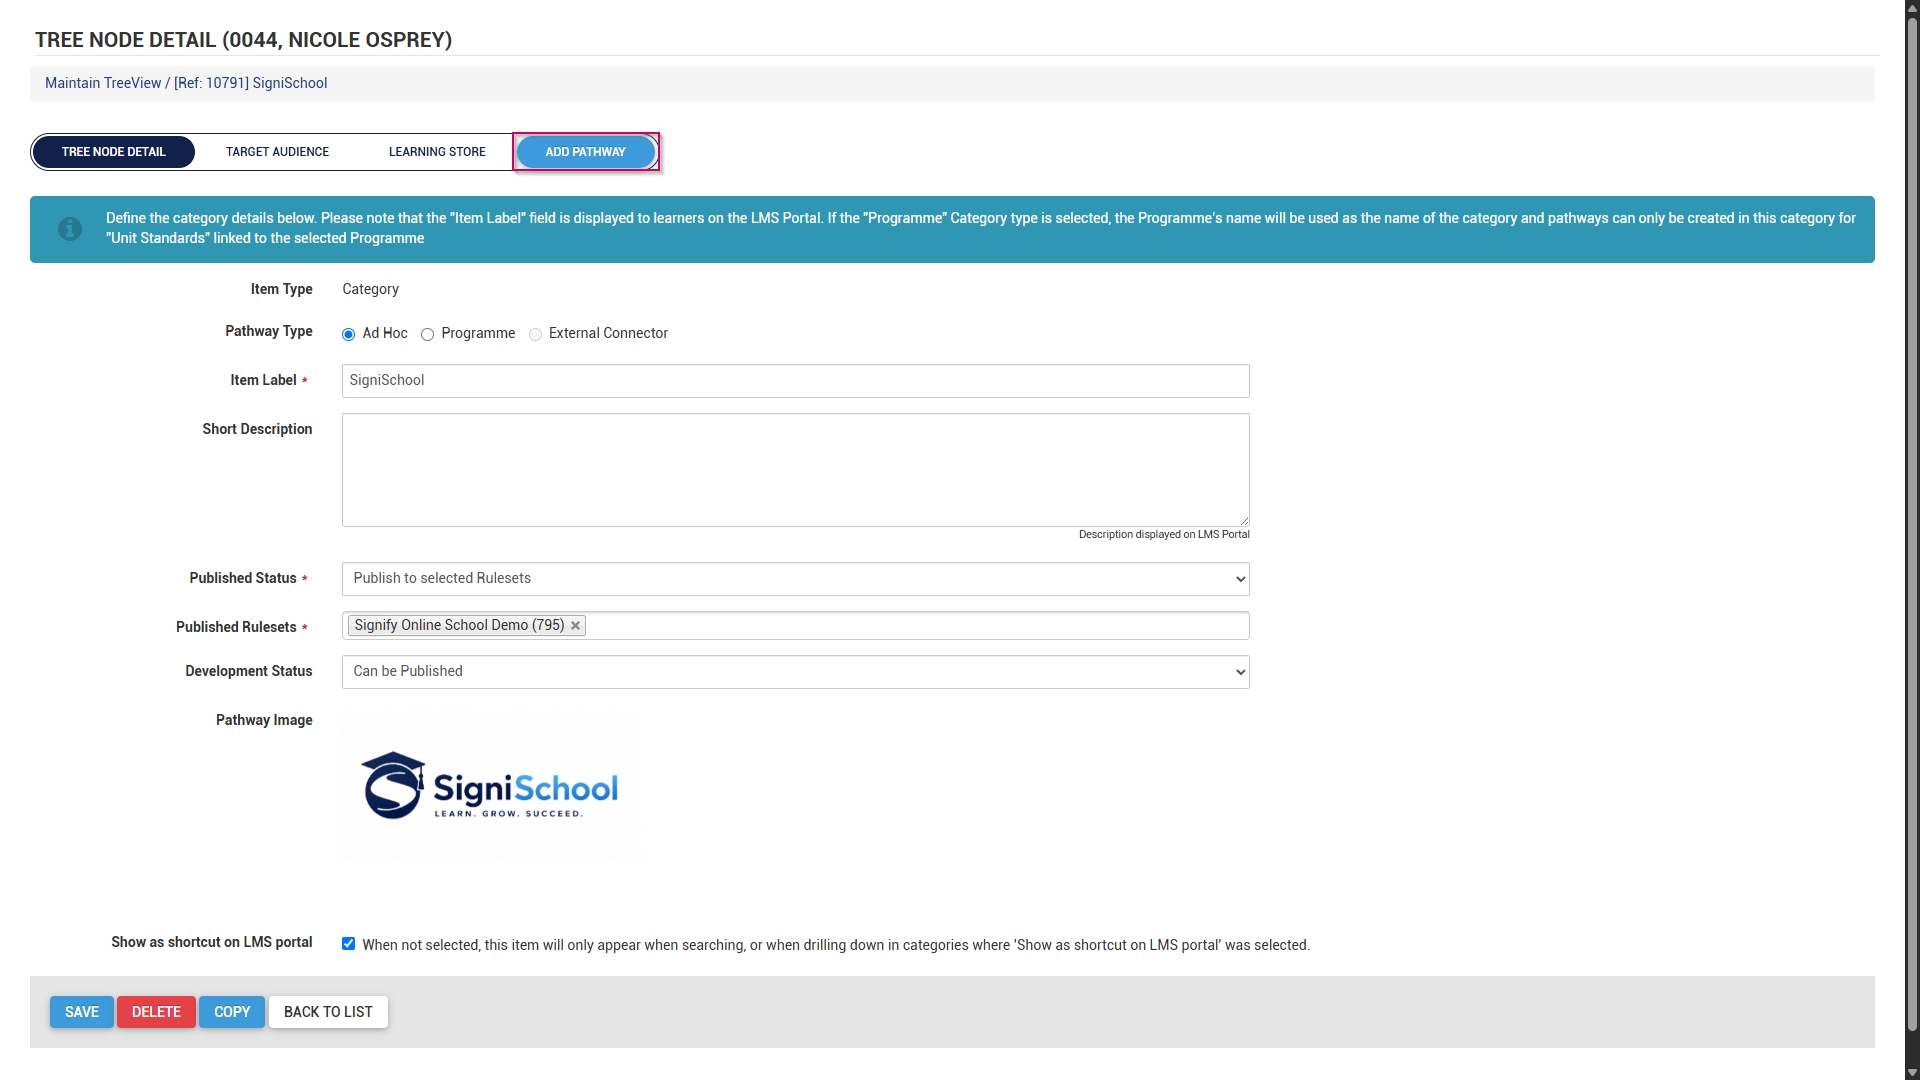
- A new pathway can be added to this category in two ways:
-
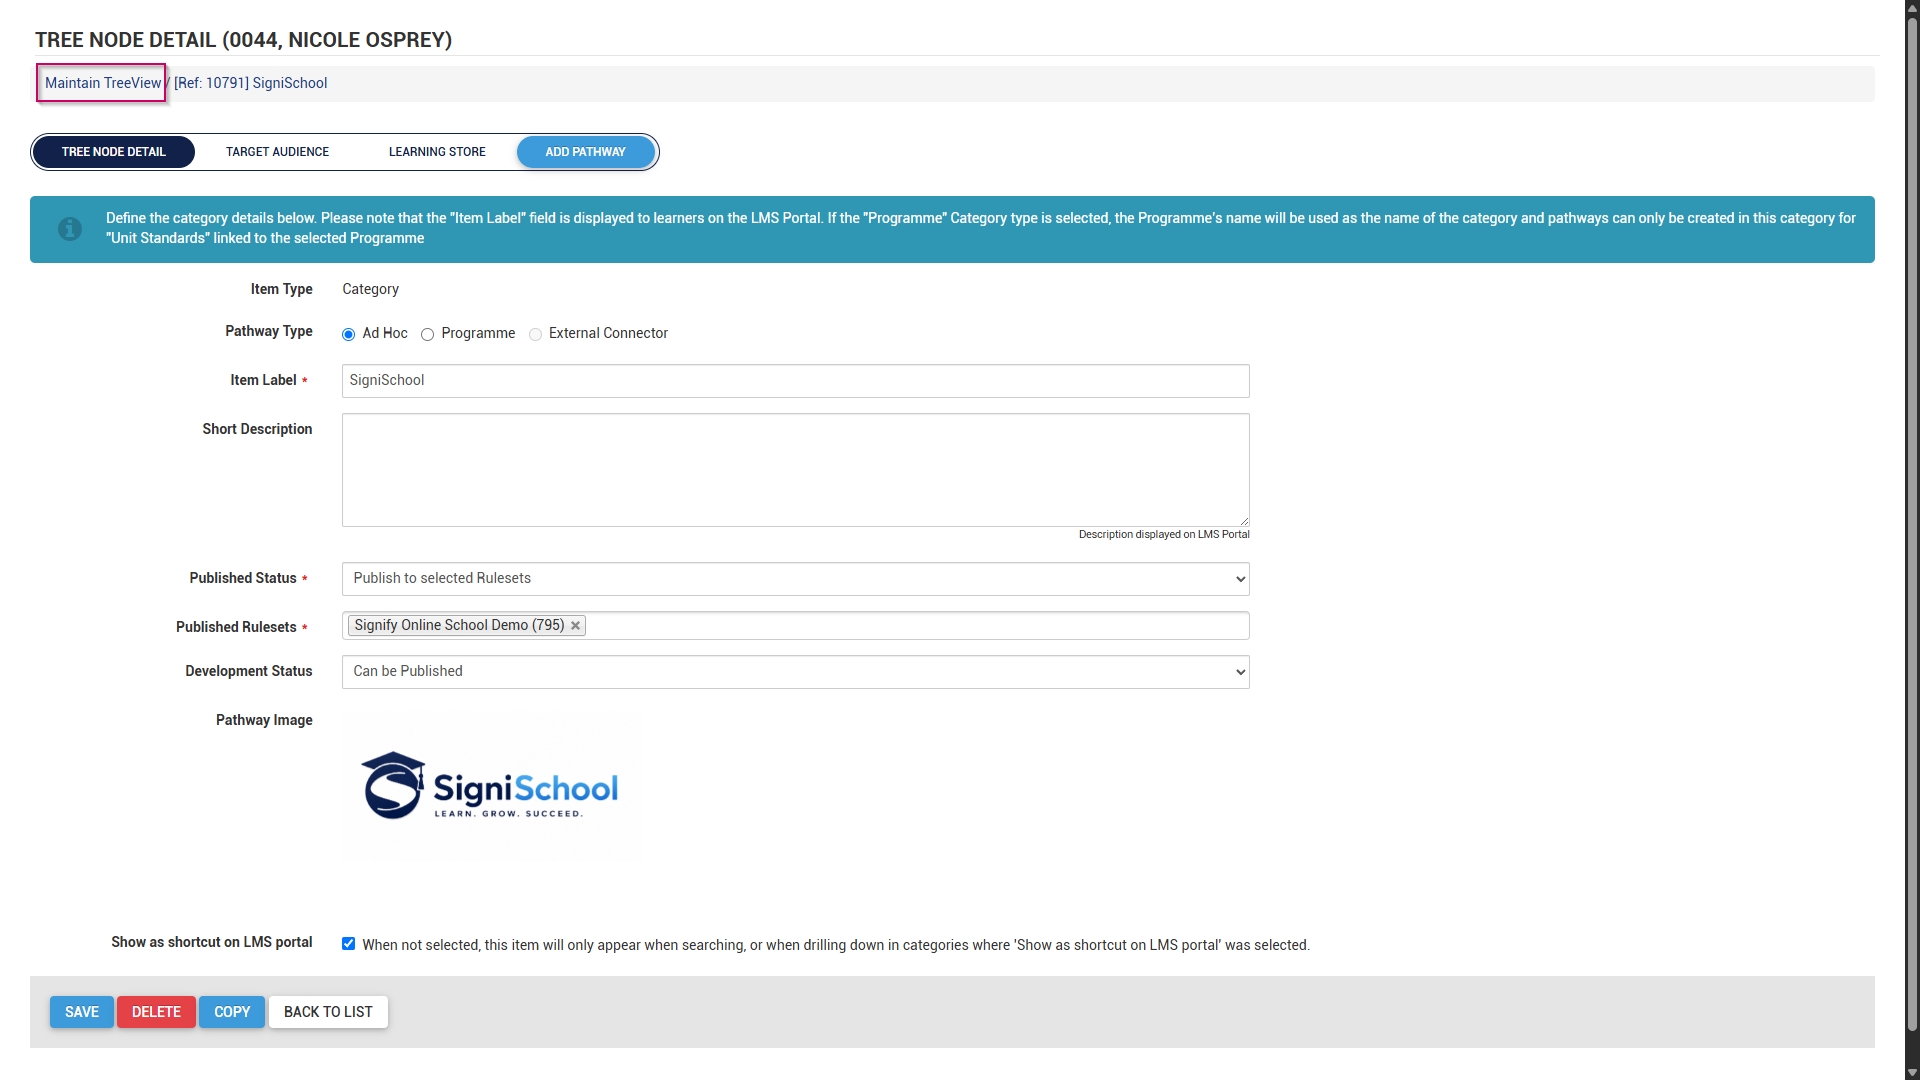
- Scroll to the top of the screen after the save is complete, then click ADD PATHWAY.
-
-
-
- Alternatively, click Maintain TreeView at the top of the screen to return to the Pathways Tree View.
-
-
-
- Click the pathway icon next to the main category's name to add a new pathway.
-
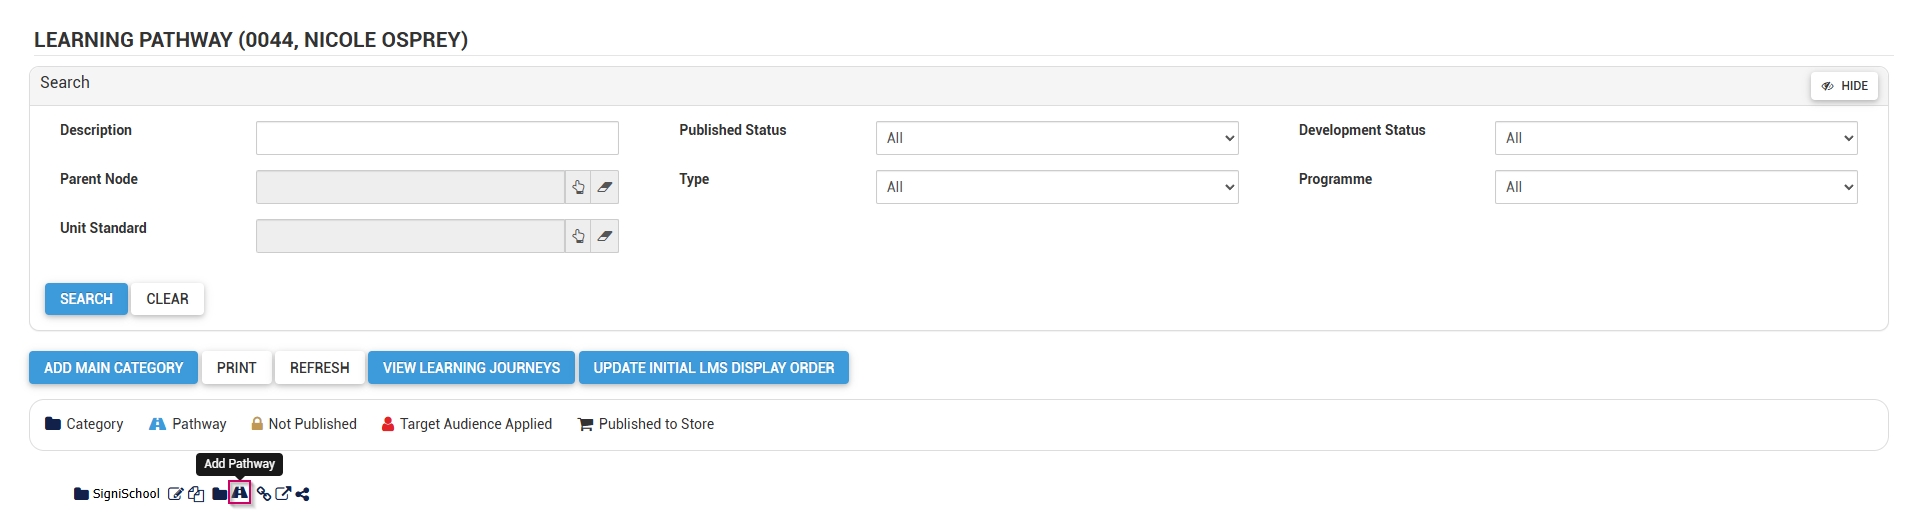
- The pathway details screen will open.
- Choose how the pathway steps should be displayed:
-
- Indicators are used for linear learning.
- Tabs are ideal for a virtual classroom or online school environment.
- For our example, we will be using tabs.
-
- Add the pathway name to the item label text field.
- Optionally, add a short description for the pathway.
- Add a description title.
- Optionally, add a longer description for the pathway.
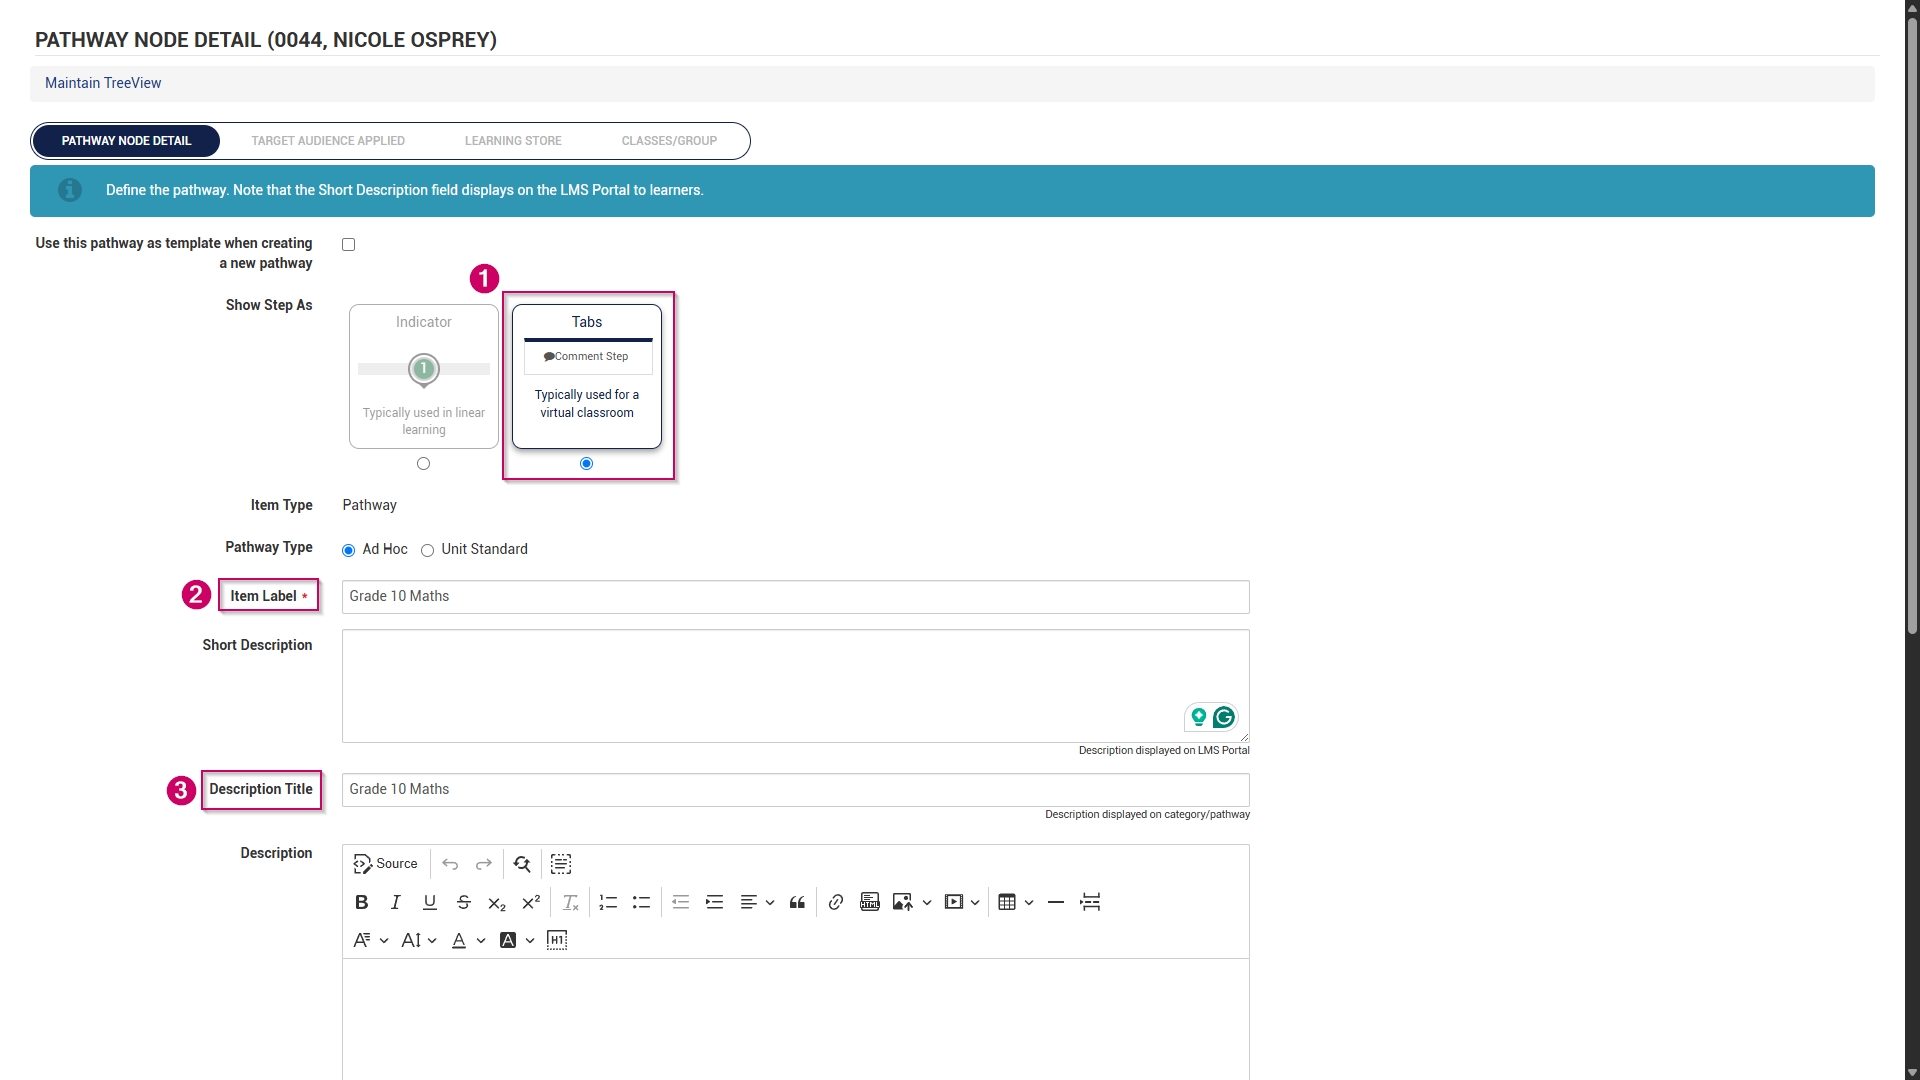
- From the drop-down menu, select the item status as Publish to this Ruleset only.
- From the drop-down menu, select Can be Published to set the development status.
- Choose a pathway image for the pathway. When adding your own image, ensure the aspect ratio is 300 by 200 px and that it is in .png, .jpg, or .gif format.
- If the main category should display on the Learning Portal, tick the Show as shortcut on LMS portal checkbox.
- Optionally, tick the Auto Start Pathway checkbox to skip the summary page when learners start the pathway.
- Click SAVE when you are finished or click BACK TO LIST to discard your edits.
- Scroll to the top of the screen after the save is complete, then click DESIGN PATHWAY.

- This overview explains how to set up learning pathways for an online school. We will create the following steps, which are mainly used in an eLearning environment:
-
- Comment
- Document (Download)
- Acceptance
- SCORM/xAPI
- Assessment (Online)
- Assignment (Upload)
- Certification point
- Class/Group
-
- Feel free to include any additional step types not covered in this guide.
Comment
- The pathway design screen will open. Select Comment from the menu.
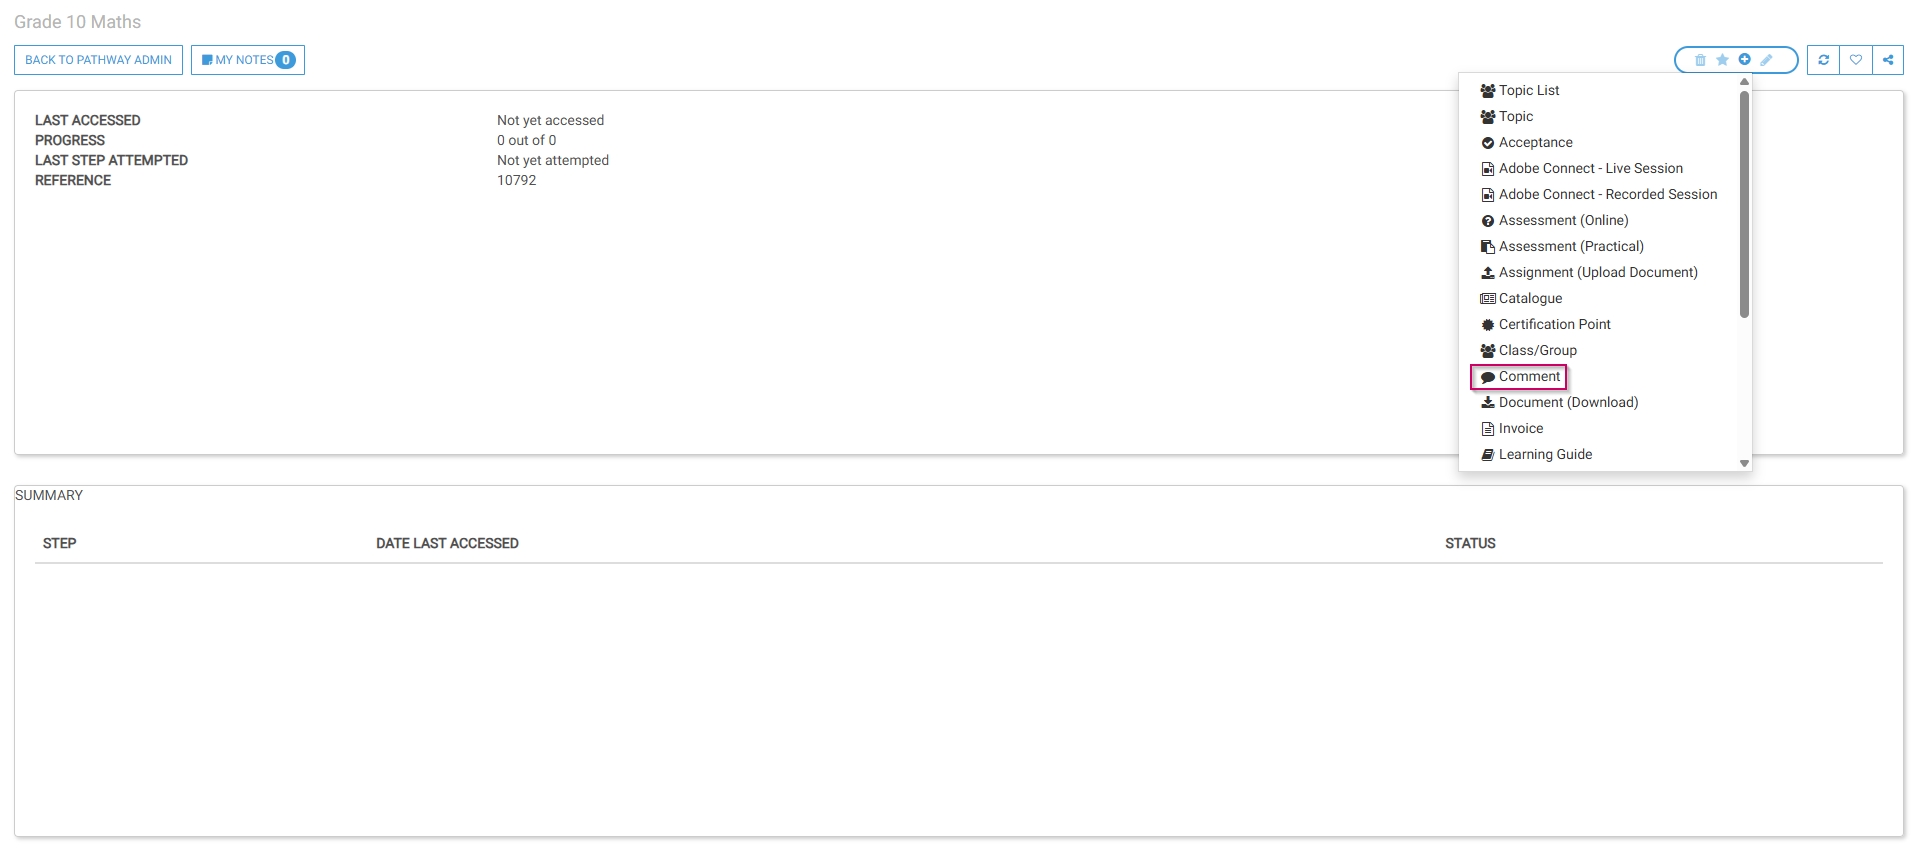
- Optionally, select an image or a custom icon for your step.
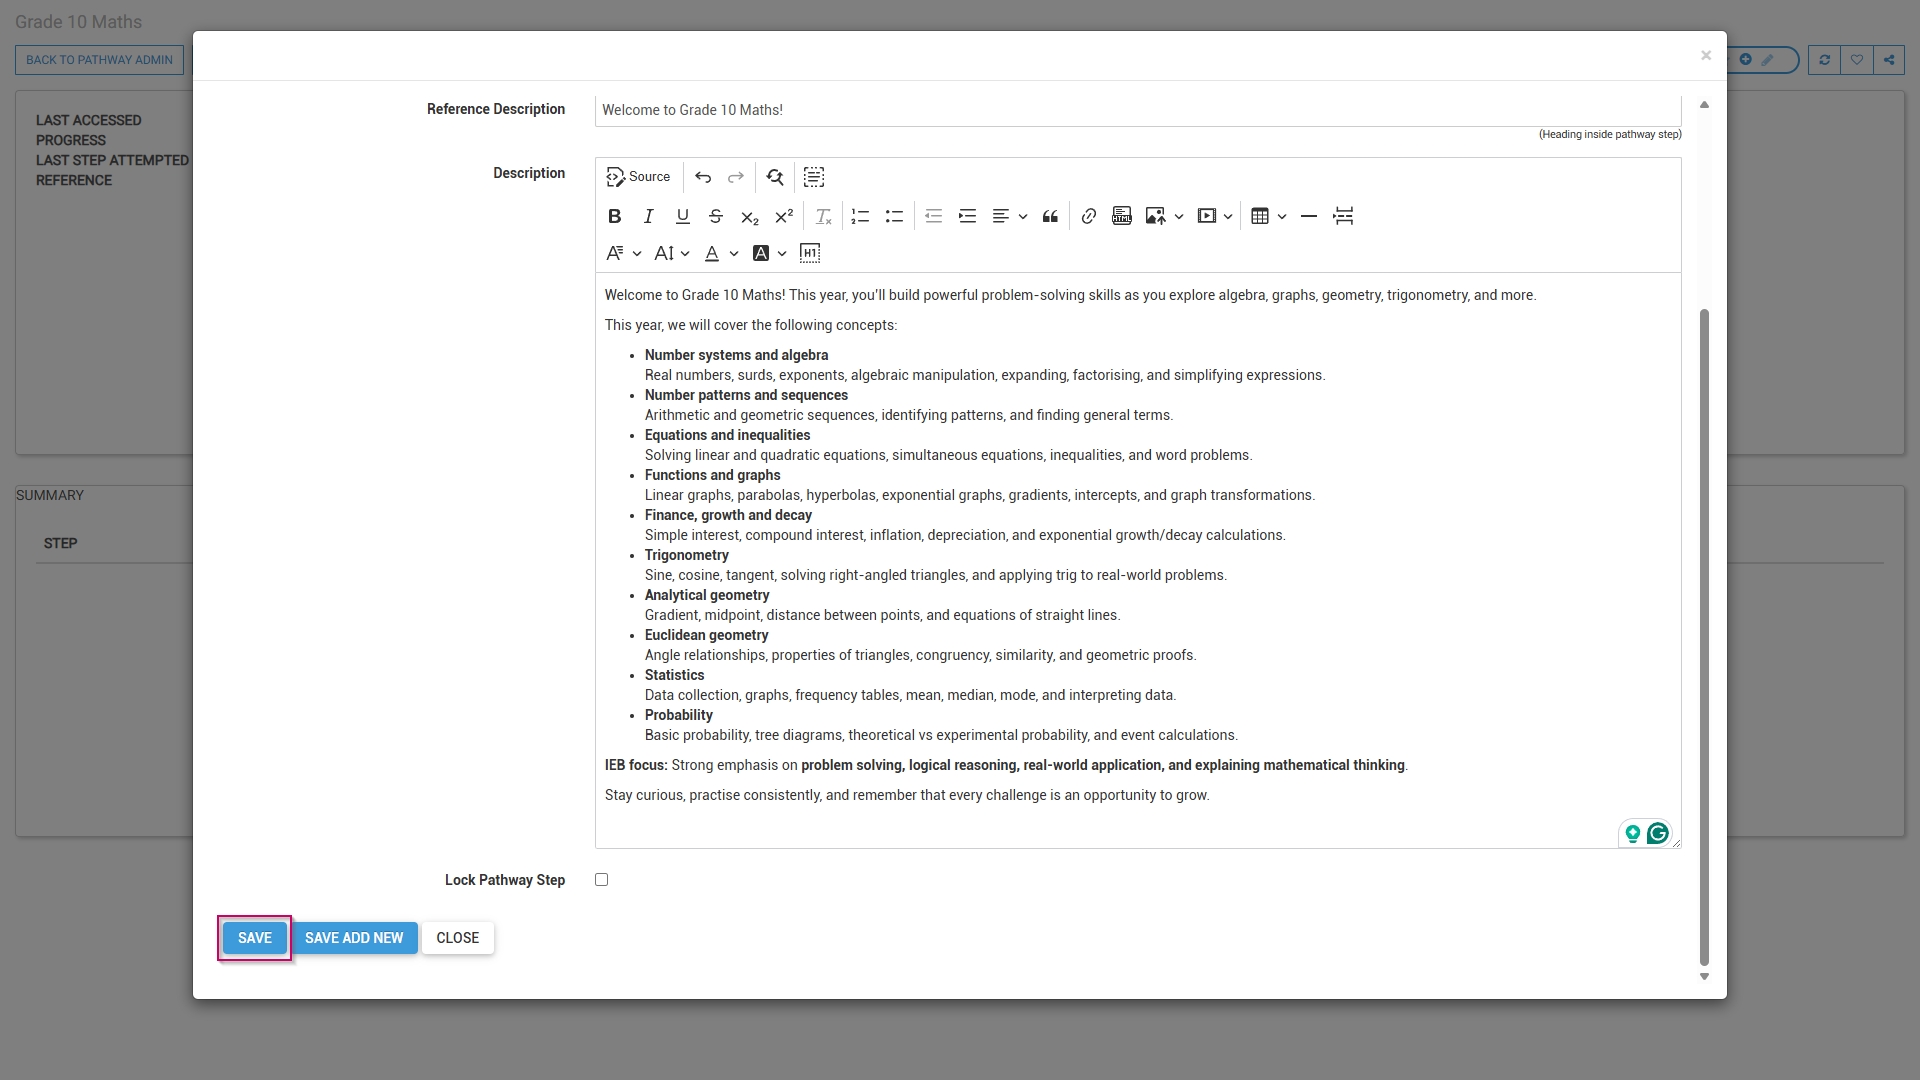
- Add a main header, or title, for this step.
- Add a subheading to the Reference Description field.
- Add a description for this step.

- Click SAVE when you are finished, SAVE ADD NEW to add another comment step or click CANCEL to discard your edits.
- The comment step has been successfully added to the pathway.
- To add an additional step, click the plus icon.

Document (Download)
- Select Document (Download) from the menu.
- Optionally, select an image or a custom icon for your step.
- Add a main header, or title, for this step.
- Add a subheading to the Reference Description field.
- Choose a file from your computer for users to download.
- Tick the checkbox if you would like the document to appear in this step.
- Add a description for this step.
- Click SAVE when you are finished, SAVE ADD NEW to add another document download step or click CLOSE to discard your edits.
- The document download step has been successfully added to the pathway.
Acceptance
- Select Acceptance from the menu.
- Optionally, select an image or a custom icon for your step.
- Add a main header, or title, for this step.
- Add a subheading to the Reference Description field.
- Add an acceptance title, which will display next to the tickbox learners are required to tick for this step.
- Add a description for this step.
- To log this step in the learner's record, check the box, then click the hand icon to select a training intervention to associate with this step.
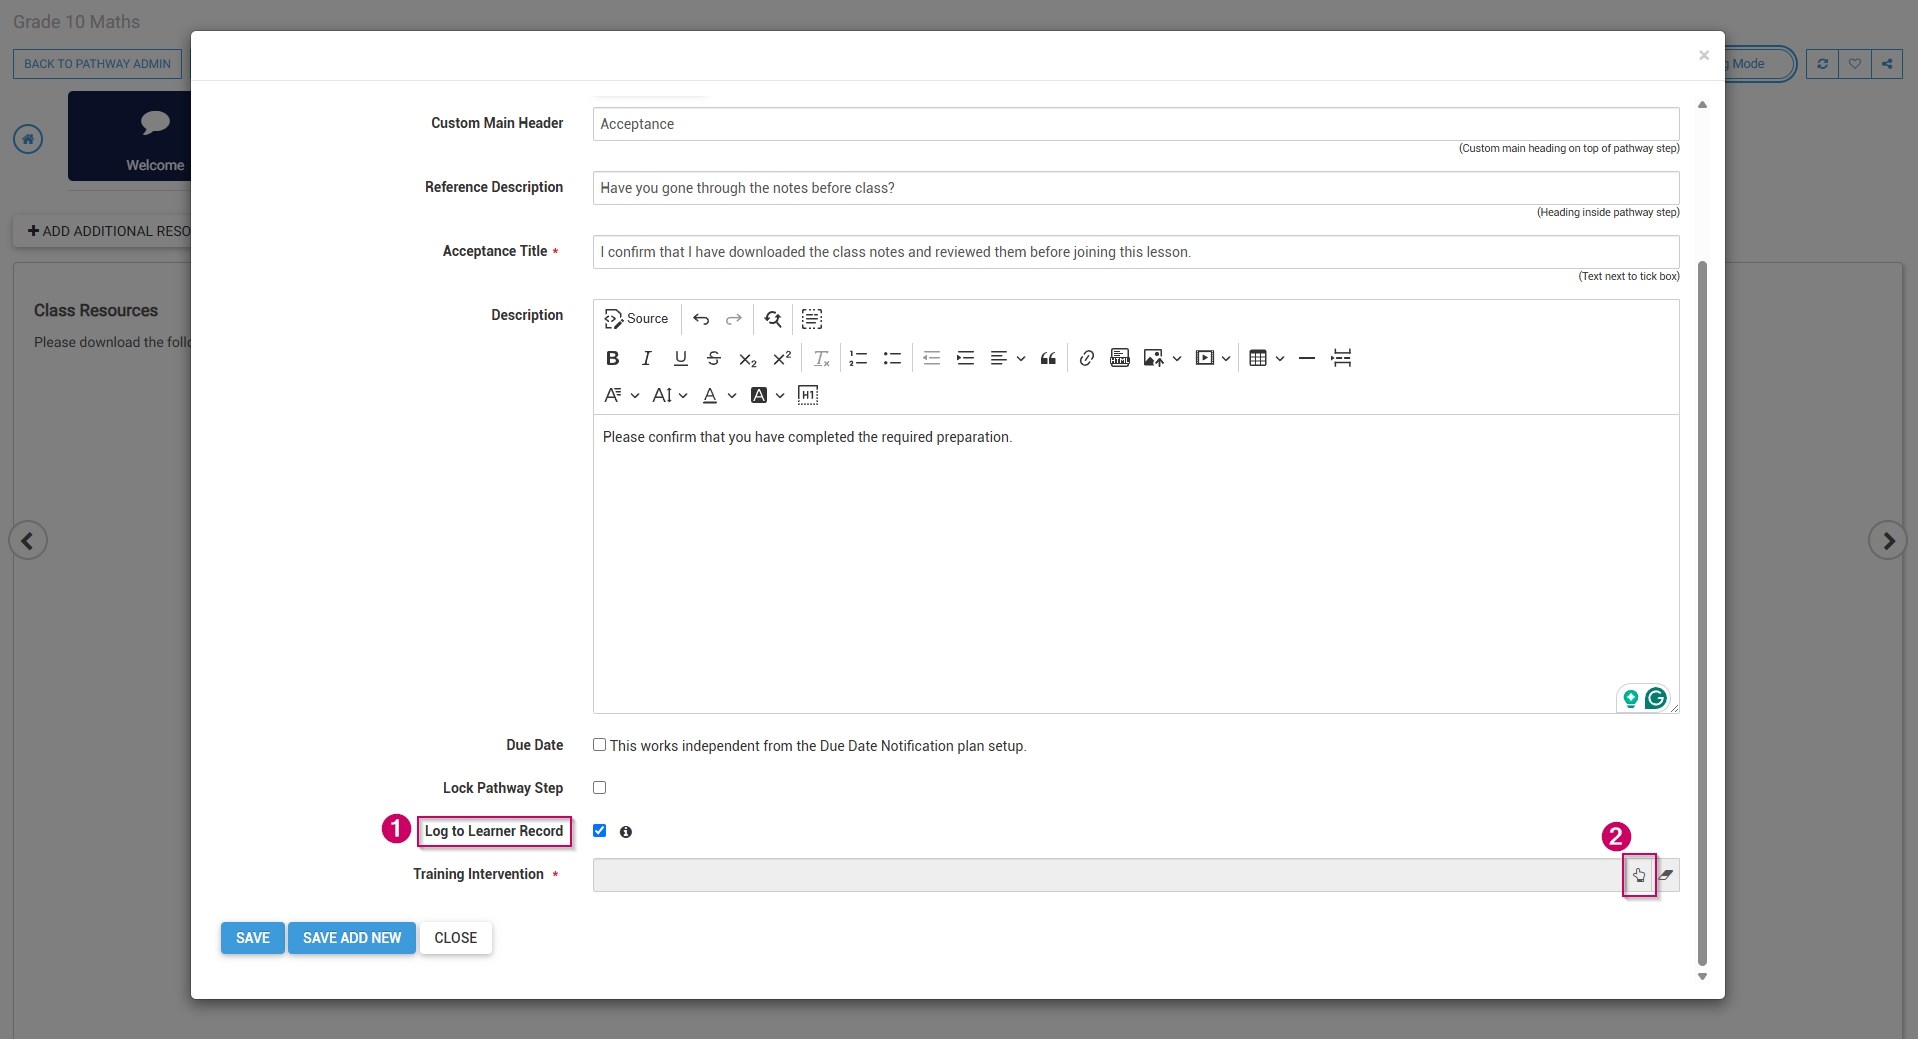
- Select the training intervention, then click SELECT.

- Click SAVE when you are finished, SAVE ADD NEW to add another acceptance step or click CLOSE to discard your edits.
- The acceptance step has been successfully added to the pathway.
SCORM/xAPI
- Select SCORM/xAPI from the menu.
- Optionally, select an image or a custom icon for your step.
- Add a name for this step in the Step Header field.
- Add a description header for this step.
- Optionally, add a description.
- Select a SCORM file to add to this step by clicking the upload icon next to the Course field. The SCORM wizard will open.
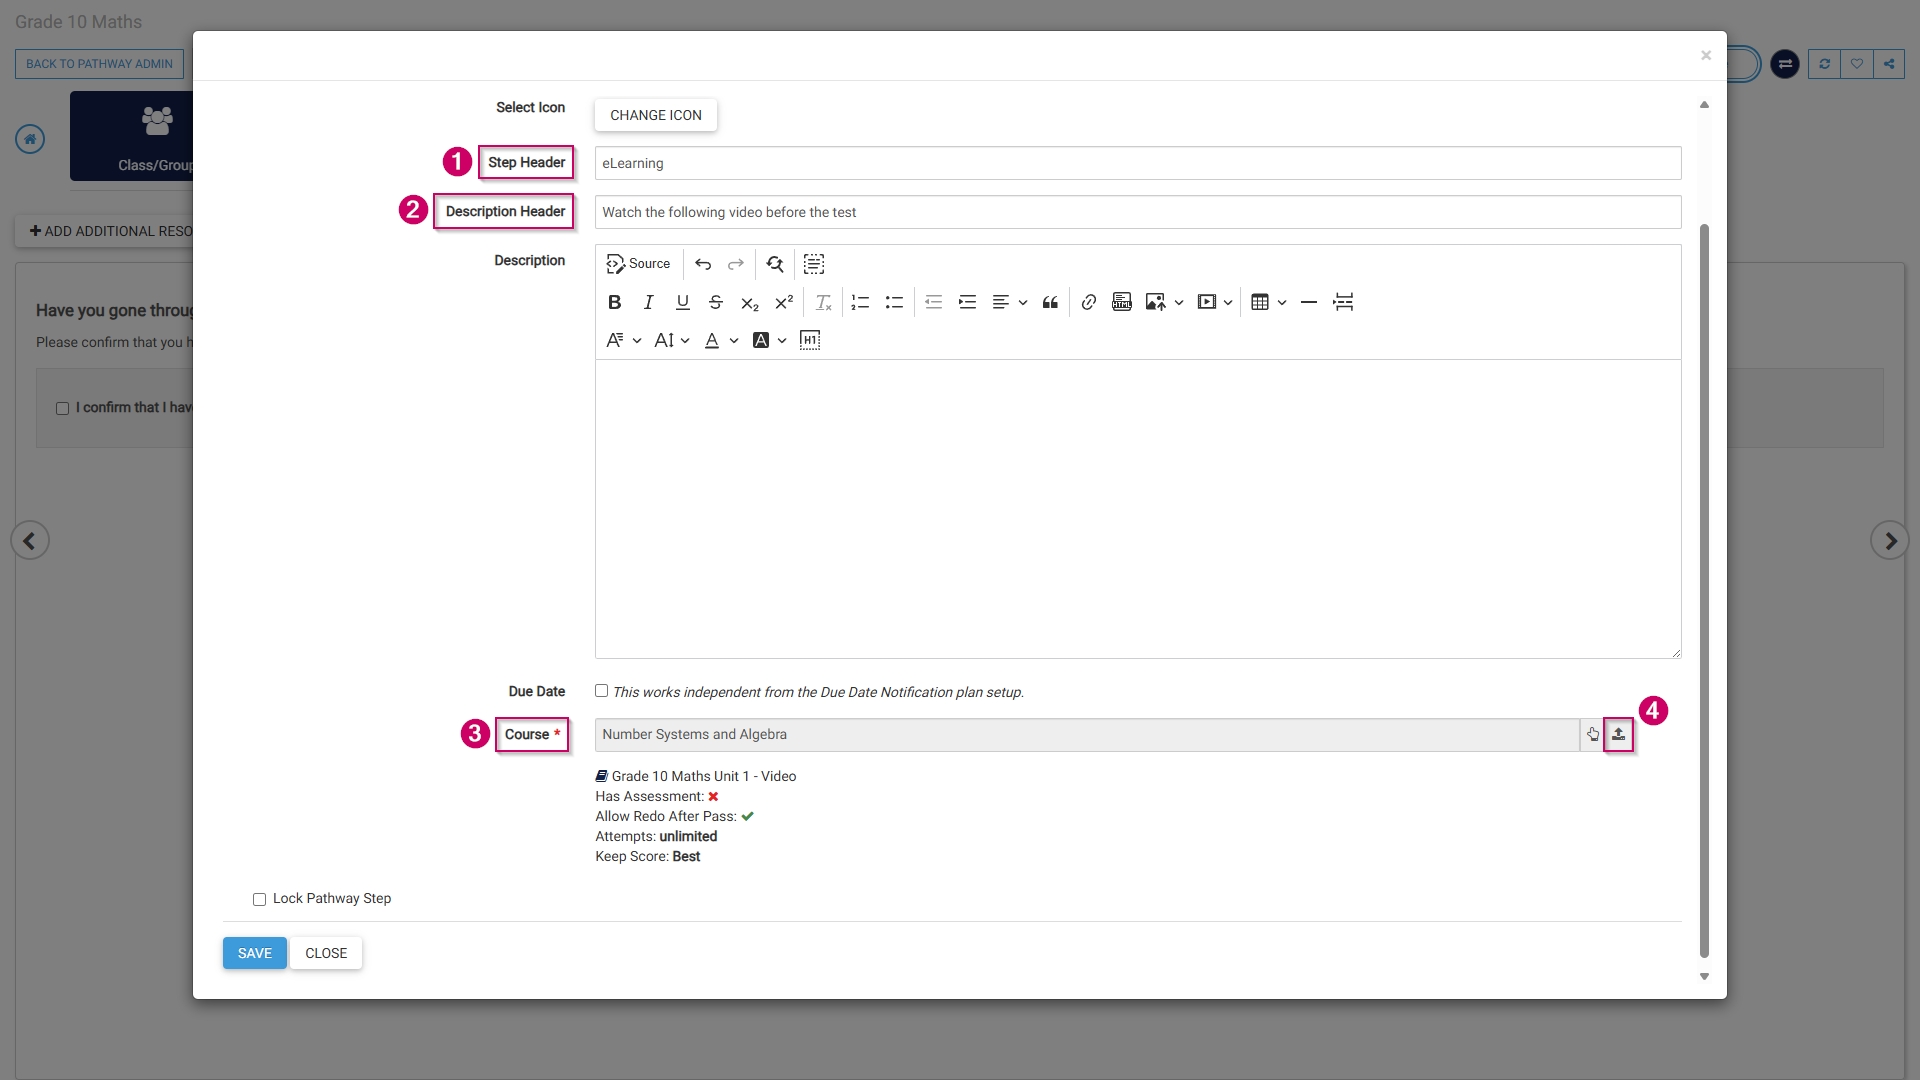
- Select the radio button next to SCORM in the Learning Content Type section.
- Add a name for this step.
- Select a training intervention from the Training Intervention Library using the hand icon.
-
- Alternatively, tick the checkbox to automatically create a training intervention for this step.
- If using standardised naming conventions, ensure the name field complies with those standards.
-
- Choose a SCORM file from your computer in a .zip format.
- Customise how the SCORM activity will be set up:
-
- Tick the checkbox if the file has an assessment.
- Tick the checkbox if the learner can redo the SCORM activity.
- Set the maximum number of attempts.
- Choose which score to keep.
- Tick the checkbox if the transcript should be made available to the learner.
- Tick the checkbox if the SCORM file is active and ready for publication.
-
- Click SAVE AND UPLOAD to continue or CLOSE to discard your edits.
- The SCORM step has been successfully added to the pathway.
- These same steps can be used to add:
-
- MP4 files,
- PDFs, or
- YouTube videos.
-
Assessment (Online)
- Select Assessment (Online) from the menu.
- Optionally, select an image or a custom icon for your step.
- Add a main header, or title, for this step.
- Link a pre-loaded assessment to this step by clicking the hand icon.
- Add a description for this step.
- Click SAVE when you are finished, SAVE ADD NEW to add another assessment step or click CLOSE to discard your edits.
- The assessment step has been successfully added to the pathway.
Assignment (Upload Document)
- Select Assignment (Upload Document) from the menu.
- Optionally, select an image or a custom icon for your step.
- Add a main header, or title, for this step.
- Add a heading for this step.
- Add a description for this step.
- To log this step in the learner's record, check the box, then click the hand icon to select a training intervention to associate with this step.
- Select the training intervention, then click SELECT.
- Click SAVE when you are finished, SAVE ADD NEW to add another assignment upload step or click CLOSE to discard your edits.
- The assignment upload step has been successfully added to the pathway.
Certification point
- Select Certification Point from the menu.
- Optionally, select an image or a custom icon for your step.
- Add a main header, or title, for this step.
- Add a certification point name.
- Add a description for this step.
- To log this step in the learner's record, check the box, then click the hand icon to select a training intervention to associate with this step.
- Select the training intervention, then click SELECT.
- Click SAVE when you are finished, SAVE ADD NEW to add another certification point step or click CLOSE to discard your edits.
- To maintain prerequisites for this certification point, click YES.
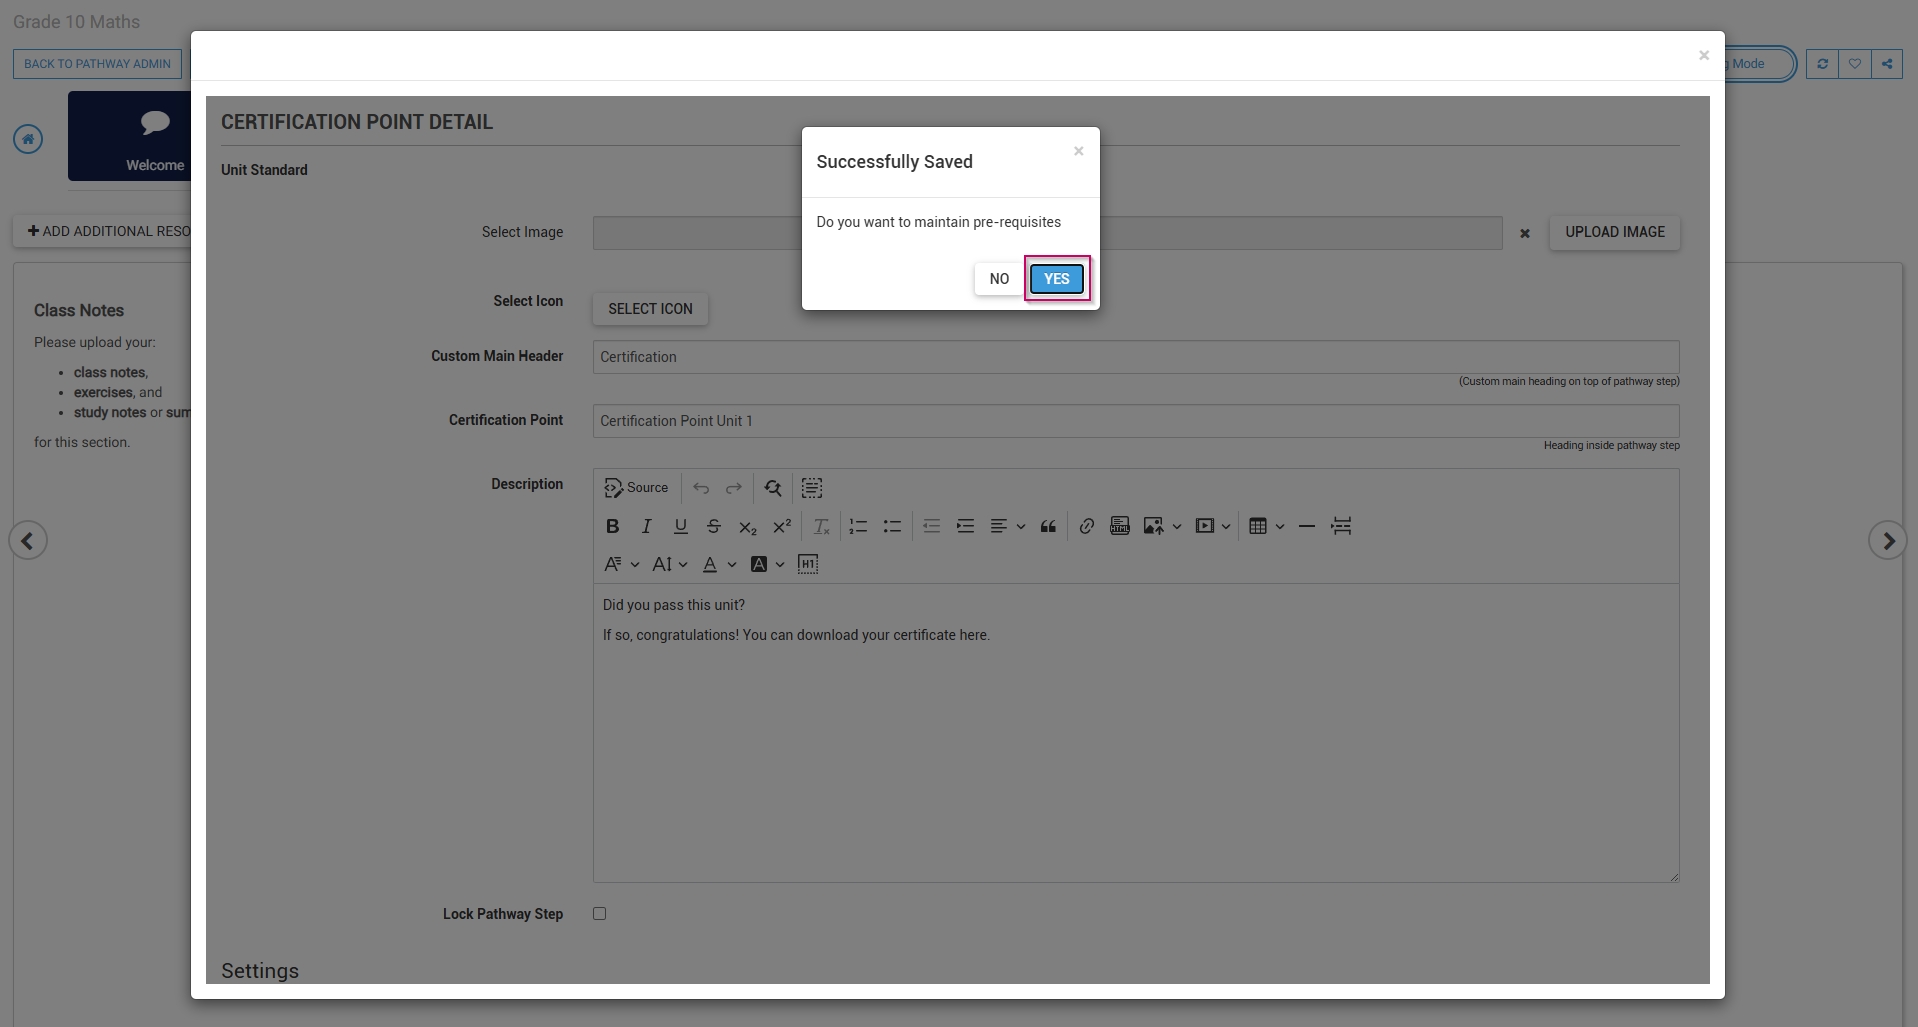
- Click ADD to select steps from the pathway to add as prerequisites.

- From the drop-down menu, select a pathway item.
- Select the status required to achieve this prerequisite.
- Click SAVE when you are finished, SAVE ADD NEW to add another prerequisite, or click CLOSE to discard your edits.
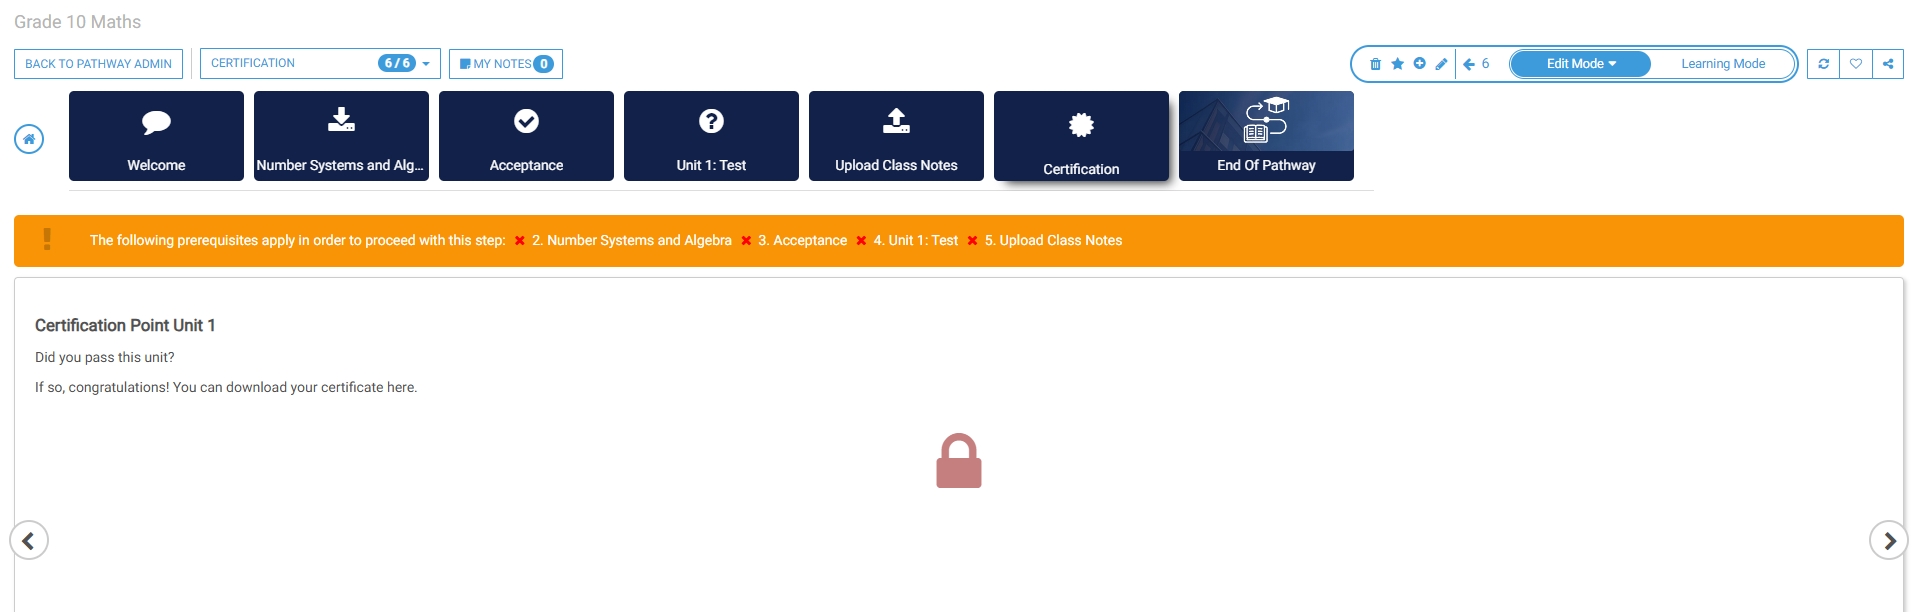
- The certification point step has been successfully added to the pathway.
Pathway features
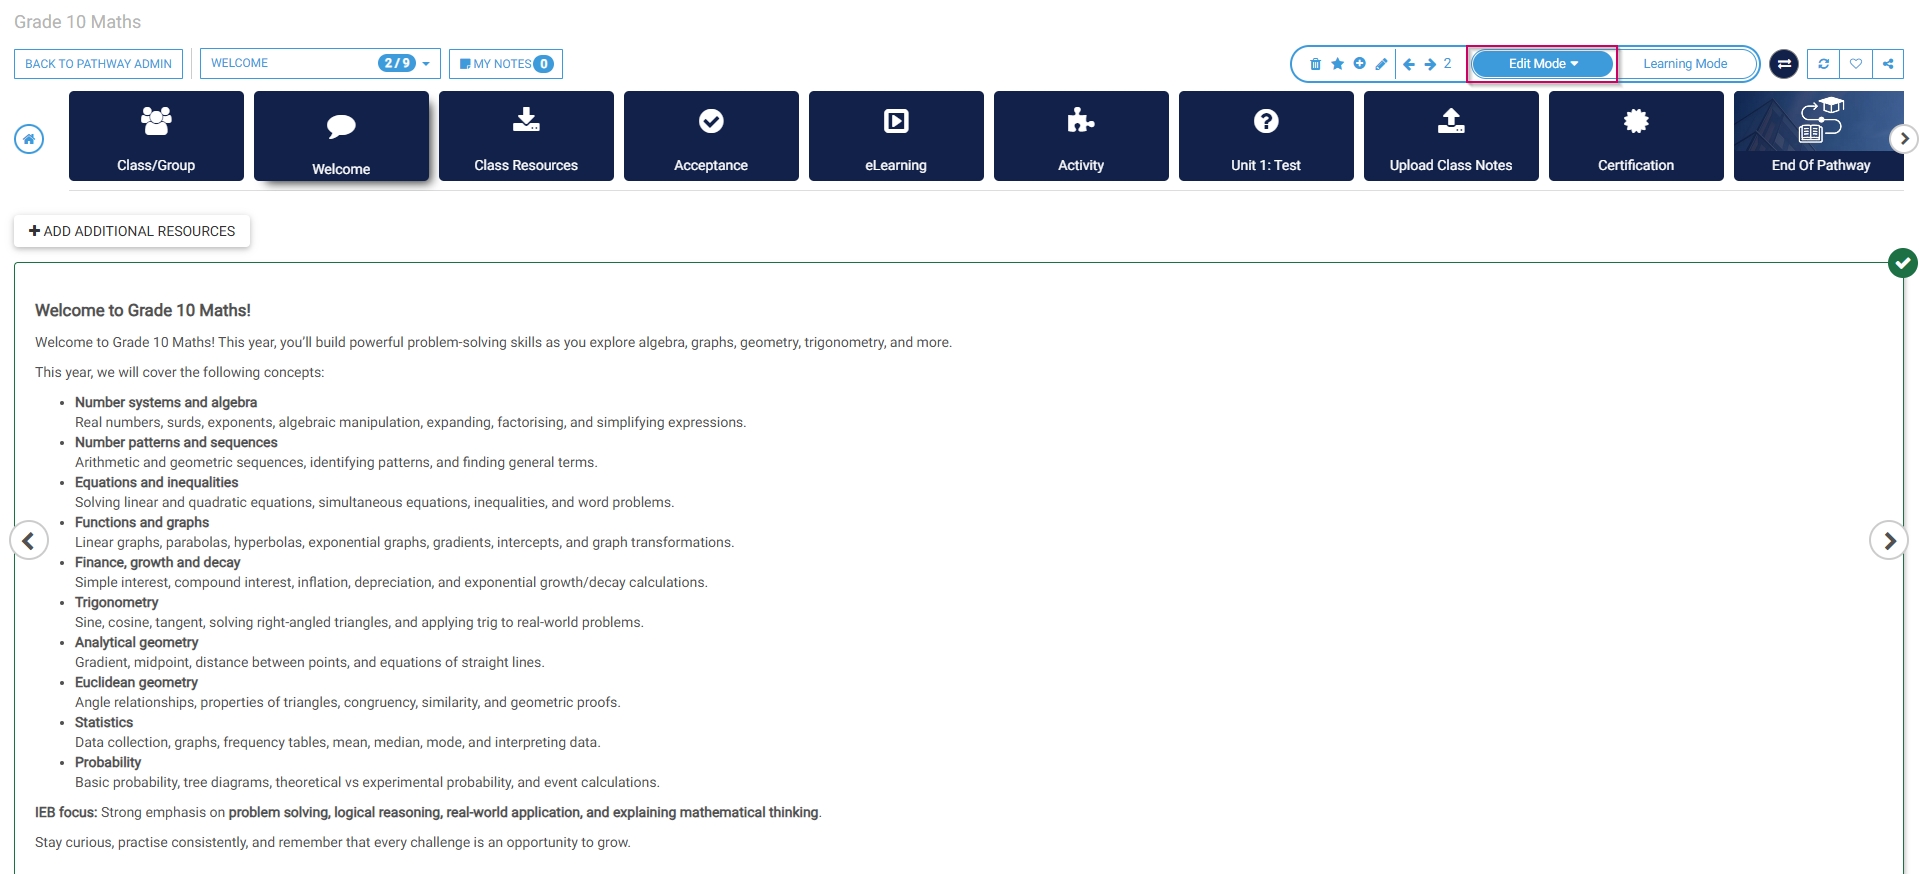
Edit mode
- When editing a pathway, click Edit Mode.
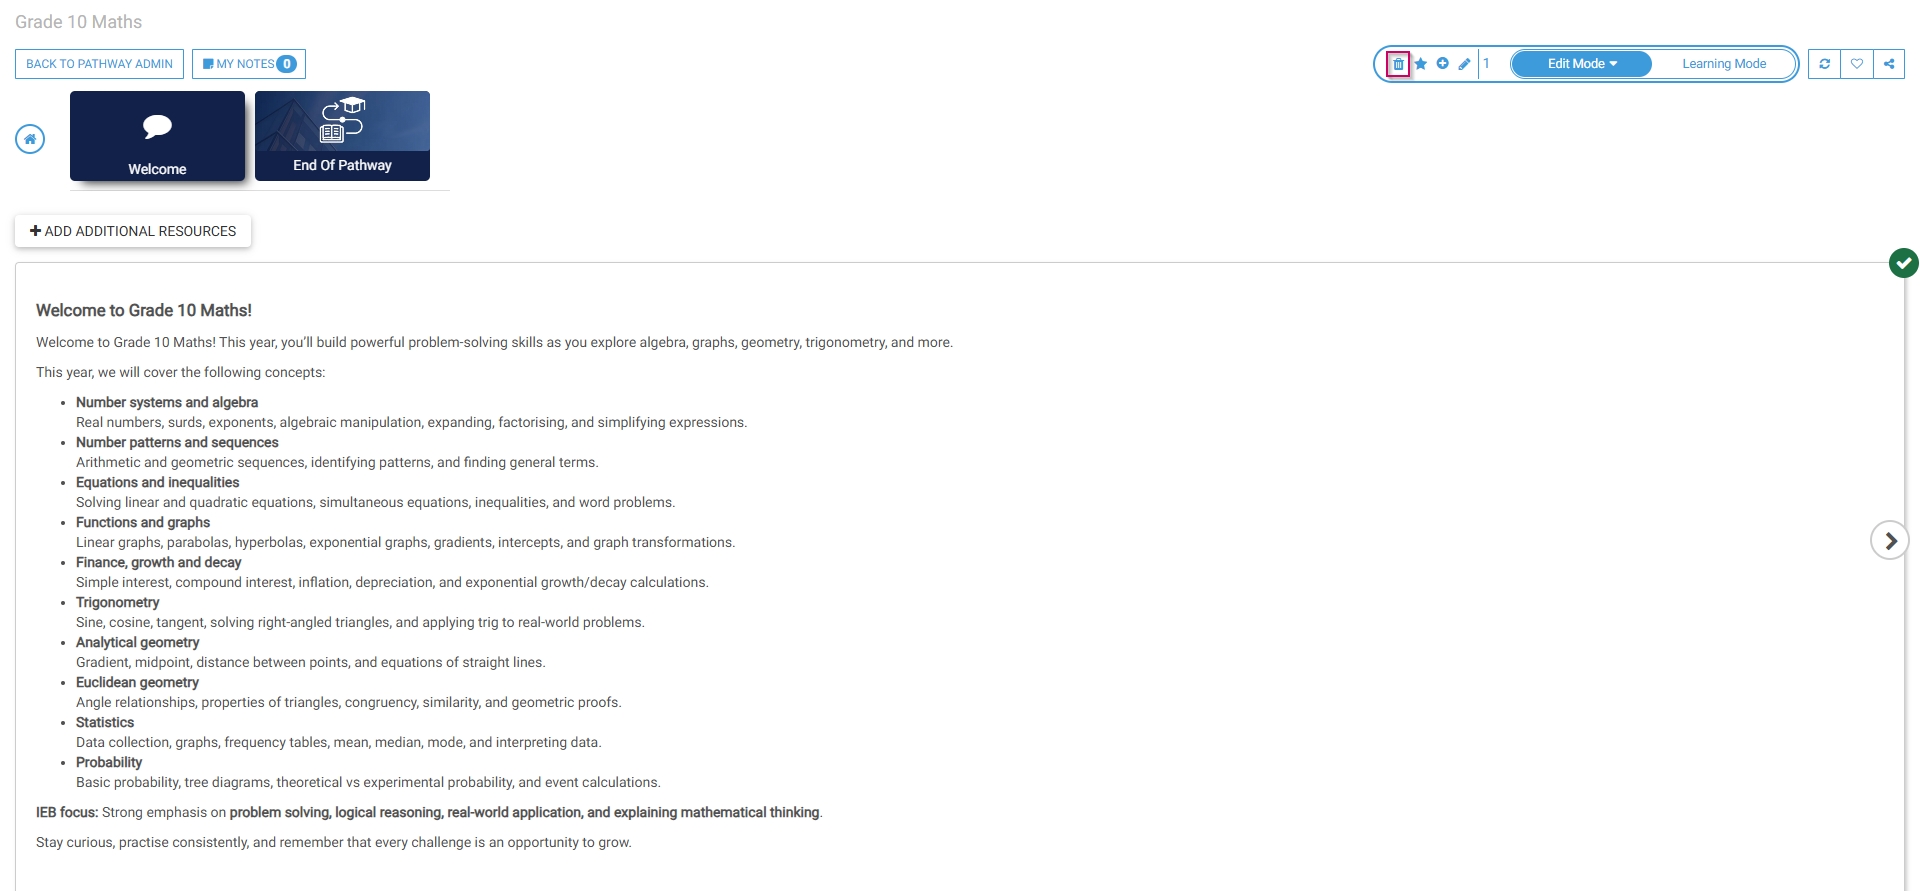
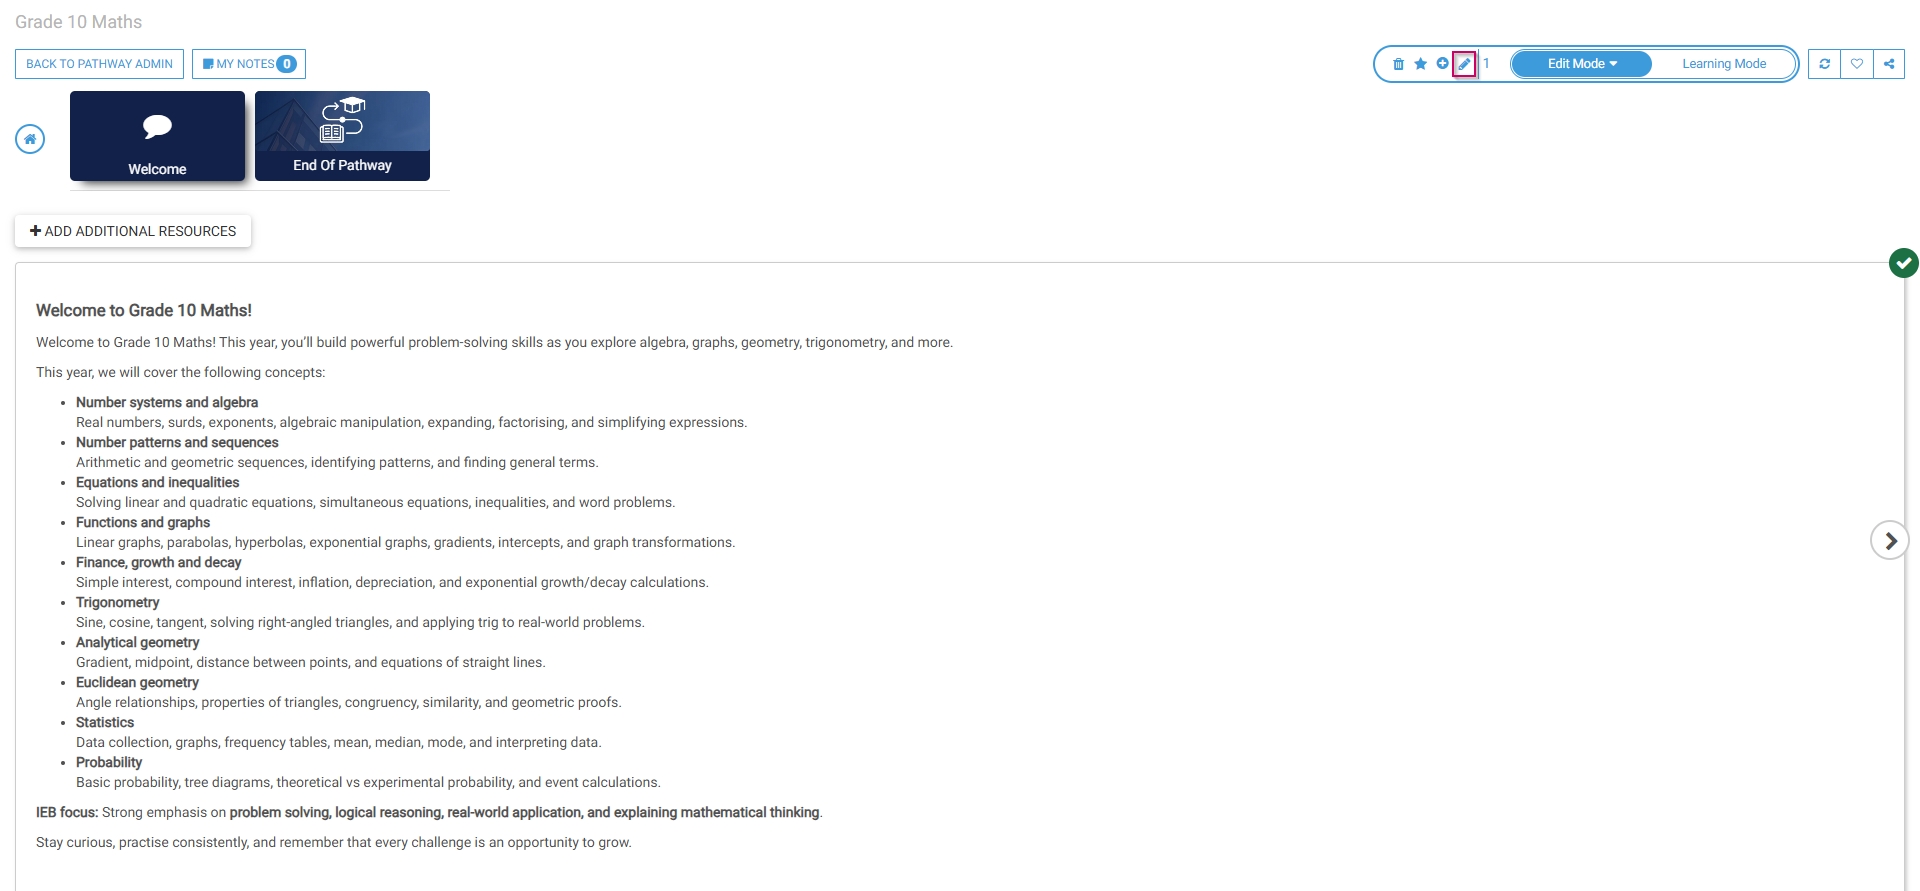
- Click the dustbin icon to delete the current pathway step.
- Click the star icon to add prerequisites to this pathway step.
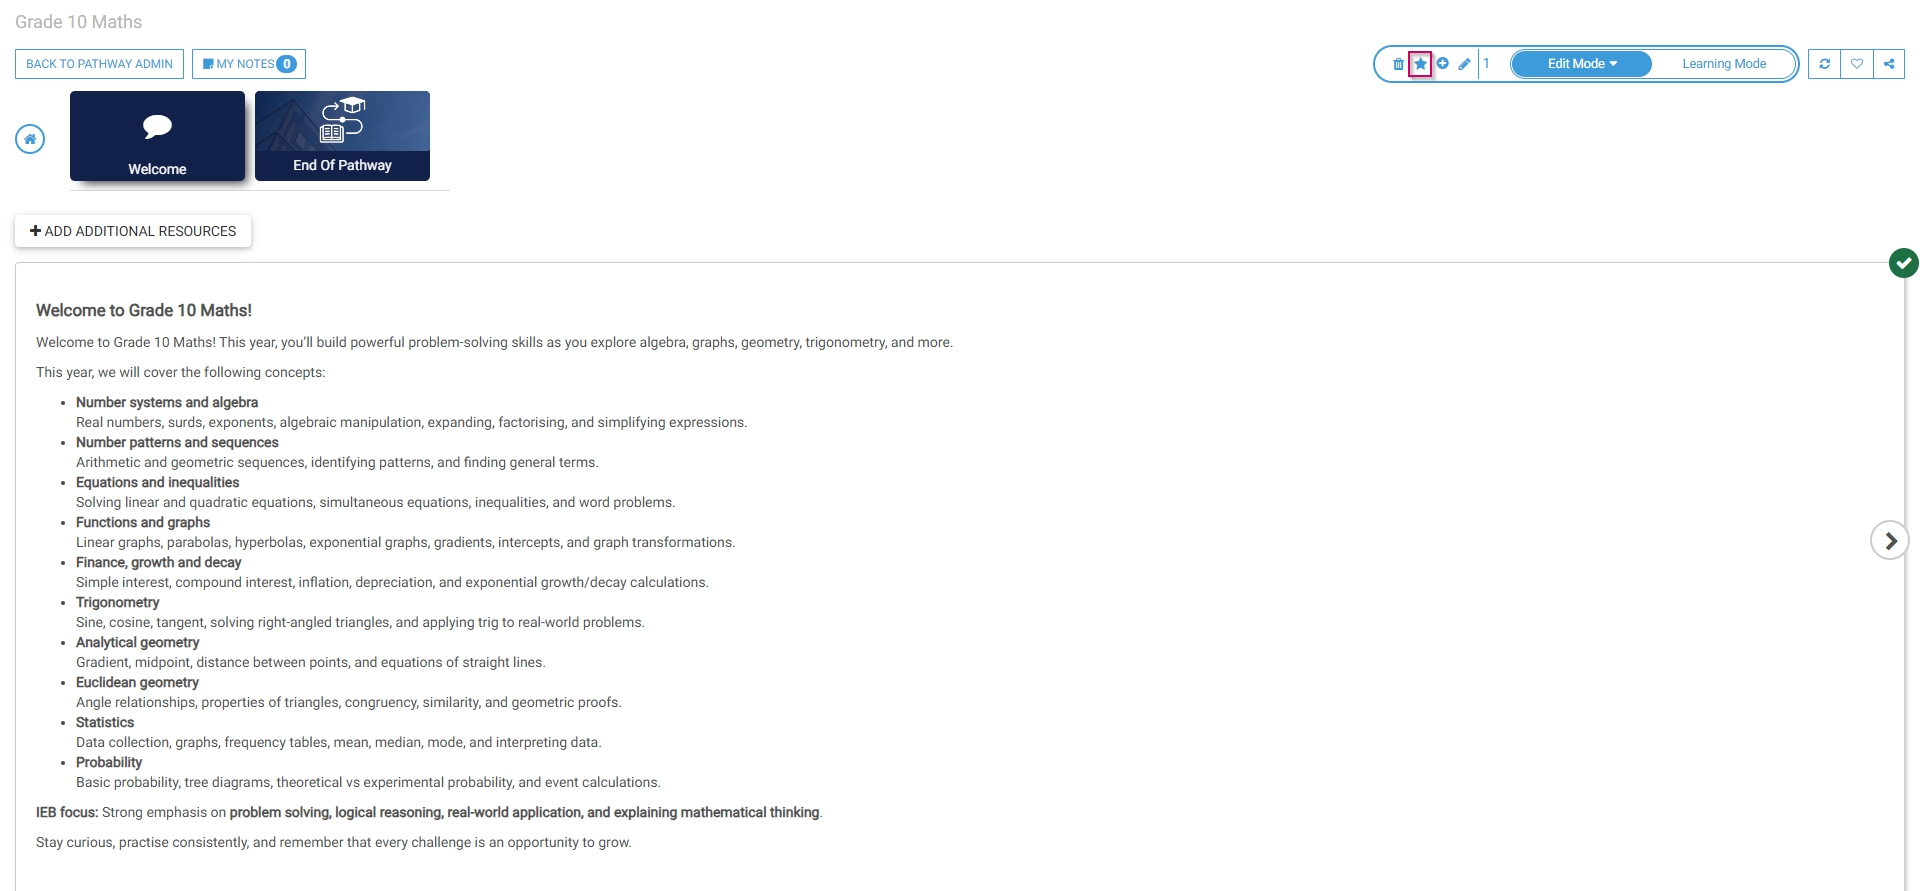
- Click the plus icon to add another pathway step after the current one.
- Click the pencil icon to edit the current pathway step.
Learning mode
- To preview the pathway as a learner, click Learning Mode.
