How To Create a Theme And Link It To a Schema
Creating a new theme
In this quick guide we will explain how you to create your own theme using your own logo and colours of your choice.
How to get there?
With your courser hover over System Administration (2) and navigate to Tools (3), then Configuration (4).
In the new window click on Framework (5).


What to do?
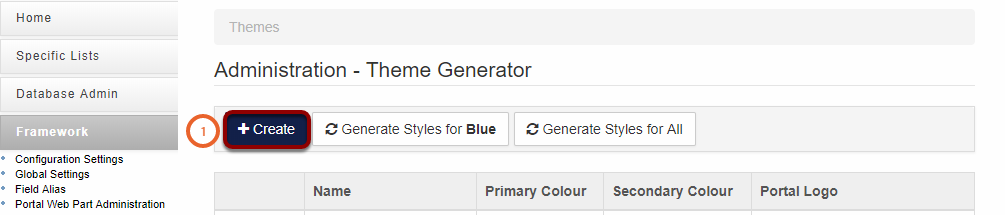
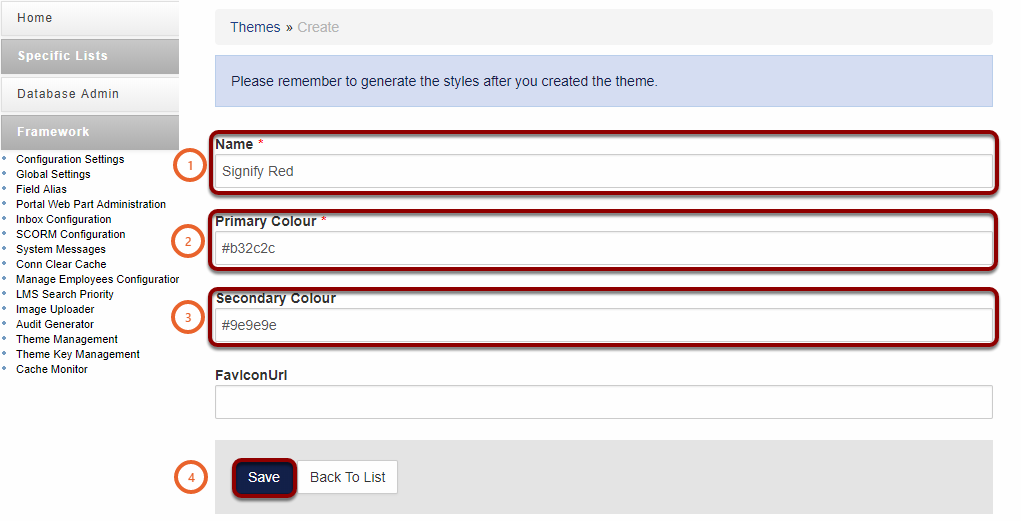
- Type in the Name of your theme (1).
- Insert your Primary Colour (2) for your theme.
- Insert your Secondary Colour (3) for your theme.
You can select your primary and secondary colour using the colour pallet below. Click on the Primary Colour (2) or Secondary Colour (3) field to use the colour pallet.

Your primary and secondary colours must be in Hex format (If you need help to convert your colours to hex, you can navigate to this website https://htmlcolorcodes.com/ ).
- You can now click on Save (4) and the window will refresh with new fields.
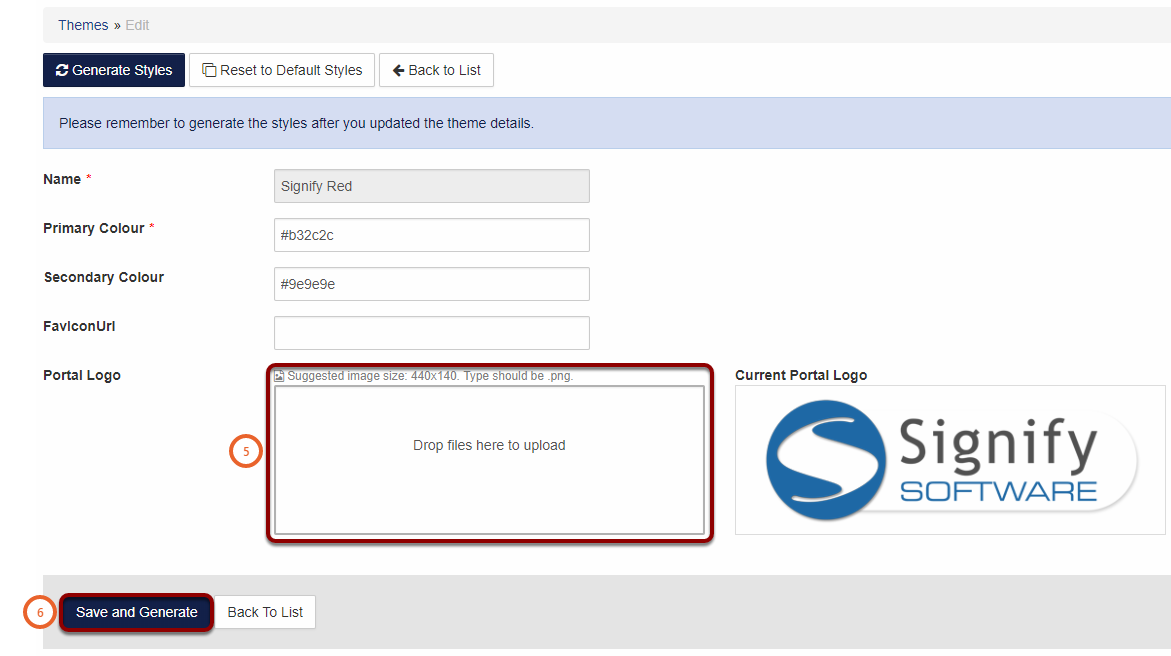
- In the new window navigate to the Portal Logo (5) field. You can either drag and drop your logo into this field or you can click on the field to browse your computer for a logo.
Your image size should be 440x140 and it should be a .png type image.
- Click on Save and Generate (6).
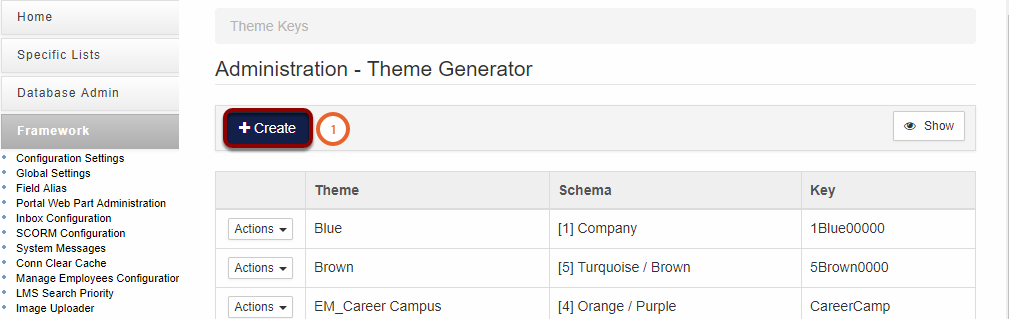
To use your theme you have to link it to a schema, follow the steps below to link your theme.
Linking a theme to a schema
When you have created a theme or want to link an existing theme to any one of your schemas. Follow the steps in this quick and easy guide.
How to get there?
Hover with you curses over System Administration (2) and navigate to Tools (3) then Configuration (4).
On the new window click on Framework (5).


What to do?
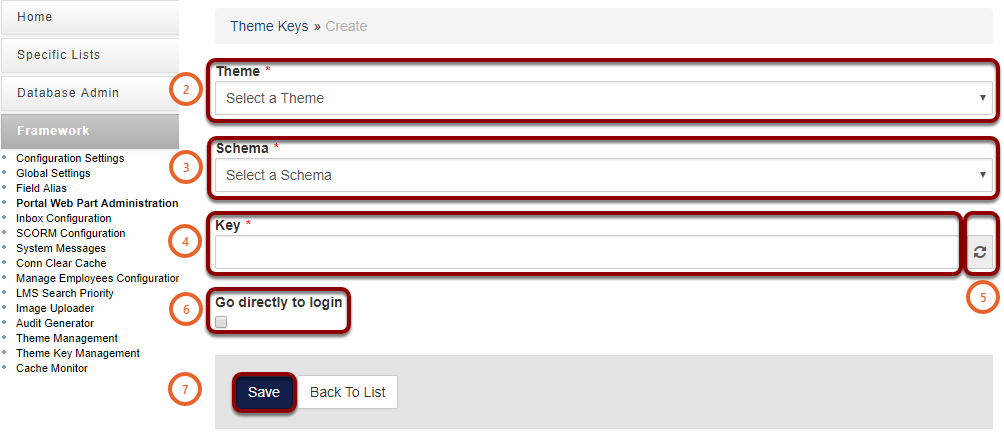
- Click on the Create button (1).
In the new window select the following options:
- Select from the drop down menu your Theme you have created (2).
- Under the Schema drop down menu, select your Schema that you want your theme to be associated with (3).
- In the Key (4) field you can enter your own key e.g. THEME00001.
- Or you can click on the Refresh (5) icon to automatically generate a key.
- Click on the tick box (6) if you want the user to be navigated directly to the log in screen. Otherwise the user will be directed to the Learning Store page.
- Then click on Save (7).
Note: The key must be 10 characters long and only alpha numeric characters are allowed.
How to use your new theme
Use your URL for the Signify portal and add the key created in step 4 above after "/app/" (8).
