How to Import Employees Using Excel
1. Before you start
Important: Before you start with this manual ensure that your Region settings are correct, otherwise the Excel (.csv) files will not work correctly.
1.1. How to get there?
- On your desktop click on Search (1).
- Then type Region & language settings (2).
- Click on Region & language settings (3) or press Enter. A new window will open.

- In the new window click on Additional date, time & regional settings (4). Another new window will open.
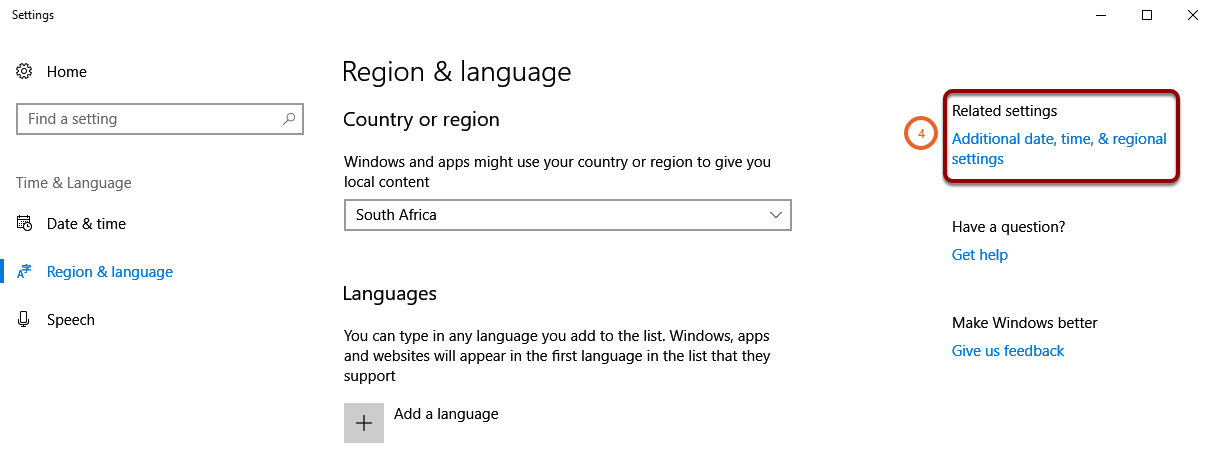
- In the new window navigate to and click on Region (5). A new window will open.
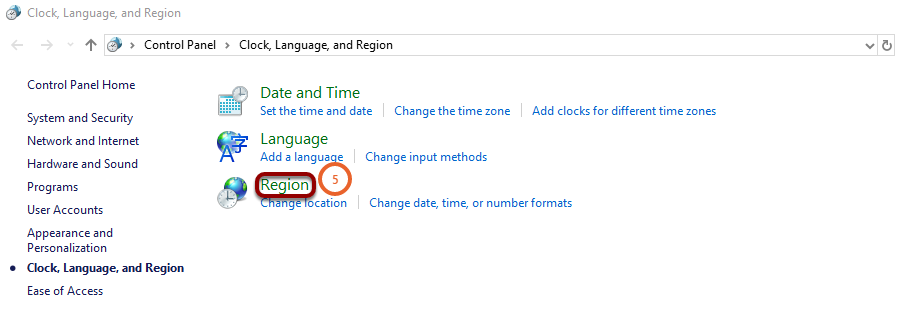
- In the Region window click on Additional Settings... (6). A new window will open.

1.2. What to do?
- In the new window ensure that the Decimal symbol (7) is a full stop (.).
- Ensure that the List separator (8) is a comma (,).
- Click Apply (9) and close all the windows.

2. How to get there?
Click on System Administration (1). With your cursor hover over System Administration (2) then click on Import Data (3)


3. What to do?
3.1. Download a sample file on Signify

- Click Download sample file (3) in the new window.

- The sample file will download in your browser (4).

3.2. Create an employee import (.csv) file in Excel
3.2.1. Enter the employee data in an Excel document (.xlsx)
- Open the sample file downloaded above (4).
- Select the entire first row (1) in the sample file.
- Copy the entire row (2).

- Create a New Microsoft Excel Worksheet (3).

- Open the new work sheet and Paste (4) the entire first row copied above into your new Excel documents First (5) row.
- Enter all the employee data in the mandatory columns.
- These columns are all mandatory:
- Column A: Employee Number.
- Column B: Surname.
- Column C: Full Name.
- Column O: OrgLevel1_Description.
- Column BC: Job Title.
- Column BM: Employment Type Description.
- Column EL: SchemaID.

3.2.2. Save the Excel document as a (.csv) file
Save the new Excel document as a .csv file:
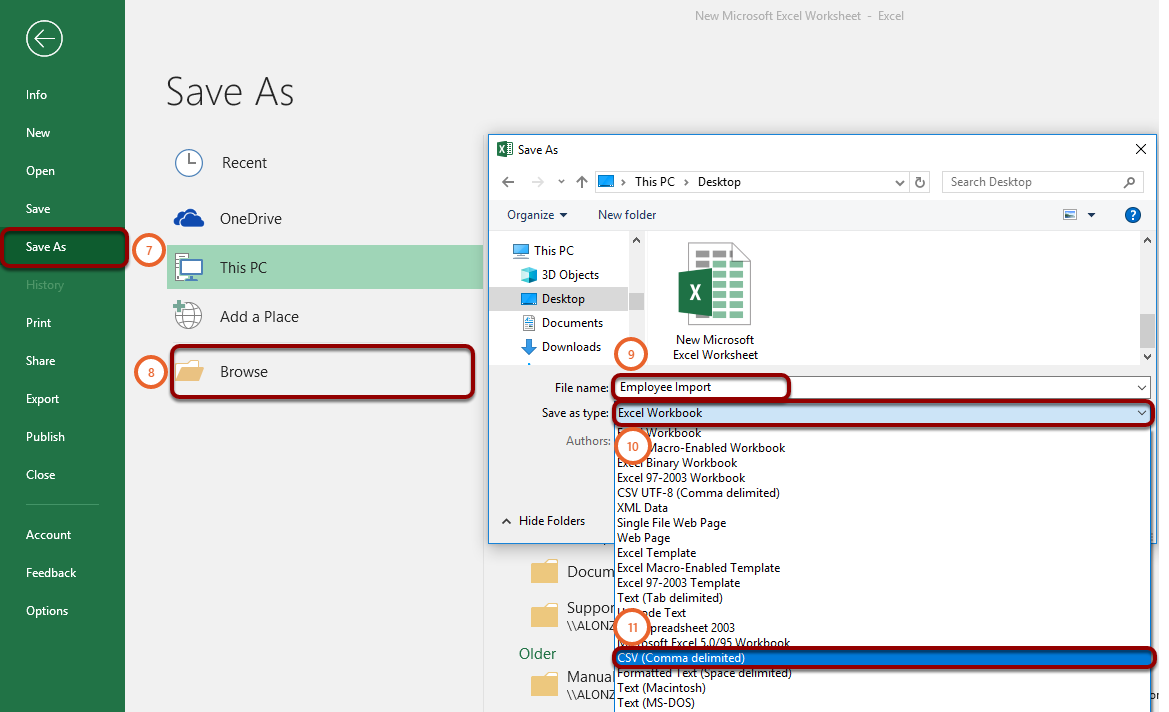
- Click on File (6).
- Navigate to Save As (7).
- Click on Browse (8).
- Insert the File name (9) of your (.csv) file.
- Click on the drop down (10).
- Select CSV (Comma delimited) (11).
- When asked, Do you want to keep using this format, click on yes (12).


3.3. Importing the (.csv) file
3.3.1. Execute Mock Import
Click on this link on instructions on how to get there.

- Click Import file (3) in the new window.

- A new window will load.
- In the new window navigate and click on Choose File (1).
- A Windows file explorer windows will open.

- Search your computer for the Employee Import file that you saved as a (.csv) in Section 2.2.2.
- Select that file (2).
- Click on open (3).

- Click on Save & Preview (4).
- The page will refresh and new options will be available.

- Tick the box I verify that the preview of the above data is correct (5).
- Then click on Execute Mock Import (6).
The system will not allow you to continue if the tick box (5) is not ticked.

If there are errors in the Import:
- Correct the errors in the original Microsoft Excel (.xlsx) employee import document Section 2.2.1.
- Save as a (.csv) file Section 2.2.2.
- Execute the Mock Import again.
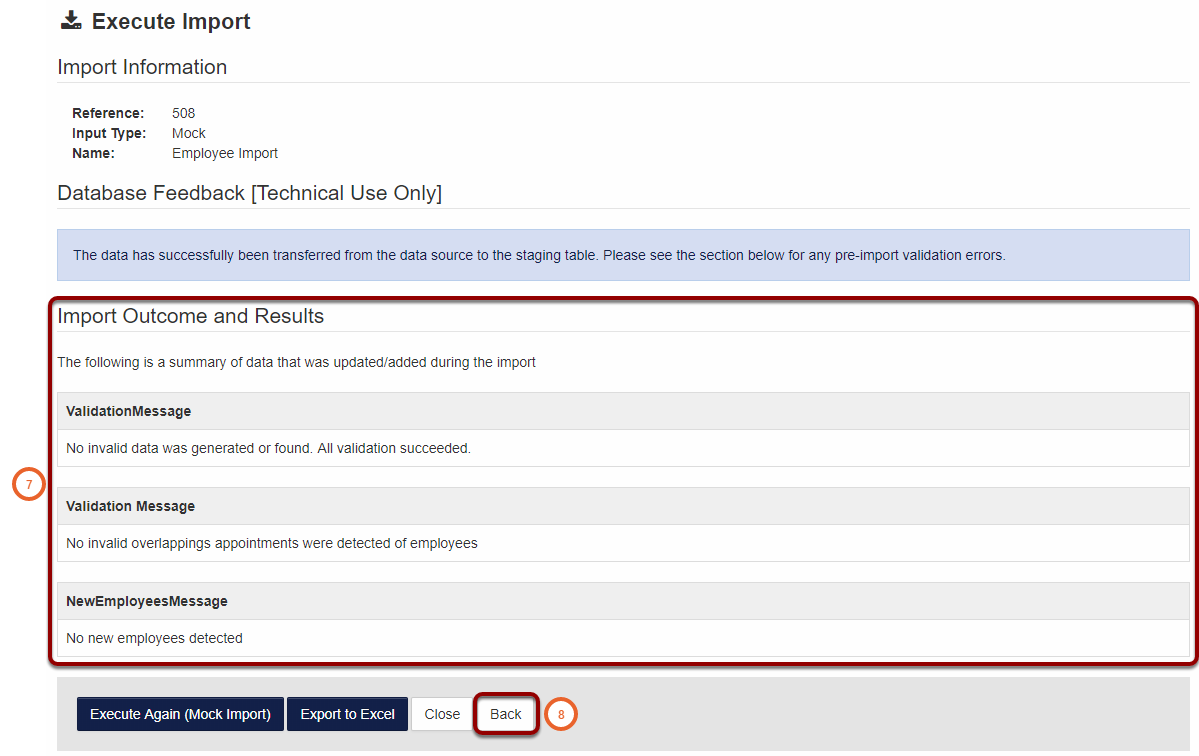
If there are no errors (7):
- Click Back (8).
- Then move to section 2.3.2.
3.3.2. Execute actual import
Note: before continuing with this section, first perform a Mock Import in Section 2.3.1 and insure no errors occur.
Click on this link on instructions on how to get there.

- Click Import file (3) in the new window.
- A new window will load.

- Click on Choose File (4) again and select the employee import file (.csv) that you saved in Section 2.2.2.
- Click Save & Preview (5).
- Tick the box I verify the preview of the above data is correct (6).
You will not be able to continue if the tick box is not ticked.
- Click on Execute Import (7).

- The page will load and a new page will appear.
- Check if there were no errors for the import (13).
- Click on Execute Again (Actual Import) (14).
- Wait for the import to complete.

3.4. Post Import Validations
Use this guide to ensure the employee data imported was correct and that it is correctly displayed on the system.
3.4.1. Organisation Structure
3.4.1.1. How to get there?
Click on System Administration (1). With your cursor hover over Modules (2) then Organisation Structure (3) then Administration (4) then click on Organisation Structure (5).


3.4.1.2. What to do?
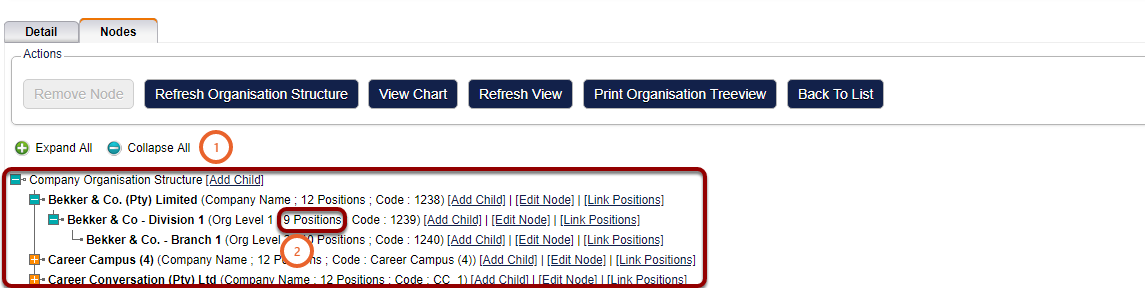
- Ensure that all the node have been created correctly (1).
- Check that the correct number of Positions (2) display.
3.4.2. Job Profiler
3.4.2.1. How to get there?
Click on System Administration (1). With your cursor hover over Modules (2) then Job Management (3) then click on Job Profiler (4).


3.4.2.2. What to do
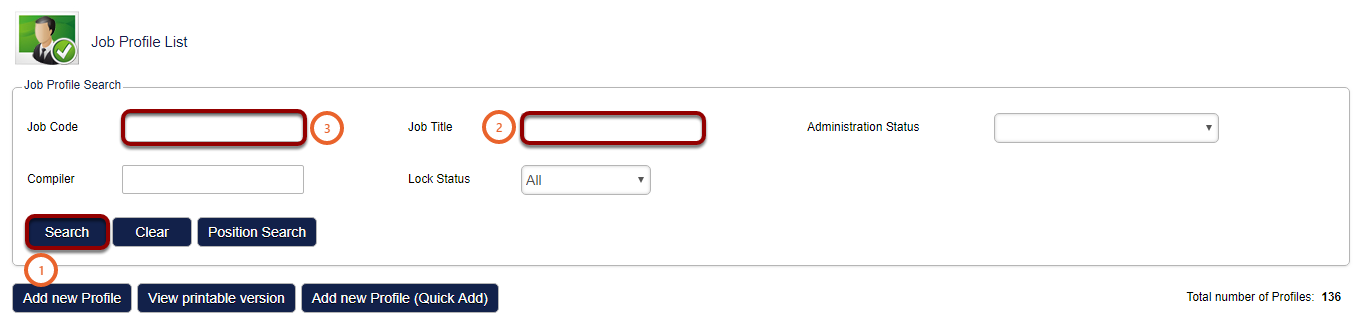
Search (1) for the Job Titles (2) and Job Codes (3) that you have imported to ensure that the jobs and positions have been created properly.
3.4.3. Manage Employees
3.4.3.1. How to get there?
Click on System Administration (1). With your cursor hover over Modules (2) then click on Manage Employees (3).


3.4.3.2. What to do?
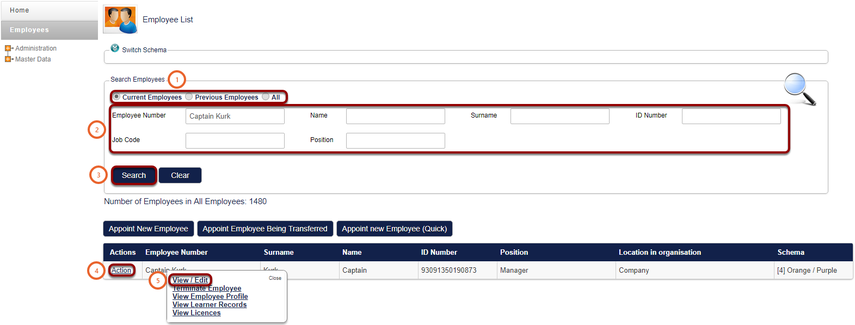
When searching for employees remember to select the correct box (1).
- A Search for your employees (2).
- Click on Search (3).
- Navigate to and click on Action (4). A small window will open.
- Click on View / Edit (5) on this window.
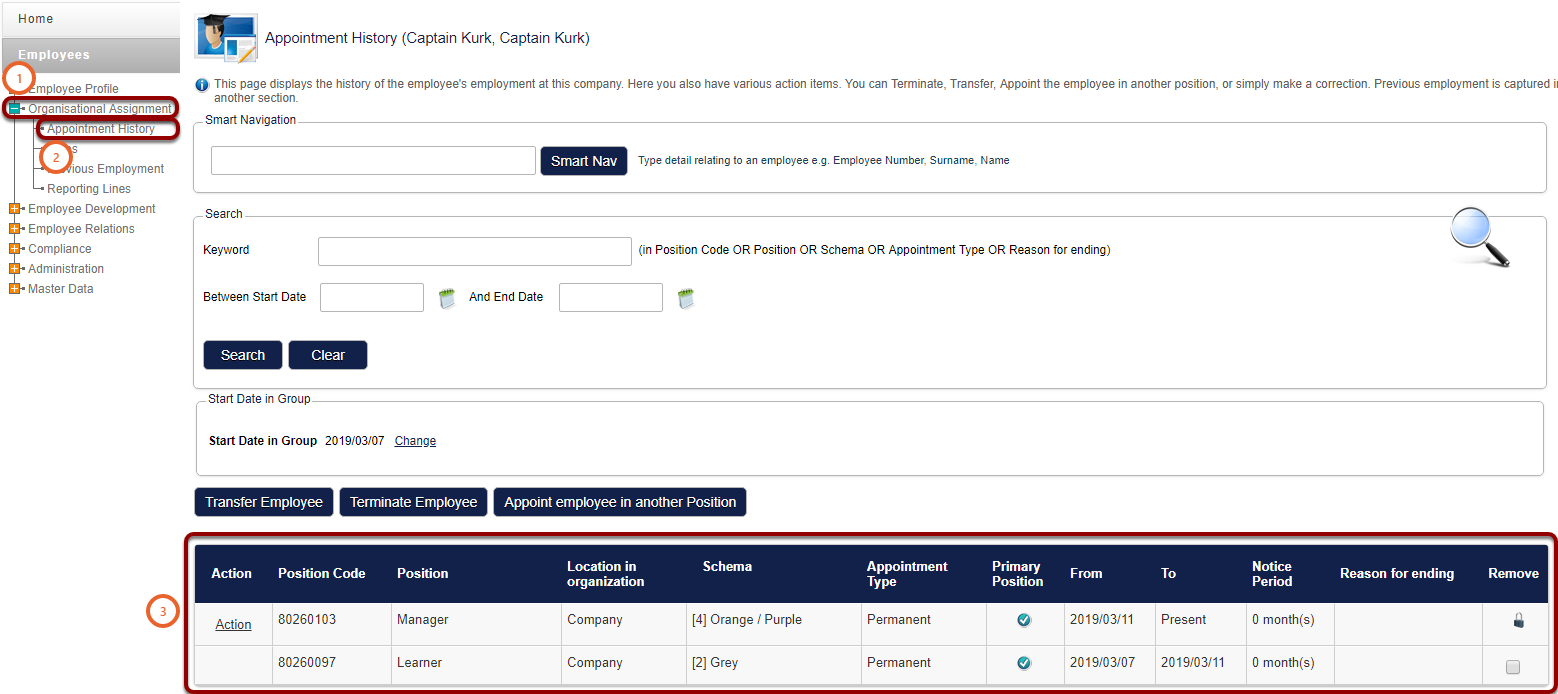
- Click on the plus icon Organisational Assignment (1).
- Navigate to Appointment History (2).
- Confirm that the appointments are all correct (3).
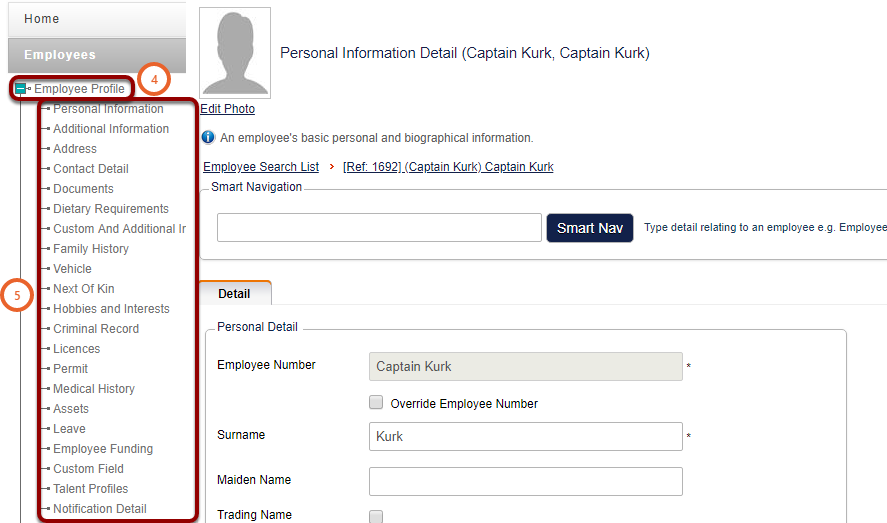
- Click on the plus icon at Employee Profile (4).
- Confirm that the details are correct (5).