How To Set Up A Welcome Email
Welcome email set-up
How to get there?
On your Home screen click on System Administration (1), With your cursor hover over the System Administration (2), then navigate to Notifications (3) | Emails (4) | Notification - Templates (5).


What to do?
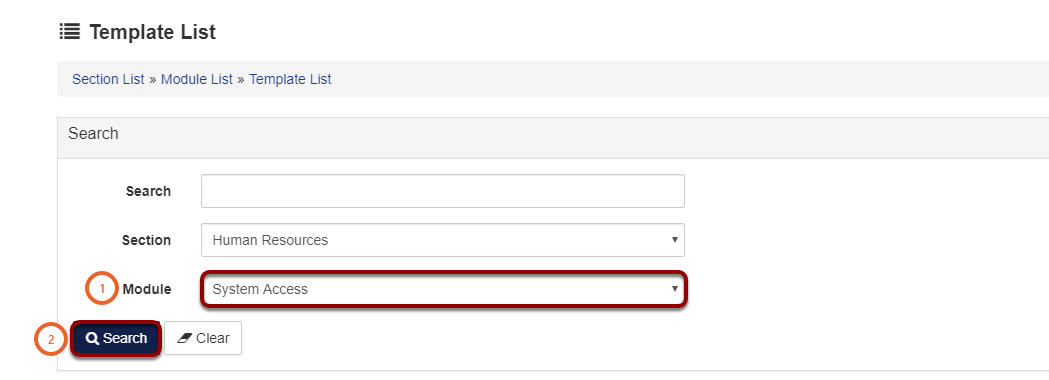
- From the drop down menu search and select System Access (1).
- Click on the Search button (2).
- Search through the list for the SECURITY_ADMIN_PASSWORDRESET_WELCOME (3) email, this is the welcome email.
- From this screen you will be able to Select the subject for your email (4).
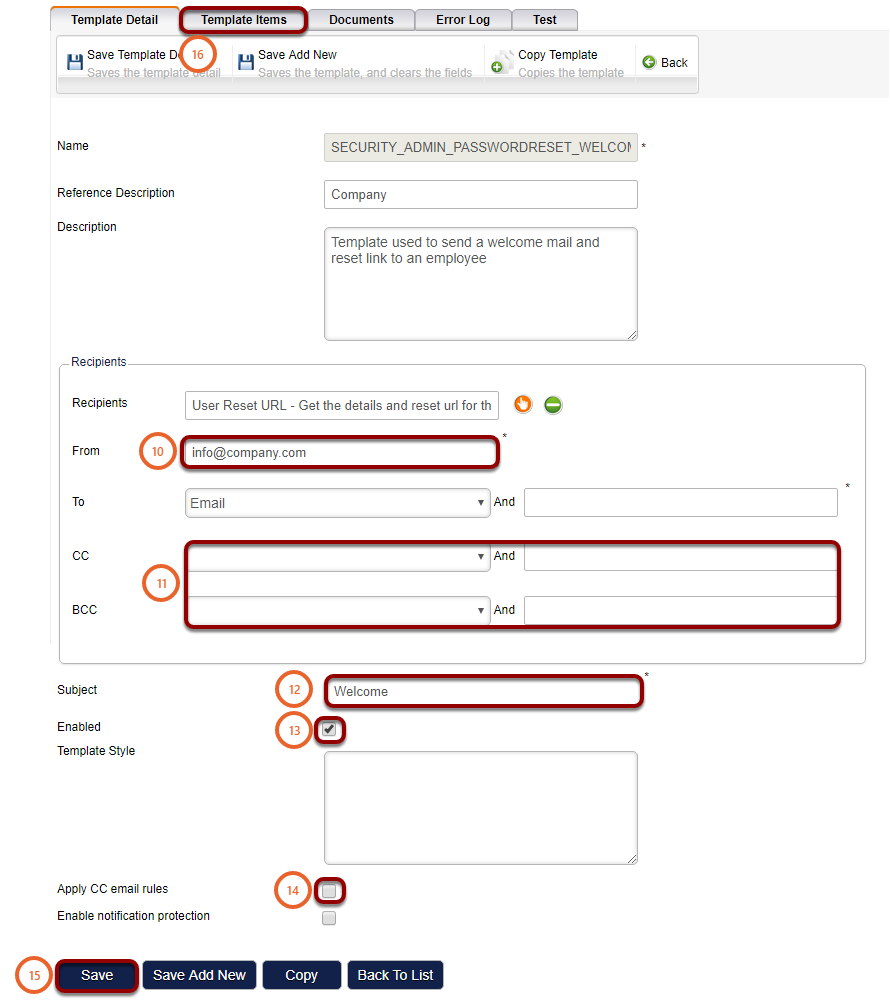
- You can edit the From E-mail Address (5).
- Remember to enable the email by clicking on the tick box (6).
- You will also be able to Copy and Preview (7) the email.
- For more options click on Action (8), a small window will open.
- Click on View / Edit (9).

- Enter the From email (10).
- Set up the CC and BCC rules by clicking on the drop down and selected Email and then entering the email address in the next field (11).
- Type in the Subject of your email (12).
- Remember to tick the tick box to Enable the welcome email (13).
- If you entered CC and BCC rules the tick box Apply CC email rules (14) must be ticked.
- Remember to click on the Save (15) button to save all your settings.
- Click on Template Items (16) to edit the email template.
- You will be directed to a new window.
Important: Do not edit any information other than the instruction given above, unless you are sure what to do, otherwise the welcome emails may not be sent.
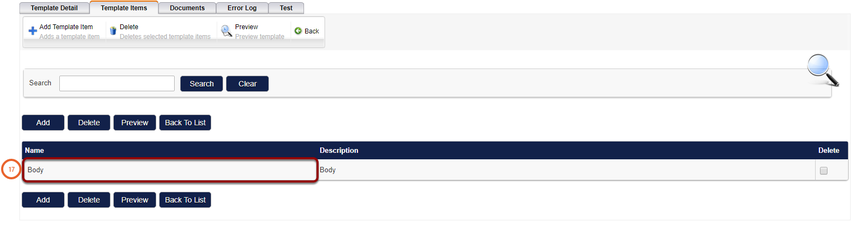
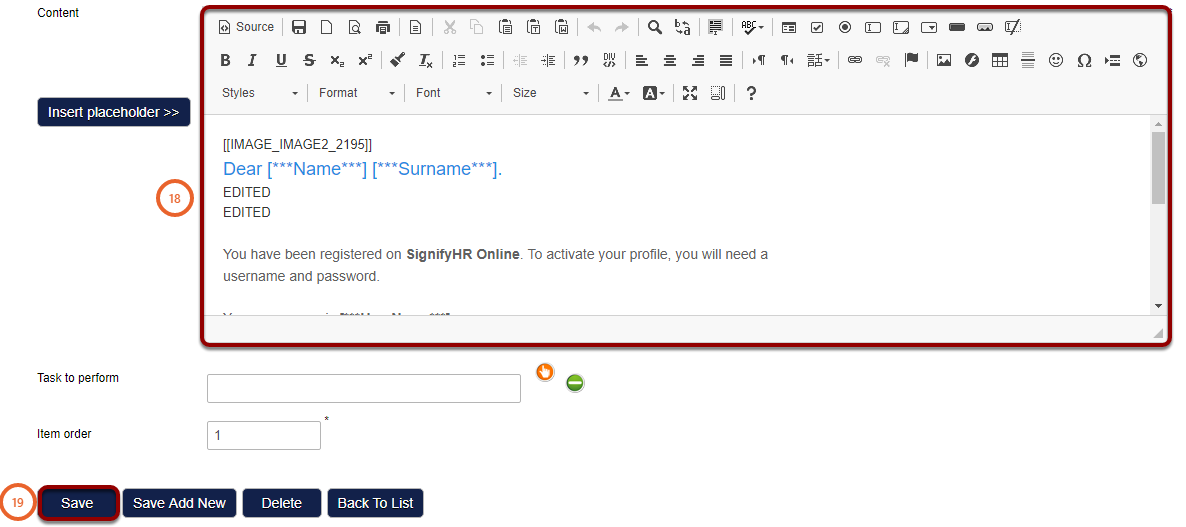
- In the new window click on Body (17) to edit the welcome email body.
- Enter your email Content (18) below.
- Remember to click on Save (19) to save your work.
Please do not hesitate to contact support at support@signify.co.za for any assistance.
Sending welcome email to new users
When users have been imported with Excel
How to get there?
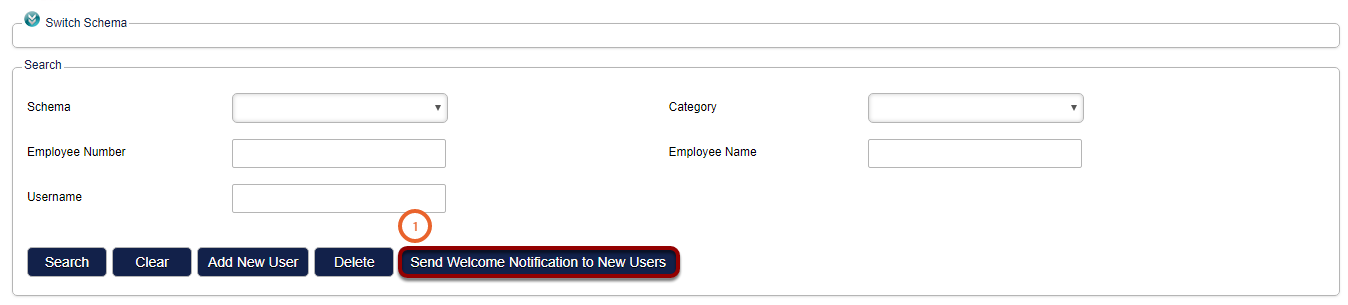
Click on System Administration (1), with your cursor hover over System Administration (2), then navigate to Users (3) | Manage Users (4).


What to do?
- If you would like to ignore users before a specific date, then tick the box at Ignore users created / imported before this date (2). Select the before date in field (3).
It is important to untick the tick box (2) when no users should be ignored.
The options that can be selected when sending a welcome email are:
- Send the welcome message to all users (4).
- The welcome notification will be sent to:
- All users who have not received it before.
- And that were created / imported after the date specified above (if applicable).
- Click on Confirm to continue.
- The welcome notification will be sent to:
- Send the welcome message only to users that I have selected. (5)
- The welcome notification will be sent to:
- Only users that have been selected.
- And who have not received it before.
- And that were created / imported after the date specified above (if applicable).
- Click on Select Users to continue.
- The welcome notification will be sent to:
- Send the welcome message to all users, but exclude users that I have selected. (6)
- The welcome notification will be sent to:
- All users who have not received it before.
- And that have not been excluded.
- And that were created / imported after the date specified above (if applicable).
- Click on Select Users to continue.
- The welcome notification will be sent to:
Click on Click on Continue To Next Step (7) to continue.
Important: If the user has already received a welcome email, they will not receive one again irrespectively of what option is selected below.

- Search for the user you would like to select by typing their Username (8).
- Use the tick box Select Username (9) to select all the visible employees (9).
- Or select the users one by one by ticking the tick box (10).
- You can see the number of Users Selected (11).
- Click on Clear Users (12) to clear all the Users Selected (11).
- Click on Continue To Next Step (13) when all the users were selected.

- Tick I confirm that my selection is correct (14).
- Click Export Users That Will Receive Notification (15) to save the list.
- Click on Send Welcome Notifications (16).

When appointing new employee (Quick)
How to get there?
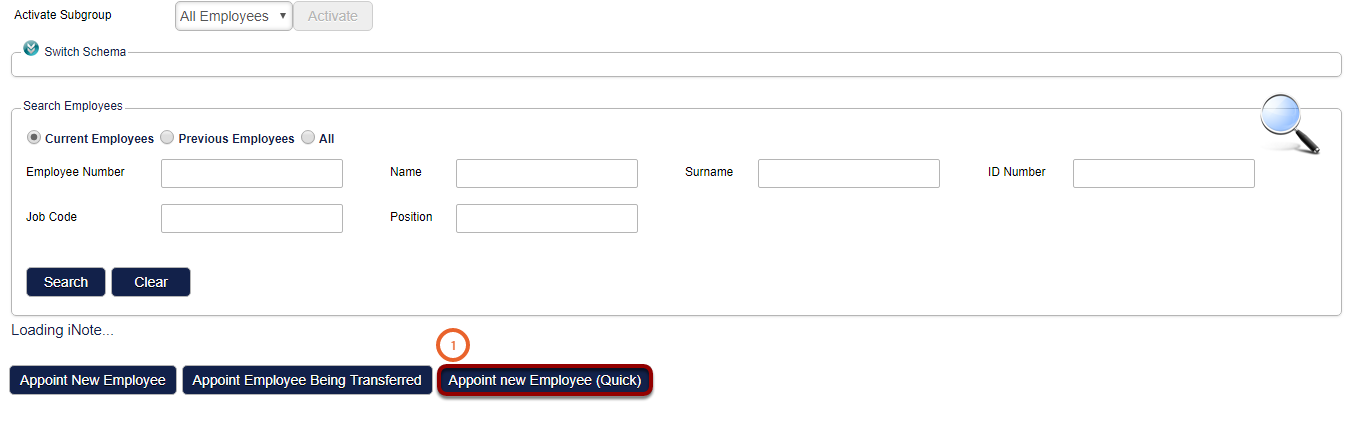
Click on System Administration (1), then with your cursor hover over Modules (2) and click on Manage Employees.


What to do?
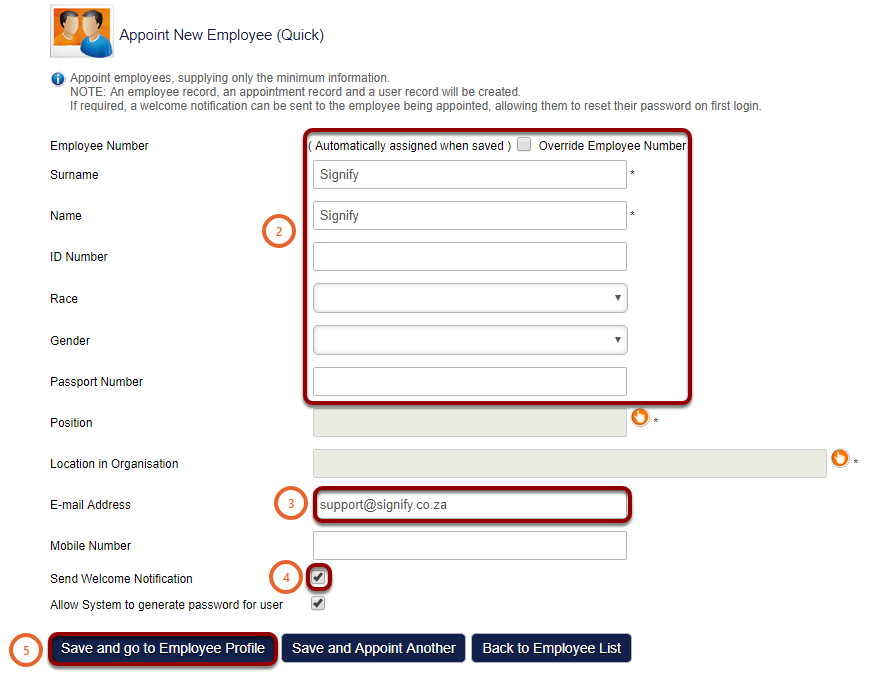
- Click on Appoint new Employee (Quick) (1).
Important: You will only be able to send the welcome email when using the quick appoint option (1)
- Enter the employees details (2).
- Enter a valid E-mail Address (3) for the employee.
- Select the box Send Welcome Notification (4).
- Click on Save and go to Employee Profile (5).