How To Publish a Pathway
How to get there?
Click on System Administration (1), then with your cursor hover over Modules (2) | e-Learning (3) | Learning Management (4) | Maintain Learning Pathway (5) | Click on Edit (6) by the pathway in question.


What to do?
Publish the pathway
To publish a pathway and make it accessible to users follow these steps:
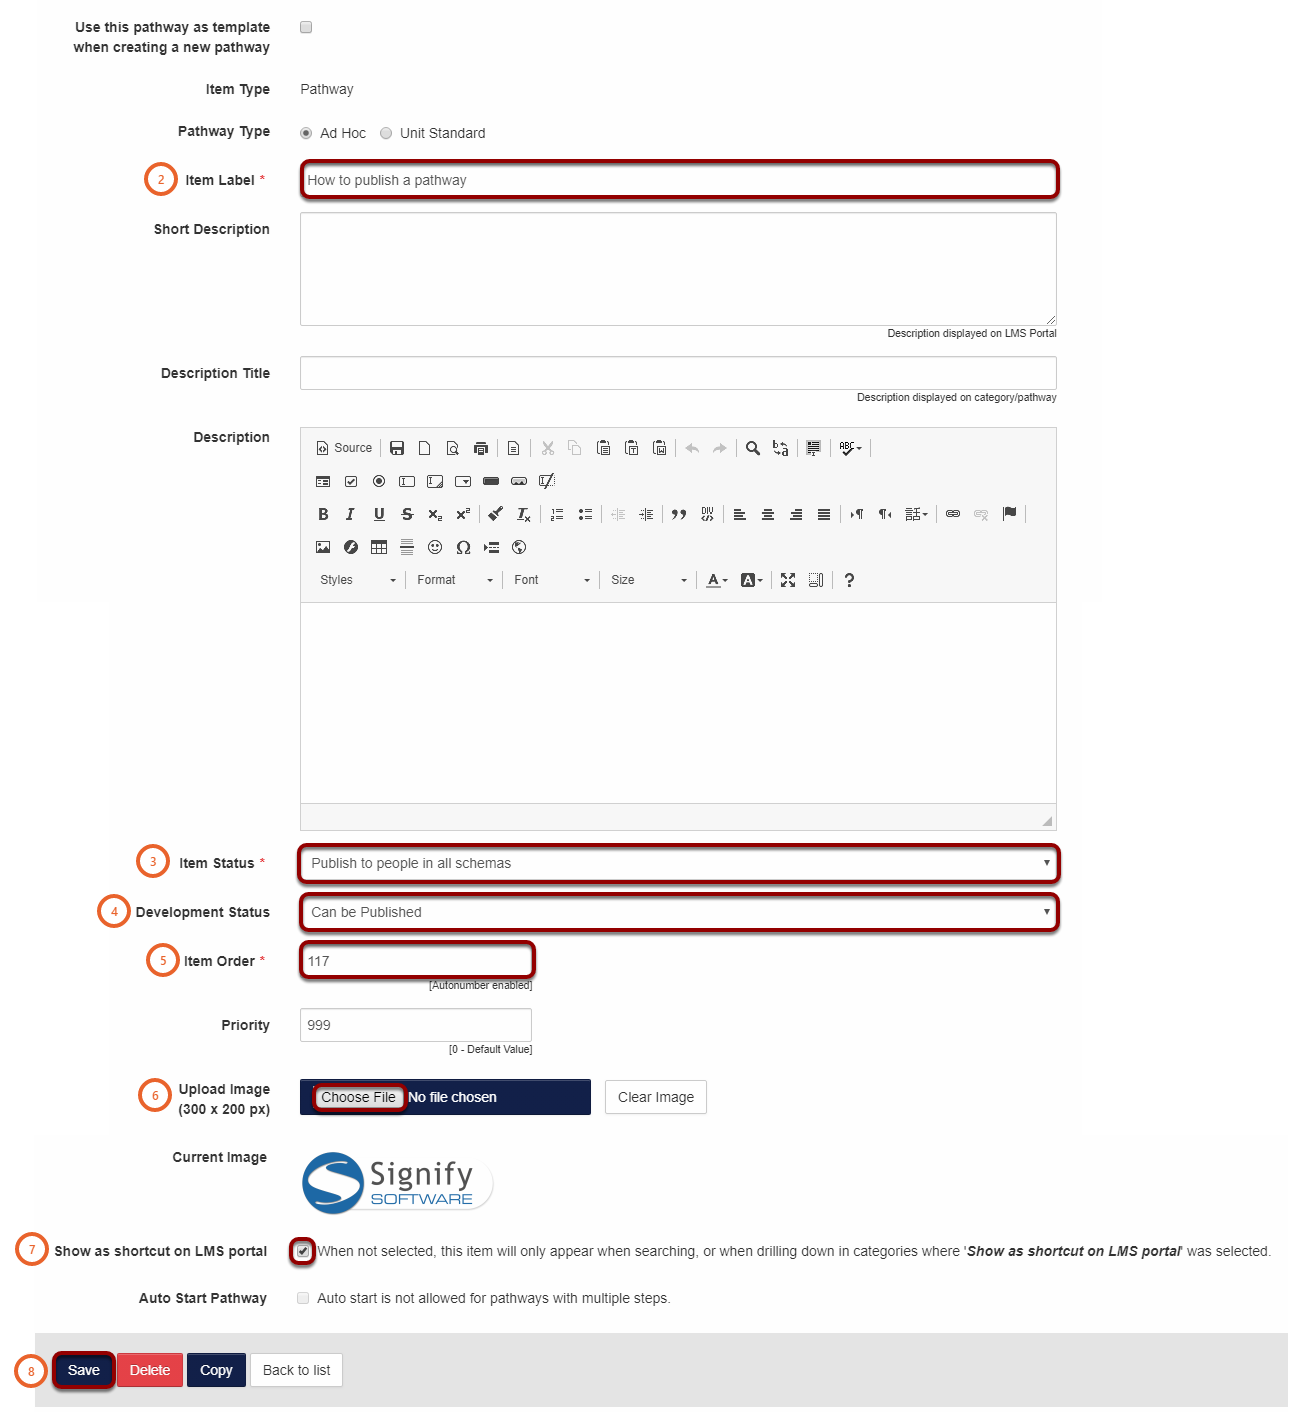
- Click on the tab Pathway Node Details (1).
Note: users have to be added to the target audience for them to access the pathway.

- Enter the pathways Item Label (2), this is the pathway name.
- From the Item Status (3) drop down select one of these options:
- Not Active. (Select this option when the pathway should not be accessed by users).
- Publish to people in all schemas. (This option allows users across all schemas to access this pathway).
- Publish to people in this schema only. (Users only in the current schema will be able to access this pathway).
- From the Development Status (4) drop down select one of these options:
- Under Construction.
- Being Checked.
- Can be Published. (Select this option to publish the pathway).
- Temporarily Out of Service.
- The Item Order (5) will automatically generate, but if you need the pathway to be in a different order you can change it here.
- Click on Choose File (6) to select a picture for the pathway.
- Select the tick box Show as shortcut on LMS portal (7).
- Click on Save (8).
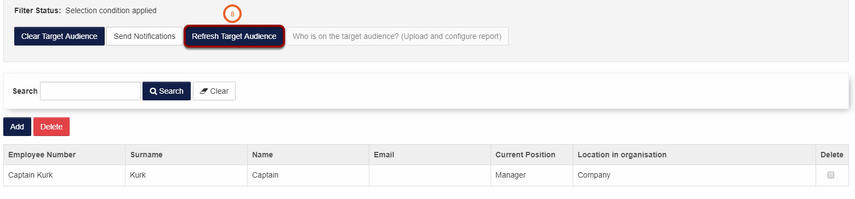
Adding users to the Target Audience
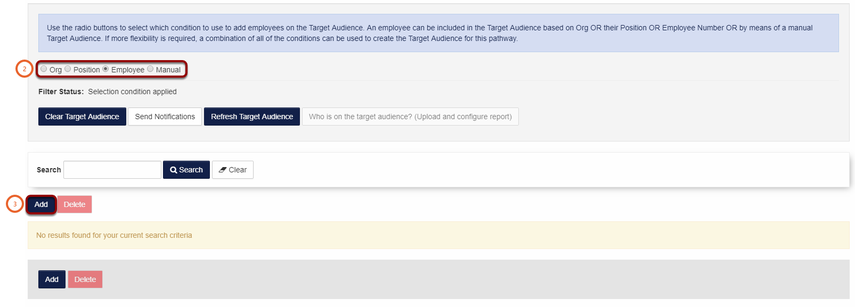
- Click on the Target Audience (1) tab to add users.

Tip: You can add an Org, Position and Employee to a target audience by clicking on the relevant buttons (2). For this example we will add an employee.
- Select Employee (2).
- Click on the Add (3) button.
- A new windows will open.
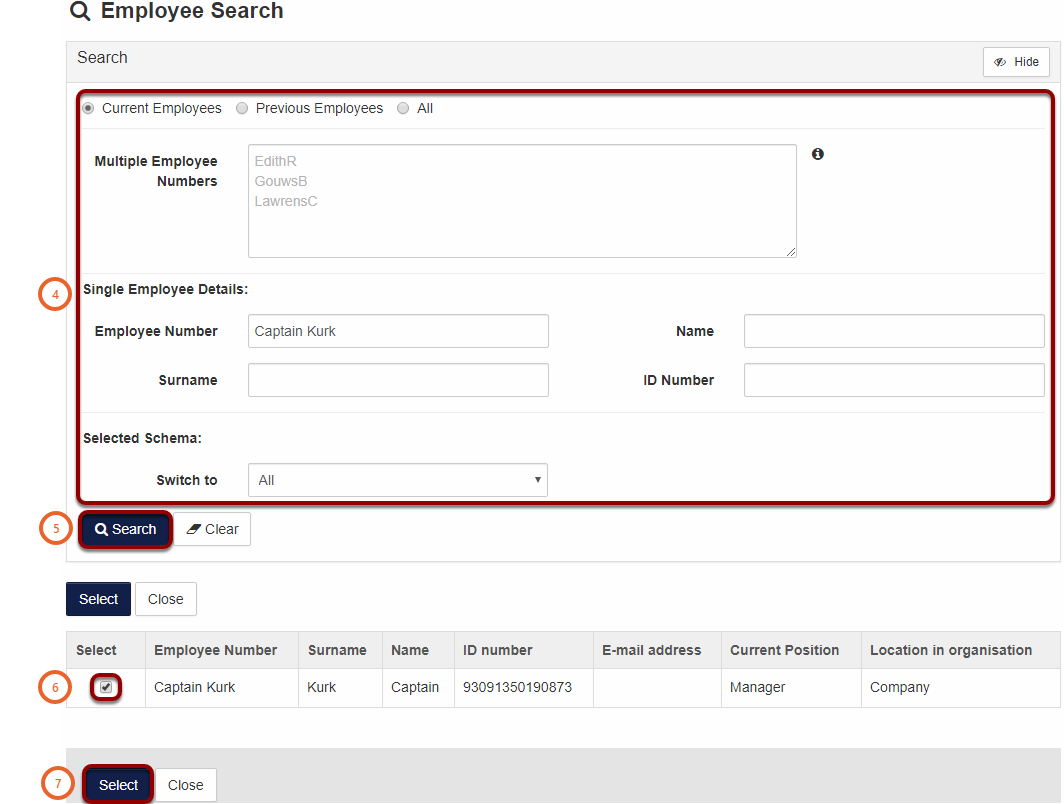
- Use the Search (4) criteria to locate a user.
- Then click on Search (5).
- Navigate to the user and select the tick box (6) to select the user.
- Click on Select (7) to add the user to the target audience.
- Close this window when all the employees have been selected.
Tip: if multiple users needs to be added use the Multiple Employee Numbers (4) field.
- Click on Refresh Target Audience (8) to apply these settings.
Tip: Click on this link to view the full manual or send an email to support@signify.co.za for any assistance or more information.